HomeMatic HmIP-HAP Mounting Instruction And Operating Manual
Hide thumbs
Also See for HmIP-HAP:
- Mounting instruction and operating manual (112 pages) ,
- Installation and operating manual (21 pages) ,
- Mounting and operating manual (15 pages)

Related Manuals for HomeMatic HmIP-HAP


Summary of Contents for HomeMatic HmIP-HAP
- Page 1 Montage- und Bedienungsanleitung Mounting instruction and operating manual Access Point (DE) S. 2 Access Point (EN) p. 24 HmIP-HAP...
- Page 2 Lieferumfang Anzahl Bezeichnung Homematic IP Access Point Steckernetzteil Netzwerkkabel Schrauben Dübel Bedienungsanleitung Dokumentation © 2015 eQ-3 AG Deutschland Alle Rechte vorbehalten. Ohne schriftliche Zustimmung des Herausgebers darf diese Anleitung auch nicht auszugsweise in irgendeiner Form reproduziert werden oder unter Verwendung elektronischer, mechanischer oder chemischer Verfahren verviel- fältigt oder verarbeitet werden.
-
Page 3: Table Of Contents
Inhaltsverzeichnis Hinweise zur Anleitung ...........4 Gefahrenhinweise ............4 Homematic IP – Die neue Smart Home-Generation 7 Funktion und Geräteübersicht ........8 Inbetriebnahme ..............10 Access Point einrichten und montieren ......10 Erste Schritte: Geräte anlernen und Räume hinzufügen ..............13 Bedienung und Konfiguration ...........14 Fehlerbehebung ............. 14 Befehl nicht bestätigt ............14... -
Page 4: Hinweise Zur Anleitung
Hinweise zur Anleitung Hinweise zur Anleitung Lesen Sie diese Anleitung sorgfältig, bevor Sie Ihre Homematic IP Geräte in Betrieb nehmen. Bewahren Sie die Anleitung zum späteren Nachschlagen auf! Wenn Sie das Gerät anderen Personen zur Nutzung überlassen, übergeben Sie auch diese Anleitung. - Page 5 Gefahrenhinweise Verwenden Sie das Gerät nicht, wenn es von au- ßen erkennbare Schäden z. B. am Gehäuse, an Bedienelementen oder an den Anschlussbuchsen bzw. eine Funktionsstörung aufweist. Im Zwei- felsfall lassen Sie das Gerät von einer Fachkraft prüfen. Öffnen Sie das Gerät nicht. Es enthält keine durch den Anwender zu wartenden Teile.
- Page 6 Gefahrenhinweise Benutzen Sie für die Stromversorgung des Gerä- tes ausschließlich das mitgelieferte Originalnetz- teil (5 V /550 mA). Das Gerät darf nur an eine leicht zugängliche Netz-Steckdose angeschlossen werden. Bei Ge- fahr ist der Netzstecker zu ziehen. Verlegen Sie Kabel stets so, dass diese keine Ge- fährdungen für Menschen und Haustiere darstel- len.
-
Page 7: Homematic Ip - Die Neue Smart Home-Generation
Homematic IP – Die neue Smart Home-Generation Homematic IP – Die neue Smart Home-Generation Mit Homematic IP gelangen Sie in wenigen Schritten zur intelligenten Smart-Home-Steuerung. Der Homematic IP Access Point ist die zentrale Einheit des Homematic IP Smart-Home-Systems und kommu- niziert über das Homematic IP Funkprotokoll. -
Page 8: Funktion Und Geräteübersicht
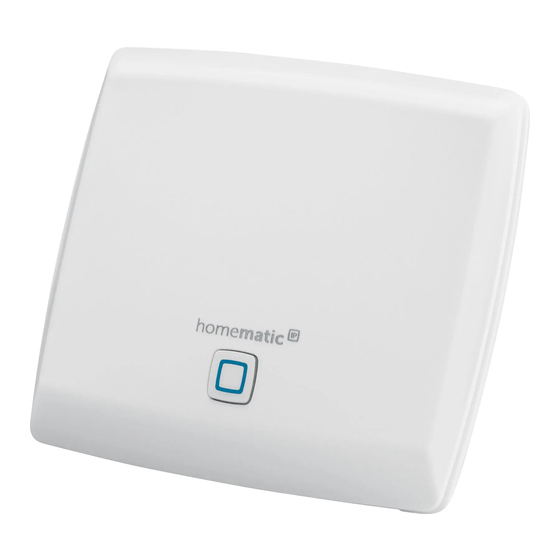
Der Homematic IP Access Point ist die zentrale Einheit des Homematic IP Systems. Das Gerät verbindet das Smartphone über die Home- matic IP Cloud mit den Homematic IP Geräten und gibt Konfigurations- und Bedienbefehle aus der App an die Homematic IP Geräte weiter. So können Sie Ihre Smart- Home-Steuerung ganz einfach zu jeder Zeit und von je- dem Ort aus an Ihre Bedürfnisse anpassen. - Page 9 Funktion und Geräteübersicht Rückseite QR-Code und Gerätenummer (SGTIN) Schraublöcher Schnittstelle: Netzwerkkabel Schnittstelle: Steckernetzteil...
-
Page 10: Inbetriebnahme
In diesem Kapitel erfahren Sie Schritt für Schritt, wie Sie Ihr Homematic IP System erfolgreich in Betrieb nehmen. Installieren Sie zunächst die Homematic IP App auf Ihrem Smartphone und nehmen Sie den Access Point in Betrieb, wie im nachfolgenden Abschnitt beschrieben. Nach er- folgreicher Inbetriebnahme des Access Points können... - Page 11 Inbetriebnahme lieferte Netzwerkkabel (F) mit dem Router und versorgen Sie Ihr Gerät über das beiliegende Ste- ckernetzteil (G) mit Strom. • Scannen Sie den QR-Code (B) auf der Rückseite des Access Points. Alternativ können Sie die Ge- rätenummer (SGTIN) (B) des Access Points ma- nuell in der App eingeben.
- Page 12 Inbetriebnahme • Wenn die LED Ihres Access Points dauerhaft blau leuchtet, bestätigen Sie dies in der App. Bei einem anderen Blinkverhalten der LED folgen Sie den Anweisungen in der App oder s. „6.3 Feh- lercodes und Blinkfolgen“ auf Seite 16. •...
-
Page 13: Erste Schritte: Geräte Anlernen Und Räume Hinzufügen
Erste Schritte: Geräte anlernen und Räu- me hinzufügen Sobald Ihr Homematic IP Access Point und die Homema- tic IP App einsatzbereit sind, lernen Sie weitere Home- matic IP Geräte an und ordnen Sie diese über die App Räumen zu. -
Page 14: Bedienung Und Konfiguration
Sie haben immer die Möglichkeit, die Gerä- te- und Raumnamen wieder zu ändern. Bedienung und Konfiguration Nachdem Sie Ihre Homematic IP Geräte erfolgreich an- gelernt und Räume hinzugefügt haben, können Sie Ihr Homematic IP System komfortabel steuern und konfigu- rieren. -
Page 15: Duty Cycle
Erreichen des 1 %-Limits nicht mehr senden, bis diese zeitliche Begrenzung vorüber ist. Gemäß dieser Richtlinie, werden Homematic IP Geräte zu 100 % nor- menkonform entwickelt und produziert. Im normalen Betrieb wird der Duty Cycle in der Regel nicht erreicht. -
Page 16: Fehlercodes Und Blinkfolgen
Fehlerbehebung Fehlercodes und Blinkfolgen Blinkcode Bedeutung Lösung Dauerhaft Access Point Warten Sie kurz oranges startet ab und achten Sie Leuchten auf das folgende Blinkverhalten. Schnelles Verbindung Warten Sie bis die blaues Blin- zum Server wird Verbindung aufge- aufgebaut baut wurde und die LED dauerhaft blau leuchtet. - Page 17 Fehlerbehebung Schnelles Fehler beim Prüfen Sie die Ser- rotes Blinken Update ver- und Internet- verbindung. Starten Sie den Access Point neu. Schnelles Vorstufe zum Drücken Sie die oranges Zurücksetzen in Systemtaste erneut Blinken Werkseinstel- für 4 s, bis die LED lungen grün aufleuchtet.
-
Page 18: Wiederherstellung Der Werkseinstellungen
• Zurücksetzen und Löschen der gesamten Installation: Hier wird die gesamte Homematic IP Installation zurückgesetzt. Die App muss danach deinstalliert und erneut installiert werden. Der Werkszustand Ihrer einzelnen Homematic IP Geräte muss ebenfalls wieder hergestellt werden, um ein erneutes Anlernen zu ermöglichen. -
Page 19: Zurücksetzen Und Löschen Der Gesamten Installation
Wiederherstellung der Werkseinstellungen halten Sie gleichzeitig die Systemtaste für 4 s gedrückt, bis die LED schnell orange zu blinken beginnt. • Lassen Sie die Systemtaste wieder los. • Drücken Sie die Systemtaste erneut für 4 s, bis die LED grün aufleuchtet. Bei rotem Aufleuchten ver- suchen Sie es erneut. -
Page 20: Wartung Und Reinigung
Wartung und Reinigung und alle zuvor beschriebenen Schritte wieder- holen. Nach diesem zweiten Neustart wird Ihr System zurück- gesetzt. Wartung und Reinigung Das Gerät ist für Sie wartungsfrei. Überlassen Sie eine Wartung oder Reparatur einer Fachkraft. Reinigen Sie das Gerät mit einem weichen, sauberen, trockenen und fusselfreien Tuch. -
Page 21: Allgemeine Hinweise Zum Funkbetrieb
Gegebenheiten vor Ort eine wich- tige Rolle. Hiermit erklärt die eQ-3 AG, Maiburger Str. 29, 26789 Leer, Deutschland, dass der Funkanlagentyp Homema- tic IP HMIP-HAP der Richtlinie 2014/53/EU entspricht. Der vollständige Text der EU-Konformitätserklärung ist unter der folgenden Internetadresse verfügbar: www.eq-3.de... -
Page 22: Technische Daten
Technische Daten Technische Daten Geräte-Kurzbezeichnung: HMIP-HAP Versorgungsspannung Steckernetzteil (Eingang): 100 V-240 V/50 Hz Leistungsaufnahme Steckernetzteil: 2,5 W max. Versorgungsspannung: Stromaufnahme: 500 mA max. Leistungsaufnahme Ruhebetrieb: 1,1 W Schutzart: IP20 Umgebungstemperatur: 5 bis 35 °C Abmessungen (B x H x T):... - Page 23 Technische Daten Entsorgungshinweis Gerät nicht im Hausmüll entsorgen! Elektroni- sche Geräte sind entsprechend der Richtlinie über Elektro- und Elektronik-Altgeräte über die örtlichen Sammelstellen für Elektronik-Altgeräte zu entsorgen. Konformitätshinweis Das CE-Zeichen ist ein Freiverkehrszeichen, das sich ausschließlich an die Behörden wendet und keine Zusicherung von Eigenschaften beinhaltet.
- Page 24 Package contents Quantity Description Homematic IP Access Point Plug-in mains adapter Network cable Screws Plugs User manual Documentation © 2015 eQ-3 AG, Germany All rights reserved. Translation from the original version in Ger- man. This manual may not be reproduced in any format, either in...
- Page 25 Table of contents Information about this manual........26 Hazard information ............26 Homematic IP – The next smart home generation 29 Function and device overview ........30 Start-up ................32 Set-up and mounting of the Access Point ....32 First steps: Connecting devices and adding rooms ..35 Operation and configuration ...........
-
Page 26: Information About This Manual
Information about this manual Read this manual carefully before beginning operation with your Homematic IP components. Keep the manual so you can refer to it at a later date if you need to. If you hand over the device to other persons for use, hand over this manual as well. - Page 27 Hazard information Do not use the device if there are signs of damage to the housing, control elements or connecting sockets, for example, or if it demonstrates a malfunction. If you have any doubts, please have the device checked by an expert. Do not open the device.
- Page 28 Hazard information The device may only be connected to an easily accessible power socket outlet. The mains plug must be pulled out if a hazard occurs. Always lay cables in such a way that they do not become a risk to people and domestic animals. The device may only be operated within residential buildings.
-
Page 29: Homematic Ip - The Next Smart Home Generation
With Homematic IP, you can install your smart home solution in just a few little steps. The Homematic IP Access Point is the central element of the Homematic IP smart home system and communicates with the Homematic IP radio protocol. All devices of the... -
Page 30: Function And Device Overview
Function and device overview Function and device overview The Homematic IP Access Point is the central unit of the Homematic IP system. It connects smartphones via the Homematic IP cloud with all Homematic IP devices and transmits configuration data and control commands from the app to all Homematic IP devices. - Page 31 Function and device overview Back QR code and device number (SGTIN) Screw holes Interface: Network cable Interface: Plug-in mains adapter...
-
Page 32: Start-Up
Start-up Start-up This chapter describes how to set up your Homematic IP system step by step. First install the Homematic IP app on your smartphone and set up your Access Point as described in the following section. Once your Access Point has been set up successfully, you can add and integrate new Homematic IP devices to your system. - Page 33 Start-up • Scan the QR code (B) on the back side of your Access Point. You can also enter the device number (SGTIN) (B) of your Access Point manually.
- Page 34 Start-up • Please confirm in the app if the LED of your Access Point lights up permanently blue. If the LED lights up differently, please follow the instructions in the app or see “6.3 Error codes and flashing sequences” on page 37. •...
-
Page 35: First Steps: Connecting Devices And Adding Rooms
First steps: Connecting devices and adding rooms As soon as your Homematic IP Access Point and the Homematic IP app are ready for use, you can connect additional Homematic IP devices and allocate them in the app to different rooms. -
Page 36: Operation And Configuration
Homematic IP system. For further information about operation via the app and configuration of the Homematic IP system, please refer to the Homematic IP User Guide (available in the download area at www.homematic-ip.com). -
Page 37: Error Codes And Flashing Sequences
Devices must cease transmission when they reach the 1% limit until this time restriction comes to an end. Homematic IP devices are designed and produced with 100% conformity to this regulation. During normal operation, the duty cycle is not usually reached. - Page 38 Troubleshooting Fast yellow No connection Connect the Ac- flashing to network or cess Point to the router network/router. Permanent No Internet con- Please check the yellow lighting nection Internet connec- tion and firewall settings. Alternately Update in pro- Please wait until long and gress the update has...
-
Page 39: Restore Factory Settings
Resetting and deleting the entire installation: Here, the entire installation is reset. Afterwards, the app has to be uninstalled and reinstalled. The factory settings of your single Homematic IP devices have to be restored as to enable them to be connected again. -
Page 40: Resetting And Deleting The Entire Installation
Restore factory settings LED lights up red, please try again. • Release the system button to finish the procedure. The device will perform a restart and Access Point is being reset. Resetting and deleting the entire installation To reset the factory settings of the entire installation, the procedure described above must be performed twice in succession, within 5 minutes: •... -
Page 41: Maintenance And Cleaning
Maintenance and cleaning Maintenance and cleaning The device does not require you to carry out any maintenance. Enlist the help of an expert to carry out any maintenance or repairs. Clean the device using a soft, lint-free cloth that is clean and dry. -
Page 42: General Information About Radio Operation
Hereby, eQ-3 AG, Maiburger Str. 29, 26789 Leer/ Germany declares that the radio equipment type Homematic IP HMIP-HAP is in compliance with Directive 2014/53/EU. The full text of the EU declaration of conformity is available at the following internet address:... -
Page 43: Technical Specifications
Technical specifications Technical specifications Device short name: HMIP-HAP Supply voltage Plug-in mains adapter (input): 100 V-240 V/50 Hz Power consumption plug-in mains adapter: 2.5 W max. Supply voltage: Current consumption: 500 mA max. Standby power consumption: 1.1 W Degree of protection:... - Page 44 Technical specifications Instructions for disposal Do not dispose of the device with regular domestic waste! Electronic equipment must be disposed of at local collection points for waste electronic equipment in compliance with the Waste Electrical and Electronic Equipment Directive. Information about conformity The CE sign is a free trading sign addressed exclusively to the authorities and does not include any warranty of any properties.
- Page 45 Kostenloser Download der Homematic IP App! Free download of the Homematic IP app! Bevollmächtigter des Herstellers: Manufacturer’s authorised representative: eQ-3 AG Maiburger Straße 29 26789 Leer / GERMANY www.eQ-3.de...
Need help?
Do you have a question about the HmIP-HAP and is the answer not in the manual?
Questions and answers