Table of Contents
Advertisement
Quick Links
OWNER'S MANUAL
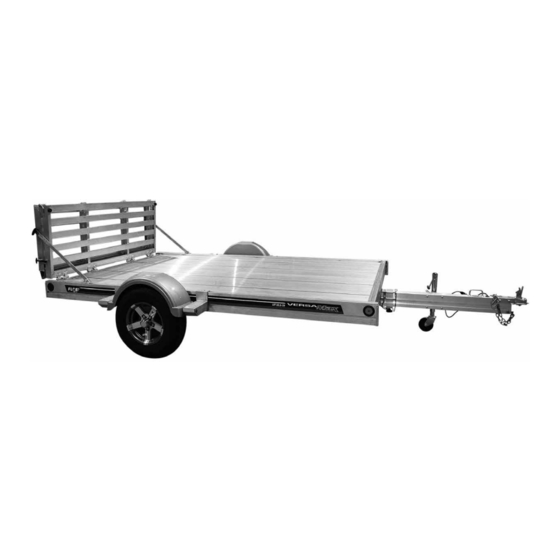
UT
UT
Retain this manual for future reference.
ATTENTION
ATTENTION
ATTENTION
Read and follow all safety rules and operating instructions carefully before using trailer.
Serious injury, potential death and/or mechanical failure could result from neglecting to take appropriate action.
P/N 500-95060-00
9/14/20
1
Advertisement
Table of Contents

Related Manuals for Floe Versa-Max UT


Summary of Contents for Floe Versa-Max UT
- Page 1 OWNER’S MANUAL Retain this manual for future reference. ATTENTION ATTENTION ATTENTION Read and follow all safety rules and operating instructions carefully before using trailer. Serious injury, potential death and/or mechanical failure could result from neglecting to take appropriate action. P/N 500-95060-00 9/14/20...
-
Page 2: Table Of Contents
Each year we implement improvements to our product lines to ensure that we are on the “leading edge” and providing the best available trailer. We are confident your FLOE trailer will provide you with years of trouble-free trailering, and that if you decide to buy another trailer, it’ s because you want another FLOE model. -
Page 3: Important Safety Information
However, NHTSA cannot become involved in individual • Check that no structural damage to trailer exists, do not use problems between you, your dealer, or FLOE International, Inc. if damaged. To contact NHTSA, you may either call the Auto Safety Hotline •... -
Page 4: Hitch Selection
Hitch Coupler Adjustment All FLOE models have a lever lock hitch coupler. With a lever lock coupler, the amount of locking force can be adjusted to the diameter of the hitch-ball. A coupler that is adjusted too tight will make it difficult to push down on the lever lock and may cause vibration from the trailer to the tow vehicle. -
Page 5: Floe Tilt Clamp
Using your FLOE trailer Tilt Clamp The FLOE tilt clamp eliminates the hassle and rattle of a hitch WARNING pin design. To tilt, simply loosen the handle screw, remove the safety cotter pin, and slide clamp forward. When finished Failure to properly tighten tilt clamp and secure safety cotter loading or unloading, slide clamp back on, replace cotter pin, and tighten handle screw. -
Page 6: Trailer Lighting System
Using your FLOE trailer Trailer Lighting System WIRE HARNESS CONNECTOR White - Grounds all lights Brown - Front & rear marker lights • Your trailer is equipped with a plug-in receptacle on the & tail lights trailer tongue to keep the electrical connector protected Yellow - Left turn/brake light when not in use as shown (FIG 1). -
Page 7: Secure Your Trailer
Loading your FLOE trailer Capacities & Weight Distribution CARGO WEIGHT DISTRIBUTION TONGUE WEIGHT CAPACITY • Trailer load should be centered left to right, and distributed • Loads should be placed on the trailer so that proper weight front to rear to provide adequate tongue weight. -
Page 8: Proper Loading & Unloading
Loading your FLOE trailer Proper Loading & Unloading 1. Prior to using the trailer loaded or unloaded it is imperative WARNING that no structural damage exists. Do a visual check to ensure that none of the structural components are bent or cracked. -
Page 9: Securing The Load
Loading your FLOE trailer Securing The Load WARNING When securing cargo, consider how it will behave if extreme acceleration, deceleration (fast braking), swerving, or poor road conditions occur. A load that shifts forward or backward may cause an unsafe situation which could result in product damage, severe injuries or even death. -
Page 10: Aluminum Tailgate Ramp
Procedure for Aluminum Tailgate Ramp When using the tailgate ramp, the trailer can be left in the upright position, or partially tilted using the limiter strap (which is ideal for low clearance items), or fully tilted. To lower the ramp, release the rubber latches and retaining pins from each side of the trailer, and lower the ramp away from the trailer while also folding the bi-fold section of the ramp out until the ramp is resting on the ground. -
Page 11: Changing Tires
Procedure for Changing Tires CHANGING TIRES WARNING 1. Start all lug nuts by hand with the beveled side of the lug nut toward the wheel to prevent cross-threading and to LUG NUTS ON NEW WHEELS SHOULD BE ensure proper nut-to-rim seal. RE-TORQUED AFTER THE FIRST 10, 25 AND 50 2. -
Page 12: Inspections & Maintenance
Procedure for Inspections & Maintenance It is very important to read and follow these maintenance procedures to help avoid trailer failure. Any trailer failure resulting from improper maintenance may void your warranty. COMPONENT INSPECTIONS & MAINTENANCE AVOID Structure/Frame a) Do a visual check to ensure that none of the structural a) Loading the trailer in an unbalanced components are bent or cracked before towing. -
Page 13: Faq
WHERE DO I FIND MY VIN TAG? VEHICLE? 1. The VIN tag is located under the bed of the Versa-Max UT 1. Over-tight hitch coupler -- See procedure for adjusting hitch – on the tongue mount – on the driver’s side of the trailer. -
Page 14: Tire Safety Information
Tire Safety Information Tire Safety Information 1. T AFETY NFORMATION This portion of the User’s Manual contains tire safety information as required by 49 CFR 575.6. Section 2.1 contains “Steps for Determining Correct Load Limit - Trailer”. Section 2.2 contains “Steps for Determining Correct Load Limit – Tow Vehicle”. Section 2.3 contains a Glossary of Tire Terminology, including “cold inflation pressure”, “maximum inflation pressure”, “recommended inflation pressure”, and other non-technical terms. - Page 15 Tire Safety Information Excessive loads and/or underinflation cause tire overloading and, as a result, abnormal tire flexing occurs. This situation can generate an excessive amount of heat within the tire. Excessive heat may lead to tire failure. It is the air pressure that enables a tire to support the load, so proper inflation is critical.
- Page 16 Bead The part of the tire that is made of steel wires, wrapped or reinforced by ply cords and that is shaped to fit the rim. Bead separation This is the breakdown of the bond between components in the bead. Bias ply tire A pneumatic tire in which the ply cords that extend to the beads are laid at alternate angles substantially less than 90 degrees to the centerline of the tread.
- Page 17 Tire Safety Information Intended outboard sidewall The sidewall that contains a white-wall, bears white lettering or bears manufacturer, brand, and/or model name molding that is higher or deeper than the same molding on the other sidewall of the tire or the outward facing sidewall of an asymmetrical tire that has a particular side that must always face outward when mounted on a vehicle.
- Page 18 The linear distance between the exteriors of the sidewalls of an inflated tire, including elevations due to labeling, decorations, or protective bands or ribs. A layer of rubber-coated parallel cords. Ply separation A parting of rubber compound between adjacent plies. Pneumatic tire A mechanical device made of rubber, chemicals, fabric and steel or other materials, that, when mounted on an automotive wheel, provides the traction and contains the gas or fluid that sustains the load.
- Page 19 Tire Safety Information That portion of a tire that comes into contact with the road. Tread rib A tread section running circumferentially around a tire. Tread separation Pulling away of the tread from the tire carcass. Treadwear indicators (TWI) The projections within the principal grooves designed to give a visual indication of the degrees of wear of the tread.
- Page 20 Tire safety tips. Use this information to make tire safety a regular part of your vehicle maintenance routine. Recognize that the time you spend is minimal compared with the inconvenience and safety consequences of a flat tire or other tire failure.
- Page 21 Tire Safety Information 1.5.4. S TEPS FOR AINTAINING ROPER RESSURE Step 1: Locate the recommended tire pressure on the vehicle's tire information placard, certification label, or in the owner's manual. Step 2: Record the tire pressure of all tires. Step 3: If the tire pressure is too high in any of the tires, slowly release air by gently pressing on the tire valve stem with the edge of your tire gauge until you get to the correct pressure.
- Page 22 1.5.9.1. Information on Passenger Vehicle Tires Please refer to the diagram below. The "P" indicates the tire is for passenger vehicles. Next number This three-digit number gives the width in millimeters of the tire from sidewall edge to sidewall edge. In general, the larger the number, the wider the tire.
- Page 23 Tire Safety Information LETTER RATING SPEED RATING 65 mph 75 mph 99 mph Tire Safety Information 106 mph 112 mph Letter Rating Speed Rating 118 mph 99 mph 124 mph 106 mph 112 mph 130 mph 118 mph 149 mph 124 mph 130 mph 168* mph...
- Page 24 1.5.9.3. Additional Information on Light Truck Tires Please refer to the following diagram. Tires for light trucks have other markings besides those found on the sidewalls of passenger tires. The "LT" indicates the tire is for light trucks or trailers. An "ST"...
-
Page 25: Warranty & Warranty Registration
FLOE INTERNATIONAL will repair or replace, at its option, any portion of the aluminum structure, formed trailer bed and lighting system (excluding L.E.D. bulbs and lenses,) which fails as a result of a defect in material or workmanship during the first year after purchase. Thereafter, FLOE INTERNATIONAL will repair or replace any portion of the aluminum structure or lighting system which fails as a result of a defect in material or workmanship at a cost to the purchaser of a proportion of the existing manufacturer’s suggested retail price as follows:... - Page 26 PURCHASED FROM: _______________________________________ E-mail: _____________________________________________ Yes please No you cannot contact me via e-mail with great offers and special promotions from FLOE International and it’s quality authorized dealers. PRODUCT PURCHASED Please check all that apply Versa-Max UT 10.5-79 ...
- Page 27 PWC, BOAT & PONTOON LIFTS (Featuring FLOE’s exclusive Easy-Level™ leveling leg): polyethylene trailer body. It can haul and be towed by ATVs, and is With FLOE, you get a long-lasting, low-maintenance lift system. They are engineered great for yard work, hunting, camping, cabin travel, construction, with custom extruded aluminum components and stainless steel leveling cables.
- Page 28 Your authorized FLOE Dealer: FLOE INTERNATIONAL, INC. 48473 STATE HIGHWAY 65 • McGREGOR, MN 55760 www.floeintl.com All material copyright © 2020 FLOE International, Inc. Unauthorized reproduction is strictly prohibited. Specifications subject to change without notice.
Need help?
Do you have a question about the Versa-Max UT and is the answer not in the manual?
Questions and answers