Table of Contents
Advertisement
Quick Links
Advertisement
Table of Contents
Troubleshooting

Related Manuals for Keysight Ixia IxOS XGS2 Series


Summary of Contents for Keysight Ixia IxOS XGS2 Series
- Page 1 IxOS XGS2 Chassis Platform Getting Started Guide Release 8.51 EA...
- Page 2 Keysight shall not customarily provided to the public to use, be liable for errors or for incidental or modify, reproduce, release, perform,...
- Page 3 This page intentionally left blank. – iii –...
-
Page 4: Contact Us
Contact Us Contact Us Ixia headquarters 26601 West Agoura Road Calabasas, California 91302 +1 877 367 4942 – Toll-free North America +1 818 871 1800 – Outside North America +1.818.871.1805 – Fax www.ixiacom.com/contact/info Support Global Support +1 818 595 2599 support@ixiacom.com APAC Support +91 80 4939 6410 support-asiapac@ixiacom.com... - Page 5 This page intentionally left blank. – v –...
-
Page 6: Table Of Contents
Contact Us About this guide Note icons and messages Typographical conventions Textual conventions Chapter 1 XGS2 Chassis Platform Overview XGS2 Processor Modules Front Panel Indicators and Controls Product Specifications Chapter 2 XGS2 Chassis Physical Setup Unpack and Connect the Unit Rack Mounting and Ventilation Warning Installing the XGS2 on a Flat Surface Record Product Information... - Page 7 Chapter 5 Ixia Test Applications Support Ixia Applications support for XGS2-HS Ixia Applications support for XGS2-SD Chapter 6 Common Administrative Tasks Start a Windows Remote Desktop Connection Start an SSH Session Start a Serial Session Reboot the System Shut Down the System Chapter 7 Troubleshooting LED Indicators IP Addressing Issues...
-
Page 8: About This Guide
About this guide This section explains the notational and typographical conventions used in this documentation, and provides a list of related documentation. Section contents: Note icons and messages Typographical conventions Textual conventions – 1 –... -
Page 9: Note Icons And Messages
About this guide Note icons and messages The following table describes the note icons and messages used in this document. Name Icon Description Note Indicates information that emphasizes or supplements important points in the main text. Important Indicates information that is essential to the completion of a task. Provides supplemental suggestions for applying techniques and procedures to accomplish a task. -
Page 10: Textual Conventions
About this guide Textual conventions The following table describes the typographical conventions used in this document. Convention Description Boolean text Words that represent Boolean notation are written in all uppercase text. For example: 1010 OR 1100. Keystrokes Simultaneous keystrokes are shown by joining the key names with a plus sign (+). - Page 11 This page intentionally left blank. – 4 –...
-
Page 12: Chapter 1 Xgs2 Chassis Platform Overview
XGS2 Chassis Platform Overview HAPTER This section provides an overview of the XGS2 chassis platform, the physical units and the indicators and controls on them. In this section: XGS2 Processor Modules Front Panel Indicators and Controls Product Specifications – 1 –... -
Page 13: Xgs2 Processor Modules
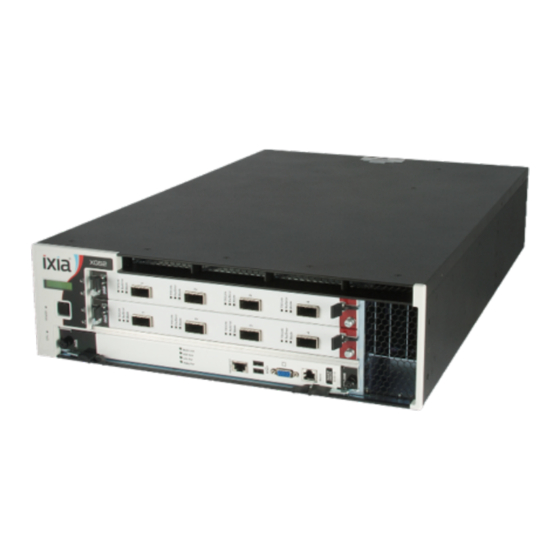
XGS2 Processor Modules XGS2 is the next-generation benchtop chassis platform that brings higher density, modular service capability, and efficient air flow for rack mount applications. This chassis platform supports application and security testing with the Ixia IxLoad™ , IxNetwork™ and BreakingPoint™ software products. There are two models of the chassis platform (based on supported controller type): XGS2-HS - High Performance Controller: This model provides support for IxLoad, IxNetwork and BPS. - Page 14 The chassis is shown below: Chassis Front View Chassis Rear View...
-
Page 15: Front Panel
Front Panel The XGS2-HS front panel: The XGS2-SD front panel: – 4 –... -
Page 16: Indicators And Controls
Chapter 1 XGS2 Chassis Platform Overview Indicators and Controls Power Indicates the current power state: Green: the system is ON and all power supplies are operational. Off: the system is powered off or one or more power supplies are not operational. - Page 17 Chapter 1 XGS2 Chassis Platform Overview EN60950-1, 2nd Edition International CB Scheme: IEC 60950-1:2nd Edition EMI/EMC North America FCC part 15, Class A (USA) ICES-003 Issue 4, Class A (Canada) Europe EN 55022:2010 +C1 (Emissions, Harmonics, Flicker) EN 55024:2010 (Immunity) International IEC/EN 61000-3-2:2009 Harmonic emissions IEC/EN 61000-3-3:2008 Voltage Fluctuations &...
- Page 18 Chapter 1 XGS2 Chassis Platform Overview Thermal Operating Temp.: 0° to 40° C Operating humidity: 10 to 85% (RH), non-condensing Input Power INPUT 1/ALIMENTATION 1: 100-240VAC, 50/60Hz, 8A INPUT 2/ALIMENTATION 2: 100-240VAC, 50/60Hz, 8A INPUT 3/ALIMENTATION 3: 100-240VAC, 50/60Hz, 8A Note: Inputs 1 and 2 are required for normal operation.
-
Page 19: Chapter 2 Xgs2 Chassis Physical Setup
XGS2 Chassis Physical Setup HAPTER This section describes the tasks needed to physically set up the XGS2-HS and XGS2-SD units for operation. In this section: Unpack and Connect the Unit Rack Mounting and Ventilation Warning Installing the XGS2 on a Flat Surface Record Product Information... -
Page 20: Unpack And Connect The Unit
Unpack and Connect the Unit 1. Unpack the unit from the shipping container, and verify that you have all the required components. The XGS2 chassis platform shipping carton contains the following items: One XGS2 chassis One rack mounting kit Two power cords (one additional power cord if you buy an optional redundant power supply) Ixia standard warranty notice One XGS2 Getting Start Guide Any optional items that you ordered (such as transceivers and cables) - Page 21 Chapter 2 XGS2 Chassis Physical Setup Install XGS2 Chassis The installation procedure for both XGS2-HS and XGS2-SD chassis are the same. The following sections describe the procedure. Insert the controller module in the lower slot in front of the chassis. Ensure that the module is fully seated.
- Page 22 Chapter 2 XGS2 Chassis Physical Setup When the Sync module is fully inserted, tighten its two screws. Insert a power supply in one of the power supply slots. Push the power supply until you hear a click and it is fully seated in its slot.
- Page 23 Chapter 2 XGS2 Chassis Physical Setup Repeat the same for the second supply. Note: If you have purchased the optional redundant power supply, you may have to repeat this step after removing the empty slot cover. The fully assembled chassis’s rear view looks like this.
-
Page 24: Rack Mounting And Ventilation Warning
Chapter 2 XGS2 Chassis Physical Setup If you need rack mounting, attach the two rack mounts. Tighten the rack mounts using the screws provided. Depending on your rack equipment placement requirement, you can attach the rack mounts to the front of the chassis, or at an offset from the chassis front. -
Page 25: Installing The Xgs2 On A Flat Surface
Chapter 2 XGS2 Chassis Physical Setup 2. Use the supplied screws to attach a mounting bracket to each side of the unit. 3. Position the unit in the rack and align the holes in the mounting bracket with the holes in the rack. -
Page 26: Record Product Information
Chapter 2 XGS2 Chassis Physical Setup Record Product Information You can use this page to record the product information required during initial system configuration (and for future reference). The Host Name, Part Number, and Windows Product Key are printed on the label on the back of the unit. -
Page 27: Chapter 3 Xgs2-Hs Configuration
XGS2-HS Configuration HAPTER This section describes the tasks needed to configure the XGS2-HS chassis. In this section: Connecting the XGS2-HS Processor module Initial Configuration of XGS2-HS System Administration of XGS2-HS... -
Page 28: Connecting The Xgs2-Hs Processor Module
Connecting the XGS2-HS Processor module This section describes the process of connecting the XGS2-HS Processor module. To connect the module you need to do the following: 1. Connect the RJ45 management port (4) as the designated management port to your lab management switch. -
Page 29: Initial Configuration Of Xgs2-Hs
Chapter 3 XGS2-HS Configuration Initial Configuration of XGS2-HS This section explains the instructions required to configure the IP addresses of the High Performance Processor Module. There are two management IP addresses required (from the same management subnet) for the operation of the High Performance Processor Module: IP used by the system controller for general management tasks and used for Ixia Web-based user interface (also used to launch BreakingPoint web user interface). - Page 30 Chapter 3 XGS2-HS Configuration 2. On the monitor connected to the VGA port, the basic login screen is prompted. To have access to the System Admin Screen (system configuration menu for configuring various system-level parameters) use the following system credentials: username: admin password: admin 3.
- Page 31 Chapter 3 XGS2-HS Configuration a. From the System Admin Screen, choose option 1 Set up network . b. From the new submenu, select the desired IP mode (using the SPACE key): DHCP : make sure to have an active DHCP server running on the management subnet (this is also the default setting).
-
Page 32: System Administration Of Xgs2-Hs
Chapter 3 XGS2-HS Configuration System Administration of XGS2-HS Local system access (using the local KVM monitor and keyboard) 1. When starting the system, the login screen displayed provides two types of access depending on the credentials that are being used: Accessing the System Admin Screen: using admin/admin credentials. -
Page 33: Chapter 4 Xgs2-Sd Configuration
XGS2-SD Configuration HAPTER This section describes the tasks needed to configure the XGS2-SD chassis. In this section: Connecting the XGS2-SD Processor module Initial Configuration XGS2-SD... -
Page 34: Connecting The Xgs2-Sd Processor Module
Connecting the XGS2-SD Processor module This section describes the process of connecting the XGS2-SD Processor module. To connect the module you need to do the following: 1. Insert and remove the Processor Module. 2. Connect the RJ45 management port (4) as the designated management port to your lab management switch. -
Page 35: Initial Configuration Xgs2-Sd
Chapter 4 XGS2-SD Configuration Initial Configuration XGS2-SD To perform initial system configuration for the XGS2-SD chassis, do the following: 1. Connect the monitor, USB mouse and keyboard, and then start the chassis. 2. When the chassis boots up, log on to the chassis. The user name is ixia and the password is the CPU module serial number found on the sticker located at the back of the chassis. - Page 36 Chapter 4 XGS2-SD Configuration 4. Click Properties . Select Internet Protocol Version 4 (TCP/IPv4) . 5. Click Properties and then click the Use the following IP address option. 6. Enter the IP address, subnet mask and default gateway. – 25 –...
-
Page 37: Chapter 5 Ixia Test Applications Support
Ixia Test Applications Support HAPTER This section provides the details of the Ixia Test Applications supported by XGS2 chassis platform. In this section: Ixia Applications support for XGS2-HS Ixia Applications support for XGS2-SD... -
Page 38: Ixia Applications Support For Xgs2-Hs
Ixia Applications support for XGS2-HS This section provides the details of the Ixia Test Applications supported by XGS2-HS chassis. IxLoad When running the IxLoad client application to add your new XGS2-HS chassis in the Chassis Chain pane, the IxOS Windows machine IP address should be used: IxNetwork To start IxNetwork and assign ports from an :XGS2-SD chassis: 1. - Page 39 Chapter 5 Ixia Test Applications Support BreakingPoint To access the BreakingPoint web-based UI, connect to the Ixia Web UI IP address using your browser and launch a new BreakingPoint session: Note: It is recommended that you periodically check the Ixia compatibility matrix https://support.ixiacom.com/support-overview/product-support/product-compatibility- matrix ) to determine the correct Ixia software application versions that are validated for...
-
Page 40: Ixia Applications Support For Xgs2-Sd
Chapter 5 Ixia Test Applications Support Ixia Applications support for XGS2-SD This section provides the details of the Ixia Test Applications supported by XGS2-SD chassis. IxLoad When running the IxLoad client application to add your new XGS2-SD chassis in the Chassis Chain pane, the IxOS Windows machine IP address should be used: IxNetwork To start IxNetwork and assign ports from an :XGS2-SD chassis... - Page 41 Chapter 5 Ixia Test Applications Support Note: It is recommended that you periodically check the Ixia compatibility matrix https://support.ixiacom.com/support-overview/product-support/product-compatibility- matrix ) to determine the correct Ixia software application versions that are validated for interoperability. – 30 –...
-
Page 42: Chapter 6 Common Administrative Tasks
Common Administrative Tasks HAPTER This topic describes, for reference, some of the common tasks that system administrators will perform on the XGS2 system. In this section: Start a Windows Remote Desktop Connection Start an SSH Session Start a Serial Session Reboot the System Shut Down the System... -
Page 43: Start A Windows Remote Desktop Connection
Start a Windows Remote Desktop Connection To start a Remote Desktop Connection session to the XGS2 system: 1. If you do not know the IxOS IP address, ping the unit's host name. The host name appears on the label on the back of the unit. The ping command will return the IxOS IP address. -
Page 44: Start An Ssh Session
Start an SSH Session You can access the XGS2 Administrative Console using either a serial connection or an SSH session. This applies to the XGS2-HS chassis model only. To start an SSH session: 1. Open an SSH session from your terminal emulation application, specifying: The FlixOS IP address as the Host Name. -
Page 45: Start A Serial Session
Start a Serial Session You can access the XGS2 Administrative Console using either a serial connection or an SSH session. This applies to the XGS2-HS chassis model only. To start a serial session: 1. Open the serial connection from your terminal emulation application. For example: The Administrative Console prompts you to log in. -
Page 46: Reboot The System
Reboot the System The Administrative Console provides options for restarting the XGS2 chassis, Using the console is the recommended approach for this activity. 1. Open a serial connection or an SSH connection from your terminal emulation application. The Administrative Console prompts you to log in. 2. - Page 47 User ID: admin Password: admin The Administrative Console presents the main menu. 3. Select option 2 (Halt system (graceful)) option: 4. Press Enter to initiate the graceful shutdown. XGS2 executes an orderly shut down of all processes, then powers-down the system. Note: The "forced"...
-
Page 48: Chapter 7 Troubleshooting
Troubleshooting HAPTER This section provides guidance for interpreting the operational status of your XGS2 unit, and troubleshooting issues that may arise. If you need assistance, contact Ixia Technical Support using the contact information provided in Contact Us on page iv In this section: LED Indicators IP Addressing Issues Troubleshooting Licensing Issues... -
Page 49: Led Indicators
LED Indicators The XGS2 chassis provides LED indicators that provide a visual presentation of the operational status of the device and its individual ports. LED/LCD Display The XGS2-HS and XGS2-SD chassis have front panel LEDs for each load module slot. The following table describes the purpose and meaning of each indicator: Label Color... -
Page 50: Ip Addressing Issues
Color Description Processor module - Link LED Green Port has link. Ethernet LEDs for Note: Link and Activity each port LEDs are included for all Ethernet ports. Act LED Flashes when port has activity. IP Addressing Issues The XGS2 chassis models require the following management IP addresses: the WebUI address (applicable for the HS model only) the IxOS address (applicable for both the HS and SD models of the chassis) If your network implements a DHCP service, the XGS2 IP addresses will automatically be assigned by that service,... -
Page 51: Troubleshooting Licensing Issues
Troubleshooting Licensing Issues Following is a list of licensing issues that can result in operational problems: Licensing: An IxOS license is required to run both BreakingPoint and IxLoad. License invalidation: Time discrepancies between the network and theXGS2 system will invalidate the installed licenses. To avoid this, configure the XGS2 to use NTP (or manage the Set the System Time time setting manually, if NTP is not an available to you). - Page 52 This page intentionally left blank. – 41 –...
-
Page 53: Appendix A Safety Instructions
Appendix A Safety Instructions Safety Instructions PPENDIX This appendix describes the various unit safety instructions in English and French. SAFETY INSTRUCTIONS (English) CAUTIONS and WARNINGS: Safety Instructions Use the following safety guidelines to help ensure your own personal safety and to help protect your equipment and working environment from potential damage. - Page 54 Appendix A Safety Instructions NOTE: The installation of your equipment and rack kit in a rack cabinet has not been approved any safety agencies. It is your responsibility to ensure that the final combination of equipment and rack complies with all applicable safety standards and local electric code requirements. Ixia disclaims all liability and warranties in connection with such combinations.
- Page 55 Appendix A Safety Instructions To help prevent electric shock, plug the equipment’s power cable into properly grounded electrical outlets. These cables are equipped with three-prong plugs to help ensure proper grounding. Do not use adapter plugs or remove the grounding prong from a cable. If you must use an extension cable, use a 3-wire cable with properly grounded plugs.
- Page 56 Appendix A Safety Instructions SAFETY: Risk of Electrical Shock CAUTION: Opening or removing the cover of this equipment may expose you to risk of electrical shock. Components inside these compartments should be serviced only by an Ixia service technician. Allow the equipment to cool before removing add-in modules. Add-in modules may become very warm during normal operation.
-
Page 57: Safety Instructions (French)
Appendix A Safety Instructions equipment. You can also take the following steps to prevent damage from electrostatic discharge: When unpacking a static-sensitive component from its shipping carton, do not remove the component from the antistatic packing material until you are ready to install the component. Just prior to unwrapping the antistatic package, be sure to discharge static electricity from your body. - Page 58 Appendix A Safety Instructions d’équipements et de bâtis soit conforme à toutes les normes de sécurité applicables et aux exigences du code local en matière d’électricité. Ixia décline toute responsabilité et toutes les garanties relatives à de telles combinaisons. Les ensembles de bâtis sont prévus pour être installés par un technicien de service formé.
- Page 59 Appendix A Safety Instructions afin d’assurer une mise à la terre adéquate. Ne pas utiliser de fiches d’adaptation ni retirer la broche de mise à la terre d’un câble. Si ’une rallonge doit absolument être utilisée, utiliser un câble à trois fils doté de fiches de mise à la terre adéquates. Respecter les caractéristiques nominales ’de la rallonge et de la barrette d’alimentation.
- Page 60 Appendix A Safety Instructions des déchets pour obtenir l’adresse du site de collecte de piles le plus proche. Manipuler les piles avec précaution. Ne pas démonter, écraser ou percer les piles. Ne pas court- circuiter les contacts externes, éliminer les piles dans le feu ou l’eau, ni exposer les piles à des températures supérieures à...
- Page 61 Appendix A Safety Instructions aux informations de sécurité spécifiques au produit fournies dans ce manuel. Les décharges électrostatiques peuvent endommager les composants électroniques. Dans certaines conditions, les décharges électrostatiques peuvent s’accumuler sur votre corps ou sur un objet, puis se décharger dans un autre objet comme vos modules additionnels. Pour prévenir les dommages dus aux décharges électrostatiques, vous devez décharger l’électricité...
- Page 62 This page intentionally left blank. – J –...
- Page 63 shutting down 35 configure the high performance module 18 SSH session, starting 33 Connecting 23 system administration 21 connecting XGS2-HS 17 troubleshooting licensing issues 40 front panel 4 typographical conventions 2 indicators and controls 5 virtual machines 18 initial configuration of XGS2-HS 18 initial configuration XGS2-SD 24 XGS2-HS 21 IP addresses...
- Page 64 © Keysight Technologies, 2018 Ixia, a Keysight Business 26601 West Agoura Road Calabasas, California 91302...
Need help?
Do you have a question about the Ixia IxOS XGS2 Series and is the answer not in the manual?
Questions and answers