Advertisement
Quick Links
Important
Please Read All Instructions Carefully Before Assembling This Product
• Inspect all parts to make sure that nothing is broken or missing. If something is broken
or missing, please contact our service department at support@eccboutdoor.com.
• The chair must be completely assembled before attempting to use it. Failure to do so
could result in damage to the chair or the user.
• Use proper safety gear and follow appropriate safety precautions when assembling this product.
• Important - Do not over-tighten the screws.
• Only hand tools should be used for assembly. Do not use power tools.
• ECCB Outdoor will not be liable for any injury or damage resulting
from improper assembly and/or use of this product.
• Failure to follow all instructions will result in the product warranty being voided.
ECCB
O U T D O O R
966 Perry Highway, Mercer, PA 16137 • Phone (800) 687-5086
ECCBOutdoor.com
Assembly Instructions
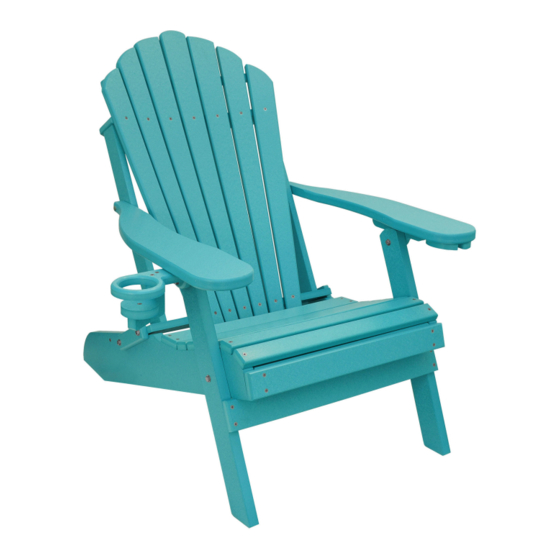
Deluxe Adirondack Chair
Congratulations on the purchase of your
new Outer Banks Deluxe Poly Lumber
Folding Adirondack Chair. You will soon
be sitting back and relaxing in the comfort
of this classic chair when you follow these
easy step by step instructions.
V3
Advertisement

Related Manuals for ECCB OUTDOOR Outer Banks Deluxe Poly Lumber Folding Adirondack Chair


Summary of Contents for ECCB OUTDOOR Outer Banks Deluxe Poly Lumber Folding Adirondack Chair
- Page 1 • Important - Do not over-tighten the screws. • Only hand tools should be used for assembly. Do not use power tools. • ECCB Outdoor will not be liable for any injury or damage resulting from improper assembly and/or use of this product.
- Page 2 Parts Make sure you have received everything. If anything is missing or damaged, please contact our service department at support@eccboutdoor.com. Back - 1 pc Seat - 1 pc Arms - 2 pcs Brace 1 Right (with cupholder) 1 Left (with wine holder) Hardware - Shown at Actual Size Lag Screws - 2 pcs...
- Page 3 Let’s Get Started! Step 1 - Attach the Seat to the Brace • Attach the brace (D) to the seat (B) using the lag screws (E) Lay the seat on its side when attaching the brace Step 2 - Attach the Back to the Seat •...
- Page 4 Step 3 - Attach the Arms to the Chair • Attach the arms (C) to the back (A) and the brace (D) • Make sure the bolt is inserted from the inside of the chair when attaching the arm to the brace Loosely attach the arms to the back of the chair, then fold up the chair back...
Need help?
Do you have a question about the Outer Banks Deluxe Poly Lumber Folding Adirondack Chair and is the answer not in the manual?
Questions and answers