Advertisement
Quick Links
Important
Please Read All Instructions Carefully Before Assembling This Product
• Inspect all parts to make sure that nothing is broken or missing. If something is broken
or missing, please contact our service department at support@eccboutdoor.com.
• The side table must be completely assembled before attempting to use it. Failure to do so
could result in damage to the table or the user.
• Use proper safety gear and follow appropriate safety precautions when assembling this product.
• Important - Do not overtighten the screws.
• Only hand tools should be used for assembly. Do not use power tools.
• ECCB Outdoor will not be liable for any injury or damage resulting
from improper assembly and/or use of this product.
• Failure to follow all instructions will result in the product warranty being voided.
ECCB
O U T D O O R
966 Perry Highway, Mercer, PA 16137 • Phone (800) 687-5086
ECCBOutdoor.com
Assembly Instructions
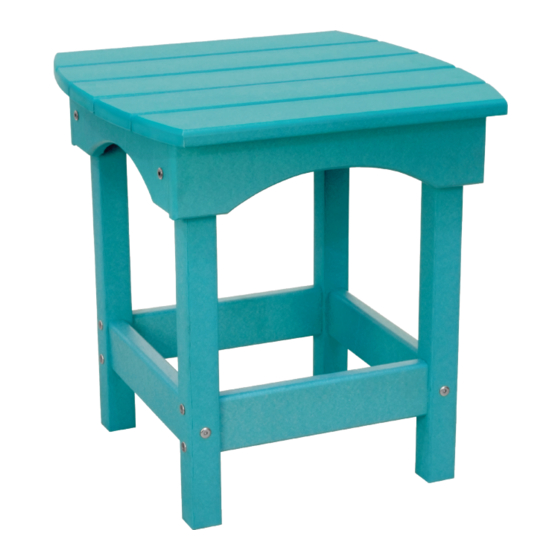
Harbor and Outer Banks Side Table
Congratulations on the purchase of your new
poly lumber side table. These easy step-by-step
instructions can be used for assembling either the
Harbor Side Table (shown)
Outer Banks Square Side Table.
or
V1
Advertisement

Related Manuals for ECCB OUTDOOR EO-OB-SET-3PC-DELUXE-INT-HARBOR-SQ


Summary of Contents for ECCB OUTDOOR EO-OB-SET-3PC-DELUXE-INT-HARBOR-SQ
- Page 1 • Important - Do not overtighten the screws. • Only hand tools should be used for assembly. Do not use power tools. • ECCB Outdoor will not be liable for any injury or damage resulting from improper assembly and/or use of this product.
- Page 2 Parts Make sure you have received everything. If anything is missing or damaged, please contact our service department support@eccboutdoor.com. Top - 1 piece Legs - 2 pieces Middle Brace - 2 pieces Hardware - Shown at Actual Size D Bolts - 4 pieces Washers - 4 pieces E Lag Screws - 4 pieces G Nuts - 4 pieces...
- Page 3 Let’s Get Started! Step 1 - Attach the Leg • Flip over the top (A) so the bottom is facing up • Line up the leg (B) with the pre-drilled holes of the top (A) • Insert the bolt (D) and tighten on the inside of the leg with a washer (F) and nut (G) using your open ended wrench The legs are interchangeable so it doesn’t matter which one...
- Page 4 Step 3 - Attach the Other Leg • Line up the other leg (B) with the pre-drilled holes of the top (A) • Insert the bolt (D) and tighten on the inside of the leg with a washer (F) and nut (G) using your open ended wrench •...
Need help?
Do you have a question about the EO-OB-SET-3PC-DELUXE-INT-HARBOR-SQ and is the answer not in the manual?
Questions and answers