Table of Contents
Advertisement
Quick Links
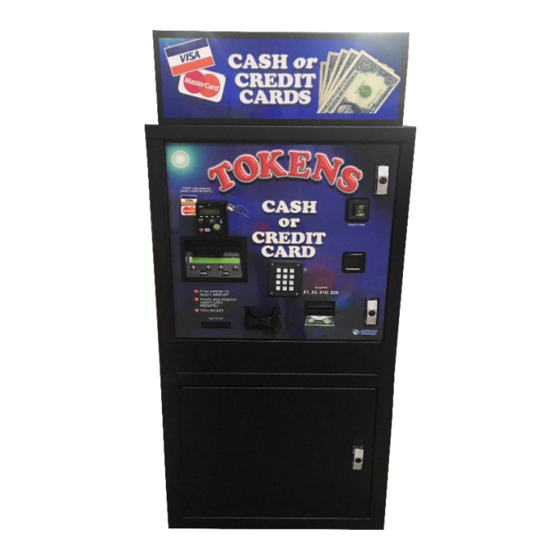
American Changer
AC2006, AC2007,
AC2207 & AC6007
Installation, Operation,
and Service Manual
Changing the Industry℠
Installers & Service Technicians
Read and understand the instructions
detailed in this manual.
Owners & Operators
Keep this manual in a safe place to
provide to any service technicians
working on this machine.
American Changer
1400 N.W. 65th Place, Ft. Lauderdale, FL 33309
Tel (954) 917-3009 • Fax (954) 917-3079
www.americanchanger.com www.hoffmanmint.com
©2017 American Changer
Manual CnTkn Series 090117
Advertisement
Table of Contents

Related Manuals for American Changer AC2006


Summary of Contents for American Changer AC2006
- Page 1 American Changer AC2006, AC2007, AC2207 & AC6007 Installation, Operation, and Service Manual Changing the Industry℠ Installers & Service Technicians Read and understand the instructions detailed in this manual. Owners & Operators Keep this manual in a safe place to provide to any service technicians working on this machine.
-
Page 3: Table Of Contents
All rights reserved. No part of this work covered by copyrights herein may be reproduced or copied in any form or by means – graphic, electronic or mechanical, including photocopying, recording, taping or information storage and retrieval systems – without the written permission of American Changer... -
Page 4: Section 1 - Product Overview
*Note: Specifications stated herein may vary without notice. Capacities are approximations and may vary. 1.2 – Warranty Information PLEASE REFERENCE SECTION 4.4 ON PAGES 47 AND 48 FOR AMERICAN CHANGER’S DETAILED LIMITED WARRANTY AND EXCLUSIVE REMEDIES. SOME HIGHLIGHTS FROM SAID SECTION ARE: Coin Hopper(s), Coin Acceptors and Logic Board These items are warranted for one year from date of purchase. -
Page 5: Machine Safety
Section 1.3 – Machine Safety Your safety and the safety of others are very important to American Changer. We have provided important safety messages in this manual and on your machine. Always read and obey all safety messages. This is a safety alert symbol. - Page 6 SAVE THESE INSTRUCTIONS American Changer does not guarantee machines (products) or services to be 100% secure against criminal attempts. All machines (products) and services are to be used in accordance with business best practices and the owner’s or operator’s best judgement.
-
Page 7: Section 2 - Setup & Installation
“ON.” The rocker switch has an “I” and “O” printed on it. When the “I” is pressed down, the changer is “ON.” If the machine does not function properly please contact American Changer’s Technical Support Department at service@americanchanger.com... -
Page 8: Mounting Instructions
2.2 – Mounting Instructions This machine must be installed in accordance with local codes. If you are unsure in any way what your local codes are or unsure of anything in the following steps, please hire a licensed professional to mount your machine. - Page 9 Installation is completed. Proceed to the “Programming the Changer” section The proper performance of your American Changer machine is directly related to the quality of the power it is supplied. AC power fluctuations, including blackouts, brownouts, over voltages, sags, surges, and spikes may cause the machine to miss pay.
-
Page 10: Ada Regulations
2.3 – ADA Regulations The American Disabilities Act requires unobstructed access to equipment. Bill insertion and coin removal are to be no lower than 15 inches and no higher than 48 inches from the floor. This requirement must be met whether a changer is installed on a base, on a table, or in the wall. NOTE: This drawing is not to scale. -
Page 11: Section 3 - Operational Overview
Section 3 – Operational Overview 3.1 – Component Description Coin Hopper The hopper uses the ccTalk communication protocol. It can dispense coins or tokens ranging in size from 21mm to 30mm in diameter and 1.25mm to 3.30mm in thickness. An option is available to dispense smaller coins. - Page 12 I/O Board and External LCD Display – The I/O board allows the main board to interface with the LCD display and displays the packages to the customer. The LCD display is located behind the I/O board pictured below. Flex I/O to Flex-2 Flex I/O to Flex I/O to 4 Main Logic Board...
- Page 13 12 Key Keypad This model machines uses a 12-key keypad for entering information into the programming menu. It is mounted on the front of the machine. Printer This machine comes standard with an audit/receipt printer.
- Page 14 Before the printer paper runs out, you might wish to contact your distributor and order more printer thermal paper. The American Changer part number is AC7071-01, and it is a special brand which is hard to find. Many owners of this product make the mistake of purchasing the incorrect paper type or have a problem loading the paper.
- Page 15 Paper Feed Lever Paper Feed Lever in the down position Paper Feed Lever in the up position 2. Move the “Paper Feed Lever” back to the DOWN position. Slide a new roll of paper onto the “Roll Holder,” oriented so the paper comes off on the side toward the printer (refer to Figure P3 for the correct placement).
- Page 16 IMPORTANT! Turn OFF the Main Board power, and turn it ON again after a few seconds. Note: The printer will not work until the power has been cycled! Enter the Setup Mode and perform a Printer Test. Make sure the printer prints all of the lines of text and cuts off the paper.
-
Page 17: Functional Description
3.2 – Functional Description 1. Dispense The coin hopper content can be defined by entering its value in the programming menu, for example, $00.25. 2. Payment The desired payout and cost must be selected by one of the four buttons. Once selected, the payment type needs to be selected. Value can be up to $999.99. - Page 18 The amount of coins in the coin hopper is below its operational threshold. First ensure there are enough coins in the coin hopper to completely covert the metal plates located at the bottom of the hopper. Second use Scotch- Brite to scrub the metal plates. This is effective on dull plates.
- Page 19 No Comm The Flex-2 Board is unable to communicate with the credit card processing device. No Reader A credit card reader is not detected. The credit card reader may be disconnected or defective. This error only occurs when using a DataCap Systems Tran device. Printer Printer Error Conditions In/Out...
- Page 20 3.4 – Programming Menu To enter the programming menu, begin by pressing the “Select Switch” on the Flex-2 main logic board. Pressing the select switch will bring the display to show “Enter Access Code.” Use the Flex Programmer Board to enter the access code. The default code from the factory is “1234” To exit the programming menu or the “Enter Access Code”...
- Page 21 Menu 05 – Enable Bill This system only uses MDB validators. Depending on what type of MDB validator is used, the display will only toggle between the denominations accepted by the bill validator. Menu 06 – Payout Table Only bills enabled in Menu 05 will be available in this menu. Enter the # of items dispensed for each bill denomination.
- Page 22 Menu 15 – Date Setup Enter the date in this format: 20YY-MM-DD. Menu 16 – Time Setup Enter the time in this format: HH:MM. 24 hour format. Menu 17 – Machine Number Assign a machine number that will appear in audit report print out. Menu 18 –...
- Page 23 Menu 31 – Webserver The Webserver IP configuration is displayed. Menu 32 – Minimum Credit Enter a minimum value for credit card transactions. Menu 33 – Anti Stringing Setup a maximum cash amount, maximum time and shut-off time for anti- stringing purposes. Menu 34 –...
- Page 24 3.5 – Remote Loading Software to the Flex-2 Board 1. What you need 1.1 Windows XP, or later pc with MicroSD port or USB to MicroSD card reader 1.2 MicroSD card (comes installed in the Flex-2 main logic board) 2. Transferring the file into the MicroSD card 2.1 Turn power off to the controller board.
-
Page 25: Section 4 - Maintenance
Section 4 – Maintenance DISCCONECT ALL ELECTRICAL POWER TO THE MACHINE BEFORE SERVICING. 4.1 – Coin Hopper Maintenance Removal of the Electronics and Opto Sensor Board All the electronics and sensors are placed on one board located behind the exit door at the side of the hopper. -
Page 26: Bill Validator Maintenance
4.2 – Bill Validator Maintenance Pyramid Acceptors Apex Model The Apex Series bill acceptor is relatively maintenance free. An occasional cleaning is all that is needed to keep the acceptor in top operation. Please Visit the “service” section of the pyramidacceptos.com website to view videos explaining how install, clean, program, and troubleshoot the Apex bill acceptor. - Page 27 Crane Payment Innovations (CPI) AE 2600 Series You can clean the bill acceptor while it is still mounted in the machine 1. Remove power from the machine. 2. Unlatch the magazine by pushing the yelow latch (located on the top of the unit) toward the front of the unit.
- Page 28 Astro Systems GBA ST1-C Cleaning the Validator Note Path Equipment Required • Cotton swab or lint-free cloth. • Cleaning solution - a mix of water and up to 50% Iso-Propyl Alcohol (IPA) is recommended. • DO NOT use more than 50% IPA. NEVER use solvent-based cleaning agents, such as Amberclens, pure alcohol, petrol, methylated spirit or white spirit on this product as the unit will be severely damaged.
- Page 29 Clearing a Note Jam 1. Ensure the power supply to the GBA ST1C unit is switched OFF. 2. Remove the Cassette. 3. Lift up the purple Access Latch on the back of the Bottom Sensor Assembly, and gently slide the module out of the Channel Assembly. 4.
-
Page 30: Parts List
4.3 – Parts List Cabinet AC2006 Number American Changer Part # Description AC2006 AC2006 Cabinet AC8001-FLEX2BD Flex-2 Main Logic Board AC9000-GFCI 15A 125VAC GFCI AC9090 Magtek Credit Card Reader AC1047-SUZO Evolution Hopper with 12 Pin Female Connector AC790 Receipt Printer... -
Page 31: Warranty Terms And Conditions
LIMITED WARRANTY AND EXCLUSIVE REMEDIES – The goods delivered hereunder are subject to the terms of American Changer Corporation’s (Seller or Seller’s) Limited Warranty provided with the deliverable, or if there is no such warranty, the terms set forth herein. In the event of any inconsistency between the written warranty provided with deliverable, and the description of the warranty set forth herein, the written warranty shall govern. - Page 32 CREDIT CARD AND/OR DEBIT CARD NUMBERS, PERSONAL IDENTIFICATION NUMBERS, PERSONAL PASSWORDS OR PASSCODES, OR OTHER SIMILAR PERSONAL INFORMATION OF THE USER OF THE GOODS. IN NO EVENT SHALL AMERICAN CHANGER BE LIABLE TO BUYER UNDER THIS WARRANTY FOR AN AMOUNT WHICH EXCEEDS THE PURCHASE PRICE OF THE GOODS.
- Page 33 Email Address: ____________________________________ Note: The purpose of this form is to enter your information in our customer database. This information will not be shared with anyone outside of American Changer Corp. It will be used to inform you of equipment upgrades.
Need help?
Do you have a question about the AC2006 and is the answer not in the manual?
Questions and answers