Table of Contents
Advertisement
Available languages
Available languages
Quick Links
ARC
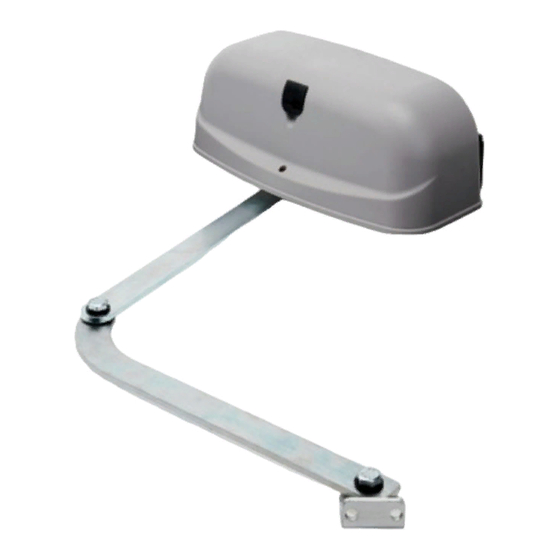
ACCIONADOR ELECTROMECÁNICO PARA PUERTAS BATIENTES
MANUAL DEL INSTALADOR
ACTIONNEUR ÉLECTROMÉCANIQUE POUR PORTES BATTANTES
MANUEL DE L´INSTALLATEUR
ELECTROMECHANICAL ACTUATOR FOR SWING GATES
INSTALLER'S MANUAL
ACCIONADOR ELECTROMECÂNICO PARA PORTAS BATENTES
MANUAL DO INSTALADOR
ELEKTROMECHANISCHER DREHTÜRANTRIEB
HANDBUCH FÜR DEN MONTEUR
www.erreka.com
Advertisement
Chapters
Table of Contents

Subscribe to Our Youtube Channel
Related Manuals for Erreka ARC Series


Summary of Contents for Erreka ARC Series
- Page 1 ACCIONADOR ELECTROMECÁNICO PARA PUERTAS BATIENTES MANUAL DEL INSTALADOR ACTIONNEUR ÉLECTROMÉCANIQUE POUR PORTES BATTANTES MANUEL DE L´INSTALLATEUR ELECTROMECHANICAL ACTUATOR FOR SWING GATES INSTALLER'S MANUAL ACCIONADOR ELECTROMECÂNICO PARA PORTAS BATENTES MANUAL DO INSTALADOR ELEKTROMECHANISCHER DREHTÜRANTRIEB HANDBUCH FÜR DEN MONTEUR www.erreka.com...
- Page 3 Español Indicaciones Generales de Seguridad Descripción del producto Instalación Mantenimiento y diagnóstico de averías Français Indications Générales de Sécurité Description du produit Installation Maintenance et diagnostic de pannes English General Safety Instructions Description of the product Installation Maintenance and diagnosis of failures Português Indicações Gerais de Segurança Descrição do produto...
-
Page 5: Table Of Contents
ÍNDICE Español Indicaciones Generales de Seguridad Símbolos utilizados en este manual _____________________________ 2 Importancia de este manual ___________________________________ 2 Uso previsto ________________________________________________ 2 Cualificación del instalador ____________________________________ 2 Elementos de seguridad del automatismo _______________________ 2 Descripción del producto Elementos de la instalación completa ___________________________ 3 Características del accionador _________________________________ 4 Declaración de conformidad___________________________________ 4 Accionamiento manual (mediante llave) _________________________ 5... -
Page 6: Indicaciones Generales De Seguridad
La seguridad de la instalación completa depende de Para más información, vea “Fig. 1 Elementos de la todos los elementos que se instalen. Para una mayor instalación completa” en la página 3. garantía de buen funcionamiento, instale sólo componentes Erreka. Manual de instalación... -
Page 7: Descripción Del Producto
F: Antena Cable apantallado Fig. 1 Elementos de la instalación completa El funcionamiento seguro y correcto de la Para una mayor seguridad, Erreka recomienda instalación es responsabilidad del instalador. instalar las fotocélulas (4) y (10). Accionador electromecánico ARC... -
Page 8: Características Del Accionador
DESCRIPCIÓN DEL PRODUCTO CARACTERÍSTICAS DEL ACCIONADOR Este accionador, junto a su correspondiente cuadro de maniobra Erreka, permite implantar un sistema de paro suave, de forma que la velocidad se reduce al final de las maniobras de cierre y apertura. Modelo... -
Page 9: Accionamiento Manual (Mediante Llave)
DESCRIPCIÓN DEL PRODUCTO ACCIONAMIENTO MANUAL Mediante la llave suministrada En caso de necesidad, la puerta puede manejarse manualmente, actuando previamente sobre el mecanismo de desbloqueo. A- Desbloqueo 1 Retire el tapón (1) e introduzca la llave (2). Gírela hasta que note un “clic”. 2 Mueva la puerta manualmente. -
Page 10: Instalación
INSTALACIÓN HERRAMIENTAS Y MATERIALES Destornilladores Llaves fijas (13 mm) Taladro eléctrico y brocas Llaves allen 2,5mm y 4mm Utilice el taladro eléctrico conforme a sus instrucciones de uso. Lápiz de marcar Tornillos de fijación del soporte del accionador y del Nivel soporte del brazo Cinta métrica... -
Page 11: Desembalaje
INSTALACIÓN DESEMBALAJE 1 Abra los paquetes y extraiga el contenido del 2 Compruebe el contenido de los paquetes (vea “Fig. interior. 2 Contenido y recambios” en la página 5). Elimine el embalaje de forma respetuosa con el Si observa que falta alguna pieza o que hay algún medio ambiente, utilizando los contenedores de deterioro, contacte con el servicio técnico más reciclado. - Page 12 INSTALACIÓN Montar el soporte (1) y el accionador (2) Montar el brazo (8) y su soporte (9) Los tornillos (3) y tacos (4) no se suministran. Los tornillos (10) no se suministran. Utilice Utilice tornillos y tacos apropiados al lugar tornillos apropiados al lugar de fijación y al de fijación y al peso y esfuerzo del esfuerzo a realizar.
-
Page 13: Conexiones Eléctricas
INSTALACIÓN CONEXIONES ELÉCTRICAS A- ARS24C con cuadro de maniobra 24Vdc con encoder (ABC2MARC9) 1 Realice las conexiones como se muestra en la figura: 1 Cable verde: señal encoder 2 Cable blanco: alimentación (-) encoder 3 Cable marrón: alimentación (+) encoder 4 Cable azul: motor (24Vdc) 5 Cable rojo: motor (24Vdc) 2 Mediante PUL1, PUL2, PUL3, PUL4 compruebe el... -
Page 14: Instalación De Cofre De Desbloqueo Para Accionamiento Manual
INSTALACIÓN INSTALACIÓN DE COFRE DE DESBLOQUEO PARA ACCIONAMIENTO MANUAL El desbloqueo para accionamiento manual puede realizarse de dos formas: • Mediante llave: vea “Accionamiento manual” en la página 5. • Mediante cofre de desbloqueo: es necesario instalar un cofre de desbloqueo, como se muestra a continuación: 1 Elimine la pestaña (1). -
Page 15: Mantenimiento Y Diagnóstico De Averías
MANTENIMIENTO Y DIAGNÓSTICO DE AVERÍAS Español MANTENIMIENTO Antes de realizar cualquier operación de 2 Limpie y engrase las articulaciones de la puerta y del mantenimiento, desconecte el aparato de la brazo articulado para que no aumente el esfuerzo red eléctrica de alimentación. que debe realizar el accionador. - Page 17 INDEX Français Indications Générales de Sécurité Symboles utilisés dans ce manuel______________________________ 14 Importance de ce manuel ____________________________________ 14 Usage prévu _______________________________________________ 14 Qualification de l´installateur _________________________________ 14 Éléments de sécurité de l´automatisme _________________________ 14 Description du produit Éléments de l´installation complète ____________________________ 15 Caractéristiques de l´actionneur _______________________________ 16 Déclaration de conformité...
- Page 18 Pour plus d´information, consultez “Illustration 1 La sécurité de l´installation complète dépend de tous Éléments de l´installation complète” à la page 15. les éléments installés. Pour une meilleure garantie fonctionnement, n´installez composants Erreka. Manuel d´installation...
- Page 19 8m (maximum 25m avec câble 2x2,5mm / 3x0,5mm F: Antenne Câble blindé Illustration 1 Éléments de l´installation complète L´installateur responsable Pour plus de sécurité, Erreka recommande d´installer fonctionnement sûr et correct de l´installation. les photocellules (4) et (10). Actionneur électromécanique ARC...
- Page 20 DESCRIPTION DU PRODUIT CARACTÉRISTIQUES DE L´ACTIONNEUR Cet actionneur, avec son armoire de commande Erreka correspondante, permet d´installer un système d´arrêt doux, de façon que la vitesse se réduise à la fin des manoeuvres de fermeture et d´ouverture. Modèle ARS24C AR220C Alimentation (Vdc) Intensité...
- Page 21 DESCRIPTION DU PRODUIT ACTIONNEMENT MANUEL Avec la clef fournie En cas de besoin, la porte peut se manier manuellement, en agissant préalablement sur le mécanisme de déblocage. A- Déblocage 1 Retirez le couvercle (1) et introduisez la clef (2). Tournez-la jusqu´à...
- Page 22 INSTALLATION OUTILS ET MATÉRIAUX Tournevis Clefs fixes (13 mm) Perceuse électrique et mèches Clefs allen 2,5mm et 4mm Utilisez la perceuse électrique selon le mode d´emploi. Crayon pour marquer Vis de fixation du support de l´actionneur et du support Niveau du bras Mètre...
- Page 23 INSTALLATION DÉBALLAGE 1 Ouvrez les paquets et sortez le contenu de 2 Vérifiez le contenu des paquets (voir “Illustration 2 l´intérieur. Contenu et rechanges” à la page 17). Éliminez l´emballage tout en respectant Si vous observez qu´il manque une pièce ou qu´il l´environnement, en utilisant les containers de y a des pièces endommagées, contactez le service recyclage.
- Page 24 INSTALLATION Monter le support (1) et l´actionneur (2) Monter le bras (8) et son support (9) Les vis (3) et les chevilles (4) ne sont pas Les vis (10) ne sont pas fournies. Utilisez des fournies. Utilisez des vis et des chevilles vis appropriées au lieu de fixation et à...
- Page 25 INSTALLATION CONNEXIONS ÉLECTRIQUES A- ARS24C avec armoire de commande 24Vdc avec encodeur (ABC2MARC9) 1 Réalisez les connexions comme indique l´illustration: 1 Câble vert: signal encodeur 2 Câble blanc: alimentation (-) encodeur 3 Câble marron: alimentation (+) encodeur 4 Câble bleu: moteur (24Vdc) 5 Câble rouge: moteur (24Vdc) 2 Avec PUL1, PUL2, PUL3, PUL4 vérifiez le fonctionnement correct de l´actionneur.
- Page 26 INSTALLATION INSTALLATION DE COFFRE DE DÉBLOCAGE POUR ACTIONNEMENT MANUEL Le déblocage pour l´actionnement manuel peut se réaliser de deux façons: • Avec la clef: voir “Actionnement manuel” à la page 17. • Avec le coffre de déblocage: il faut installer un coffre de déblocage, comme il est montré...
- Page 27 MAINTENANCE ET DIAGNOSTIC DE PANNES Français MAINTENANCE Avant de réaliser n´importe quelle opération de 2 Nettoyez et engraissez les articulations de la porte et maintenance, déconnectez l´appareil du réseau du bras articulé pour ne pas augmenter l´effort que électrique d´alimentation. doit réaliser l´actionneur.
- Page 29 INDEX English General Safety Instructions Symbols used in this manual__________________________________ 26 Importance of this manual ___________________________________ 26 Envisaged use ______________________________________________ 26 Installer's qualifications ______________________________________ 26 Automatic operation safety elements __________________________ 26 Description of the product Elements of the complete installation __________________________ 27 Actuator characteristics ______________________________________ 28 Declaration of conformity ____________________________________ 28 Manual operation __________________________________________ 29...
- Page 30 For further details, see “Fig. 1 Elements of the The safety of the complete installation depends on complete installation” on page 27. all the elements installed. Install only Erreka components order guarantee proper operation.
- Page 31 F: Antenna Screened cable Fig. 1 Elements of the complete installation The safe and correct operation of the For greater safety, Erreka recommends installing the installation is the responsibility of the installer. photocells (4) and (10). ARC electro-mechanical actuator...
- Page 32 DESCRIPTION OF THE PRODUCT ACTUATOR CHARACTERISTICS This actuator, along with its corresponding Erreka control panel, allow the implementation of a gentle halt system, with the speed slowing down at the end of the closing and opening operations. Model ARS24C AR220C...
- Page 33 DESCRIPTION OF THE PRODUCT MANUAL OPERATION By way of the supplied key In the event of need, the gate may be operated manually, first operating the release mechanism. A- Release 1 Remove the cap (1) and introduce the key (2). Turn until you hear a click.
- Page 34 INSTALLATION TOOLS AND MATERIALS Screwdrivers Fixed wrenches (13 mm) Electric drill and broaches 2.5 mm and 4 mm Allen keys Use the electrical drill in line with the use instructions. Marker pencil Screws to attach the actuator bracket and the arm Spirit level bracket Tape measure...
- Page 35 INSTALLATION UNPACKING 1 Open the packages and remove the contents from 2 Check the content of the packages (see “Fig. 2 within. Content and spare parts” on page 29). Discard the packaging in an environmentally Should it be noticed that a piece is missing or friendly manner, using recycling containers.
- Page 36 INSTALLATION Mount the bracket (1) and the actuator (2) Mount the arm (8) and its bracket (9) The screws (3) and plugs (4) are not The screws (10) are not supplied. Use screws supplied. Use screws and plugs which are which are suitable for the place of suitable for the place of attachment and the attachment and the effort of the actuator.
- Page 37 INSTALLATION ELECTRICAL CONNECTIONS A- ARS24C with 24Vdc control panel with encoder (ABC2MARC9) 1 Complete the connections as shown in the figure: 1 Green cable: encoder signal 2 White cable: power supply (-) encoder 3 Brown cable: power supply (+) encoder 4 Blue cable: motor (24Vdc) 5 Red cable: motor (24Vdc) 2 Use PUL1, PUL2, PUL3, PUL4 to check the correct...
- Page 38 INSTALLATION INSTALLATION OF RELEASE BOX FOR MANUAL DRIVE Release for manual drive can be carried out in two manners: • By way of key: see “Manual operation” on page 29. • By way of release box: a release box must be installed, as shown below: 1 Remove the rim (1).
- Page 39 MAINTENANCE AND DIAGNOSIS OF FAILURES English MAINTENANCE Before carrying maintenance 2 Clean and lubricate the articulations of the gate and operation, disconnect the device from the the articulated arm, so as not to increase the effort power supply. of the actuator. 1 Frequently check the installation in order to discover 3 Check that the controls and photocells, as well as any imbalance or sign of deterioration or wear.
- Page 41 ÍNDICE Português Indicações Gerais de Segurança Símbolos utilizados neste manual _____________________________ 38 Importância deste manual____________________________________ 38 Uso previsto _______________________________________________ 38 Qualificação do instalador____________________________________ 38 Elementos de segurança do automatismo ______________________ 38 Descrição do produto Elementos da instalação completa _____________________________ 39 Características do accionador _________________________________ 40 Declaração de conformidade _________________________________ 40 Accionamento manual ______________________________________ 41...
-
Page 42: Indicações Gerais De Segurança
Para mais informação, ver “Fig. 1 Elementos da A segurança da instalação completa depende de instalação completa” na página 39. todos os elementos que forem instalados. Para uma maior garantia de bom funcionamento, instale somente componentes Erreka. Manual de instalação... -
Page 43: Descrição Do Produto
8m (máximo 25m com cabo 2x2,5mm / 3x0,5mm F: Antena Cabo blindado Fig. 1 Elementos da instalação completa funcionamento seguro correcto Para uma maior segurança, a Erreka recomenda instalação é responsabilidade do instalador. instalar as fotocélulas (4) e (10). Accionador electromecânico ARC... -
Page 44: Características Do Accionador
DESCRIÇÃO DO PRODUTO CARACTERÍSTICAS DO ACCIONADOR Este accionador, junto com o seu correspondente quadro de manobra Erreka, permite implantar um sistema de paragem suave, de forma que a velocidade é reduzida no final das operações de fecho e abertura. Modelo... -
Page 45: Accionamento Manual
DESCRIÇÃO DO PRODUTO ACCIONAMENTO MANUAL Com a chave fornecida Em caso de necessidade, a porta pode ser accionada manualmente, actuando previamente mecanismo de desbloqueio. A- Desbloqueio 1 Retire a tampa (1) e introduza a chave (2). Rode até ouvir um "click". 2 Mova a porta manualmente. -
Page 46: Instalação
INSTALAÇÃO FERRAMENTAS E MATERIAIS Chave de fenda Chave de boca (13 mm) Berbequim eléctrico e brocas Chaves Allen 2,5 mm e 4 mm Utilize o berbequim eléctrico conforme a suas instruções de uso. Lápis para marcar Parafusos de fixação do suporte do accionador e do Nível suporte do braço. -
Page 47: Desembalagem
INSTALAÇÃO DESEMBALAGEM 1 Abra os pacotes e retire o conteúdo do interior. 2 Verifique o conteúdo dos pacotes (ver “Fig. 2 Conteúdo e peças sobresselentes” na página 41). Elimine a embalagem de forma respeitosa com o meio ambiente, utilizando os contentores de Se observar que falta alguma peça ou que houve reciclagem. - Page 48 INSTALAÇÃO Montar o suporte (1) e o accionador (2) Montar o braço (8) e seu suporte (9) Os parafusos (3) e as buchas (4) não são Os parafusos (10) não são fornecidos. Utilize fornecidos. Utilize parafusos e buchas parafusos adequados ao local de fixação e adequadas ao local de fixação e ao peso e ao esforço a ser realizado.
-
Page 49: Ligações Eléctricas
INSTALAÇÃO LIGAÇÕES ELÉCTRICAS A- ARS24C com quadro de manobra 24Vdc com encoder (ABC2MARC9) 1 Faça as ligações como mostrado na figura: 1 Cabo verde: sinal do encoder 2 Cabo branco: alimentação (-) encoder 3 Cabo castanho: alimentação (+) encoder 4 Cabo azul: motor (24Vdc) 5 Cabo vermelho: motor (24Vdc) 2 Através de PUL1, PUL2, PUL3 e PUL4 verifique o correcto funcionamento do accionador. -
Page 50: Instalação Da Caixa De Desbloqueio Para Accionamento Manual
INSTALAÇÃO INSTALAÇÃO DA CAIXA DE DESBLOQUEIO PARA ACCIONAMENTO MANUAL O desbloqueio para o accionamento manual pode ser realizado de duas formas: • Com a chave: veja “Accionamento manual” na página 41. • Através da caixa de desbloqueio: é necessário instalar uma caixa de desbloqueio, como é... -
Page 51: Manutenção E Diagnóstico De Avarias
MANUTENÇÃO E DIAGNÓSTICO DE AVARIAS Português MANUTENÇÃO Antes de realizar qualquer operação de 2 Limpe e lubrifique as articulações da porta e do manutenção, desligue o aparelho da rede braço articulado para que não aumente o esforço eléctrica de alimentação. que o accionador deve fazer. - Page 53 VERZEICHNIS Deutsch Allgemeine Sicherheitshinweise In diesem Handbuch benutzte Symbole ________________________ 50 Bedeutung der Bedienungsanleitung___________________________ 50 Bestimmungsgemäße Verwendung ____________________________ 50 Qualifizierung des Monteurs__________________________________ 50 Sicherheitsstand des Antriebs _________________________________ 50 Produktbeschreibung Bestandteile der kompletten Anlage ___________________________ 51 Allgemeine Merkmale des Antriebs ____________________________ 52 Konformitätserklärung ______________________________________ 52 Manueller Betrieb___________________________________________ 53 Inhalt der Verpackung _______________________________________ 53...
-
Page 54: Allgemeine Sicherheitshinweise
Sicherheitselementen. Die Sicherheit der gesamten Anlage hängt von allen Für weitere Informationen siehe “Abb. eingebauten Bestandteilen einen Bestandteile der kompletten Anlage” auf Seite 51. ordnungsgemäßen Betrieb der Anlage sicher zu stellen benutzen Sie bitte ausschließlich Erreka- Bestandteile. Montageanleitung... -
Page 55: Produktbeschreibung
F: Antenne Abgeschirmtes Kabel Abb. 1 Bestandteile der kompletten Anlage Der Monteur trägt die Verantwortung für das Erreka empfehlt den Einbau von Lichtschranken (4) sichere und richtige Funktionieren der Anlage. und (10) für eine erhöhte Sicherheit. Elektromechanischer Antrieb ARC... -
Page 56: Allgemeine Merkmale Des Antriebs
PRODUKTBESCHREIBUNG ALLGEMEINE MERKMALE DES ANTRIEBS Zusammen mit der entsprechenden Steuerungsvorrichtung der Marke Erreka erlaubt dieser Antrieb, dass die Geschwindigkeit beim Öffnen und Schließen der Tür allmählich reduziert wird und somit ein sanftes Anhalt- System entsteht. Modell ARS24C AR220C Stromversorgung (Vcc) Max. -
Page 57: Manueller Betrieb
PRODUKTBESCHREIBUNG MANUELLER BETRIEB Mit Hilfe des mitgelieferten Schlüssels Bei Bedarf kann das Tor manuell betätigt werden nachdem die Blockierung aufgehoben wird. A- Entriegelung 1 Abdeckung (1) entfernen und Schlüssel (2) einfügen. Schlüssel bis zum Einrasten drehen. 2 Bewegen Sie die Tür manuell. B- Blockierung 1 Schlüssel (2) einstecken und bis zum Einrasten drehen. -
Page 58: Montage
MONTAGE MATERIAL UND WERKZEUGE Schraubenzieher Schraubenschlüssel (13 mm) Elektrische Bohrmaschine und Bohreinsätze Imbusschlüssel 2,5 mm und 4mm Benutzen Bohrmaschine gemäß entsprechender Gebrauchsanweisung. Markierstift Schrauben für die Befestigung der Antriebs- sowie der Wasserwaage Armhalterung Messband BEDINGUNGEN UND PRÜFUNGEN VOR DER MONTAGE Ausgangsbedingungen des Tors ... -
Page 59: Auspacken
MONTAGE AUSPACKEN 1 Öffnen Sie die Packungen und entnehmen Sie 2 Überprüfen Sie den Inhalt der Packungen (siehe vorsichtig deren Inhalt. “Abb. 2 Inhalt und Ersatz” auf Seite 53). Entsorgen Sie das Verpackungsmaterial auf eine Sollten Sie das Fehlen eines Bestandteils oder umweltfreundliche Art und Weise indem Sie eine Beschädigung feststellen wenden Sie sich bitte entsprechende Abfallcontainer benutzen. - Page 60 MONTAGE Halterung (1) und Antrieb (2) montieren Den Arm (8) und seine Halterung (9) montieren Schrauben (3) sowie Dübel (4) werden nicht Schrauben (10) werden nicht mitgeliefert. Benutzen für mitgeliefert. Benutzen für Montageuntergrund sowie das Gewicht des Untergrund geeignete Schrauben. Antriebs geeignete Schrauben und Dübel.
-
Page 61: Elektrische Verbindungen
MONTAGE ELEKTRISCHE VERBINDUNGEN A- ARS24C mit 24Vdc Steuerung und mit (ABC2MARC9) Encoder 1 Führen Sie die elektrischen Anschlüsse laut Abbildung durch: 1 Grünes Kabel: Encoder- Signal 2 Weisses Kabel: Encoder- Versorgung (-) 3 Braunes Kabel: Encoder- Versorgung (+) 4 Blaues Kabel: Motor (24Vdc) 5 Rotes Kabel: Motor (24Vdc) 2 Überprüfen Sie das korrekte Funktionieren des Antriebs durch PUL1, PUL2, PUL3, PUL4. -
Page 62: Montage Des Entriegelungskastens Für Die Handbedienung
MONTAGE MONTAGE DES ENTRIEGELUNGSKASTENS FÜR DIE HANDBEDIENUNG Die manuele Entriegelung kann auf zwei Weisen erfolgen: • Mit dem Schlüssel: Siehe “Manueller Betrieb” auf Seite 53. • Mit Entriegelungskasten: Entriegelungskasten muss auf folgende Art und Weise installiert werden: 1 Flansch (1) entfernen. 2 Feder (2) einsetzen und Entriegelungskabel (3) in das Gehäuse (4) einführen. -
Page 63: Wartung Und Störungssuche
WARTUNG UND STÖRUNGSSUCHE Deutsch WARTUNG Bevor irgendeine Wartungsoperation 2 Säubern und schmieren Sie die Getriebe des Tores durchführen schalten sie das Gerät vom und des Gelenkarms regelmäßig um den Antrieb Stromversorgungsnetz ab. nicht unnötig zu belasten. 1 Überprüfen Sie die Installation regelmäßig um 3 Überprüfen Sie ob die Fernbedienungen und jedwede Unregelmäßigkeiten und Zeichen von Lichtschranken keinen Schaden aufgrund von... - Page 64 Erreka Bº Ibarreta s/n 20577 Antzuola (Gipuzkoa) T. 943 786 150 F. 943 787 072 comaut@matz-erreka.es MSB-011/00 www.erreka.com...
Need help?
Do you have a question about the ARC Series and is the answer not in the manual?
Questions and answers