Advertisement
Quick Links
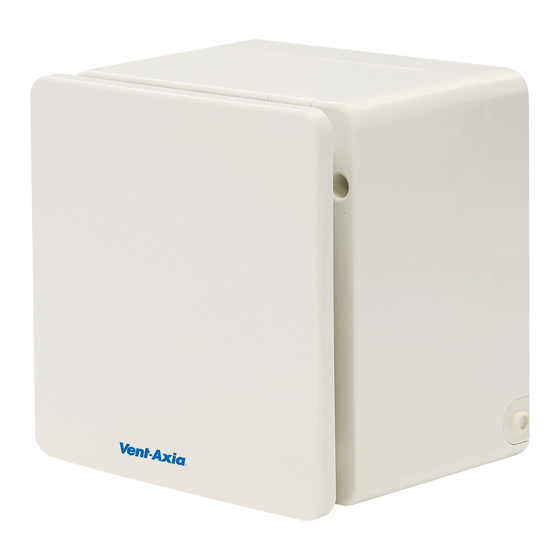
Solo Pro
SELV RANGE
Installation and Wiring Instructions
FAN UNITS 12V 50Hz SELV (CLASS III)
CONTROLLERS 220-240V 50Hz MAINS SUPPLY (CLASS II)
WITH 12V 50Hz SELV OUTPUT
PLEASE READ INSTRUCTIONS IN CONJUNCTION WITH ILLUSTRATIONS.
PLEASE SAVE THESE INSTRUCTIONS.
Stock Ref. N°
Solo Pro SVP
409163
Solo Pro SVT
409164
Solo Pro SVHTP
409165
IPX7
Advertisement

Related Manuals for Vent-Axia Solo Pro SELV Series


Summary of Contents for Vent-Axia Solo Pro SELV Series
- Page 1 Solo Pro SELV RANGE Installation and Wiring Instructions Stock Ref. N° Solo Pro SVP 409163 Solo Pro SVT 409164 Solo Pro SVHTP 409165 FAN UNITS 12V 50Hz SELV (CLASS III) CONTROLLERS 220-240V 50Hz MAINS SUPPLY (CLASS II) WITH 12V 50Hz SELV OUTPUT IPX7 PLEASE READ INSTRUCTIONS IN CONJUNCTION WITH ILLUSTRATIONS.
-
Page 3: Safety And Guidance Notes
Phase) complies with the rating label. D. The Fan should only be used in conjunction with the appropriate Vent-Axia products. E. The fan should only be used in conjunction with fixed wiring. F. When the Fan is used to remove air from a room containing a fuel-burning appliance, ensure that the air replacement is adequate for both the fan and the fuel-burning appliance. - Page 4 IMPORTANT:- ONLY CONNECT TOGETHER PRODUCTS FROM THE SOLO PRO SELV RANGE SINCE THE FANS ARE SPECIALLY DESIGNED TO WORK ON 12V AC AND ARE NOT COMPATIBLE WITH OTHER VENT-AXIA CONTROLLERS. DO NOT CONNECT MORE THAN ONE FAN TO THE CONTROLLER.
- Page 5 WALL MOUNTING – (FIG.4.) For wall mounting cut a 117mm diameter hole through the wall and insert the wall sleeve. Slope the sleeve slightly downwards away from the fan. Where necessary cut to length and cement both ends into position flush with the wall faces. Fix exterior grille into position with the louvres positioned downwards.
-
Page 6: Servicing And Maintenance
Unscrew the fixing screws on the cover of the controller. The fan overrun period can be adjusted up or down using the pot located on the internal PCB. To REDUCE the operating time, use a small screwdriver to turn the pot ANTI- CLOCKWISE. - Page 7 1. At intervals appropriate to the installation, the fan should be inspected and cleaned to ensure there is no build-up of dirt or other deposits. 2. Carefully pull the front panel off the inner grille. (fig.4.) 3. Wipe the inlets and front face with a damp cloth until clean. The fan has sealed for life bearings, which do not require lubrication.
- Page 8 Fig.3 (Solo Pro SVHTP) SELV Supply (12V 50Hz) Controller...
- Page 9 Fig.4. continued. Remove the PCB cover 4) Push clips together to release the impeller 5) Remove two screws as shown Fig.5. Wiring and settings Supply cable via side or rear Supply cable connections Secure Supply cable with Cable Clamp Adjust Timer overrun or Humidistat set point (model dependant) as shown.
-
Page 10: Product Fiche
PRODUCT FICHE For Residential Ventilation Units (Complying Commission Delegated Regulation (EU) No 1254/2014) Name: Vent‐Axia Vent‐Axia Vent‐Axia Solo Pro SELV SVP ‐ Solo Pro SELV SVT ‐ Solo Pro SELV SVHTP ‐ Model ID (Stock Ref.) : 409163 409164 409165 SEC Class F F E SEC Value ('Average') 13.97 15.72 26.23 SEC Value ('Warm') 6.32 7.11 11.86 SEC Value ('Cold') 27.32 30.75 51.31 Label Required? (Yes/No=Out of scope) ... - Page 12 Vent-Axia guarantees its products for two years from date of purchase against faulty material or workmanship. In the event of any part being found to be defective, the product will be repaired, or at the Company’s option replaced, without charge, provided that the product:- ...
Need help?
Do you have a question about the Solo Pro SELV Series and is the answer not in the manual?
Questions and answers