
Subscribe to Our Youtube Channel
Related Manuals for Gtech MULTI ATF036


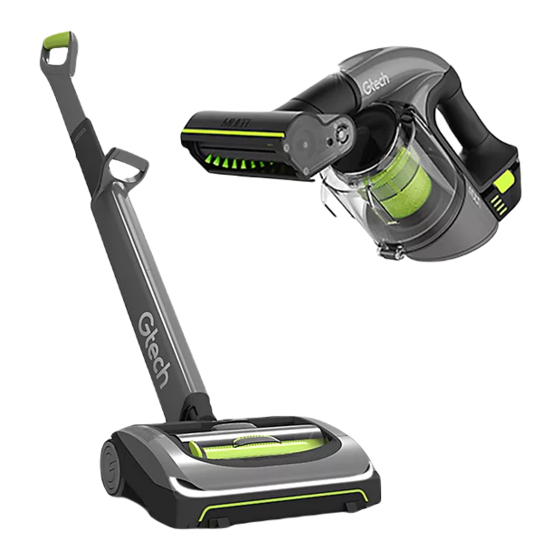
Summary of Contents for Gtech MULTI ATF036
- Page 1 ATF036 Model number: AR29 Model number: OPERATING MANUAL 2859_System_TE_manual_update_aw.indd 1 31/05/2018 13:24...
-
Page 2: Important Safeguards
Electrical safety: connecting or disconnecting the • Only use batteries and chargers motorised brush bar. supplied by Gtech. Battery safety: • Never modify the charger in any way. • This appliance includes Li-Ion batteries; • The charger has been designed for do not incinerate batteries or expose a specific voltage. -
Page 3: Intended Use
• Shorting the battery terminals may • The Gtech AirRam has been designed cause burns or fire. to clean a wide variety of floor surfaces • When the battery pack is not in use, without the need to change settings. -
Page 4: What's In The Box
Thank you for choosing the Gtech AirRam and Multi. “I started Gtech to create sensible, easy to use products, which do a great job. Your opinion is important to us and we will use your feedback to improve our products and services and let other people know what it’s like to be part of the Gtech family.”... - Page 5 AirRam: Assembly Ensure the lower handle is sitting completely To attach the lower handle to the head flush against the yoke. Then push the green assembly, insert the metal pin on the lower locking clip into the back of the head. handle into the hole located on the pivot yoke.
-
Page 6: Operation
Storage Upper Button Lower Button To stow or extend the upper handle simply The upper handle can be set in two press the button on the lower handle to positions: Lowered for storage and raised unlock the upper handle. for use. To lower the handle, release the The upper handle will now slide up or down upper button. -
Page 7: Battery Charging
Press the power button with your foot to To get the best performance on hard floors turn the AirRam on. with deep crevices, remove the brush bar as shown on page 11. Insert the supplied brush bar hole plug into the side of the head assembly as shown in the image above. - Page 8 hours hour boost Plug the charger into the mains and connect It is OK to charge for 1 hour for a burst it to the battery. Switch on at the mains. of cleaning. The battery can be charged from flat in 4 hours.
-
Page 9: State Of Charge
State of Charge 100% - 75% 75% - 50% 50% - 25% 25% - 1% The battery state of charge indicator shows While the battery is on charge, the LEDs how much charge the AirRam has. As you will pulsate and in turn illuminate. When the use the product, the green lights will turn off battery is fully charged all of the LEDs will be in a downwards direction. -
Page 10: Cleaning The Filters
Hold the AirRam’s bin over a rubbish bin Pull the green lever back towards the bottom and push the green lever towards the lid to of the bin. Close the bin lid and reinsert the empty the dirt. bin into the AirRam. Cleaning the filters - do this once a month or more frequently depending on use. -
Page 11: Replacing The Filters
Remove the filter from the inner shroud, Wash the filter under a tap. Squeeze out by twisting and pulling. any excess water then let it dry completely Tap the inner shroud over a bin to remove before reinserting into the AirRam. any excess dirt. - Page 12 Removing and cleaning the brush bar If the brush bar jams during use, the Rest the AirRam on its side and locate AirRam will stop and the LEDs will appear the brush bar button on the right hand side. red. Before checking for a blockage, Press the button inwards and then pull remove the battery.
- Page 13 Re-insert the brush bar, starting by the end Replace the battery by sliding it down into furthest away from the button. Then line the head assembly. It will click into place. up and push the brush bar into the AirRam until it clicks into place.
-
Page 14: Product Care
Product Care Your Gtech AirRam doesn’t need much maintenance: keep the filters clean, keep the brush bar tangle-free and charge the battery. Wipe it with a dry cloth if it gets dirty, including under the bin. Troubleshooting AirRam is not cleaning well 1. -
Page 15: Multi: Operation
Multi: Operation The dusting brush can be slotted onto the Press the button above the handle to turn active nozzle. The crevice tool is stored the Multi on and off. on board the product for easy access. An active nozzle is built into your Multi. The dusting brush, crevice tool, extension tube and power brush all attach to the active nozzle. -
Page 16: Power Brush
Power brush Make sure the terminals on the Power Gently pull the Power Brush from the Multi Brush and Active nozzle are correctly lined to remove. The battery should be removed up and gently push the Power brush onto when changing attachments. the Active nozzle. - Page 17 Battery charging When a single green light flashes, recharge The battery can be charged on or off the the battery. main unit hour hours boost After 4 hours, the LEDs turn solid green It is OK to charge for 1 hour for a burst and charging is complete.
- Page 18 State of Charge 100% - 75% 75% - 50% 50% - 25% 25% - 1% The battery state of charge indicator shows While the battery is on charge, the LEDs how much charge the Multi has. As you use will pulsate and in turn illuminate. When the the product, the green lights will turn off in a battery is fully charged all of the LEDs will be downwards direction.
-
Page 19: Cleaning The Filter
Wash the Recommended water temperature 40°C. filter if necessary. Do not use detergent or soaps. (You can buy more at www.gtech.co.uk) Never put the bin back without the filter inside. You could damage the motor. 2859_System_TE_manual_update_aw.indd 19... -
Page 20: Removing The Battery
Press the green buttons and pull to remove the battery. The battery can be charged on or off the main unit. If you want to buy a spare battery go to www.gtech.co.uk or call 01905 345891 2859_System_TE_manual_update_aw.indd 20 31/05/2018 13:24... - Page 21 Product Care Your Gtech Multi doesn’t need much maintenance: keep the filter clean, check for blockages, remove hair from the brushbar and charge the battery. Wipe it with a dry cloth if it gets dirty, including the area under the bin. Never wash it with liquid, run it under a tap or use it without the filter.
- Page 22 XXXXX~ WWYY~ 00~0000000 If you purchased directly from Gtech your details are already registered and your 2 year warranty will start automatically. If you purchased from an authorised Gtech retailer, please register your warranty within 3 months and you will need to provide proof of purchase to support any claim against your warranty.
-
Page 23: For Household Use Only
Call your local council, via amenity site, or symbol indicates that this product is covered by legislation for waste electrical and recycling centre for information on the disposal electronic products (EN2002/96/EC) and recycling of electrical products. Alternatively visit www.recycle-more.co.uk for advice on recycling and to find your nearest recycling When the vacuum has reached the end of its life, it and the Li-Ion battery it contains should not be... - Page 24 Grey Technology Limited Brindley Road, Warndon, Worcester WR4 9FB email: support@gtech.co.uk telephone: 01905 345891 www.gtech.co.uk 2859_System_TE_manual_update_aw.indd 24 31/05/2018 13:24...
Need help?
Do you have a question about the MULTI ATF036 and is the answer not in the manual?
Questions and answers