
Related Manuals for March Networks 8516 Series


Summary of Contents for March Networks 8516 Series
- Page 1 March Networks 8516 Hybrid NVR with RAID Models 8516 SR and 8516 RR Installation Guide...
- Page 2 Copyright © 2019. March Networks Corporation. All rights reserved. Information in this document is subject to change without notice. MARCH NETWORKS, March Networks Command, March Networks Searchlight, March Networks RideSafe, and the MARCH NETWORKS logo are trademarks of March Networks Corporation. All other trademarks are the property of their respective owners.
-
Page 3: Table Of Contents
Contents Chapter 1: Mandatory Regulations ..........5 Regulatory Compliance Statements..................5 Canada - Industry Canada ....................5 United States - Federal Communications Commission..........5 Europe ..........................5 Environmental Directive Compliance................... 6 Battery Notices ........................6 NiCd Battery Pack Notice....................6 Lithium Battery Notice ....................6 Avis pour les batteries...................... - Page 4 Contents Video Inputs ..........................14 Video Capture Rates......................15 IP Camera Video Inputs.....................15 Front Panel LEDs ........................16 Keyed Power Switch and Front USB Ports................17 Keyed Power Switch ......................17 Two Front USB Ports ......................17 12-Volt Out, RS-485, and RS-232 ..................18 12-Volt Out ........................18 RS-485 Interface ........................18 RS-232 Interface ........................18 Alarm and Switch Terminals ....................19...
-
Page 5: Chapter 1: Mandatory Regulations
Chapter 1 Mandatory Regulations You must be familiar with the following mandatory regulations governing the product’s operations. You should also adhere to these instructions to ensure the installation meets regulatory compliance. Regulatory Compliance Statements Canada - Industry Canada This Class A digital apparatus complies with Canadian ICES-003. CAN ICES-3 (A)/NMB-3(A) United States - Federal Communications Commission This equipment has been tested and found to comply with the limits for a Class A digital device,... -
Page 6: Environmental Directive Compliance
Battery Notices CAUTION: There is risk of explosion if any battery is replaced with another battery of the incorrect type. Ensure that you only use the NiCd battery pack and lithium battery provided by March Networks. NiCd Battery Pack Notice The unit contains an internal NiCd battery pack that is used during power shortages. -
Page 7: Avis Sur La Batterie Lithium
Mandatory Regulations • Remplacer seulement avec les blocs de batterie de marque March Networks. • Ne pas modifier le bloc de batterie NiCd. • Ne pas ouvrir ou tenter d’ouvrir la batterie individuelle NiCd • Ne pas jeter le bloc de batterie dans le feu. -
Page 8: Fuse
Mandatory Regulations Lorsque relié à une caméra installée à l’extérieur, l’enveloppe du câble coaxial de la camera doit être mise à terre de façon adéquate. Les systèmes de distribution câblés sont sujet au code électrique National (NEC) au États-Unis et au code électrique Canadien (CEC) au Canada. Si vous transportez ou déplacez l'unité... -
Page 9: Chapter 2: Feature Overview
March Networks Command or the Visual Intelligence video management platforms. Note: You can manage an 8516 NVR using either of the management platforms offered by March Networks: Command or Visual Intelligence. You should familiarize yourself with the differences between the platforms prior to deploying the recorders. For more information, see the documentation available from the March Networks Partner Portal. -
Page 10: Key Features
Advanced health management features for centralized support and maximum up-time. • QR code - use March Networks’ free GURU Smartphone App to scan the recorder’s front panel QR code for instant product information, like serial number and warranty information. The RR model recorders slide out of the docking station for easy installation and maintenance. -
Page 11: Packaging/Shipment Contents
• Data and power cables for the hard drives • Software DVD — The software can also be downloaded from the March Networks Partner Portal website. • Technical publications — Included with the software, or you can also download hardware and software technical publications (PDFs) from the March Networks Partner Portal website. -
Page 12: Specifications
Feature Overview Specifications This section contains the dimensions, weight, temperature ranges, and power ratings of the unit. Dimensions of the RR Model (with Docking Station) 17.4 inches/44.2 centimeters 14.6 inches/37.1 centimeters 16.0 inches/40.6 centimeters 0.8 inches/2.0 centimeters 3.1 inches/8.0 centimeters 19.2 inches/48.8 centimeters Dimensions of SR Model (with Backplane) 16.9 inches/43.0 centimeters... -
Page 13: Weight
Feature Overview Weight • RR models with docking station (no hard drives): 18.5 pounds / 8.4 kilograms • SR models with backplane (no hard drives): 13.0 pounds/5.9 kilograms • Each hard drive: Approximately 6 pounds / 2.8 kilograms Operating and Storage Temperature °... -
Page 14: Video Inputs
Video Termination Video termination for the 8516 is controlled through the Visual Intelligence software. You can use the March Networks Administrator Console application to view and modify the analog video termination. For more information, see the Administrator Console User Manual or online Help. -
Page 15: Video Capture Rates
Feature Overview Video Capture Rates This section details the video inputs and associated video capture rates. The 8516 supports the following resolutions for analog cameras: • 4CIF — 704 x 480 (NTSC) or 704 x 576 (PAL) • 2CIF — 704 x 240 (NTSC) or 704 x 288 (PAL) •... -
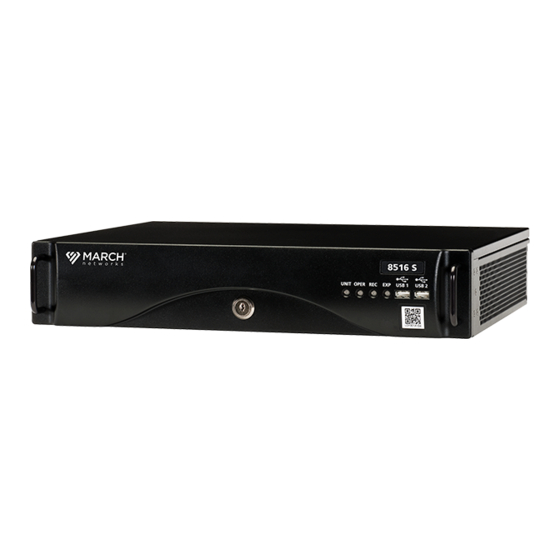
Page 16: Front Panel Leds
Use the Administrator Console or Command Client software application to review the health alert and determine a possible resolution. For more information, see the Administrator Console User Manual or Command Enterprise User Guide, available from the March Networks Partner Portal website. Green... -
Page 17: Keyed Power Switch And Front Usb Ports
Command or Visual Intelligence). For more information, see the Command Enterprise User Guide or the Administrator Console User Manual, available from the March Networks Partner Portal. Keyed Power Switch and Front USB Ports There is a keyed power switch and two USB ports on the front of the unit. -
Page 18: 12-Volt Out, Rs-485, And Rs-232
12-Volt Out This connection is for powering external devices with a battery backed up source. It is intended for use with the March Networks 2316 Encoder. Maximum 12 Watts. The G indicates the ground connection pin and the + indicates the 12-volt positive connection pin. -
Page 19: Alarm And Switch Terminals
Feature Overview Alarm and Switch Terminals There are alarm and switch terminals on the back of the unit. Alarm and switch devices can connect to these. Alarm Terminals Switch Terminals Connecting an Alarm or Switch Device Using the following procedure, you can connect alarm and switch devices to the terminals at the back of the unit. -
Page 20: Audio Terminals
Feature Overview Audio Terminals Audio in and out terminals are available on the back of the unit. These terminals provide line level audio input and output. Audio In Audio Out Pinout Description Audio Signal for audio input channel 1. Connect the return to the “G” between audio input 1 and 2. Signal for audio input channel 2. -
Page 21: Ethernet Ports, Usb Ports, Video And Hd Monitor Output
Feature Overview Ethernet Ports, USB Ports, Video and HD Monitor Output There are two Ethernet ports, two USB ports, and a video output available on the back of the unit. HD Monitor Output 2 USB Ports 2 Ethernet Ports and LEDs Video Output Two Ethernet Ports and LEDs There are two gigabit Ethernet ports on RJ-45 connectors with LEDs to... -
Page 22: Hd Monitor Output
Video Output. For more information on the Provisioning Interface, see the Provisioning Interface Technical Instructions, available for download from the March Networks Partner Portal. For more information on using Local Control, see the 8000 Series NVR Local Control Addendum or the Local Control for the 8000 Series NVR Quick Start Guide, available for download from the March Networks Partner Portal. -
Page 23: Power Connector And Fuse Compartment
Feature Overview Power Connector and Fuse Compartment The power connector and fuse compartment are located on the back of the unit. Power Connector Fuse Compartment Power Connector Connects the docking station to a power source via a connected power cord. For the unit’s power ratings, see “Specifications”... -
Page 24: Hard Drives
Feature Overview Hard Drives The unit must contain four hard drives to support RAID. Hard Drives (stack of 2) Four installed hard drives. Hard Drives (stack of 2) Hard Drive Details The unit uses Serial ATA (SATA) hard drive technology. Each unit has four hard drives. - Page 25 Feature Overview For more information on health alerts, see the Administrator Console User Manual, available from the March Networks Partner Portal website. 8516 Hybrid NVR with RAID Installation Guide...
-
Page 26: Nicd Battery Pack And Lithium Battery
Used by the unit to allow graceful shut down during power outages. The unit will perform a graceful shut down if power is removed for more than 15 seconds. Custom NiCd battery pack supplied by March Networks. Lithium Battery Provides backup power for the unit’s clock. -
Page 27: Chapter 3: Unit Setup
Then, specify basic device configurations using the March Networks Administrator Console. The Administrator Console application is included on the provided software DVD. For more information, see the Administrator Console User Manual, available for download from the March Networks Partner Portal. -
Page 28: Rack-Mounting
Unit Setup Rack-Mounting Rack-mount the docking station in a standard 19-inch rack (RR model only). To rack-mount the docking station Position the docking station in the appropriate position. Attach the docking station to the rack using four screws. For details about recommended screws, consult the documentation accompanying the rack. -
Page 29: Wall-Mounting With A Docking Station
Unit Setup Wall-Mounting with a Docking Station If your NVR unit includes a docking station (RR model only), you attach the brackets and drip trays to the docking station, which holds the NVR unit on the wall. To attach the docking station mounting brackets Use the large countersunk screws provided in the wall-mounting kit to attach the brackets to the docking station. -
Page 30: Attaching The Drip Trays To The Docking Station
Unit Setup Attaching the Drip Trays to the Docking Station Because the cooling fans are at the bottom of the recorder when wall-mounted, two drip trays are required. The drip trays and four small countersunk screws required to attach the trays to the docking station are included in the wall-mounting kit. - Page 31 Unit Setup Install the upper mounting screws at the marked locations. • If the upper mounting location is in a wall stud, thread the screw directly into the wall stud. • If the upper mounting location is in drywall, first install a drywall anchor, and then thread the screw into the drywall anchor.
-
Page 32: Wall-Mounting Without A Docking Station
Unit Setup Wall-Mounting without a Docking Station If your NVR does not include a docking station (SR model), you attach the brackets and drip trays directly to the recorder unit. To attach the mounting brackets to the recorder Use the large pan head screws provided in the wall-mounting kit to attach the brackets to the recorder. -
Page 33: Attaching The Drip Trays To The Recorder
Unit Setup Attaching the Drip Trays to the Recorder Because the cooling fans are at the bottom of the recorder when wall-mounted, two drip trays are required. The drip trays and four small pan head screws required to attach the trays to the recorder are included in the wall-mounting kit. -
Page 34: Desk-Mounting
Unit Setup Install the upper mounting screws at the marked locations. • If the upper mounting location is in a wall stud, thread the screw directly into the wall stud. • If the location is in drywall, first install a drywall anchor, then thread the screw into the anchor. Do not thread the mounting screws all the way in. -
Page 35: Replacing Hard Drives
Unit Setup Replacing Hard Drives This section describes how to replace a hard drive (this unit must contain four to support RAID). WARNING: The procedures contained in this section outline how to install components located inside the unit, requiring the removal of the cover. These procedures are to be performed by qualified service personnel only. - Page 36 Unit Setup Remove the cover of the recorder. There are four hard drive positions in two hard drive trays. Position 1 is at the bottom of the right-hand tray, position 2 is at the top of the right-hand tray, position 3 is at the bottom of the left-hand tray, and position 4 is at the top of the left-hand tray.
- Page 37 Unit Setup Loosen the four screws at the bottom of the hard drive bracket (two each side) and remove it from the recorder. Note: Set the screws aside - you will use them to re-attach the bracket. Screws at bottom of bracket If you are replacing the hard drive in position 1 or 2, you need the right bracket, if you are replacing the hard drive in position 3 or 4 you need the left bracket.
- Page 38 Unit Setup Install and tighten the two screws on one side of a hard drive before installing and tightening the two screws on the other side. Note: When tightening the screws, use 5.3 in-lbs (inch pounds) of torque. Screws securing hard drive in bracket For each position where you are replacing a hard drive, locate the data and power cables and connect both cables to the hard drive before you install the bracket back in the unit.
- Page 39 Unit Setup Ensure that the power cables are connected to the main PCBA and the data cables are connected to the RAID card. The power cables are connected to the PCBA with the power cable for the hard drives in position one and two on the far right, and the power cable for the hard drives in position three and four on the far left, as shown in the photos below.
- Page 40 Unit Setup 11 Install the hard drive bracket in the recorder unit and secure the bracket with the four screws at the bottom. The data cable and power cable connections of the hard drives must face the middle of the recorder. Hard Drive position 1 in bracket (right side of unit)
-
Page 41: Turning The Unit On And Off
Unit Setup Turning the Unit On and Off Before turning the unit on, first ensure that the AC power cord is plugged into the power connector on the back of the docking station (RR model) or back plane (SR model). The power connector is shown in section “Power Connector and Fuse Compartment”... - Page 42 Glossary Administrator Console A configuration and maintenance tool that lets security and IT staff customize and maintain recorders in a central or local manner. Docking Station A metal frame that holds the recorder in place. All main device connections, including the required connection to a camera and power source are made to the docking station —...
- Page 43 Companies worldwide use our software solutions to improve efficiency and compliance, reduce losses and risk, enhance customer service and compete more successfully. With deep roots in video security and networking, March Networks is also recognized as the leader in scalable, enterprise-class video management and hosted services.
Need help?
Do you have a question about the 8516 Series and is the answer not in the manual?
Questions and answers