Table of Contents
Advertisement
Quick Links
Advertisement
Table of Contents

Related Manuals for Trotec IR 2050


Summary of Contents for Trotec IR 2050
- Page 1 IR 2050 / IR 3050 OPERATING MANUAL RADIANT HEATER...
-
Page 2: Table Of Contents
Information marked with this symbol indicates that the Children aged from 3 years and less than 8 years shall operating manual must be observed. not plug in, regulate and clean the appliance or perform user maintenance. radiant heater IR 2050 / IR 3050... - Page 3 Never immerse the device in water. Defective power cables pose a serious health risk! • The device must not be mounted to the ceiling. radiant heater IR 2050 / IR 3050...
-
Page 4: Information About The Device
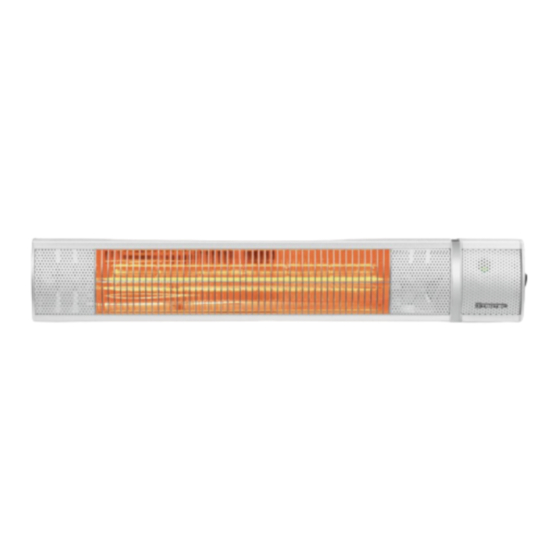
• IP65 type of protection – water-jet-proof professional hands of children. device, dustproof and rainproof from all directions • The IR 2050 comes equipped with a high-quality low-glare short-wave infrared tube offering more heat, lower brightness and a long service life. radiant heater IR 2050 / IR 3050... - Page 5 Remote control Designation Heating rod Operating light (behind grille) Grille On/off switch Infrared receiver for remote control Wall holder with adjustable inclination angle Remote control Heating rod Grille Infrared receiver for remote control radiant heater IR 2050 / IR 3050...
-
Page 6: Transport And Storage
3. Remove the transport protection from the grille (6) of the radiant heater. 4. Fully unwind the power cable. Make sure that the power cable is not damaged and that you do not damage it during unwinding. radiant heater IR 2050 / IR 3050... - Page 7 6. Screw the device onto the mounting bracket. To do so, 50 cm fasten the wall holder to the mounting bracket using the fastening screws and wing nuts. 50 cm 7. Make sure that the device is attached securely. 50 cm 180 cm radiant heater IR 2050 / IR 3050...
- Page 8 5. Check the mounting brackets for tight fit. 6. Screw the device onto the mounting brackets. To do so, fasten the wall holders to the mounting brackets using the fastening screws and wing nuts. radiant heater IR 2050 / IR 3050...
-
Page 9: Operation
For switching the device on and off 10 P2 button To select heating capacity level 2 (1500 W) 11 P3 button To select heating capacity level 3 (2000 W) 12 P1 button To select heating capacity level 1 (750 W) radiant heater IR 2050 / IR 3050... -
Page 10: Available Accessories
2. To set a higher heating capacity press either the P2 button (10) or the P3 button (11). Switching the device on Once you have completely installed the device as described in the Start-up chapter, you can switch it on. radiant heater IR 2050 / IR 3050... -
Page 11: Errors And Faults
• If the batteries have just been changed, check them for correct polarity. Note Wait for at least 3 minutes after maintenance and repair work. Only then switch the device back on. radiant heater IR 2050 / IR 3050... -
Page 12: Technical Annex
Directive 2006/66/EC of the European Parliament and of the Council of 6 September 2006 on batteries and accumulators. Please dispose of batteries and accumulators according to the relevant legal requirements. radiant heater IR 2050 / IR 3050... - Page 13 Trotec GmbH Grebbener Str. 7 D-52525 Heinsberg +49 2452 962-400 +49 2452 962-200 info@trotec.com www.trotec.com...
Need help?
Do you have a question about the IR 2050 and is the answer not in the manual?
Questions and answers