
Subscribe to Our Youtube Channel
Related Manuals for Permobil Halsa Plus


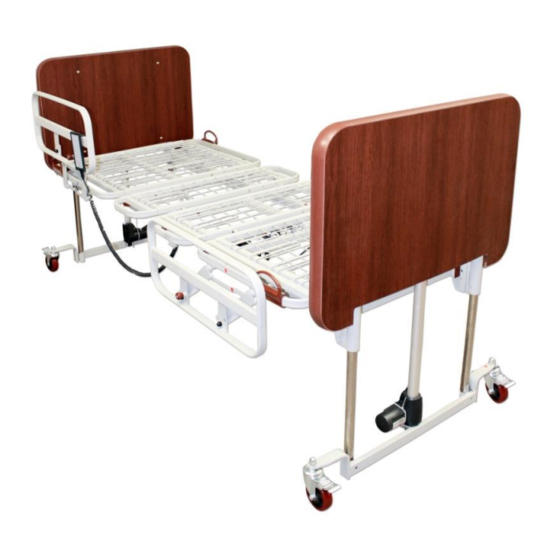
Summary of Contents for Permobil Halsa Plus
- Page 1 Hälsa Plus Bed / Lit Hälsa Plus USER MANUAL / Manuel de l’Utilisateur Updated March 2017 Vancouver | Toronto | Montreal | www.permobil.ca Tel: 800-265-9830 | Fax: 877-636-8944...
-
Page 2: Table Of Contents
TABLE OF CONTENTS / TABLE DES MATIÈRES 1. TECHNICAL SPECIFICATIONS / SPÉCIFICATIONS TECHNIQUES ..3 1.1. Bed weight capacity / Capacité de charge ................3 1.2 Bed weight / Poids du lit ......................3 1.3 Storage / Entreposage ......................3 1.4 Moving specifications / Spécifications de déplacement ............ -
Page 3: Technical Specifications / Spécifications Techniques
1. TECHNICAL SPECIFICATIONS / SPÉCIFICATIONS TECHNIQUES 1.1. Bed weight capacity / Capacité de charge The maximum weight capacity for this bed is 226 kg (500 lbs). La capacité de charge du lit est de 226 kg (500 lbs). 1.2 Bed weight / Poids du lit The bed weighs ~99 kilos (~265 lbs). -
Page 4: Limited Warranty / Garantie Limitée
All repaired or replaced parts are guaranteed for whichever is greater: 1 year from the date of service or the life of the warranty. Permobil se réserve le droit de substituer des matériaux de la même qualité ou supérieurs lors des réparations et/ou de remplacements. Les pièces réparées ou remplacées sont garanties soit pour une durée de 1 an suivant la date de service ou la durée de la garantie, selon celle qui à... -
Page 5: Return Policy / Politique De Retour
Permobil’s expense and will be made as soon as possible, following the notification of the non- compliancy. Si un produit de Permobil ne correspond pas à ce qui est indiqué sur la facture d’originale, le problème doit être avisé dans un délai maximal de 48 heures suivant l’heure de livraison. Les mesures nécessaires pour corriger la situation seront aux frais de Permobil et seront entreprises... -
Page 6: List Of Parts / Liste Des Pièces
2. LIST OF PARTS / LISTE DES PIÈCES Part Number / Quantity / Description / Description Picture / Photo Numéro de pièce Quantité Bed Frame Structure de lit Head/Footboard Side Panels Tête/Pied du lit Panneau latéral Caster Roulette Head/Foot board mounting screw Vis de monture pour tête/pied de lit... - Page 7 Part Number / Quantity / Description / Description Picture / Photo Numéro de pièce Quantité Red locking knob L + M Poigné de verrouillage 4 + 2 rouge Black bolt Boulon noir Red handle knob Poigné rouge Unthreaded bolt (1), its pin 1 set (1) and its washers (4) (6 pcs)
- Page 8 Part Number / Quantity / Description / Description Picture / Photo Numéro de pièce Quantité Mounting screw & its washer for rails Vis de montage & ses rondelles pour les côtés de Half side rail Côté de lit demi-longueur (optional, facultatif) P a g e...
-
Page 9: Unpacking Instructions / Instructions De Déballage
3. UNPACKING INSTRUCTIONS / INSTRUCTIONS DE DÉBALLAGE Step 1 / Étape 1: Cut the binding straps; lift off the cardboard box upwards. Coupez les courroies; soulevez la boîte de carton vers le haut. Caution / Avertissement: A wooden protective-insert underneath the cardboard protecting the top of the bed could fall out if cardboard box is not removed carefully. - Page 10 Step 2 / Étape 2: Loosen the two (2) black bolts (N) and the two (2) lowest red handle knobs (O), and pull, slightly turning the two (2) lowest red locking knobs (M) from each side of the bed frame parts to keep it unlocked. This will allow these parts of the bed frames to be unfastened from the u-shaped metal piece (U), used to facilitate the packing and transportation process.
- Page 11 Step 4 / Étape 4: On each head/foot board part, pull and slightly turn the 4 red locking knobs (L) to keep it unlocked from the u-shaped metal piece. Lock the casters (C) by pressing down the “BRAKE ON”. Sur chaque partie de la tête/pied de lit, tirez et tournez légèrement les quatre (4) poignés de verrouillage rouge (L) pour le maintenir dégagé...
-
Page 12: Assembly Instructions / Directives D'assemblage
4. ASSEMBLY INSTRUCTIONS / DIRECTIVES D’ASSEMBLAGE Step 1 / Étape 1: Place the bed frames on the floor and the head/foot boards leaning against a wall. Verify that all the red locking knobs are still in the released position. Hook and join the head board to the frame. Turn and release its red locking knob to lock it. - Page 13 Step 2 / Étape 2: Approach and hook both bed frames parts together. Approchez et crochez les deux parties du cadre de lit ensemble. Step 3 / Étape 3: Align together the three (3) holes of the joints in the center and under the bed frame.
- Page 14 Remove the wire-protection off the bed’s central motor. Connect the five (5) Step 5 / Étape 5: wires to the central motor according to its color coding. When finished, clasp back the wire-protection onto the central motor. Enlevez le protecteur de câble du moteur central du lit. Connectez les cinq (5) câbles au moteur central selon le codage de couleur.
- Page 15 Step 8 / Étape 8: To extend the platform / Pour étendre la plateforme: Press and hold on the ball-lock on the side of the bed frame’s grid sections. Poussez et maintenez le verrouillage à bille sur le côté des sections grillées du cadre de lit.
-
Page 16: User Instructions / Directives De L'utilisateur
5. USER INSTRUCTIONS / DIRECTIVES DE L’UTILISATEUR 5.1 Warnings / Avertissement Please read the instructions in this manual carefully before using this bed: Veuillez lire attentivement les instructions dans ce manuel avant l’utilisation de ce lit: · This bed is not for pediatric use; ·... - Page 17 · Always lower the bed to the lowest position or leave side rails up when the user is sleeping or left without supervision to reduce risks of falls or injuries; · Aillez toujours le lit à sa position la plus basse ou les côtés de lit levés lorsque le patient dort ou est laissé...
-
Page 18: Inspection Before Use / Inspection Avant Utilisation
· Le fabricant se réserve tout droit de modifier le lit; · Only use Permobil replacement parts. · Utilisez seulement les pièces de rechange de Permobil. 5.2 Inspection before use / Inspection avant utilisation These verifications are necessary to make sure that the bed was not damaged during the transport: Ces vérifications sont nécessaires pour s'assurer que le lit n'a pas été... -
Page 19: Function & Operation / Fonction & Opération
· Branchez le câble électrique et activez tous les moteurs. Vérifiez si leur fonctionnement est constant et complet. Cette vérification vous permettra de vérifier le fonctionnement de la télécommande; · Unplug the power cable and turn on the motors to check the battery. ·... - Page 20 Notes : P a g e | 20...
- Page 21 Vancouver | Toronto | Montreal | www.permobil.ca Tel: 800-265-9830 | Fax: 877-636-8944 P a g e | 21...
Need help?
Do you have a question about the Halsa Plus and is the answer not in the manual?
Questions and answers