
Related Manuals for Victron energy MultiPlus Compact 12/800/35-16


Summary of Contents for Victron energy MultiPlus Compact 12/800/35-16
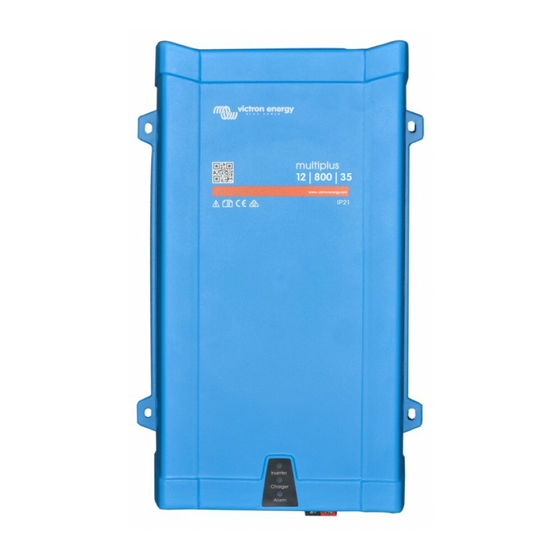
- Page 1 Manual Handleiding Manuel Anleitung Manual MultiPlus Compact 12 | 800 | 35-16 230V 24 | 800 | 16-16 230V 12 | 1200 | 50-16 230V 24 | 1200 | 25-16 230V 12 | 1600 | 70-16 230V 24 | 1600 | 40-16 230V...
-
Page 3: Safety Instructions
1. SAFETY INSTRUCTIONS General Please familiarize yourself with the safety features and instructions by first reading the documentation supplied with this product before using the equipment. This product has been designed and tested in accordance with international standards. The equipment must be used exclusively for the purpose for which it was designed. -
Page 4: Transport And Storage
Ensure that the equipment is used under the correct ambient conditions. Never operate the product in a wet or dusty environment. Ensure there is adequate free space for ventilation around the product and check that the ventilation vents are not blocked. Ensure that the required system voltage does not exceed the product's capacity. -
Page 5: Battery Charger
2. DESCRIPTION 2.1 General MultiPlus Compact-functional The MultiPlus Compact gets its name from the multiple functions it can perform. It is a powerful true sine wave inverter, a sophisticated battery charger that features adaptive charge technology and a high-speed AC transfer switch in a single compact enclosure. Beside these primary functions, however, the MultiPlus Compact has several advanced features that provide a range of new applications as outlined below. - Page 6 Preventing damage due to excessive gassing: the BatterySafe mode If, in order to quickly charge a battery, a high charge current in combination with a high absorption voltage has been chosen, damage due to excessive gassing will be prevented by automatically limiting the rate of voltage increase once the gassing voltage has been reached.
-
Page 7: Remote Control
3. OPERATION 3.1 On/Off/Charger Only Switch When switched to "on", the product is fully functional. The inverter will come into operation and the LED "inverter on" will light up. An AC voltage connected to the "AC in" terminal will be switched through to the "AC out" terminal, if within specifications. - Page 8 3.3.3 Activating equalisation or forced absorption The MultiPlus can be put into both these states from the remote panel as well as with the front panel switch, provided that all switches (front, remote and panel) are set to “on” and no switches are set to “charger only”.
-
Page 9: Led Indications
3.4 LED Indications LED off LED flashes LED illuminated Inverter inverter The inverter is switched on and supplies charger power to the load. Battery operation. alarm charger only The inverter is switched on and supplies inverter power to the load. charger Pre alarm: overload, or battery voltage low, or... - Page 10 inverter The AC input voltage is switched through charger and the charger operates in bulk or absorption mode. alarm charger only inverter The AC input voltage is switched through charger and the charger operates in float mode. alarm charger only Remote Control panel (optional) Power Control and PowerAssist indication inverter on...
-
Page 11: Installation
4. INSTALLATION This product should be installed by a qualified electrician. 4.1 Location The product must be installed in a dry and well-ventilated area, as close as possible to the batteries. There should be a clear space of at least 10cm around the appliance for cooling. -
Page 12: Connection Of Battery Cables
4.2 Connection of Battery cables In order to fully utilize the full capacity of the product, batteries with sufficient capacity and battery cables with sufficient cross section should be used. See table. 24/800 24/1200 24/1600 12/800 12/1200 12/1600 Preassembled cable length 1.5 m Recommended cross section (mm ... - Page 13 4.3 Connection of the AC cabling This is a Safety Class I product (supplied with a protective grounding terminal). Uninterruptible protective grounding must be provided at the AC input and/or output terminals and/or chassis grounding point located externally on the product. The MultiPlus is provided with a ground relay (relay H, see appendix B) that automatically connects the Neutral output to the chassis if no external AC supply is available.
-
Page 14: Optional Connections
4.4 Optional Connections A number of optional connections are possible: Undo the four screws at the front of the enclosure and remove the front panel. 4.4.1 Second Battery The MultiPlus Compact has a connection (+) for charging a starter battery. For connection see appendix 1 4.4.2 Temperature Sensor The temperature sensor supplied with the product may be used for temperature-compensated... - Page 15 4.4.5 Parallel Connection The MultiPlus can be connected in parallel with several identical devices. To this end, a connection is established between the devices by means of standard RJ45 UTP cables. The system (one or more MultiPlus units plus optional control panel) will require subsequent configuration (see Section 5).
- Page 16 5. CONFIGURATION Settings may only be changed by a qualified engineer Carefully read the instructions before changes are made. Batteries should be placed in a dry and well-ventilated area during charging. 5.1 Standard settings: ready for use On delivery, the MultiPlus is set to standard factory values. In general, these settings are suitable for single-unit operation.
- Page 17 5.2 Explanation of settings Settings that are not self-explanatory are described briefly below. For further information, please refer to the help files in the software configuration programs (see Section 5.3). Inverter frequency Output frequency if no AC is present at the input. Adjustability: 50Hz;...
- Page 18 AES (Automatic Economy Switch) Instead of the search mode, the AES mode can also be chosen (with help of VEConfigure only). If this setting is turned ‘on’, the power consumption in no-load operation and with low loads is decreased by approx. 20%, by slightly 'narrowing' the sinusoidal voltage. Not adjustable with DIP switches.
- Page 19 Bulk Protection When this setting is ‘on’, the bulk charging time is limited to 10 hours. A longer charging time could indicate a system error (e.g. a battery cell short-circuit). Not adjustable with DIP switches. AC input current limit These are the current limit settings at which PowerControl and PowerAssist come into operation.
- Page 20 Not adjustable with DIP switches. BoostFactor Change this setting only after consulting with Victron Energy or with an engineer trained by Victron Energy! Not adjustable with DIP switches. Programmable relay By default, the programmable relay is set as an alarm relay, i.e.
-
Page 21: Configuration By Computer
5.3 Configuration by computer All settings can be changed by means of a computer or with a VE.Net panel (except for the multi-functional relay and the VirtualSwitch when using VE.Net). Some settings can be changed with DIP switches (see Section 5.2). For changing settings with the computer, the following is required: - - VEConfigure3 software: can be downloaded free of charge at www.victronenergy.com. - Page 22 5.5 Configuration with DIP switches Some settings can be changed with DIP switches. Procedure: a) Turn the Compact on, preferably without load and without AC voltage on the inputs. The Compact will then operate in inverter mode. b) Set the dipswitches as required. c) Store the settings by moving Dip switch 8 to “on”...
- Page 23 ds3-ds4: Setting charge voltages Absorption Absorption Float Storage ds3-ds4 Time Suitable for voltage voltage Voltage (hours) Gel Victron Deep dS3=off 14.4 13.8 13.2 Discharge dS4=off 28.8 27.6 26.4 Gel Exide A200 (default) 57.6 55.2 52.8 AGM Victron Deep Discharge Gel Victron Long dS3=on 14.1 13.8...
-
Page 24: Maintenance
5.5.3 Exemplary settings Example 1 is the factory setting (since factory settings are entered by computer, all DIP switches of a new product are set to ‘off’, except for DS-2). DS-1 Panel option DS-1 DS-1 DS-2 Panel option DS-2 DS-2 DS-3 Ch. -
Page 25: Troubleshooting Table
DC loads must be disconnected from the batteries and the AC loads must be disconnected from the inverter before the inverter and/ or battery charger is tested. Consult your Victron Energy dealer if the fault cannot be resolved. Problem Cause... - Page 26 Problem Cause Solution The charger is not The AC input voltage or frequency Ensure that the input voltage is functioning is out of range. between 185 Vac and 265 Vac, and that the frequency matches the setting. The thermal circuit breaker has Reset the 16 A thermal circuit tripped.
-
Page 27: Technical Data
8. TECHNICAL DATA 12 Volt C 12/800/35 C 12/1200/50 C 12/1600/70 MultiPlus Compact 24 Volt C 24/800/16 C 24/1200/25 C 24/1600/40 PowerControl / PowerAssist Transfer switch (A) INVERTER Input voltage range (V DC) 9,5 – 17V 19 – 33V Output voltage: 230 VAC ± 2% Output Frequency: 50 Hz ±... - Page 28 1) Can be adjusted to 60Hz and to 240V 2) Protection a. Output short circuit b. Overload c. Battery voltage too high d. Battery voltage too low e. Temperature too high f. 230VAC on inverter output g. Input voltage ripple too high 3) Non linear load, crest factor 3:1 4) At 25 °C ambient 5) Programmable relay which can be set for general alarm, DC undervoltage or genset start signal function...
- Page 30 www.victronenergy.com Appendix A: overview connections...
-
Page 31: Appendix A: Overview Connections
Appendix A: overview connections... - Page 32 www.victronenergy.com Appendix A: overview connections Dipswitch schakelaar Commutateur Dipswitch Dipswitch Schalter Conmutador Dipswitch Ingangs-zekering Disjoncteur entrée Eingangssicherung Disyuntor de entrada Communicatiepoort Port de communication Kommunikationsanschluss Puerto de comunicaciones Temperatuursensor Sonde de temperature Temperaturfühler Sensor de temperatura Alarm contact Contact d’alarme Alarmkontakt Contacto de alarma Accu Minus...
-
Page 33: Appendix B: Installation Information
Appendix B: installation information... - Page 34 www.victronenergy.com Appendix B: installation information Thermische Fusible d;entrée Thermischer Überstrom- Fusible de entrada ingangszekering (thermique) schutzschalter (térmico) Ingang Entrée Netzeingang Entrada Uitgang Sortie Verbracherausgang Salida Aardverbinding naar Liaison à la terre du Verbindung Conexión a tierra de la behuizing boitier Landstromerde / carcasa gehäuse...
-
Page 35: Appendix C: Parallel Connection
APPENDIX C: parallel connection... -
Page 36: Appendix D: Three-Phase Connection
www.victronenergy.com APPENDIX D: three-phase connection... -
Page 37: Appendix E: Charge Curve
APPENDIX E: charge curve 64 32 64 32 Battery Safe mode 60 30 60 30 20 x Bulk-hours or 56 28 56 28 Max. Absorption time 52 26 52 26 48 24 44 22 48 24 40 20 Bulk hours Absorption 1 day 7 days... -
Page 38: Appendix F: Temperature Compensation
www.victronenergy.com APPENDIX F: temperature compensation Default output voltages for Float and Absorption are at 25°C. Reduced Float voltage follows Float voltage and Raised Absorption voltage follows Absorption voltage. In adjust mode temperature compensation does not apply. - Page 40 www.victronenergy.com...
- Page 41 Serial number: Version : 01 Date : February 14 , 2019 Victron Energy B.V. De Paal 35 | 1351 JG Almere PO Box 50016 | 1305 AA Almere | The Netherlands General phone : +31 (0)36 535 97 00 E-mail : sales@victronenergy.com...
- Page 42 Manual Handleiding Manuel Anleitung Manual MultiPlus Compact 12 | 2000 | 80-30 230V 24 | 2000 | 50-30 230V...
-
Page 44: Safety Instructions
1. SAFETY INSTRUCTIONS General Please familiarize yourself with the safety features and instructions by first reading the documentation supplied with this product before using the equipment. This product has been designed and tested in accordance with international standards. The equipment must be used exclusively for the purpose for which it was designed. - Page 45 Ensure that the equipment is used under the correct ambient conditions. Never operate the product in a wet or dusty environment. Ensure there is adequate free space for ventilation around the product and check that the ventilation vents are not blocked. Ensure that the required system voltage does not exceed the product's capacity.
-
Page 46: Battery Charger
2. DESCRIPTION 2.1 General Multi Compact -functional The MultiPlus Compact gets its name from the multiple functions it can perform. It is a powerful true sine wave inverter, a sophisticated battery charger that features adaptive charge technology and a high-speed AC transfer switch in a single compact enclosure. - Page 47 Preventing damage due to excessive gassing: the BatterySafe mode If, in order to quickly charge a battery, a high charge current in combination with a high absorption voltage has been chosen, damage due to excessive gassing will be prevented by automatically limiting the rate of voltage increase once the gassing voltage has been reached.
-
Page 48: Operation
3. OPERATION 3.1 On/Off/Charger Only Switch When switched to "on", the product is fully functional. The inverter will come into operation and the LED "inverter on" will light up. An AC voltage connected to the "AC in" terminal will be switched through to the "AC out"... - Page 49 3.3.3 Activating equalisation or forced absorption The MultiPlus can be put into both these states from the remote panel as well as with the front panel switch, provided that all switches (front, remote and panel) are set to “on” and no switches are set to “charger only”.
- Page 50 3.4 LED Indications LED off LED flashes LED illuminated Inverter inverter The inverter is switched on and supplies power to the load. Battery charger operation. alarm charger only The inverter is switched on and supplies inverter power to the load. charger Pre alarm: overload, or battery voltage low, or...
- Page 51 inverter The AC input voltage is switched through and the charger is switched off. charger The battery charger can not reach battery alarm end voltage (bulk protection mode). charger only inverter The AC input voltage is switched through charger and the charger operates in bulk or absorption mode.
- Page 52 4. INSTALLATION This product should be installed by a qualified electrician. 4.1 Location The product must be installed in a dry and well-ventilated area, as close as possible to the batteries. There should be a clear space of at least 10cm around the appliance for cooling.
- Page 53 4.2 Connection of Battery cables In order to fully utilize the full capacity of the product, batteries with sufficient capacity and battery cables with sufficient cross section should be used. See table. 12/2000/80-50 24/2000/50-50 Recommended battery capacity 350–1000 200–500 (Ah) Recommended DC fuse 300A 200A...
- Page 54 4.3 Connection of the AC cabling This is a Safety Class I product (supplied with a protective grounding terminal). Uninterruptible protective grounding must be provided at the AC input and/or output terminals and/or chassis grounding point located externally on the product. The MultiPlus is provided with a ground relay (relay H, see appendix B) that automatically connects the Neutral output to the chassis if no external AC supply is available.
- Page 55 4.4 Optional Connections A number of optional connections are possible: Undo the four screws at the front of the enclosure and remove the front panel. 4.4.1 Second Battery The MultiPlus Compact has a connection (+) for charging a starter battery. For connection see appendix A.
- Page 56 4.4.5 Parallel Connection The MultiPlus can be connected in parallel with several identical devices. To this end, a connection is established between the devices by means of standard RJ45 UTP cables. The system (one or more Multis plus optional control panel) will require subsequent configuration (see Section 5).
-
Page 57: Standard Multiplus Factory Settings
5. CONFIGURATION Settings may only be changed by a qualified engineer Carefully read the instructions before changes are made. Batteries should be placed in a dry and well-ventilated area during charging. 5.1 Standard settings: ready for use On delivery, the MultiPlus is set to standard factory values. In general, these settings are suitable for single-unit operation. -
Page 58: Inverter Voltage
5.2 Explanation of settings Settings that are not self-explanatory are described briefly below. For further information, please refer to the help files in the software configuration programs (see Section 5.3). Inverter frequency Output frequency if no AC is present at the input. Adjustability: 50Hz;... - Page 59 AES (Automatic Economy Switch) Instead of the search mode, the AES can also be chosen (with help of VEConfigure only). If this setting is turned ‘on’, the power consumption in no-load operation and with low loads is decreased by approx. 20%, by slightly 'narrowing' the sinusoidal voltage. Not adjustable with DIP switches.
-
Page 60: Dynamic Current Limiter
Bulk Protection When this setting is ‘on’, the bulk charging time is limited to 10 hours. A longer charging time could indicate a system error (e.g. a battery cell short-circuit). Not adjustable with DIP switches. AC input current limit These are the current limit settings at which PowerControl and PowerAssist come into operation. -
Page 61: Programmable Relay
Not adjustable with DIP switches. BoostFactor Change this setting only after consulting with Victron Energy or with an engineer trained by Victron Energy! Not adjustable with DIP switches. Programmable relay By default, the multi-functional relay is set as an alarm relay, i.e. - Page 62 5.3 Configuration by computer All settings can be changed by means of a computer or with a VE.Net panel (except for the multi-functional relay and the VirtualSwitch when using VE.Net). Some settings can be changed with DIP switches (see Section 5.2). For changing settings with the computer, the following is required: •...
- Page 63 5.5 Configuration with DIP switches Some settings can be changed with DIP switches Procedure: a) Turn the Compact on, preferably without load and without AC voltage on the inputs. The Compact will then operate in inverter mode. b) Set the dipswitches as required. c) Store the settings by moving Dip switch 8 to “on”...
- Page 64 ds3-ds4: Setting charge voltages Absorption Absorption Float Storage ds3-ds4 Time Suitable for voltage voltage Voltage (hours) Gel Victron Deep dS3=off 14.4 13.8 13.2 Discharge dS4=off 28.8 27.6 26.4 Gel Exide A200 (default) 57.6 55.2 52.8 AGM Victron Deep Discharge Gel Victron Long dS3=on 14.1 13.8...
-
Page 65: Maintenance
5.5.3 Exemplary settings Example 1 is the factory setting ds-1 ds-1 ds-1 ds-2 Panel option ds-2 ds-2 ds-3 Ch. voltage ds-3 ds-3 ds-4 Ch. voltage ds-4 ds-4 ds-5 Frequency ds-5 ds-5 ds-6 Search mode ds-6 ds-6 ds-7 AC-in Limit ds-7 ds-7 →... - Page 66 DC loads must be disconnected from the batteries and the AC loads must be disconnected from the inverter before the inverter and/ or battery charger is tested. Consult your Victron Energy dealer if the fault cannot be resolved. Problem Cause...
- Page 67 Problem Cause Solution The charger is not The AC input voltage or frequency Ensure that the input voltage is functioning is out of range. between 185 Vac and 265 Vac, and that the frequency matches the setting. The thermal circuit breaker has Reset the 30 A thermal circuit tripped.
- Page 68 8. TECHNICAL DATA 12/2000/80-30 24/2000/50-30 MultiPlus 230V 230V PowerControl / PowerAssist Transfer switch (A) Minimum PowerAssist current (A) INVERTER Input voltage range (V DC) 9,5 – 17 19 – 33 Output voltage: 230 VAC ± 2% Output Frequency: 50 Hz ± 0,1% (1) Cont.
- Page 69 1) Can be adjusted to 60Hz and to 240V 2) Protection a. Output short circuit b. Overload c. Battery voltage too high d. Battery voltage too low e. Temperature too high f. 230VAC on inverter output g. Input voltage ripple too high 3) Non linear load, crest factor 3:1 4) At 25 °C ambient 5) Multi purpose relay which can be set for general alarm, DC undervoltage or genset start signal function...
- Page 70 APPENDIX A: Connection overview...
- Page 71 www.victronenergy.com APPENDIX A: Connection overview AC input line L1 and neutral (N) 2x RJ45 connector for remote panel and/or parallel and 3-phase operation. C AC output line L1 and neutral (N). D AC input circuit breaker M8 battery minus connection. G Starter battery positive (TR CHARGE).
- Page 72 APPENDIX B: Installation information...
- Page 73 www.victronenergy.com APPENDIX B: Installation information Thermische Fusible d;entrée Thermischer Überstrom- Fusible de entrada ingangszekering (thermique) schutzschalter (térmico) Ingang Entrée Netzeingang Entrada Uitgang Sortie Verbracherausgang Salida Aardverbinding naar Liaison à la terre du Verbindung Conexión a tierra de la behuizing boitier Landstromerde / carcasa gehäuse...
- Page 74 APPENDIX C: Parallel connection APPENDIX D: Three-phase connection...
- Page 75 www.victronenergy.com APPENDIX E: Charge curve 64 32 64 32 Battery Safe mode 60 30 60 30 20 x Bulk-hours or 56 28 56 28 Max. Absorption time 52 26 52 26 48 24 44 22 48 24 40 20 Bulk hours Absorption 1 day 7 days...
- Page 76 APPENDIX F: Temperature compensation Default output voltages for Float and Absorption are at 25°C. Reduced Float voltage follows Float voltage and Raised Absorption voltage follows Absorption voltage. In adjust mode temperature compensation does not apply.
- Page 77 www.victronenergy.com 255m 125m 520m 95mm...
- Page 80 Serial number: Version : 02 Date : April 26 , 2019 Victron Energy B.V. De Paal 35 | 1351 JG Almere PO Box 50016 | 1305 AA Almere | The Netherlands General phone : +31 (0)36 535 97 00 E-mail : sales@victronenergy.com...
- Page 81 Manual Handleiding Manuel Anleitung Manual Användarhandbok MultiPlus (with firmware xxxx400 or higher) 12 | 3000 | 120 - 16 | 230/240V 12 | 3000 | 120 - 50 | 230/240V 24 | 3000 | 70 - 16 | 230/240V 24 | 3000 | 70 - 50 | 230/240V 48 | 3000 | 35 - 16 | 230/240V 48 | 3000 | 35 - 50 | 230/240V...
- Page 83 NOTE: This manual is intended for products with firmware xxxx400 or higher (with x any number) The firmware number can be found on the microprocessor, after removing the front panel. It is possible to update older units, as long as that same 7 digit number starts with either 26 or 27. When it starts with 19 or 20 you have an old microprocessor and it is not possible to update to 400 or higher.
- Page 84 MultiPlus will supply additional power from the battery. For more information see our white papar Self Consumption or Grid independence with the Victron Energy Storage Hub.
- Page 85 General Technical Information our website. 2.3 Self consumption – solar energy storage systems For more information see our white paper Self Consumption or Grid independence with the Victron Energy Storage Hub. The appropriate software can be downloaded from our website.
- Page 86 3. OPERATION 3.1 On/Off/Charger Only Switch When switched to "on", the product is fully functional. The inverter will come into operation and the LED "inverter on" will light up. An AC voltage connected to the "AC in" terminal will be switched through to the "AC out" terminal, if within specifications. The inverter will switch off, the "mains on"...
- Page 87 3.4 LED Indications LED off LED flashes LED illuminated Inverter Charger Inverter Mains on Inverter on Bulk Overload The inverter is on and supplies power to the load. Absorption Low battery charger only Float Temperature Charger Inverter Mains on Inverter on The nominal output of the inverter is Bulk Overload...
- Page 88 Charger Inverter Mains on Inverter on The inverter has switched off due to Bulk Overload the electronics temperature being too high. Absorption Low battery charger only Float Temperature Charger Inverter Mains on Inverter on -If the LEDs are flashing alternately, the battery is nearly exhausted and Bulk Overload...
- Page 89 Charger Inverter Mains on Inverter on The mains voltage is switched Bulk Overload through and the charger operates in float mode. Absorption Low battery charger only Float Temperature Charger Inverter Mains on Inverter on The mains voltage is switched Bulk Overload through and the charger operates in equalize mode.
- Page 90 4. Installation This product may only be installed by a qualified electrical engineer. 4.1 Location The product must be installed in a dry and well-ventilated area, as close as possible to the batteries. There should be a clear space of at least 10 cm around the appliance for cooling.
- Page 91 4.3 Connection of the AC cabling The MultiPlus is a safety class I product (supplied with a ground terminal for safety purposes). Its AC input and/or output terminals and/or grounding point on the outside of the product must be provided with an uninterruptible grounding point for safety purposes.
- Page 92 4.4 Optional Connections A number of optional connections are possible: 4.4.1 Second Battery The MultiPlus has a connection for charging a starter battery. For connection see Appendix A. 4.4.2 Voltage Sense For compensating possible cable losses during charging, two sense wires can be connected with which the voltage directly on the battery or on the positive and negative distribution points can be measured.
- Page 93 5. Configuration • Settings may only be changed by a qualified electrical engineer. • Read the instructions thoroughly before implementing changes. • During setting of the charger, the AC input must be removed. 5.1 Standard settings: ready for use On delivery, the MultiPlus is set to standard factory values. In general, these settings are suitable for single-unit operation. Warning: Possibly, the standard battery charging voltage is not suitable for your batteries! Refer to the manufacturer's documentation, or to your battery supplier!
- Page 94 Inverter voltage Output voltage of the MultiPlus in battery operation. Adjustability: 210 – 245 V Stand-alone / parallel operation / 2-3 phase setting Using several devices, it is possible to: • increase total inverter power (several devices in parallel) • create a split-phase system by stacking (only for MultiPlus units with 120 V output voltage) •...
- Page 95 Note: when WeakAC is on, the maximum charge current is reduced by approximately 20 %. Not adjustable with DIP switches. BoostFactor Change this setting only after consulting with Victron Energy or with an engineer trained by Victron Energy! Not adjustable with DIP switches. Programmable relays The models with 16 A transfer capacity (see section 4) are equipped with one programmable relay that by default is set as an alarm relay.
- Page 96 5.3 Configuration by computer All settings can be changed by means of a computer or with a VE.Net panel (except for the multi-functional relay and the VirtualSwitch when using VE.Net). The most common settings can be changed by means of DIP switches (see Section 5.5). NOTE: This manual is intended for products with firmware xxxx400 or higher (with x any number) The firmware number can be found on the microprocessor, after removing the front panel.
- Page 97 5.5 Configuration with DIP switches A number of settings can be changed using DIP switches (see appendix A, position M). Note: When changing settings with DIP switches in a parallel or split-phase/3-phase system one should be aware that not all settings are relevant on all Multis.
- Page 98 Procedure The AC input current limit can be set using DIP switches ds8, ds7 and ds6 (default setting: 50 A, automatically limited to 16 A in 16 A models). Procedure: set the DIP switches to the required value: ds8 ds7 ds6 off = 6 A (1.4 kVA at 230 V) on = 10 A (2.3 kVA at 230 V) off = 12 A (2.8 kVA at 230 V)
- Page 99 5.5.1.5 Examples examples of settings: DS-8 AC input DS-8 DS-8 DS-8 DS-7 AC input DS-7 DS-7 DS-7 DS-6 AC input DS-6 DS-6 DS-6 DS-5 AES DS-5 DS-5 DS-5 DS-4 Ch. current DS-4 DS-4 DS-4 DS-3 Ch. current DS-3 DS-3 DS-3 DS-2 N/A DS-2 DS-2...
- Page 100 Step 2: Exemplary settings Example 1 is the factory setting (since factory settings are entered by computer, all DIP switches of a new product are set to ‘off’ and do not reflect the actual settings in the microprocessor). DS-8 Ch. voltage DS-8 DS-8 DS-8...
-
Page 101: Error Indications
The MultiPlus does not require specific maintenance. It will suffice to check all connections once a year. Avoid moisture and oil/soot/vapours, and keep the device clean. 7. Error indications With the procedures below, most errors can be quickly identified. If an error cannot be resolved, please refer to your Victron Energy supplier. 7.1 General error indications... - Page 102 One alarm LED The inverter is switched off due to Check this table for appropriate lights and the alarm activation by the lighted LED. measures in regard to this alarm second flashes. The flashing LED indicates that the state. inverter was about to switch off due to the related alarm.
- Page 103 7.2 Special LED indications (for the normal LED indications, see section 3.4) Bulk and absorption LEDs flash synchronously Voltage sense error. The voltage measured at the voltage sense connection (simultaneously). deviates too much (more than 7 V) from the voltage on the positive and negative connection of the device.
- Page 104 3) Switch on all other devices one by one until the error message reoccurs. conjunction with this device. 4) Update the firmware in the last device that was switched on. Should not occur. Switch all equipment off, and then on again. Contact Internal error. Victron Energy if the problem persists.
-
Page 105: Technical Specifications
8. Technical specifications 12/3000/120-16 230V 24/3000/70-16 230V 48/3000/35-16 230V MultiPlus 12/3000/120-50 230V 24/3000/70-50 230V 48/3000/35-50 230V PowerControl / PowerAssist AC input Input voltage range: 187-265 VAC Input frequency: 45 – 65 Hz Maximum feed through current (A) 16 / 50 Minimum AC supply current capacity 2,3 / 5,3 for PowerAssist (A) - Page 107 APPENDIX A: Overview connections ANNEXE A : Vue d’ensemble des connections ANHANG A: Übersicht Anschlüsse APÉNDICE A: Conexiones generales APPENDIX A: Anslutningsöversikt Models with 16A transfer capacity (eg MultiPlus 12/3000/120- 230V) Modèles ayant une capacité de transfert de 16A (Ex. : MultiPlus 12/3000/120 - 230 V) Modelle mit 16A Transferkapazität (z.
- Page 108 Models with 50A transfer capacity (eg MultiPlus 12/3000/120- 230V) Modèles ayant une capacité de transfert de 50A (Ex. : MultiPlus 12/3000/120 - 230 V) Modelle mit 50 A Transferkapazität (z. B. MultiPlus 12/3000/120- 230 V) Modelos con capacidad de transferencia de 50A (p.ej. MultiPlus 12/3000/120- 230V) Modeller med 50 A överföringskapacitet (t.ex.
- Page 109 A AC input 16 A. Left to right: PE (earth/ground), L (phase), N (neutral). AC input 50 A. Left to right: L (phase), N (neutral), PE (earth/ground). B 2x RJ45 connector for remote control and/or parallel / three-phase operation C Load connection. AC out1. Left to right: L (phase), N (neutral), PE (earth/ground). D Load connection.
- Page 110 K Drukknoppen om de instellingen in het micropressor geheugen op te slaan. Primaire aarde M8. M Instel DIP switches DS1 tm DS8. N Schuifschakelaars, fabrieksinstelling 16 A: SW1= rechter (uit) stand, SW2 = rechter (uit) stand SW1: Niet in gebruik. Toepasbaar in de toekomst. SW2: INT(naar rechts) = intern GND-relais geselecteerd, EXT(naar links) = extern GND-relais geselecteeerd (relais aan te sluiten via klemmen, zie E).
- Page 111 A AC-Eingang 16 A. Von links nach rechts: PE (Erde); L (Phase), N (Nullleiter). AC-Eingang 50 A. Von links nach rechts: L (Phase), N (Nullleiter), PE (Erde). B 2x RJ45-Stecker für die Fernsteuerung und/oder Parallel- / 3-Phasenbetrieb. C Lastanschluss AC out1. Von links nach rechts: L (Phase), N (Nullleiter), PE (Erde). D Lastanschluss AC out2.
- Page 112 Terminal izquierdo corto y medio para "encender". Terminal derecho corto y medio para conmutar a "charger only". Contacto de la alarma: (de izquierda a derecha) NC, NO, COM. K Pulsadores para modo configuración. Conexión a tierra primaria M8 (PE). M Interruptores DIP, DS1-DS8, para modo configuración. N Interruptores deslizantes, configuración de fábrica 16 A: SW1= posición derecha (off), SW2 = posición derecha (off).
- Page 113 APPENDIX B: Block diagram ANNEXE B : Schéma bloc ANHANG B: Blockschaltbild APÉNDICE B: Diagrama de bloques APPENDIX B: Blockdiagram Models with 16 A transfer capacity (eg MultiPlus 12/3000/120-16 230V) Modèles ayant une capacité de transfert de 16 A (Ex. : MultiPlus 12/3000/120 - 16 230 V) Modelle mit 16 A Transferkapazität (z.
- Page 114 Models with 50 A transfer capacity (eg MultiPlus 12/3000/120- 230V) Modèles ayant une capacité de transfert de 50 A (Ex. : MultiPlus 12/3000/120 - 230 V) Modelle mit 50 A Transferkapazität (z. B. MultiPlus 12/3000/120- 230 V) Modelos con capacidad de transferencia de 50 A (p.ej. MultiPlus 12/3000/120- 230V) Modeller med 50 A överföringskapacitet (t.ex.
- Page 115 APPENDIX C: Parallelconnection ANNEXE C : Connexion en parallèle ANHANG C: Parallelbetrieb APÉNDICE C: Conexión en paralelo APPENDIX C: Parallellanslutning SLAVE Unit 3 SLAVE Unit 2 MASTER Unit 1 Panel BAT- BAT- BAT- BAT+ BAT+ BAT+ PE OUT To load AC OUT 1 N AC OUT 1 L To load...
- Page 116 APPENDIX D: Three phase connection ANNEXE D : Configuration triphasée ANHANG D: Drei Phasen-Betrieb APÉNDICE D: Conexión trifásica APPENDIX D: Trefasanslutning SLAVE Unit 3 SLAVE Unit 2 MASTER Unit 1 Panel BAT- BAT- BAT- BAT+ BAT+ PE OUT To load AC OUT 1 AC OUT 1 L3 AC OUT 1 L2...
- Page 117 APPENDIX E: Charge characteristic ANNEXE E : Courbe de charge ANHANG E: Ladekennlinie APÉNDICE E: Características de carga APPENDIX E: Laddningsfunktion 4-stage charging: Bulk Entered when charger is started. Constant current is applied until nominal battery voltage is reached, depending on temperature and input voltage, after which constant power is applied up to the point where excessive gassing is starting (14.4 V resp.
- Page 118 4-stufiges Laden: Bulk Eingeleitet, wenn Ladegerät gestartet wird. Konstantstrom wird zugeführt, bis die nominale Batteriespannung erreicht wird. Dies ist abhängig von der Temperatur und der Eingangsspannung. Danach wird konstante Energie zugeführt, bis zu dem Punkt an dem die übermäßige Gasung einsetzt (14,4 V bzw.
- Page 119 APPENDIX F: Temperature compensation ANNEXE F : Compensation de température APPENDIX F: Temperaturkompensation APÉNDICE F: Compensación de temperatura APPENDIX F: Temperaturkompensation EN Default output voltages for Float and Absorption are at 25 °C. Reduced Float voltage follows Float voltage and Raised Absorption voltage follows Absorption voltage.
- Page 120 APPENDIX G: Dimensions ANNEXE G : Dimensions ANHANG G: Maße APÉNDICE G: Dimensiones APPENDIX G: Dimensioner...
- Page 124 Version : 25 Date : October 16 , 2017 Victron Energy B.V. De Paal 35 | 1351 JG Almere PO Box 50016 | 1305 AA Almere | The Netherlands General phone +31 (0)36 535 97 00 +31 (0)36 535 97 40 E-mail sales@victronenergy.com...
Need help?
Do you have a question about the MultiPlus Compact 12/800/35-16 and is the answer not in the manual?
Questions and answers