Table of Contents
Advertisement
Available languages
Available languages
Quick Links
Advertisement
Table of Contents

Related Manuals for Stanley STST1825-AR


Summary of Contents for Stanley STST1825-AR
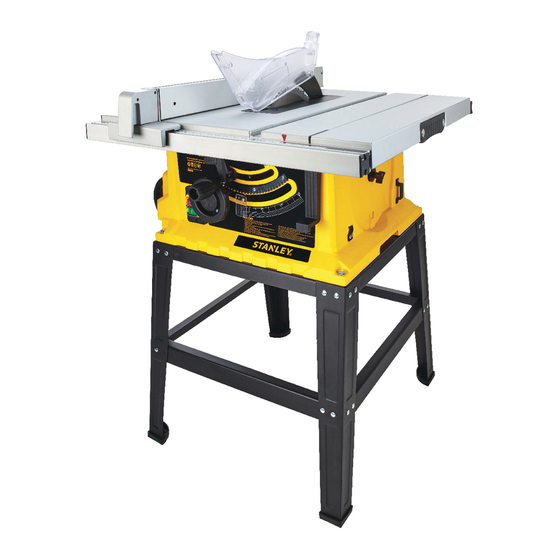
- Page 1 Sierra de Banco Table Saw STST1825-AR Español English MANUAL DE INSTRUCCIONES INSTRUCTION MANUAL ADVERTENCIA: LEASE ESTE INSTRUCTIVO ANTES DE USAR EL PRODUCTO. WARNING: READ INSTRUCTION MANUAL BEFORE USING PRODUCT.
- Page 2 FIG. A...
-
Page 3: Normas Generales De Seguridad
Centro contacto con tierra. de Servicio STANLEY más cercano a usted. c. No exponga las herramientas eléctricas a la lluvia y evite que penetren líquidos en su interior. Existe CONSERVE ESTAS INSTRUCCIONES el peligro de recibir una descarga eléctrica si penetran... - Page 4 Con la herramienta eléctrica adecuada reemplazado por una persona igualmente podrá trabajar mejor y más seguro dentro del margen calificada pero no autorizada por STANLEY, de potencia indicado. la garantía no tendrá efecto. b. No utilice herramientas eléctricas con un interruptor defectuoso.
-
Page 5: Conexiones Eléctricas
ESPAÑOL • 5 10. EL CORTE DE UNA PIEZA DE TRABAJO SIN NORMAS DE SEGURIDAD ADICIONALES UTILIZAR UNA GUÍA O CALIBRADOR DE PARA LAS SIERRAS DE MESA INGLETE SE CONOCE COMO CORTE “A PULSO”. NUNCA realice operaciones “a pulso”. Use una guía ¡Advertencia! La falta de cumplimiento de estas normas o calibrador de inglete para guiar y ubicar la pieza de puede provocar lesiones graves. - Page 6 6 • ESPAÑOL ¡Peligro! No exponga la máquina a la lluvia, ni la utilice Alinee los orificios y asegure con los pernos (a) como se muestra en la Fig. B1. en lugares húmedos. NO apriete completamente los pernos, tuercas y Antes de conectar la máquina a la fuente de energía, roldanas en este punto.
- Page 7 ESPAÑOL • 7 Paso 4 Ahora coloque y conecte los extremos de la parte superior y centre los soportes del marco al marco. Tenga cuidado para asegurarse que los soportes estén colocados como se muestra en la Fig. B5. Ajuste el divisor (FIG. D1-D3) El divisor (3) tiene dos posiciones: Posición de almacenamiento (Fig.
- Page 8 8 • ESPAÑOL d. Jale el divisor hacia arriba a la posición de trabajo. Nivel Los dos orificios de la posición de trabajo deben alinearse con las dos clavijas en el dispositivo. e. Asegure el divisor empujando hacia abajo la palanca de seguro del divisor.
- Page 9 ESPAÑOL • 9 Instalar el banco de extensión y el riel de extensión Ensamble del banco de la sierra Inserte las piezas de extensión en los oficios del banco Elevando y bajando la manija (Consulte la Fig. H1) y atornille la perilla. (Consulte la Fig. H2) 1.
-
Page 10: Operación
10 • ESPAÑOL Ajuste del tope paralelo Cuando gire el interruptor a “ENCENDIDO”, párese en cualquier lado de la hoja y nunca directamente frente a 4. El tope paralelo está ajustado de fábrica para estar ésta. Permita que la hoja llegue a velocidad total antes de en un ángulo de 90°... - Page 11 ESPAÑOL • 11 Apriete el collarín de paro girándolo en sentido de las obtener un grado exacto del ángulo. Para ajustar el tope de la guía de ingletes, afloje la perilla de seguro manecillas del reloj. Antes de girar la sierra en el banco a “ENCENDIDO”, asegúrese que todos los ajustes estén y deslice el tope a la posición que desea.
- Page 12 12 • ESPAÑOL Corte cruzado de ingletes (Consulte la Fig. S) 6. Retire la brida y jale la hoja fuera de la flecha del motor. 7. Para instalar la hoja, invierta el procedimiento. El corte cruzado de ingletes es cortar la madera a un ángulo distinto a 90°.
- Page 13 ESPAÑOL • 13 Solamente aplique presión de alimentación a la pieza de hoja correcta. La parte superior de los dientes de trabajo entre la hoja y el tope paralelo para evitar que la pieza la hoja deben liberar la parte superior del material a de trabajo se una contra la hoja y ocasione un contragolpe.
-
Page 14: Protección Del Medio Ambiente
PROTECCIÓN DEL MEDIO AMBIENTE INFORMACIÓN DE SERVICIO Separación de desechos. Este producto no debe Todos los Centros de Servicio de STANLEY cuentan desecharse con la basura doméstica normal. con personal altamente capacitado dispuesto a brindar Si llega el momento de reemplazar su producto a todos los clientes un servicio eficiente y confiable en STANLEY o éste ha dejado de tener utilidad... -
Page 15: Detección De Problemas
ESPAÑOL • 15 DETECCIÓN DE PROBLEMAS Problema Posible Causa Solución 1. La sierra no está conectada 1. Conéctela en la fuente de energía 2. Se fundió un fusible o interruptor 2. Reemplace el fusible o vuelva a de circuito ajustar el interruptor de circuito La sierra no enciende 3. -
Page 16: General Safety Rules
16 • ENGLISH DO NOT RETURN THIS PRODUCT TO THE STORE, a cord suitable for outdoor use reduces the risk of first contact your local STANLEY office electric shock. If operating a power tool in a damp location is or nearest authorized service center. -
Page 17: Additional Safety Rules For Table Saws
STANLEY, the warranty will not be valid. along the fence. f. using featherboards when the anti-kickback 7. -
Page 18: Power Connections
18 • ENGLISH ASSEMBLY 10. CUTTING THE WORKPIECE WITHOUT THE Assembly of the leg stand USE OF A FENCE OR MITER GAUGE IS KNOWN AS “FREEHAND” CUTTING. NEVER perform “free- When assembling the stand, it is recommended that the hand” operations. Use either the fence or miter gauge screws are only lightly tightened until the stand is fully to position and guide the workpiece. - Page 19 ENGLISH • 19 Step 2 Step 4 Repeat Step 1 so that there are two frames assembled. Now place and connect the ends of the top and center frame supports to the frame. Take care to ensure that the supports are positioned as shown in Fig. B5. Step 5 Once you are satisfied that the frame is assembled correctly, fully tighten ALL the bolts.
- Page 20 20 • ENGLISH Adjusting the splitter (FIG. D1-D3) To adjust the alignment of the splitter The splitter (3) has two positions: storage position (Fig. The splitter must be precisely IN LINE with the saw blade. D1) and working position (Fig. D2). The splitter is in the Loosen the two nuts (c) and align the splitter with the saw blade.
- Page 21 ENGLISH • 21 Assemble the handle (See Fig. H4) Put the handle on the extension table and tighten it with supplied screws. Installing the extension table and extension rail Insert the extension pieces into the holes of the table (See Assembly of the table saw Fig.
-
Page 22: Operation
22 • ENGLISH Rear locking plate When turning the switch “ON” , stand to either side of the blade and never directly in front of it. Allow blade to reach full speed before cutting. To stop the machine, press the switch in the “OFF”... - Page 23 ENGLISH • 23 When setting the angle of the cut, loosen the stop collar by Sliding turning it counter-clockwise. Rotate the blade tilting wheel and use the bevel scale. Set the blade at the desired angle. Tighten the stop collar by turning it clockwise. Before turning the table saw “ON”, be sure all adjustments are securely tightened to prevent the blade from shifting during operation.
-
Page 24: Basic Table Saw Operations
24 • ENGLISH Bevel crosscutting (See Fig. W) Bevel crosscutting is the same as crosscutting except that the blade is also set at an angle other than 90º. Adjust the Blade throat blade to the desired angle using the blade tilting wheel. plate Compound miter cutting (See Fig. -
Page 25: Maintain Tools With Care
2. Cut the wood with the finished side up. disposed of with normal household waste. 3. Always have a proper support for the wood as it Should you find one day that your STANLEY comes out of the blade. product needs replacement, or if it is of no 4. -
Page 26: Service Information
Blade diameter and if you need technical advice, repair, or genuine factory Table size 25” x 25” replacement parts, contact the STANLEY location nearest you. (640 mm x 640 mm) 2” (50 mm) Max. cutting depth at 45º 3” (80 mm) Max. -
Page 27: Troubleshooting
ENGLISH • 27 TROUBLESHOOTING Problem Possible Cause Solution 1. Plug into power source 1. Saw is not plugged in 2. Replace fuse or reset circuit breaker 2. Blown fuse or circuit breaker Saw will not start 3. Have power cord replaced by authorized 3. - Page 28 Solamente para propósito de Argentina: Importa y Distribuye: Black & Decker Argentina S.A. Pacheco Trade Center Colectora de Ruta Panamericana Km. 32.0 El Talar de Pacheco Partido de Tigre Buenos Aires (B1618FBQ) República de Argentina CUIT: 33-65861596-9 Tel.: (011) 4726-4400 Hecho en China Fabricado na China Made in China...
Need help?
Do you have a question about the STST1825-AR and is the answer not in the manual?
Questions and answers