VTech VCS752 User Manual
Sip conference phone with wireless mics
Hide thumbs
Also See for VCS752:
- Administrator and provisioning manual (148 pages) ,
- Quick user manual (2 pages)

Related Manuals for VTech VCS752


Summary of Contents for VTech VCS752
- Page 1 ErisStation ® SIP Conference Phone with Wireless Mics Wireless Conference System User’s manual busines sphones.v tec h.c om Model: VCS752...
- Page 2 Congratulations on purchasing your new VTech product. Before using this product, please read Important safety instructions on page ii of this manual. This manual includes the information and procedures necessary to install and operate your new VTech product. Please review this manual thoroughly to ensure proper installation and operation of this innovative and feature-rich VTech product.
- Page 3 Important safety instructions When using your ErisStation Conference Phone with Wireless Mics, basic safety precautions should always be followed to reduce the risk of fire, electric shock and injury to persons, including the following: Read and understand all instructions. Follow all warnings and instructions marked on the product. Unplug this product from the wall outlet before cleaning.
- Page 4 accessible. 18. CAUTION: Use only the batteries indicated in this manual. There may be a risk of explosion if a wrong type of battery is used. Use only the supplied rechargeable battery or replacement battery pack (BT183642/BT283642). Do not dispose of batteries in a fire. They may explode. Dispose of used battery according to the information in The RBRC seal.
-
Page 5: Table Of Contents
Wireless Mics ........1 Answering calls using a Bluetooth- connected cell phone .......25 Introduction ......... 2 Transferring Bluetooth calls from the VCS752 to your cell phone ....25 Parts checklist ........2 Conference calls with a Bluetooth- Getting Started ......3 connected cell phone .......25 Connect base unit ........3... - Page 6 Table of contents Limited warranty ......75 Cordless accessory registration and deregistration time-out .....49 Technical specifications ... 77 Registering a wireless speaker ....50 WebUI ......... 51 Using the WebUI ........51 Status ............52 Call Settings ..........53 User Preferences ........55 Program Dial Soft Keys ......56 Speed Dial ..........57 Directory ..........58 Blacklist ..........61...
-
Page 7: Introduction
VCS752, you can use the conference phone in parallel with your cell phone, or use a Bluetooth headset for a private conversation. For large meeting rooms, you can extend the range of the VCS752 with up to three VTech VCS850 DECT expansion speakerphones. -
Page 8: Introduction
Quick start guide Quick start guide Phone line cord connector cable Adapter Connection box Ethernet cable A C power cord DC power cable (with yellow plugs) To purchase any accessories or replacements, visit our website at businessphones.vtech.com or call 1-888-370-2006. -
Page 9: Getting Started
1. Plug one end of the DC power cable into the power jack of the base unit, and plug the other end into the VCS752 jack of the power adapter. Route the cord through the slots. 2. Plug one end of the Ethernet cable into the LAN jack of the power adapter, and plug the other end into a network switch or router. -
Page 10: Install The Wireless Mic Battery
Network switch or router Ethernet cable Note: You can connect the VCS752 to both PoE and AC power. Ensure that you Ethernet cable connect the cables in the order shown in the diagram on page 2. Once connected, the unit will use PoE. If PoE fails, the unit will use AC power as a backup. -
Page 11: Before Use
Recheck the installation diagram and the connections to the unit. • Ensure the unit is correctly configured with the correct SIP account information. For more information, see the VCS752 Administrator and Provisioning Guide, available at businessphones.vtech.com. • Consult your service provider if you require additional user accounts or if you suspect a service disruption is at fault. -
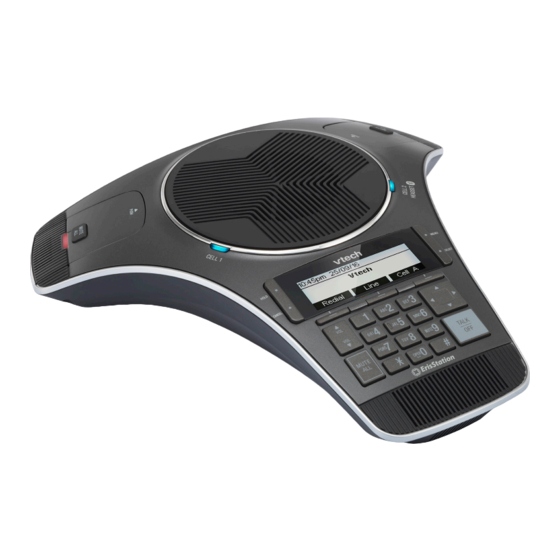
Page 12: Base Unit Overview (Front)
Getting Started Base unit overview (front) Status indicator • Indicates the system status. See also “Status indicators overview” on page Speaker Cell 2/Headset Bluetooth Status indicator Indicates the status of the Bluetooth-connected device. See also Status • indicators overview on page 9. LCD screen MENU / SELECT •... - Page 13 Getting Started • Press to make, answer, or end a call. Dial pad keys • Press to enter numbers or characters. • While editing names, press to add a space. Front microphone 10. MUTE ALL • During a call, press to mute or end mute all microphones in the system. •...
-
Page 14: Base Unit Overview (Rear)
Getting Started Base unit overview (rear) Adapter jack... -
Page 15: Wireless Mic Overview
Getting Started Wireless mic overview Microphone • Functions as an extended microphone of the base unit during a call. Status indicator • Indicates the system status. See Status indicators overview on page 9. MUTE ALL • During a call, press to mute or end mute all microphones in the system. Battery door Charging contacts... -
Page 16: Status Indicators Overview
Getting Started Status indicators overview Status indicator on the base unit Green (two seconds) • Power up. Green (steady) • On a call. Red (steady) • System is muted during a call. Green (slow flash) • Call on hold. Green (fast flash) •... -
Page 17: Idle Screen
Device list (that is, the device name replaces “Device 2”). See “Using the Bluetooth menu” on page 32. • to view the Device list and connect the VCS752 to a Bluetooth device. Connect • to view the phone’s call history. See “Call history” on page 38. -
Page 18: Active Call Screen Icons
Getting Started Active call screen icons During a call, the following screen icons indicate the call’s status. Icon Status Speakerphone—the speakerphone is active. Headset—audio is being routed to a Bluetooth or DECT headset. Call counter—more than one call is active. More than one call is active. -
Page 19: Using The Phone Menu
Main menu items 1. Features (see page 27) 2. Status (see page 63) 3. User settings (see page 42) 4. Admin settings (Available only to your system administrator. For more information, see the VCS752 Administrator and Provisioning Guide, available from businessphones.vtech.com.) -
Page 20: Making Calls
Conference phone operation Making calls You can make a call at any time by pressing , and then dialing a number. When the phone is in idle mode or has calls on hold, you can make a call by pre-dialing a phone number and then pressing to call the number. -
Page 21: Use A Wireless Mic During A Call
Conference phone operation When the call is answered, the active call screen appears. Note that the default active call screen soft keys are shown above. Your phone’s soft keys are programmable and may differ from what is shown here. Use a wireless mic during a call 1. -
Page 22: Putting A Call On Hold
Conference phone operation If a missed call alert screen appears, you can press: • to return to the Idle screen. Exit • to immediately dial the caller’s number. Callback • to see the caller’s information in the call history. View Putting a call on hold Use this feature to hold one call while you access another. -
Page 23: Forwarding Calls
Conference phone operation Forwarding calls You can forward an incoming call to another number, either by entering the number yourself, or by selecting a number from the directory or call history (the call history stores the numbers for missed calls, received calls and dialed calls). Note: Your phone’s Call Forward–No Answer setting will cancel the manual forwarding process if it takes effect first. -
Page 24: Transferring Calls
Conference phone operation 3. Select the Call History folder or Directory you want to access. 4. If necessary, press t or u until appears and then press Dial Dial The Call Forwarded screen appears. Your phone returns to idle mode if you have no other active calls. - Page 25 Conference phone operation Transferring calls (continued) To cancel the transfer, press: • on the transfer setup screen. The active call screen reappears. Cancel • when the second call is active. You will hang up on the second call. • when the second call is active. You will stay connected to the second Split call.
-
Page 26: Making A Conference Call
Conference phone operation Making a conference call You can hold a conference call between yourself and two other callers. To make a conference call: 1. During a call, press Conf . The call is automatically put on hold and the conference setup screen appears. -
Page 27: Setting Up A Network Conference
Conference phone operation Making a conference call (continued) To end a conference call: Press one of the following soft keys: • , to hang up on both calls. • , to put both calls on hold. The screen shows information for the second Split call. -
Page 28: Redialing
Conference phone operation Retrieving messages (continued) To view the Message menu: 1. When the phone is idle, press Menu. 2. With Features highlighted, press SELECT. 3. On the Features menu, press q to highlight Message, and then press SELECT. The Message menu appears. 4. -
Page 29: Locating Wireless Microphones
Conference phone operation Locating wireless microphones This feature helps you find any misplaced wireless mics within the range of the base unit. To locate wireless microphones: 1. Press MENU, and then highlight and select STATUS. 2. On the Status menu, highlight and select Wireless microphone. 3. -
Page 30: Making Calls Using A Bluetooth-Connected Cell Phone
The VCS752 can have up to two Bluetooth-connected cell phones that can be used for conference calls on the VCS752. You can use the VCS752 to make calls using these cell phones, and the cell phone audio will be routed through the conference phone. -
Page 31: Answering Calls Using A Bluetooth-Connected Cell Phone
VCS752. Note: You can have simultaneous cell phone and SIP account calls (one call will be on hold while the other call is active) on the VCS752, but you cannot have more than one cell phone call. -
Page 32: Playing Audio With A Bluetooth-Connected Call Phone
DECT headset for both SIP account calls and cell phone calls. To route audio to a BT headset, a SIP call must be established first at the VCS752. You can then route the SIP call using the... -
Page 33: Phone Features
Phone Features Using the Features menu On the Features menu, you can manage incoming calls, use the Directory, access your messages, view the Call History, and manage your speed dial numbers. To access the Features menu: 1. When the phone is idle, press MENU. The Main Menu appears. -
Page 34: Using The Call Menu
Phone Features Using the Call menu On the Call menu, you can manage how your phone handles incoming calls. The settings available on the Call menu include: Setting Description page… 1. Do Not Disturb You can set Do Not Disturb (DND) for each line assigned to your phone. - Page 35 Phone Features Using the Call menu (continued) To set Do Not Disturb: 1. From the Call menu, if necessary, press p or q to highlight Do Not Disturb. 2. Press SELECT. 3. On the Do Not Disturb menu, highlight the line for which you want to turn Do Not Disturb On or Off.
- Page 36 Phone Features 7. Press q. 8. Enter the number to which you would like to forward calls. 9. (If you selected Call forward no ans earlier) Press q. 10. (If you selected Call forward no ans earlier) Press t or u to set the No answer delay between 1 to 10 rings.
- Page 37 Phone Features Using the Call menu (continued) To enable missed call alerts: 1. From the Call menu, press q to highlight Missed call alert. 2. Press SELECT. The Missed call alert menu appears. 3. Press t or u to turn missed call alerts on (Yes) or off (No). 4.
-
Page 38: Using The Bluetooth Menu
1. From the Bluetooth menu, with Device list highlighted, press SELECT. The Device list appears, showing the registered devices. 2. On your Bluetooth device, enable Bluetooth. Place your device close to the VCS752. 3. On the Device list, highlight the device you want to connect and then press... - Page 39 Phone Features Note: The VCS752 can use only the first two Bluetooth devices on the Device list for calls (as shown by the Device 1 and Device 2 soft keys on the Idle screen. See page 11 for information about the Idle screen). For example, if you highlight Device 3...
- Page 40 Note: Methods for activating Bluetooth may vary depending on your phone’s operating system. 5. When the CELL 1 and CELL 2 LEDs flash on the VCS752, select VCS752 on your phone’s list of available Bluetooth devices. 6. If prompted by your phone, enter the VCS752 PIN. The default PIN is 0000.
-
Page 41: Using The Local Directory
Phone Features Using the local directory You can store the names and phone numbers for up to 200 contacts in the directory. Once directory entries are saved, you can dial them directly from the directory. You can also search directory entries by first or last name. When adding an entry, you can enter numbers for work, mobile, and other. - Page 42 Phone Features To call a contact: 1. Press p or q or (see “To search directory entries:” on page 37) to Search view the desired directory entry. 2. To view other numbers for the entry, press Type 3. When the desired number appears, press Dial Note: If you view a directory entry when the phone is in dial mode, press Dial...
- Page 43 Phone Features To search directory entries: 1. From the Local or Blacklist directory, press t or u until the soft key Search appears. 2. Press Search The search screen appears. 3. To filter your search by first name or last name, press t or u. 4.
-
Page 44: Call History
Phone Features Call history The call history provides available name and number information for the last 200 incoming and outgoing calls. The newest entries replace the oldest. You can view call history information for: • All calls—all categories of calls •... - Page 45 Phone Features The following soft keys are available when viewing a call history entry: Delete Deletes the entry Dial Dials the entry Edit Dial Displays the predial screen so you can edit the number before dialing Save Saves the call information to the local directory To call a call history entry:...
-
Page 46: Using Speed Dial
Phone Features • If necessary, edit the name and number. Press q to move the cursor to the next line. • Press to delete incorrect characters. Backspc 4. Press to save the entry. Save To delete a single call history entry: While viewing the desired entry, press Delete To delete multiple call history entries:... -
Page 47: Sending A Multicast Page
Phone Features 5. Press A blank speed dial entry appears. 6. Use the dial pad keys to enter the name and number. • Press to switch between entering numbers, lower-case letters, and upper-case letters. • When you start entering characters, the soft key changes to Cancel . -
Page 48: Configuring The Phone
Configuring the Phone How to configure the phone You can configure the phone using one of two methods: 1. The User Settings menu on the phone 2. The WebUI, which you access using your Internet browser. This section describes the User Settings menu. For information about the WebUI, see page 51. -
Page 49: Preferences
Configuring the Phone Preferences Use the Preferences menu to set the language, date and time formats, and restart the phone. To use the Preferences menu: 1. From the User Settings menu, ensure that Preferences is highlighted, and then press SELECT. The Preferences menu appears. -
Page 50: Setting Date And Time Preferences
Note: If the NTP server is disabled, you must manually set the time and date. This setting is valid only if the system administrator has already configured the Network Time settings. For more information, see the VCS752 Administrator and Provisioning Guide, available from businessphones.vtech.com. -
Page 51: Restarting The Phone
Configuring the Phone Setting date and time preferences (continued) To manually set the Year, Month, Day, Hour and Minute: 1. From the Date & Time menu, press q to highlight Set manually. 2. Press SELECT. Note: If the NTP server is enabled, when you press SELECT a message appears informing you that date and time cannot be edited. -
Page 52: Display
Configuring the Phone Display Use the Display menu to set screen appearance and backlight behavior. To use the Display menu: 1. Press MENU, then select User settings, or press 3. The User settings menu appears. 2. Press p or q to highlight Display, then press SELECT. The Display menu appears. -
Page 53: Audio
Configuring the Phone Audio Use the Audio menu to pick one of ten ringer tones, and turn key tones on and off. Note: To adjust the ringer volume, press the keys while the phone is idle. To use the Audio menu: From the User Settings menu, press q to highlight Audio, and then press SELECT. -
Page 54: Registering The Wireless Microphones
VCS752-WM wireless mic Quick Start Guide. Registering an optional cordless headset You can register one cordless headset to a VCS752. When the conference phone has a cordless accessory, the conference phone and headset are all part of the same extension, and only one device can be used at a time. -
Page 55: Deregistering A Cordless Headset
Cordless headsets can also be deregistered using the headset. You can use this method when you cannot use the deskset for standard deregistration. The VCS752 may be out of range or may have been removed from the system. Check your headset manual for deregistration instructions applicable to your model. -
Page 56: Registering A Wireless Speaker
Configuring the Phone Registering a wireless speaker For large meeting rooms, you can extend the range of the VCS752 with up to three VTech VCS850 DECT Expansion Wireless Speakerphones. Note: If a DECT headset is already registered, you can register up to two VCS850 DECT Expansion Wireless Speakerphones. -
Page 57: Webui
WebUI Using the WebUI Use an Internet browser to access the Web User Interface (WebUI) that resides on the conference phone. After you log on to the WebUI, you can configure the following features: • Call Settings (See page 53) •... -
Page 58: Status
WebUI 6. Under Password, enter user (the default password), or your own password, if you have already changed the default password. You can change a password after you log on. 7. Click Log In. The WebUI appears. Click topics from the navigation bar at the top of the page, and then click the desired setting on the left side of the WebUI to see the page for that setting. -
Page 59: Call Settings
WebUI Call Settings To view the call settings, click SYSTEM in the WebUI header, and then click Call Settings in the sidebar. You can configure call settings for each account that is available to your phone. Click Account 1, Account 2, and so on to select the call settings page for the desired account. - Page 60 WebUI Call Settings (continued) Call Forward Settings Setting Description Enable Call Forward Select to enable call forwarding for all calls on that account. Always Target Number Enter a number to which all calls will be forwarded. Enable Call Forward Select to enable call forwarding for calls when you are on another call Busy on that account.
-
Page 61: User Preferences
WebUI User Preferences On the User Preferences page, you can configure some basic settings for your phone and set how your phone responds to calls. After changing any settings on this page, click Save to save them. General User Settings Setting Description Range... -
Page 62: Program Dial Soft Keys
WebUI User Preferences (continued) Call Hold Reminder Settings Setting Description Range Default Enable Call Hold Enables or disables the call hold n/a — Select Enabled Reminder Tone reminder tone. to enable Tone Interval (secs) Sets the interval for the call hold 10–300 30 seconds reminder tone. -
Page 63: Speed Dial
WebUI To enter program dial soft keys: 1. Enter the Program Dial key label. Labels that exceed the width of the soft key will end with ... when they appear on the phone. 2. Enter a value that the Program Dial key will dial. 3. -
Page 64: Directory
WebUI Directory To view the local directory, click CONTACTS in the WebUI header, and then click Local Directory in the sidebar. On the Local Directory page, you can manage your local directory entries. You can sort, edit, delete, and add contact information for up to 200 entries. The page also allows you to export your phone’s local directory or import a local directory file. - Page 65 WebUI Local Directory Click To... Sort the list by last name. Edit information for an entry. View the last page of entries. View the next page of entries. Delete selected entries from the directory. Click Select All to select every entry on the page you are viewing. Add a new directory entry.
- Page 66 WebUI Directory (continued) To edit a directory entry: 1. Click Edit for the entry you want to edit. The Edit Local Directory Entry page appears. 2. Edit or add the desired information. 3. Click Save. Import Local Directory You can import an existing local directory file. Importing a directory file replaces all your previous local directory entries.
-
Page 67: Blacklist
WebUI Blacklist You can manage the blacklist on the WebUI. Calls from blacklisted numbers will not ring your phone, or be recorded in your call history. The procedures for adding, deleting and editing entries are the same as for the Directory. See “Directory” on page 58. -
Page 68: Appendix
To reduce the risk of fire or injury, read and follow these instructions: • Use only the batteries provided or equivalent. To order a replacement, visit our website at businessphones.vtech.com or call 1-888-370-2006. • Do not dispose of the batteries in a fire. Check with local waste management codes for special disposal instructions. -
Page 69: Troubleshooting
Troubleshooting If you have difficulty with your conference phone, please try the suggestions below. For customer service, visit our website at businessphones.vtech.com or call 1-888-370-2006. Finding the firmware version As part of troubleshooting, you may be asked to provide the firmware version of the conference phone. - Page 70 Troubleshooting The base unit does not ring when there is an incoming call. • Make sure there is a dial tone before dialing. • Make sure the ringer volume of the base unit is not set to off (page 6). •...
- Page 71 Troubleshooting If that still does not work, you might have a defective battery or a defective wireless mic. Please contact customer service for assistance. Note: Every time the base unit is powered up, the wireless mics will need some time to connect to the base unit.
- Page 72 Troubleshooting The status indicator on the wireless mic does not turn orange when in charging cradle. • The wireless mic might be fully charged. • Clean the charging contacts on the wireless mic and the charging cradles each month with a pencil eraser or a dry non-abrasive fabric. •...
- Page 73 Troubleshooting I have accidentally set my LCD language to Spanish or French, and I don’t know how to change it back to English. When the base unit is not in use or on a call, press MENU → 3 → 1 → 1 → 1. •...
-
Page 74: Precautions For Users Of Implanted Cardiac Pacemakers
Precautions for users of implanted cardiac pacemakers Cardiac pacemakers (applies only to digital cordless telephones): Wireless Technology Research, LLC (WTR), an independent research entity, led a multidisciplinary evaluation of the interference between portable wireless telephones and implanted cardiac pacemakers. Supported by the U.S. Food and Drug Administration, WTR recommends to physicians that: Pacemaker patients •... -
Page 75: Maintenance
Maintenance Taking care of your ErisStation Conference Phone with Wireless Mics Your conference phone contains sophisticated electronic parts, so it must be treated with care. Avoid rough treatment Place the wireless mic down gently. Save the original packing materials to protect your ErisStation Conference Phone with Wireless Mics if you ever need to ship it. -
Page 76: Fcc, Acta And Ic Regulations
FCC, ACTA and IC regulations FCC Part 15 This equipment has been tested and found to comply with the requirements for a Class B digital device under Part 15 of the Federal Communications Commission (FCC) rules. These requirements are intended to provide reasonable protection against harmful interference in a residential installation. -
Page 77: The Rbrc ® Seal
FCC, ACTA and IC regulations If this equipment is malfunctioning, it must be unplugged from the modular jack until the problem has been corrected. Repairs to this telephone equipment can only be made by the manufacturer or its authorized agents. For repair procedures, follow the instructions outlined under the Limited warranty. If this equipment is causing harm to the telephone network, the telephone service provider may temporarily discontinue your telephone service. -
Page 78: California Energy Commission Battery Charging Testing Instructions
To register the wireless mics again, go to Main Menu → 3. User Settings → 4. Wireless microphone → 1. Register, or follow the instructions in the VCS752-WM wireless mic Quick Start Guide. For cUL compliance only Respectez toujours les mesures de sécurité... - Page 79 11. Ne surchargez pas les prises de courant et les rallonges. 12. Débranchez cet appareil de la prise de courant et communiquez avec le département de service à la clientèle de VTech dans les cas suivants : • Lorsque le cordon d’alimentation est endommagé ou écorché.
- Page 80 For C-ETL compliance only Pile • MISE EN GARDE : N’utilisez que la pile incluse. • Ne jetez pas la pile au feu. Vérifiez les instructions spécifiques de mise aux rebus auprès des autorités locales. • N’ouvrez pas et ne mutilez pas la pile. L’électrolyte qui s’en échapperait est corrosif et pourrait causer des brûlures ou des blessures aux yeux ou à...
-
Page 81: Cordless Accessory Registration And Limited Warranty
What does this limited warranty cover? The manufacturer of this VTech Product warrants to the holder of a valid proof of purchase (“Consumer” or “you”) that the Product and all accessories provided in the sales package (“Product”) are free from defects in material and workmanship, pursuant to the following terms and conditions, when installed and used normally and in accordance with the Product operating instructions. - Page 82 Product in transit. If the Product failure is not covered by this limited warranty, or proof of purchase does not meet the terms of this limited warranty, VTech will notify you and will request that you authorize the cost of repair prior to any further repair activity.
-
Page 83: Technical Specifications
Technical specifications Frequency control Crystal controlled PLL synthesizer Transmit frequency Wireless mic: 1921.536–1928.448 MHz Base unit: 1921.536–1928.448 MHz Channels Nominal effective Maximum power allowed by FCC and IC. Actual operating range may vary range according to environmental conditions at the time of use. Optimal and minimum Optimal distance between the base unit/wireless mic and the participant: 2 feet distances... - Page 84 Designed to fit your home. And your life. VTech Communications, Inc. A member of THE VTECH GROUP OF COMPANIES. VTech is a registered trademark of VTech Holdings Limited. ErisStation and Orbitlink Wireless Technology are trademarks of VTech Communications, Inc. Specifications are subject to change without notice.
Need help?
Do you have a question about the VCS752 and is the answer not in the manual?
Questions and answers