Table of Contents
Advertisement
Advertisement
Table of Contents

Related Manuals for Inter-m ARM-911A


Summary of Contents for Inter-m ARM-911A
- Page 1 Operation anual utomated Remote Message RM-911...
- Page 2 Welcome personal welcome to you from the management and employees of Inter-M All of the co-workers here at Inter-M are dedicated to providing excellent products with inherently good value, and we are delighted you have purchased one of our products.
-
Page 3: Table Of Contents
1. SD Disk Function .........................7 2. SD Disk Copy Function ........................7 3. Telephone Paging........................8 Web-browser Interface Configuration 1. Accessing to the ARM-911A Web-browser ...................9 2. Network Setting ..........................9 3. Time Signal Setting........................10 4. Priority Setting...........................15 5. AUX Input Setting ........................16 6. -
Page 4: Unpacking
AUTOMATED REMOTE MESSAGE Unpacking Unpacking Although your ARM-911A is neither complicated nor difficult to operate, we recommend you take a few minutes to read this brief manual and familiarize yourself with the important information regarding product features, setup and operation. -
Page 5: Features
- MP3 Decoding MP3 file format is supported. - Remote Control by Network Using Network, ARM-911A can be controlled at remote place. - Remote Control by RS-232C Using RS-232C, ARM-911A can be controlled at remote place. - Remote Control by Tel In (DTMF) Using telephone, 10 front buttons can be controlled and voice can be broadcasted. -
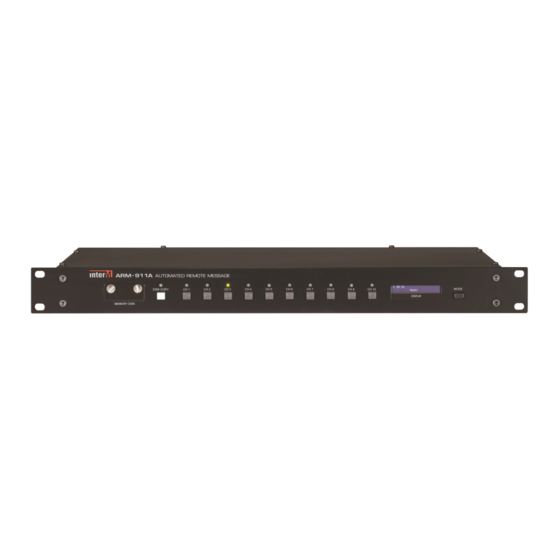
Page 6: Front Panel
4. INST NT PL Y BUTTONS Use this button to play the file in the SD card directly. 5. DISPL Y WINDOW The display shows the current status of the unit. 6. DISPL Y MODE BUTTON Use this button to change the display mode. ARM-911A... -
Page 7: Rear Panel
4. RM INPUT TERMIN L Connect the RM-911D or RM-911W to this terminal. Be sure for the CAT5E cable not to exceed the maximum operable distance. *Maximum length of CAT5E cable between ARM-911A and RM-911. Cable resistance 30Ω: 300m 30Ω < cable resistance 80Ω: 100m... - Page 8 This is the audio output terminal. The output level can be controlled by GUI (Graphic User Interface). 13. RS-232C TERMIN L This terminal allows control by a remote controller such as AMX / CRESTRON etc. The control protocol can be downloaded from the home page. (www.inter-m.com) The maximum cable length should be below 15m. Purpose...
-
Page 9: Operation Method
When the copy is finished, the window displays ‘READY’. (2) Take out the SD memory from the front slot. (3) Press the Instant Play Button from 1 to 10 respectively to check the message files copied from the front SD memory. ARM-911A... -
Page 10: Telephone Paging
3. Telephone Paging A telephone paging input allows the ARM-911A to be connected to the paging port of a PBX. This allows the use of any authorised telephone to connect to the ARM-911A to make direct live voice announcements. A DTMF decoder can trigger any of the 10 messages can be activated using the dial pad of the phone. -
Page 11: Web-Browser Interface Configuration
ARM-911A has been set to something different then use that address. You can reset the ARM-911A to factory default by pushing the RESET button for more than 5 second. The unit will be reset to default mode. -
Page 12: Time Signal Setting
- A range of free IP addresses that can be allocated to the ARM-911A unit(s) without network conflicts. - The correct subnet mask. - The address of the Gateway and the DNS servers if you want your ARM-911A to be able to connect to the Internet. - Page 13 (1) Title : Indicates the title of the schedule. (2) File : Select a file to play. Hold down the Ctrl key on your keyboard to select multiple files. (3) Time : Playing time. (4) Current Time : Current ARM-911A internal time is displayed. ARM-911A...
- Page 14 Any other minute can be set by selecting the User in drop down menu and typing a desired minute. (6) Specified Time : File will play for the interval set from ‘start time’ will repeat until the ’end time’. (7) Day of Week : Set the desired day of broadcasting. ARM-911A...
- Page 15 4) Delete : Press to delete a schedule and the following screen will appear: (1) Delete : Delete the selected schedule. (2) Select all : Select or clear the entire list. 5) Modify : Modify the time schedule. After modify the schedule, press the Apply button. ARM-911A...
- Page 16 (4) Start/End Time : set the start time and the end time of the holiday setup. Press the save button to save the holiday setup. 7) Delete (1) Delete : Delete the selected holiday schedule. (2) Select all : Select or clear the entire list. ARM-911A...
-
Page 17: Priority Setting
(5) Upload : Upload the desired file from the PC. Only MP3 file can be used. 9) Holiday File The holiday file can download or upload for duplicating a multiple units with sme holiday setting. 4. Priority Setting Set the priority of the input sources. The value "0" is the top priority. ARM-911A... -
Page 18: Aux Input Setting
Default setting is: AUX 1 – Mic level, Phantom ‘off’. AUX 2 – Line level (-10dBu), Phantom ‘off’. 6. Level Setting Set the volume of the inputs and output. Level can be set from 0 to 100. Default is 50. ARM-911A... -
Page 19: Eq Setting
The EQ of every input can be set individually. Each input is set by selecting the respective channel button. Default value is 0 for each band. 20 Steps can be set from -10 to +10. High pass filter (65Hz) can be set for each input. ARM-911A... -
Page 20: Rm Setting
RM-911D or RM-911W and select the TALK button. If the entered password is not correct or does not entered, then the IN USE LEDs which are on RM-911D/W are blinking. In this case, after the IN USE LEDs are off enter the correct password. ARM-911A... -
Page 21: Message Control
AUTOMATED REMOTE MESSAGE 9. Message Control Message playback can be controlled. Choose Play button to play the message. Playback number can be set. Choose Stop button to stop the playback. ARM-911A... -
Page 22: Contact Setting
“ON” will set contact 1-10 to “Momentary”. Contact output can be set. Select the message number and press the set button, then contact is output when the message is played. Normally the contact is open. It is closed when the message is played. ARM-911A... -
Page 23: Time Setting
(1) Manual Setup ARM-911A uses internal clock to make time so that its time has some drift from the correct time. It is needed to adjust the time regularly. If time has not been set, the dote will be displayed as 1970/1/1 (2) Automatic Synchronization time It synchronize the time from the time server so that ARM-911A can maintain the accurate time. -
Page 24: Log View
AUTOMATED REMOTE MESSAGE 12. Log View This page displays the log information of the ARM-911A setting and history of modification with time. If time has not been set, the log information will be shown with jan/ 1/ 1970 as default date. -
Page 25: Upgrade
Down load the new firmware to your computer. Go to the system upgrade page. Choose the firmware from your computer using the ‘FIND FILE’ Tab. Start the firmware upgrade by clicking the ‘set’ button. Network settings will be retained after the upgrade. ARM-911A... -
Page 26: Restart
To restart the ARM-911A, press the 'Set' button. Reboot process takes about 30 seconds. 15. Factory Setting To reset the ARM-911A to factory default, press the ‘Set’ button. Reset process takes about 30 seconds. The network and time setting will be reset to default setting. ARM-911A... -
Page 27: Password Setting
Password Confirm – Confirm the new password. Press the ‘Set’ button. Default password is ‘1’. Different password can be set for admin, clock and trigger. To keep security, the password have to be changed to new one before use. ARM-911A... -
Page 28: Pplications
AUTOMATED REMOTE MESSAGE pplications pplications Telephone Local #1 Speaker Switch CD-6208 RM-911D ARM-911A RM-911D Local #2 Speaker RM-911W DPA-1200S(Amplifier) RM-911W ARM-911A... -
Page 29: Block Diagram
AUTOMATED REMOTE MESSAGE Block Diagram Block Diagram ARM-911A... -
Page 30: Specifications
20Hz-18kHz Power Source 120VAC – 240VAC; 50/60Hz, 24VDC Operating Temperature 0°C ~ +40°C Power Consumption Weight (SET) 3.5kg/7.7lb Dimensions (SET) 482(W)x44(H)x280(D)mm/19(W)x1.7(H)x11(D)in * Design and specification are subject to be changed for the improvement of product quality without pre notice. ARM-911A... - Page 31 AUTOMATED REMOTE MESSAGE ※ DIMENSIONS ARM-911A...
-
Page 32: Service
To obtain specific warranty information and available service locations contact Inter-M directly or the authorized Inter-M Distributor for your specific country or region. - Page 33 NOTE ARM-911A...
- Page 34 NOTE ARM-911A...
- Page 35 ARM-911A...
- Page 36 Inter-M, Ltd. (Korea) began operations in 1983. Since then, Inter-M has grown to become one of the largest manufacturers of professional audio and commercial sound electronics equipment in the world. Inter-M has gained worldwide recognition for its own branded products, as well as private label manufacturing of electronics sold under other names (OEM).
Need help?
Do you have a question about the ARM-911A and is the answer not in the manual?
Questions and answers