
Related Manuals for TileVision TV/17/FR2


Summary of Contents for TileVision TV/17/FR2
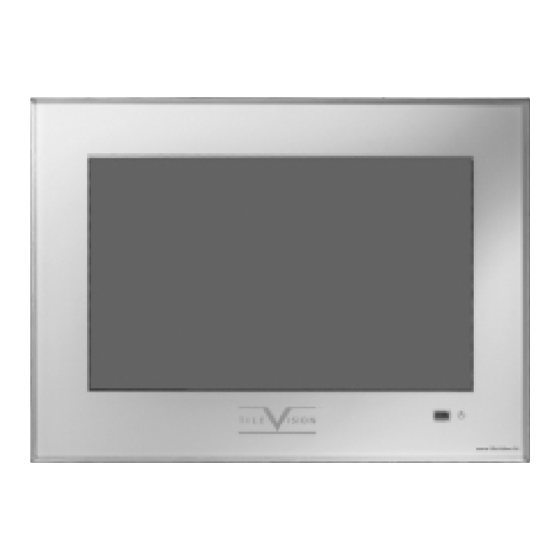
- Page 1 17" TileVision ® Operating Instructions PORTER LANCASTRIAN LIMITED www.tilevision.tv...
- Page 2 You can switch between Flat, Music, Movie, and Speech, or you can configure the settings yourself. Quick View Press the QV button to view the last programme you were watching. Teletext Function You can display teletext information at any time on your TileVision ® CAUTION RISK OF ELECTRIC SHOCK DO NOT OPEN...
-
Page 3: Safety Instructions
Safety Instructions Do not use a damaged socket and do not let the power cord Do not connect too many extension cords or plugs to touch a heat source. an outlet. – This may cause an electric shock or fire. –... -
Page 4: Tools Required
Tools Required Suction Lifter Soft Cloth I s op rop y l A lcohol Silicone Sealant Isopropyl Alcohol Silicone Sealant evolves acetic acid during cure. Use only in well ventilated areas. Irritating to eyes. Wash hands after use and before meals. Wash splashes from skin, clothing and other surfaces. -
Page 5: Table Of Contents
Table of Contents Safety Instructions ........................1 Tools Required ..........................2 Unpacking your TileVision ® ......................4 Your TileVision ® ..........................5 Connector Inputs ..........................5 Connections ..........................6 Connecting an Antenna or Cable ....................7 Connecting to the RCA or S-Video Input ..................8 Connecting to a DVD or DTV Set-Top Box Input ................9 Connecting to the SCART Input ....................9... -
Page 6: Unpacking Your Tilevision
Unpacking your TileVision ® Please make sure the following items are included with your TileVision ® if any items are missing, contact your dealer. Accessories Two boxes supplied – 1. Back Box Assembly – (first fix) 2 speakers. 2 lengths speaker cable. -
Page 7: Your Tilevision
Your TileVision ® Front View Remote control sensor and indicator Power Indicator Status Indicator Status Stand-by Green Power on Green blinking Remote control Connector Inputs 12VDC Audio In EURO-SCART Phones S-VIDEO VIDEO Audio DC12V Power Input Headphone Output RGB Video Input (PC/DTV) -
Page 8: Connections
Connections Earthing Points The Earthing connection points are found on the rear of the front plate and are clearly marked with green labels. Power Socket The Power socket (1) is located at the extreme left of the connection array. Speaker Connections The speakers should be connected after the Speaker Connection Block Earth straps to the rear of the front plate as... -
Page 9: Connecting An Antenna Or Cable
Connect the antenna or input cable to the 75Ω coaxial input on the rear of the TileVision ® If you are using an indoor antenna, you may need to turn it Rear of the when tuning your television until you receive a clear picture. -
Page 10: Connecting To The Rca Or S-Video Input
1. Connect the RGB IN cable (D sub jack) from the RGB output socket of the PC to the PC/DTV input socket of TileVision. 2. Connect the PC Audio IN cable from the PC to the PC Audio IN socket of the TileVision. -
Page 11: Connecting To A Dvd Or Dtv Set-Top Box Input
You can select and set one among the two types of cables (A, B) appropriate for the output jack of external device. Insert a 3.5mm stereo jack into the Headphone socket of TileVision to obtain an audio feed which is subject to the TileVision volume controls. This can be connected to the auxiliary input of any audio amplifier which accepts an input from a portable audio device such as a personal CD etc. -
Page 12: Installing The Front Plate
Note: It is the installer’s responsibility to ensure that the TileVision ® unit is installed and sealed correctly, failure to do so will invalidate Velcro your guarantee. -
Page 13: The Remote Control
Remote Control Power On/Off button Turns the TileVision ® on or off from standby Number buttons Selects programme numbers PSM (Picture Status Memory) button Recalls the preferred picture setting VOL (Volume) buttons Adjust the volume and selects/adjusts Menu Items PR (Programme up/down) button... -
Page 14: Switching The Tilevision On/Off
Switching the TileVision ® On/Off To switch your TileVision ® on, press the POWER ( ) button. To switch your TileVision off, press the POWER ( ) button ® again. Selecting a Picture from External Sources After your various systems (audio and video) have been connected, you can view any of the sources by selecting the appropriate external input. -
Page 15: On-Screen Menus And Displays
On-screen Menus and Displays Press the red MENU button to display the main menu. Equalizer Flat Press the PR UD to select menus. Music Movie Press VOL UD to adjust menu items. Speech User Press MENU to go back to the previous menu. 0.1 0.5 1.5 5.0 10Khz Press TV/AV to exit the menus and confirm settings. -
Page 16: Tuning, Setup And Editing Programs
Tuning, Setup and editing TV Programmes Note: It is recommended that Auto Programme is used when installing TileVision ® as all available programmes will be stored. Auto Programme Press the red MENU button. Press the PR UD button to select the SETUP menu and then press the VOL U button. - Page 17 Tuning, Setup and editing TV Programmes Manual Programme lets you tune and arrange the programmes in whatever order you desire. You can also assign a programme name with 5 characters for each programme number. Manual Programme Press the red MENU button. Press the PR UD button to select the SETUP menu and then press the VOL U button.
- Page 18 Tuning, Setup and editing TV Programmes Programme Edit This function enables you to delete or skip the stored programmes. Also you can move channels to different programme numbers, or insert blank programme data into the selected programme number. Press the red MENU button. Press the PR UD button to select the SETUP menu and then press the VOL U button.
-
Page 19: Picture Control
Picture Control You can adjust picture Contrast, Brightness, Colour and Sharpness to the levels you prefer. Main menu Manual Picture Control Picture Press the red MENU button. Sound Special Press the PR UD button to select the Picture menu and then Setup press the VOL U button. -
Page 20: Pc Picture Adjustment
PC Picture Adjustment You can adjust picture Contrast, Brightness, Temperature, Horizontal/Vertical position, Clock, Phase, Auto and Reset as you prefer. Contrast Press the TV/AV button to select the PC mode. Press the red MENU button. Press the PR UD button to select the desired picture item. Press the VOL UD button to make appropriate adjustments. -
Page 21: Sound Control
Sound Control Preferred sound setting can be selected; Flat, Music, Movie or Speech. Main menu Manual Sound Control Picture Equaliser mode can be manually adjusted by cutting and boosting Sound the five selected frequency bands, then storing the settings as User. Special Balance can be adjusted. -
Page 22: Tv, Scart, S-Video And Pc Modes
Blue back To return to TV mode, press the TV/AV button repeatedly. 16:9 Auto Sleep Main menu If you select Auto Sleep On the TileVision ® will automatically switch Picture itself to standby mode approximately ten minutes after a TV Sound channel stops broadcasting. -
Page 23: Blue Back
Blue Back Main menu If you select Blue Back On any programme without a signal will Picture appear in blue on the screen. Sound Press the red MENU button. Special Setup Press the PR UD button to select the Special menu, and then press the VOL U button. -
Page 24: Sleep Timer
Sleep Timer The sleep timer automatically switches the TileVision ® to standby after the preset time elapses. Press the SLEEP button repeatedly to select the number of minutes. The display will appear on the screen followed by 0, 10, 20, 30, 60, 90, 120, 180 and 240. -
Page 25: Teletext
Teletext The Teletext page of most TV channels provide information such as TV programme times, News bulletins, Weather forecasts, Travel information, or Sports results. Functions of Teletext: Part Display Contents Selected page number. Broadcast Station identity. Current page number or searching status. Date and time. -
Page 26: Teletext Button Functions
Teletext Button Functions The table below gives a complete explanation of each of the Teletext buttons. Button Menu Functions Activates Teletext mode, press again to display teletext page TEXT superimposed on the TV picture. Press again to return to TV mode. Selects double height text. -
Page 27: Troubleshooting
Troubleshooting No picture or sound. Make sure the AC power cord is connected to the 12V power adapter. Make sure the 12V DC power cord is connected to the TileVision ® Check for power failure. Screen is black. Make sure the external signal source mode is selected. -
Page 28: Specifications
Specifications – TV/17/FR2 Model name TV/17/FR2 Size 17.1" Diagonal Display Size 400 mm (H) x 258 mm (V) Pixel Pitch 0.291mm (H)/0.291mm (V) Pixel Number 1,280 x 768 pixels RGB stripe arrangement Colour Depth 8 bits (16.7 million colours) Type... -
Page 29: Notes
Notes... - Page 30 Notes...
- Page 32 PORTER LANCASTRIAN LIMITED www.tilevision.tv TV/17/FR2 – 17" Tilevision ® Operating Instructions Revision C – December 2004 – Part No. TVS/00144/04...
Need help?
Do you have a question about the TV/17/FR2 and is the answer not in the manual?
Questions and answers