
Related Manuals for TileVision TV/17/FR


Summary of Contents for TileVision TV/17/FR
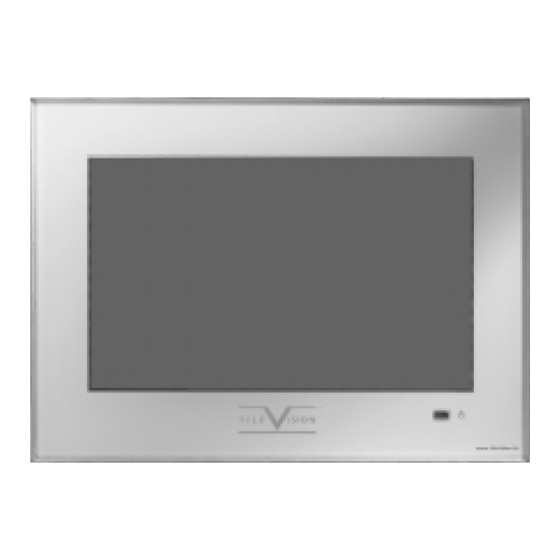
- Page 1 17" TileVision ® Operating instructions PORTER LANCASTRIAN LIMITED www.tilevision.tv...
- Page 2 Favourite Channel Memory You can store your favourite channels in the order of preference for easy channel selection. Teletext Function You can display teletext information at any time on your TileVision ® CAUTION RISK OF ELECTRIC SHOCK DO NOT OPEN CAUTION: DO NOT REMOVE COVER.
-
Page 3: Safety Instructions
Safety Instructions Do not use a damaged socket and do not let the power cord Do not connect too many extension cords or plugs to touch a heat source. an outlet. – This may cause an electric shock or fire. –... -
Page 4: Tools Required
Tools Required Suction Lifter Soft Cloth I s op rop y l A lcohol Silicone Isopropyl Alcohol... -
Page 5: Table Of Contents
Table of Contents Safety Instructions ..........................1 Tools Required ............................2 Unpacking your TileVision ® ........................4 Your TileVision ® ............................5 Connector Inputs ..........................5 Connections ............................6 Connecting an Antenna or Cable ......................7 Connecting to the RCA or S-Video Input (AV1 or AV2) ................8 Connecting to a DVD or DTV Set-Top Box Input ..................9... -
Page 6: Unpacking Your Tilevision
Unpacking your TileVision ® Please make sure the following items are included with your TileVision ® if any items are missing, contact your dealer. Accessories Two boxes supplied – 1. Back Box Assembly – (first fix) 2 speakers. 2 lengths speaker cable. -
Page 7: Your Tilevision
Your TileVision ® Front View Remote control sensor and indicator Power Indicator Status Indicator Status Stand-by Green Power on Green blinking Remote control Connector Inputs 12VDC POWER S-VIDEO VIDEO Audio EURO-SCART DTV/DVD Audio Power Input Jack AV1 S-Video Input Power Input Jack (7-pin Not Used) -
Page 8: Connections
Earth cables from the backbox to the earthing screws marked with green earthing labels on the TileVision ® chassis. Note: The unit is either On or in Standby Mode – the TileVision ® is permanently powered up. Speakers Connect the speaker wires into the Grey Connection Speaker Connection Block Block. -
Page 9: Connecting An Antenna Or Cable
Connecting an Antenna or Cable To view television channels correctly, a signal must be received by the set from one of the following sources: an outdoor antenna, a cable television system or a satellite dish. Connect the antenna or input cable to the 75Ω coaxial input on the rear of the TV. -
Page 10: Connecting To The Rca Or S-Video Input (Av1 Or Av2)
Connecting to the RCA or S-Video Input ( AV1 or AV2 ) (A) For RCA Input Camcorder S-Video VIDEO (B) For S-Video Input Video game device All connections must be made prior to sealing the front plate into the back box. (A) For RCA Input 1. -
Page 11: Connecting To A Dvd Or Dtv Set-Top Box Input
Connecting to a DVD or DTV Set-Top Box Input Video Cable DVD/DTV STB Audio Cable All connections must be made prior to sealing the front plate into the back box. 1. Connect the video cables to the Y, Pb, Pr input jacks (AV3) on the TV and the Y, Pb, Pr output jacks on the DVD or DTV Set-Top Box. -
Page 12: Installing The Front Plate
This Seal is of the greatest importance to the reliable and safe operation of this unit and must be waterproof. Sealing Tip: To achieve a neat seal easily it is good practice to use masking tape around the TileVision ®... -
Page 13: The Remote Control
Fastext Functions ® TileVision : (See page 29) – – M M a a k k e e s s u u r r e e t t h h e e r r e e a a r r e e n n o o o o b b j j e e c c t t s s b b e e t t w w e e e e n n t t h h e e r r e e m m o o t t e e c c o o n n t t r r o o l l a a n n d d i i t t s s s s e e n n s s o o r r –... -
Page 14: On/Off
Switching the TileVision ® On/Off To switch your TileVision ® on, press the POWER( ) button. To switch your TileVision ® off, press the POWER( ) button again. Selecting a Picture from External Sources After your various systems (audio and video) have been connected, you can view any of the sources by selecting the appropriate external input. -
Page 15: Tuning And Storing Channels In Memory
Enter the Security Code ( , 1, 2, 5, ) in sequence. This code prevents unauthorised de-tuning of the TileVision ® Press the MENU button. (Install does not appear if Security MENU Code is not entered.) If Install does not appear in the menu repeat step 2 œ❷... - Page 16 Tuning and Storing Channels in Memory Setting the program name and modification. Picture Sound œ❷ Press the ( )button to select Name and then press the Clock (➛❿)button On the right side you can then input a program Install Language name using up to 5 characters.
-
Page 17: Customising The Picture
Customising the Picture You can select an appropriate picture mode by pressing the ( ❿ )button in Picture mode. Press the MENU button. œ❷ Press the ( )button to select the Picture group and press MENU the(➛❿)or OK button. Pre-set mode will be displayed. The picture mode will change whenever you press the (➛❿) Favorite button. -
Page 18: Customising The Sound
Customising the Sound Press the MENU button. œ❷ Press the ( )button to select Sound group and press MENU the(➛❿)or OK button. œ❷ Press the ( )button to select Balance and press the (➛❿)button to adjust the sound balance. Favorite œ❷... -
Page 19: Adjusting The Speaker Volume & Selecting The Speaker Sound Source
Adjusting the Speaker Volume & Selecting the Speaker Sound Source Press the MENU button. Press the ( œ❷ )button to select Sound group and press MENU the(➛❿)or OK button. œ❷ Press the ( )button to select Volume (speaker). Favorite Press the (➛❿)button to adjust the speaker volume. œ❷... -
Page 20: Listening To Stereo Sound/Dual Sound
Listening to Stereo Sound / Dual Sound Listening to stereo sound Favorite Press the ( ) button on the remote control to select Mono Still or Stereo. 16:9 Swap Mono or Stereo be will selected in turn whenever you press the button. S S e e l l e e c c t t M M o o n n o o s s o o u u n n d d w w h h e e n n y y o o u u h h a a v v e e d d i i f f f f i i c c u u l l t t y y w w i i t t h h s s t t e e r r e e o o s s o o u u n n d d Listening to the Dual sound... -
Page 21: Setting The Date & Time
Setting the Date & Time Press the MENU button. Press the ( œ❷ )button to select Clock and press the(➛❿)or MENU OK button. Press the (➛❿)button to move between Date Month Year. Favorite œ❷ Press the ( )or number (0~9) buttons to adjust the Date and repeat the above steps 3-4 to adjust the Month and Year in the same way. -
Page 22: Setting The Preset Time (On/Off)
Setting the Preset Time (On/Off) This function is available after you set the clock first. Press the MENU button. œ❷ Press the ( ) button to select Clock and press the (➛❿) MENU or OK button. Press the (➛❿) button to select the Hour or Minute. Favorite œ❷... -
Page 23: Setting Restrictions On Button Input
Setting Restrictions On Button Input * Not available on 17" TileVision ® Press the MENU button. œ❷ Press the ( ) button to select the Advanced group and MENU press the (➛❿) or OK button. œ❷ Press the ( ) button to select Local lock. -
Page 24: Setting The Osd Display Time
Setting the OSD Display Time Press the MENU button. Advanced Local Lock Press the ( œ❷ ) button to select the Advanced group and Osd Timeout No Operation Timeout press the (➛❿) or OK button. No Signal Timeout Favorite Channel œ❷... -
Page 25: No Signal Auto Power Off
No Signal Auto Power Off Automatically turns the power off if there is no broadcast signal or button pressed for some time. Press the MENU button. Advanced Local Lock œ❷ Press the ( ) button to select the Advanced group and Osd Timeout No Operation Timeout press the (➛❿) or OK button. -
Page 26: Display The Picture In Picture (Pip)
Display the Picture in Picture ( PIP ) You can watch another device's image in the PIP while watching the TV, PC or in VIDEO the main image. Press the PIP( ) button. You will see the PIP in the at Favorite upper right corner. - Page 27 Display the Picture in Picture (PIP ) Changing the PIP Size Press the ( ) button on the remote control. Favorite The PIP will change among 6 different sizes whenever you Still press this button. 16:9 Swap Changing the PIP Mode Press the ( ) button on the remote control.
-
Page 28: Changing The Picture Size
Changing the Picture Size 16:9 Press the ( ) button on the remote control. Favorite When you are viewing watch the Main image: Still The image will change as shown below whenever you press this button. ( 4:3 16:9 Zoom Waterglass) 16:9 Swap... -
Page 29: Teletext Functions
Teletext Functions The Teletext page of most TV channels provide information such as TV programme times, News bulletins, Weather forecasts, Travel information, or Sports results. Functions of the teletext Part Display Contents Selected page number. Broadcast Station identity. Current page number or searching status. Date and time. -
Page 30: Selecting Special Teletext Functions
Selecting a Special Teletext Functions Selecting a Special Teletext Functions MENU Functions MENU REVEAL Displays concealed text such as answer to quiz games. To return to normal viewing, press this Favorite button again. Still SUB-PAGE Displays a secondary page by entering its 16:9 Swap number. -
Page 31: Connecting To The Pc
Connecting to the PC To use the TileVision ® as a PC Display The PC Function is not currently available on TileVision ® . If the PC mode is selected use the Input button ( ) to return to the required input. -
Page 32: Adjusting The Screen Colour
Adjusting the Screen Colour Selecting the mode Geometry Picture Sound Press the (➛❿) button to select the mode. Clock The modes will change in the following order. Language Advanced Standard Sports Natural Mild Custom MENU : Previous : Select TV/AV : Exit : Position Adjusting Contrast Picture... -
Page 33: Troubleshooting
Troubleshooting No picture or sound. Make sure the power cord is connected.. Make sure the power cord is connected to the TileVision ® Check for power failure. Screen is black. Make sure the external signal source mode is selected. Press the INPUT button to change to TV. -
Page 34: Specifications
Specifications – TV/17/FR Model name TV/17/FR Size 17.1" Diagonal Display Size 400mm (H) x 258mm (V) Pixel Pitch 0.291mm (H) / 0.291mm (V) Pixel Number 1024 x 768 pixels RGB stripe arrangement Colour Depth 8 bits (16.7 million colours) Type... - Page 36 PORTER LANCASTRIAN LIMITED www.tilevision.tv TV/17/FR – 17" Tilevision ® Operating Instructions – Part No. TVS/00114/04...
Need help?
Do you have a question about the TV/17/FR and is the answer not in the manual?
Questions and answers