Table of Contents
Advertisement
Advertisement
Table of Contents

Related Manuals for Jenn-Air 730-0163


Summary of Contents for Jenn-Air 730-0163
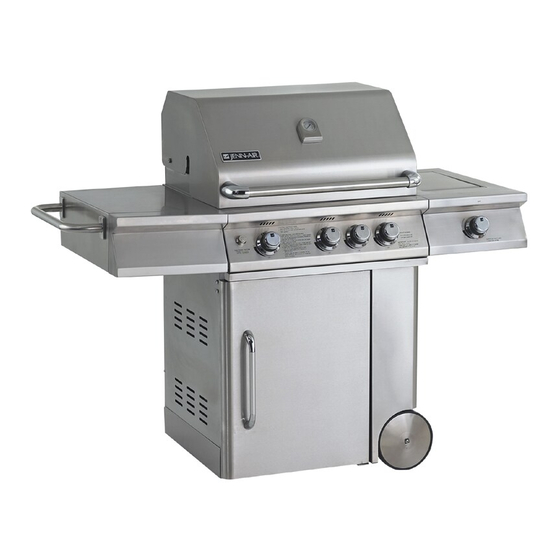
- Page 1 STAINLESS STEEL NATURAL GAS GRILL MODEL NO.: 730-0163 ITEM NO: 24193 Jenn-Air is a Trademark of the Maytag Corporation and is used under license to Lowe’s Companies, Incorporated. FOR OUTDOOR USE ONLY PLEASE CONTACT 1-800-554-5799 FOR ASSISTANCE DO NOT RETURN TO PLACE OF PURCHASE...
-
Page 2: Table Of Contents
TABLE OF CONTENTS SECTION ONE SECTION FIVE Safety Instructions……………………………. Exploded View…………………………….. Placement of the Grill ……………………….. Parts List……………………………………. SECTION TWO SECTION SIX Side Burner & Side Shelf Assembly………… Grilling Hints……………………………… Quick Connector Assembly…………………. Grill Cooking Chart……………………….. 21-23 Side Shelf Handle & Battery Assembly……. Grill Recipe Suggestions…………………... -
Page 3: Safety Instructions
SAFETY INSTRUCTIONS RECOGNIZED SAFETY SYMBOLS, WORDS AND LABELS WARNING WARNING Do not try lighting this appliance without first reading the “LIGHTING INSTRUCTIONS” section of this manual. WARNING – Hazards or unsafe practices which COULD result in severe personal injury or death. WARNING Spiders and insects can nest inside the burners of CAUTION... - Page 4 SAFETY INSTRUCTIONS CAUTION WARNING When using a match to light the grill make Do not use the grill if the odor of gas is sure to use the attached lighting rod. present. Contact customer service at 1- 800-554-5799. CAUTION Before cleaning, make sure the gas supply WARNING and control knobs are in the “OFF”...
- Page 5 SAFETY INSTRUCTIONS USING THE SIDE BURNER WARNING Inspect the gas supply hose prior to turning on Do not attempt to light the grill if gas odor is the gas. If there is evidence of cuts, wear or present. Contact customer service at 1-800-554- abrasion, it must be replaced prior to use.
- Page 6 SAFETY INSTRUCTIONS The grill is not intended to be installed in or on WARNING recreational vehicles and/or boats. Do not try lighting this appliance without first reading the “LIGHTING INSTRUCTIONS” section Children should not be left alone or unattended in of this manual.
-
Page 8: Side Burner & Side Shelf Assembly
SIDE BURNER & SIDE SHELF ASSEMBLY Estimated Assembly Time: Approximately 10 minutes Required Tools: Phillips Screwdriver 1. Remove both side burner and side shelf from inside grill cart. 2. The screws used to attach the side shelf and side burner are already screwed into the side panels of the grill cart. -
Page 9: Quick Connector Assembly
SIDE BURNER HOSE QUICK-CONNECT ASSEMBLY Estimated Assembly Time: Approximately 5-7 minutes No tools required for assembly. 1. Insert the side burner hose with male end of the quick-connect fitting through the side panel of the cart (top drawing). 2. Push the sleeve of the female socket back and insert male end of the connector. Release the sleeve. -
Page 10: Side Shelf Handle & Battery Assembly
SIDE SHELF HANDLE ASSEMBLY Estimated Assembly Time: Approximately 5-7 minutes Required Tools: Phillips Screwdriver 1. Remove the four side shelf handle screws from the side shelf. 2. Align the holes in the handle with the holes in the shelf. 3. Insert the screws and tighten. BATTERY INSTALLATION 1. -
Page 11: Braking System Operations
BRAKING SYSTEM OPERATION Push right to lock. Push left to unlock. INSTALLATION OF NATURAL GAS REGULATOR 1. Connect the PVC natural gas hose to the house gas supply line using the quick-connect fitting as show in the figure 2. Perform the leak test on page 8 before each use. -
Page 12: Gas Hook Up & Leak Testing
Total 71,000 BTU/Hr. Total gas consumption (per hour) of the 730-0163 The installation of this appliance must conform with Natural Gas Grill with all burners set on “HI”: local codes or, in the absence of local codes, to the National Fuel Gas Code, ANSI Z223. -
Page 13: Installer Final Check
INSTALLER FINAL CHECK Specified clearance maintained of 24 inches The unit has been tested and is free of leaks. from combustible materials/constructions. The gas supply shut off valve has been All internal packaging has been removed. located. The hose and regulator are properly All burners are factory installed. -
Page 14: Operating Instructions
OPERATING INSTRUCTIONS GENERAL USE OF THE GRILL AND ROTISSERIE Each main burner is rated at 15,000 BTU/Hr. The After its first use, the stainless steel adjacent to the main grill burners encompass the entire cooking rotisserie burner will most likely turn dark blue. This area and are side ported to minimize blockage from is a normal property of the non-rusting type falling grease and debris. -
Page 15: Lighting Instructions
NOTE Adjust the counter balance weight to balance the It is normal for the skewer to flex when larger cuts heavier side of the meat and avoid lopsided rotation of meat are being cooked. of the rotisserie motor. If the meat scrapes on the cooking grids during any CAUTION part of the rotation, the cooking grids must be When using the rotisserie burner, remove the... -
Page 16: To Match Light The Grill
TO MATCH LIGHT THE GRILL If the burner will not light after several attempts using the control knobs, the burner may be lit with a match. 1. If you have already attempted to light the burner with the igniter, allow 5 minutes for any accumulated gas to dissipate. -
Page 17: Lighting Illustrations
LIGHTING ILLUSTRATIONS MAIN, SIDE & ROTISSERIE BURNER LIGHTING 1. Open the top cover or lid. 2. Push and turn the main, side or rotisserie burner control knobs to the “HI” setting. Push the knob until the burner ignites. The burner should ignite within 4 seconds (if burner does not ignite follow match lighting instructions on Page 14). -
Page 18: Using The Side Burner
USING THE SIDE BURNER 4. If the smell of gas is detected and the igniter Inspect the gas supply hose prior to turning on is not functioning, immediately turn the control the gas. If there is evidence of cuts, wear or knob to the “OFF”... -
Page 19: Care And Maintenance Of The Grill
CARE & MAINTENANCE OF THE GRILL GRILL BURNERS STAINLESS STEEL Extreme care should be taken when moving a Grease specks can gather and bake onto the burner. It must be correctly centered on the surfaces of the stainless steel, giving the orifice before any attempt is made to relight the appearance of rust. -
Page 20: Troubleshooting
TROUBLESHOOTING WHEN TO LOOK FOR SPIDERS You should inspect the burners at least twice a WARNING year or immediately after any of the following Spiders and insects can nest inside the burners conditions occur: of the grill and disrupt gas flow. This very dangerous condition could cause a fire behind 1. -
Page 21: Exploded View
EXPLODED VIEW... -
Page 22: Parts List
PARTS LIST Model N. 730-0163 REF# DESCRIPTION Q’TY REF# DESCRIPTION Main Lid Rear Baffle Heat Indicator Side Burner Lid Name Plate Side Burner Cooking Grid Heat Insulating Spacer Side Burner Cap Main Lid Handle Assembly Side Burner Ring Rotisserie Burner... -
Page 23: Grilling Hints
GRILLING HINTS The preparation of meat, whether rare, medium, To get the juiciest meat, add seasoning or salt or well done, is affected to a large degree by the after cooking is finished and turn the meat only thickness of the cut. once during cooking. - Page 24 FOOD WEIGHT FLAME APPROXIMATE SPECIAL OR THICKNESS SIZE TIME INSTRUCTIONS AND TIPS MEATS BEEF Hamburgers 1/2 to 3/4 inch Medium 10 to 18 minutes Grill, turning once when juices rise to the surface. Do not leave hamburgers unattended. A flare-up could occur quickly.
- Page 25 FOOD WEIGHT FLAME APPROXIMATE SPECIAL OR THICKNESS SIZE TIME INSTRUCTIONS AND TIPS Breasts Medium 30 to 45 minutes Marinate with Italian dressing well-done FISH AND SEAFOOD Steaks Grill, turning once. Brush with Halibut 3/4 to 1 inch Medium to 8 to 15 minutes Melted butter, margarine or oil Salmon High...
-
Page 26: Grill Recipe Suggestions
GRILL RECIPES BBQ SALMON Half-hour before cooking, turn the 1tsp. Worcestershire sauce 2 large salmon steaks burner to the grill on high. Drain 1tsp. Dry mustard 2 tbs. oil seafood-reserving marinade. On each ¼ tsp. Thyme, crushed Salt & pepper of twelve 10in. - Page 27 heat tortillas on grill. Slice meat across CHICKEN TANDOORI STYLE 2 oz. lemon juice grain in thin slices. Place on hot platter. 8 large chicken thighs or drumsticks 10 lbs. pork roast Squeeze lemon juice over. Wrap meat and 1 c. plain nonfat yogurt any of the following toppings in tortillas: ½...
-
Page 28: Limited Warranty
Saturday. Our telephone number is 1-800-554-5799, fax number 1-800-598-8829. Please direct all correspondence to: Nexgrill Industries, Inc. 280 Machlin Court, City of Industry, California, 91789, ATTN: Warranty Service Center. *Jenn-Air is a trademark of the Maytag Corporation and is used under license to Lowe’s Company Inc. Printed in China...
Need help?
Do you have a question about the 730-0163 and is the answer not in the manual?
Questions and answers
the burner knobs are all locked in the off position. cannot push in or turn the knobs. model 730 0163.