Table of Contents
Advertisement
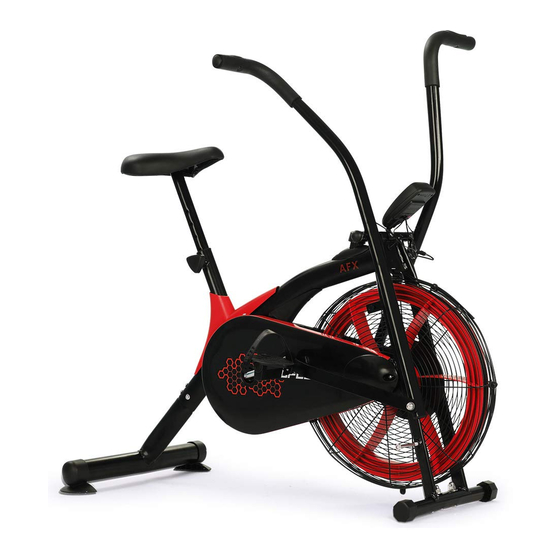
AFX
Air Resistance Bike
Colours may vary
User Manual
[Revision 3.0 May 2020]
READ THIS MANUAL CAREFULLY BEFORE USE – FAILURE TO DO SO MAY RESULT IN INJURY, PROPERTY DAMAGE
AND MAY VOID WARRANTY. • KEEP THIS MANUAL FOR FUTURE REFERENCE. • Products covered by this manual may
vary in appearance, assembly, inclusions, specifications, description and packaging.
E&OE
© 2020 Proflex
Advertisement
Table of Contents

Subscribe to Our Youtube Channel
Related Manuals for Proflex AFX


Summary of Contents for Proflex AFX
- Page 1 READ THIS MANUAL CAREFULLY BEFORE USE – FAILURE TO DO SO MAY RESULT IN INJURY, PROPERTY DAMAGE AND MAY VOID WARRANTY. • KEEP THIS MANUAL FOR FUTURE REFERENCE. • Products covered by this manual may vary in appearance, assembly, inclusions, specifications, description and packaging. E&OE © 2020 Proflex...
-
Page 2: Safety
AFX Air Resistance Bike Safety Safety messages are designed to alert you to possible dangers or hazards that could cause death, injury or equipment or property damage if not understood or followed. Safety messages have the following symbols: You WILL be KILLED or... - Page 3 AFX Air Resistance Bike General Electrical Safety General Electrical Safety General Service Information • Inspect electrical equipment, extension • Electrically grounded equipment must have • The equipment must be serviced or cords, power bars, and electrical fittings for an approved cord and plug and be repaired at authorised service centres by damage or wear before each use.
-
Page 4: Safety Symbols
AFX Air Resistance Bike Safety Symbols The product may have safety warning labels attached to it, explained below. Understand the symbols on your product and their meanings. If any stickers become unreadable, unattached etc., replace them. Flammable Material Hazard Read User Manual... - Page 5 AFX Air Resistance Bike Carbon-Monoxide Hazard Pull Hazard Slope / Fall Injury Hazard "Slam Dunk" Warning Do not use the product in Be aware that the product Be aware that using the product Do NOT attempt "slam dunk" confined areas or without...
-
Page 6: Table Of Contents
AFX Air Resistance Bike Table of Contents Safety ................................2 Safety Symbols ................................4 Parts Identification ............................7 Assembly ..............................10 Adjustments ..............................18 Adjusting the Front Stabilizer End Cap........................18 Adjusting the Tension Control Knob ......................... 18 Adjusting the Seat Height ............................19 Specifications ............................. -
Page 7: Parts Identification
AFX Air Resistance Bike Parts Identification E&OE © 2020 Proflex... - Page 8 AFX Air Resistance Bike Description Description Main Frame Hexagon Flat Nut 7/8' Rear Stabilizer Stop Washer Ø35×2.0 Left Handrail Puller Sleeve 7/8'' Right Handrail Ball Bearing Ø44.5 Seat Post Bearing Bush Ø55.6×16 Left Connection Bar Puller Sleeve 15/16'' Right Connection Bar Flat Washer Ø40×2.8...
- Page 9 AFX Air Resistance Bike Description Description Seat Height Adjustment Knob M12 Nylon Nut M5 Left Pedal Cross Pan Head Tapping Screw ST4.2x12 Clip 50×40×2.0 Meter Plate Alien Bearing Ø31×Ø29×Ø 13×11 Bolt M5×25 Decorative Cover 350×130×47 E&OE © 2020 Proflex...
-
Page 10: Assembly
AFX Air Resistance Bike Assembly Video Tutorial: Assembly Guide Step 1 Attach the Rear Stabilizer (2) onto the rear curve of the Main Frame (1) with four Hexagon Bolts (56) and four Arc Washers (57). Tighten bolts with S4 Allen Wrenches provided. - Page 11 AFX Air Resistance Bike Step 2 Attach the Front Stabilizer (8) onto the front curve of the Main Frame (1) with two Cap Nuts (21), two Arc Washers (20) and two Carriage Bolts (19). Tighten nuts with Multi Hex Tool with Phillips Screwdriver provided.
- Page 12 AFX Air Resistance Bike Step 3 Place the Rotation Rod (26) into the hole of the Main Frame (1). Install the Meter Plate (76) to the Main Frame (1) with one Hexagon Bolt (56) and one Arc Washer (57). Tighten bolts with Allen Wrenches provided.
- Page 13 AFX Air Resistance Bike Step 4 Slide the Left/Right Handrails (3)(4) onto the Rotation Rod (26) and secure in place with two Flat Washers (25), two Spring Washers (69) and two Nylon Nuts (17). Tighten bolts with S6 Allen Wrenches provided.
- Page 14 AFX Air Resistance Bike Step 5 Install the Left/Right Connection Bar (6)(7) to the Left/Right Handlebar (3)(4) with two Hexagon Bolts (16), two Flat Washers (61), two Spring Washers (69) and two Nylon Nuts (17). Tighten nuts and bolts with Multi Hex Tool with Phillips Screwdriver and Allen Wrenches provided.
- Page 15 AFX Air Resistance Bike Step 6 Attach the Left Connection Bar (6) and Left Pedal (36) to the crank with one Spacer Bush (63), one Clip (37), one Alien Bearing (38) and one Left Nylon Nut (52) with clockwise direction.
- Page 16 AFX Air Resistance Bike Step 7 Attach the Seat Cushion (58) onto the Seat Post (5) with three Flat Washers (61) and three Nylon Nuts (17). Tighten bolts with Multi Hex Tool with Phillips Screwdriver provided. Insert the Seat Post (5) into the Seat...
- Page 17 AFX Air Resistance Bike Step 8 Slide the Meter (28) onto the Meter Plate (76). Then Connect the Sensor with wires (13), Hand Pulse with Wire (31) and Extension Sensor Wire (68) to the wires that comes from the Meter (28).
-
Page 18: Adjustments
AFX Air Resistance Bike Adjustments Adjusting the Front Stabilizer End Cap Turn the front stabilizer end cap (18) on the front stabilizer as needed to level the air bike. Adjusting the Tension Control Knob • To increase the tension, turn the tension control knob (33) in a clockwise direction. -
Page 19: Adjusting The Seat Height
AFX Air Resistance Bike Adjusting the Seat Height Remove the seat height adjustment knob (35) from the tube of the main frame. Then slide the seat post up or down slightly to the desired hole for the suitable position. Lock the seat post in place by tightening the seat height adjustment knob (35) in a clockwise direction. - Page 20 ©2020 Proflex. All rights reserved. No part of this document, including descriptive content, concepts, ideas, diagrams or images may be reproduced or transmitted in any form or by any means, electronic or mechanical, including photocopying, scanning or recording, or any information storage and retrieval system,...
Need help?
Do you have a question about the AFX and is the answer not in the manual?
Questions and answers