Bend-Tech Dragon A400 Start-Up And Training Manual
Hide thumbs
Also See for Dragon A400:
- Start-up and training manual (56 pages) ,
- Assembly manual (56 pages) ,
- Maintenance & troubleshooting (56 pages)

Related Manuals for Bend-Tech Dragon A400


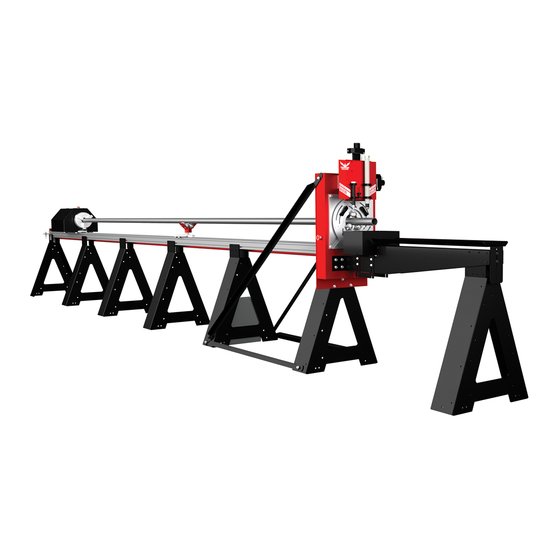
Summary of Contents for Bend-Tech Dragon A400
- Page 1 Part 2 of 3 A400 Startup and Training Manual Part 2: Machine Overview, Inspection, and Startup Revision 6 | English ©2021 Bend-Tech LLC...
- Page 2 We are constantly working to improve and advance our products to increase performance, user satisfaction and experience. Bend-Tech LLC assumes no responsibility for errors or omissions regarding this manual. Bend-Tech LLC assumes no liability for damages resulting from the use of the information contained in this publication.
- Page 3 Dragon A400 Start-Up and Training Manual Revision 6 English Original Instructions Janurary 2021 Bend-Tech LLC 729 Prospect Ave. Osceola, WI 54020 USA (651) 257-8715 www.bend-tech.com support@bend-tech.com Bend-Tech Dragon A400 Startup and Training Manual...
-
Page 4: Table Of Contents
Locations ....14 2.3.8 Ground Cable ... . . 27 1.6 Motor Cable Connections Overview 15 2.3.9 Check the Breakout Board..28 Startup and Training Manual Bend-Tech Dragon A400... -
Page 5: Contents
Machine Control Startup ..31 3.1 Machine Control Startup ..31 3.2 Booting Up The Dragon A400 ..31 3.2.1 Power On Computer ..31 3.3 Power On Control Box . - Page 6 Contents Startup and Training Manual Bend-Tech Dragon A400...
-
Page 7: Machine Overview
Manual. 1.2 Gate Overview The gate is located at the front of the Dragon A400. The gate works in conjunction with the chuck to support and move the material through the cutting process. There are two styles of gate that the Dragon A400 can come equipped with: a non-powered gate and a powered gate. -
Page 8: Gate Eccentric Bearing
Front Gate Rollers Powered Gate Ring Gear A Dragon A400 machine equipped A Dragon A400 machine equipped with with a Powered Gate will include a Non-Powered Gate will not have a the C-Axis drive motor and C-Axis drive motor or ring gear. -
Page 9: Gate Lead Screws
The material support lift can accommodate up to 6-inch OD round stock or 4-inch diameter square stock. By default the material support lift will activate for material stock over 10 feet (3 meters). Bend-Tech Dragon A400 Startup and Training Manual... -
Page 10: Material Support Lift Operation
Right Needle Valve Material Support Lift air cylinder it is best to turn Material Support them ¼ turn at a time to Lift Air Regulator avoid over adjustment and possible damage to the assembly. Startup and Training Manual Bend-Tech Dragon A400... -
Page 11: Toolhead
Machine Overview 1.4 Toolhead The toolhead on the Dragon A400 serves as the tool mount, and the vehicle for engaging the tools vertically and horizontally during the machine’s operation. It is located at the front of the Dragon A400. The marker holder, engraver, torch, and laser light are mounted to the Toolhead. -
Page 12: Marker Holder
The engraver is driven by pressurized air. It uses two separate regulators located just behind the toolhead. The left regulator controls the engraver and is pre-set at the Bend-Tech manufacturing facility to 70 PSI. The right regulator controls the engraver air cylinder and is pre-set at the Bend-Tech manufacturing facility to 5-10 PSI. -
Page 13: Torch
Inspection of the torch is covered in Chapter 2 of the Startup and Training Manual Part 3. 1.4.6 Laser Light The laser light is used to calibrate the Dragon A400 tools in relation to the material. The laser light is mounted and calibrated at the Bend-Tech manufacturing facility. No adjustment of the laser light is necessary. -
Page 14: Homing Sensors
Machine Overview 1.5.3 Homing Sensors The Dragon A400 uses five homing sensors; six when the machine is equipped with the powered gate. These should be checked for function on initial startup using a metal tool such as the blade of a screwdriver. When touched with a metal tool the sensor will either light up or the sensor light will go out, depending on the location and type of the sensor. -
Page 15: Motor Cable Connections Overview
1.7.1 Hypertherm Overview Bend-Tech recommends the Hypertherm Powermax45 XP, Powermax65 or Powermax85 for use with the Dragon A400. The customer can purchase the Dragon A400 supplied with a Hypertherm unit or it can be purchased separately. 1.7.2 Hypertherm Cable The Dragon A400 is supplied with a cable that connects the Hypertherm to the machine’s... -
Page 16: Amperage
Machine Overview 1.7.4 Amperage Hypertherm units are available for use with the Dragon A400 in 45, 65 and 85 amp versions. The amperage the customer chooses will depend on the thickness of material being cut as well as the amount of usage the Dragon A400 will see. -
Page 17: Gas
The customer may choose different types of gas for use with their particular Hypertherm unit. Bend-Tech recommends non-flammable gas or shielded gas. ! Danger ! When using the Dragon A400, do not use flammable gas in the plasma cutting process. 1.7.7 Consumables It is recommended that the customer have additional consumables on hand when operating the Dragon A400. - Page 18 Machine Overview Startup and Training Manual Bend-Tech Dragon A400...
-
Page 19: Machine Inspection
Machine Inspection 2.1 Machine Inspection After assembling the Dragon A400, it is important to conduct an initial inspection of components to ensure proper setup before powering on the machine for the first time. Please follow the procedures outlined in this chapter to ensure all components are inspected thoroughly. -
Page 20: Rail Inspection
3. Ensure that the swivel levelers are installed. These will need to be adjusted if the machine is not level. 4. Bend-Tech recommends anchoring the machine to the floor. If this has already been done, the anchors will need to be loosened if the machine is not level or straight. -
Page 21: Check Rail Level
Swivel Leveler The swivel levelers should be installed during machine assembly. Bend-Tech Dragon A400 Startup and Training Manual... -
Page 22: Check Rail Straightness
Machine Inspection 2.2.3 Check Rail Straightness Ensuring the Dragon A400 is straight and level is one of the most important steps in preparing the machine for operation. Each machine comes with a length of string specific to that machine. The string is located in the Miscellaneous box. -
Page 23: Electrical Inspection
Main Power Fuses Ensuring the cables are connected correctly is important to maintaining electrical connection to all the motors and sensors required for the Dragon A400 to operate. Only C Axis one end of the motor cables, homing sensor cables, and... -
Page 24: Motor Cables
It is possible for improperly fitted GX connectors to overheat and melt. This can damage the connector and affect the operational status of the machine. In extreme cases it could cause a risk of fire. Startup and Training Manual Bend-Tech Dragon A400... -
Page 25: Motor Cable Locations
While using tools is not recommended when tightening GX connectors, sometimes GX connectors may require tools to get them loose. Should this issue arise, care should be taken not to damage the connectors. Bend-Tech Dragon A400 Startup and Training Manual... -
Page 26: Emergency Stop Cables
The ethernet cable should be connected directly from the ethernet connection on the Control Box to the ethernet connection on the computer. Connect the computer to the internet via wifi. 1. Ensure that the ethernet cable that connects the Dragon A400 computer to the control box is connected and securely clipped into place. -
Page 27: Laser Light Cord
1. Ensure the laser light cord is plugged in all the way. 2.3.7 Tool Connections The tool connections for the Dragon A400 are located at the bottom right of the control box. The engraver uses the left hand connection, the torch uses the center connection. -
Page 28: Check The Breakout Board
The main power switch is located near the bottom center of the control box. The main power cord connects to the control box just below the switch. 1. Ensure that the main power cord is connected securely. Laser Main Power Switch Engraver Torch Power Cord Connection Startup and Training Manual Bend-Tech Dragon A400... -
Page 29: Check For 5 Volts
3. Press one of the E-Stops. This should turn off the green power button. 4. Dis-engage the E-Stop that was pressed. Press the green power button again, and repeat this test for all of the E-Stops. Bend-Tech Dragon A400 Startup and Training Manual... -
Page 30: Air Line Connection
2.4 Air Line Connection The Dragon A400 requires two air line feeds. One air line hose is connected to the air inlet on the control and the second air line hose is connected to the Hypertherm plasma unit. A single source air line can feed both units if split with a T-junction. -
Page 31: Machine Control Startup
Booting up the Dragon A400 requires following a specific procedure. Following this procedure in the proper order will ensure the Dragon A400 is up and running as quickly as possible. Failure to follow the procedure in the proper order can affect machine operation and lead to unnecessary down time. -
Page 32: Power On Control Box
The Bend-Tech Launcher will open showing options to launch Dragon CAD, Dragon CAM and Dragon CAD + Dragon CAM. The Dragon A400 is operated fully with the Dragon CAM software. Dragon CAD software is used to design assemblies for production. -
Page 33: Bend-Tech Launcher
In some cases, if there is only one machine entered in the Machine Library, the program may go straight to Mach3 and not present a Machine Selection window after clicking Machine Control. If Mach3 does not connect properly repeat Power On Dragon A400 Control Box procedure beginning at Section 3.3.1. Bend-Tech Dragon A400... -
Page 34: Mach3 Machine Control
Machine Control Startup 3.3.7 Mach3 Machine Control Mach3 CNC software control interface will appear. Minimize Mach3, the operator will primarily work in the Bend-Tech Machine Control interface when operating the Dragon A400. Machine Control interface Mach3 CNC Machine Control interface 3.3.8 Enable Machine... -
Page 35: Index
Powered Gate Clockwise Powered Gate Counter-Clockwise 3.4.3 Jogging the Machine With the Jog Controls screen open, jog the Dragon A400 to observe that all controls are in working order. On machines equipped with a powered gate, use coordinated rotation to job the C-Axis and Y-Axis. -
Page 36: Homing The Machine
Machine Control Startup 3.5 Homing The Machine Before beginning operations with the Dragon A400, the machine must determine Home for all of its operating Axes. This allows the machine to operate efficiently and within its operational parameters. 3.5.1 Homing an AXIS The AXIS feature on the Machine Controls screen allows the operator to Home each Axis of the Dragon A400. -
Page 37: Jog The Trolley
Trolley contacts the end of the Rail the Operator will see a Machine Disabled signal. This is a safety feature designed to protect the Dragon A400 from being damaged. The Operator will need to click Enable Machine to resume machine operation. -
Page 38: Hypertherm
Powermax65 and Powermax85 is located on the back of the machine. Turn it clockwise to power on the unit. ! Caution ! Ensure the Hypertherm ground clamp is connected to the Dragon A400 ground wire. Ensure the air supply is connected to the Hypertherm. -
Page 39: Hypertherm Cut Type
The Customer should ensure the air supply for the Dragon A400 is appropriate to operate the Hypertherm as well as other working aspects of the machine. If connected to a separate air source the Customer should ensure the air source is appropriate to supply the Hypertherm unit. - Page 40 Machine Control Startup Startup and Training Manual Bend-Tech Dragon A400...
- Page 41 Machine Control Startup Bend-Tech Dragon A400 Startup and Training Manual...
- Page 42 Machine Control Startup Startup and Training Manual Bend-Tech Dragon A400...
- Page 43 Attention After completing Startup and Training Manual Part 2, please proceed to Startup and Training Manual Part 3.
- Page 44 Bend-Tech, LLC 729 Prospect Ave. Osceola, WI 54020 1-651-257-8715 sales@bend-tech.com www.bend-tech.com...
Need help?
Do you have a question about the Dragon A400 and is the answer not in the manual?
Questions and answers