Table of Contents
Advertisement
Quick Links
Floating Air Pro-Premiere
Single Zone
Model
FPHW091
FPHW091A
FPHW093
FPHW093A
FRHW093
FRHW093A
FPHW121
FPHW121A
FPHW123
FPHW123A
FRHW123
FRHW123A
FPHW183
FPHW183A
FPHW243
FPHW243A
FPHW363
FPHW363A
FPHW363B
1
96261401_01
Indoor Unit
Outdoor Unit
FPHSW09A1A
FPHSR09A1A
FPHSW09A1B
FPHSR09A1A
FPHFW09A3A
FPHSR09A3A
FPHFW09A3B
FPHSR09A3A
FRHSW09A3A
FRHSR09A3A
FRHSW09A3B
FRHSR09A3A
FPHSW12A1A
FPHSR12A1A
FPHSW12A1B
FPHSR12A1A
FPHFW12A3A
FPHSR12A3A
FPHFW12A3B
FPHSR12A3A
FRHSW12A3A
FRHSR12A3A
FRHSW12A3B
FRHSR12A3A
FPHFW18A3A
FPHSR18A3A
FPHFW18A3B
FPHSR18A3A
FPHFW24A3A
FPHSR24A3A
FPHFW24A3B
FPHSR24A3A
FPHSW36A3A
FPHSR36A3A
FPHSW36A3B
FPHSR36A3A
FPHSW36A3C
FPHSR36A3B
Voltage
BTU
115
9k
115
9k
WiFi
208/230
9k
208/230
9k
WiFi
208/230
9k
208/230
9k
WiFi
115
12k
115
12k
WiFi
208/230
12k
208/230
12k
WiFi
208/230
12k
208/230
12k
WiFi
208/230
18k
208/230
18k
WiFi
208/230
24k
208/230
24k
WiFi
208/230
36k
208/230
36k
WiFi
208/230
36k
WiFi
Advertisement
Table of Contents

Related Manuals for Friedrich FPHW091A


Summary of Contents for Friedrich FPHW091A
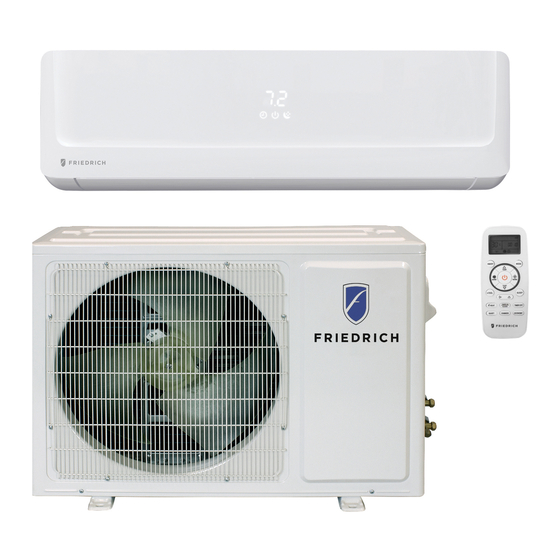
- Page 1 Floating Air Pro-Premiere Single Zone Model Indoor Unit Outdoor Unit Voltage FPHW091 FPHSW09A1A FPHSR09A1A FPHW091A FPHSW09A1B FPHSR09A1A WiFi FPHW093 FPHFW09A3A FPHSR09A3A 208/230 FPHW093A FPHFW09A3B FPHSR09A3A 208/230 WiFi FRHW093 FRHSW09A3A FRHSR09A3A 208/230 FRHW093A FRHSW09A3B FRHSR09A3A 208/230 WiFi FPHW121 FPHSW12A1A FPHSR12A1A FPHW121A...
-
Page 2: Table Of Contents
TABLE OF CONTENTS INTRODUCTION‑ Important Safety Information‑ Personal Injury Or Death Hazards‑ Model Identification Guide‑ SPECIFICATIONS‑ Product Specifications 9k and 12k‑ Product Specifications 18k, 24k and 36k‑ Product Dimensions: Indoor Units‑ Capacities and Selection Data‑ Capacities and Selection Data‑ Remote Control‑ Using Sleep during Off‑Timer Function‑... - Page 3 115V Outdoor Unit 12K‑ 230v Outdoor Unit 9K HIGH SEER‑ 230V Outdoor Unit 12K HIGH SEER‑ APPENDIX‑ Appendix 1: Reference Sheet of Celsius and Farenheit‑ Appendix 2: Pipe Expanding Method‑ LIMITED WARRANTY‑ CUSTOMER SATISFACTION and QUALITY ASSURANCE‑ FRIEDRICH AUTHORIZED PARTS DEPOTS‑...
-
Page 4: Introduction
INTRODUCTION Important Safety Information The information in this manual is intended for use by a qualified technician who is familiar with the safety procedures required for installation and repair, and who is equipped with the proper tools and test instruments required to service this product. - Page 5 DO NOT OPERATE EQUIPMENT DURING ACTIVE STAGES OF CONSTRUCTION To ensure proper operation, Friedrich requires that all equipment is not operated during active construction phases. This includes active stages of completing framing, drywalling, spackling, sanding, painting, flooring, and moulding in the equipment’s designated conditioning space.
-
Page 6: Personal Injury Or Death Hazards
INTRODUCTION Personal Injury Or Death Hazards WARNING AVERTISSEMENT ADVERTENCIA SAFETY FIRST Do not remove, disable Ne pas supprime, désactiver No eliminar, desactivar o or bypass this unit’s ou contourner cette l´unité pasar por alto los safety devices. Doing so des dispositifs de sécurité, dispositivos de seguridad de may cause fire, Doing so faire vous risqueriez de... -
Page 7: Model Identification Guide
INTRODUCTION Model Identification Guide MODEL IDENTIFICATION GUIDE Function : Model Type: HS – H ea t Pump Single Approximate Voltag e FR- Floating Air Premier Coolin g 1- 115 Volts HM – Heat Pump Multi FP - Floating Air Pro BTU/HR 3- 230 Volts HF –... -
Page 8: Specifications
SPECIFICATIONS Product Specifications 9k and 12k Model No. Units FPHW091/A FPHW121/A FPHW093/A FRHW093/A FPHW123/A FRHW123/A INDOOR MODEL FPHSW09A1A, FPHSW12A1A, FPHFW09A3A, FRHSW09A3A, FPHFW12A3A, FRHSW12A3A, FPHSW09A1B/B FPHSW12A1B/B FPHFW09A3B/B FRHSW09A3B/B FPHFW12A3B/B FRHSW12A3B/B OUTDOOR MODEL FPHSR09A1A FPHSR12A1A FPHSR09A3A FRHSR09A3A FPHSR12A3A FRHSR12A3A SPECIFICATIONS CAPACITY COOLING (RATED) 9000 12000 9000... -
Page 9: Product Specifications 18K, 24K And 36K
SPECIFICATIONS Product Specifications 18k, 24k and 36k Model No. Unit FPHW183/A FPHW243/A FPHW363A FPHW363B INDOOR MODEL FPHFW18A3A,/ B FPHFW24A3A/B FPHSW36A3A/B FPHSW36A3C OUTDOOR MODEL FPHSR18A3A FPHSR24A3A FPHSR36A3A FPHSR36A3B CAPACITY COOLING (RATED) 18000 23500 36000 35000 CAPACITY COOLING MIN ‑ MAX 6500‑19500 8000‑26500 12000‑‑38000 12000‑‑38000... -
Page 10: Product Dimensions: Indoor Units
SPECIFICATIONS Product Dimensions: Indoor Units Model Width Height Depth FPHSW09A1A, 33 7/8 “(Inches) 11 3/16 “(Inches) 8 1/2 “(Inches) FPHSW09A1B/B FPHFW09A3A, 33 7/8 “(Inches) 11 3/16 “(Inches) 8 1/2 “(Inches) FPHFW09A3B/B FPHSW12A1A, 33 7/8 “(Inches) 11 3/16 “(Inches) 8 1/2 “(Inches) FPHSW12A1B/B FPHFW12A3A, 33 7/8 “(Inches) -
Page 11: Capacities And Selection Data
SPECIFICATIONS Capacities and Selection Data Capacity characteristic charts The following charts show the characteristics of outdoor unit capacity, which corresponds with the operating ambient temperature of outdoor unit. This data is obtained with Free‑Spin of the Condenser and not in a testing mode Conditions: 1‑... - Page 12 SPECIFICATIONS Capacities and Selection Data Floating Air Pro / Premier Cooling Extended Capacity (By System Model) Indoor Air Temp. °F DB / °F WB 80 /67 Outdoor Air System Model Temp. (°F DB) kBtu/h 9.56 6.69 0.26 10.09 7.06 0.36 10.35 7.24 0.47...
- Page 13 SPECIFICATIONS Capacities and Selection Data Floating Air Pro / Premier Cooling Extended Capacity (By System Model) Indoor Air Temp. °F DB / °F WB 80 /67 Outdoor Air System Model Temp. (°F DB) kBtu/h 10.66 7.46 0.35 11.39 7.97 0.54 12.09 8.46 0.65...
- Page 14 SPECIFICATIONS Capacities and Selection Data Floating Air Pro / Premier Cooling Extended Capacity (By System Model) Indoor Air Temp. °F DB / °F WB 80 /67 Outdoor Air System Model Temp. (°F DB) kBtu/h 29.25 20.48 1.09 32.72 22.90 1.45 33.50 23.45 2.20...
-
Page 15: Error Code
SPECIFICATIONS Capacities and Selection Data Floating Air Pro / Premier Cooling Extended Capacity (By System Model) Indoor Air Temp. °F DB / °F WB 80 /67 Outdoor Air System Model Temp. (°F DB) kBtu/h ‑5 ‑7 4.95 1.14 5.45 1.07 7.08 1.17 8.93... - Page 16 SPECIFICATIONS Capacities and Selection Data Floating Air Pro / Premier Cooling Extended Capacity (By System Model) Indoor Air Temp. °F DB / °F WB 80 /67 Outdoor Air System Model Temp. (°F DB) kBtu/h ‑5 ‑7 8.57 1.17 10.90 1.27 13.90 1.28 15.43...
- Page 17 SPECIFICATIONS Capacities and Selection Data Floating Air Pro / Premier Cooling Extended Capacity (By System Model) Indoor Air Temp. °F DB / °F WB 80 /67 Outdoor Air System Model Temp. (°F DB) kBtu/h ‑5 ‑7 8.56 1.46 10.78 1.60 11.96 1.80 11.90...
-
Page 18: Remote Control
Remote controller OPERATION Remote Control Remote controller The remote controller transmits signals to the system. SMART(invalid for multi system) TEMP+ Used to enter fuzzy logic operation directly, regardless of the unit is on or off. Used to adjust the room temperature and the timer, also real time. - Page 19 OPERATION Remote Technical Parameters Remote receiver distance (front of the air conditioner): 26ft. Remote receiver angle: Less than 60 degrees. Temperature control accuracy: ±2.4°F. Time Response: Less than 1 second. Display Functions Remote Current control functions on the remote controller (See unit’s “Installation and Operating Manual”) Display of the indoor unit displays set temperature or indoor temperature.
-
Page 20: Using Sleep During Off-Timer Function
OPERATION Sleep mode will cease after 8 hours of operation. Using Sleep during Off-Timer Function When using Sleep mode, if the next OFF‑Timer setting less than 8 hours, Sleep mode will remain active until the OFF‑Timer setting. If the next OFF‑Timer setting more than 8 hours, it will override the OFF‑Timer setting and will turn the system off 8 hours after engaging Sleep mode. - Page 21 OPERATION Air flow direction (Louvers) control The louver is operated by a stepper motor and operates the horizontal swing of the louver automatically. Press the SWING button to start or stop the louver swing. During the louver swing in normal operation, the current position will be stored. When the appliance turns off and the louvers swing automatically to the default position, it will position at the close position plus 5º.
- Page 22 OPERATION Dehumidifying mode Figure 304 Dehumidifying area I: Operation at the frequency in the range (30–60Hz) according to Dt (Tindoor ambient‑Tset). Dehumidifying area II: The compressor stops for 5 minutes and operators for 5 minutes at the lowest frequency. Dehumidifying area III: The compressor stops. Dt(°F) f(Hz) Figure 305...
- Page 23 OPERATION Fan Only Mode Operation During the appliance run in this mode; the compressor and outdoor fan stop and the indoor fan operates under the pre‑ setting of air volume. The louver swing and the indoor fan speed is the same as the Heating Mode. Defrost Conditions for Defrost Activation: The following three conditions must be met to activate Defrost.
-
Page 24: Installation
INSTALLATION Installation Dimension Diagram Figure 401... -
Page 25: Main Tools For Installation And Maintenance
INSTALLATION Main Tools For Installation and Maintenance Figure 402... - Page 26 (Btu/h) Length (ft) Elevation A (ft) Refrigerant B (ft) (oz/ft) LIQUID If the height or pipe length is out of the scope of the table, please consult your installer or Friedrich /!ur Conditioning. 9k‑12 1/4"(Ø6.35) 3/8"(Ø9.52) 24.5 1/4"(Ø6.35) 1/2"(Ø12.7) 24.5 24k‑36k...
-
Page 27: Install Indoor Unit
INSTALLATION Install Indoor Unit Horizontal ruler Mounting plate the Mounting Plate position Decide an installing location for the mounting plate Holder according to the indoor unit location and piping (for some models) ..-· · ··· direction. Find the center of the mounting plate according to the : . - Page 28 INSTALLATION Install Indoor Unit Note: Both sides drainage structure is standanl. For both sides drainage stroctul'8, it be chosen for right. left or both Ilk/es drainage connection. If choosing both aides drainage connection, another proper drain hose Is needed as there Is only one drain hose offered by facto,y. If choosing one side drainage connection, ma/ce suf8 the drain hole on the other side Is well plugged.
- Page 29 INSTALLATION Install Indoor Unit 4. Indoor Unit Piping Installation 1 ) Hang the unit onto mounting plate (Fig. 412).
- Page 30 INSTALLATION Install Indoor Unit 6) Connect the piping . Piping Connection: � sealing cap a.Before unscrewing the b ig and the small sealing caps, press the small seallng cap with the finger until the exhaust noise stops, and then loosen the finger.
- Page 31 INSTALLATION Install Indoor Unit 8) Connect the power connecting cord (Fig.422). � u 'it!=; :;�� � . P ower connecting '-. cord Fig. 422 mounUng plate mounting plate Flg.423 Fig424 9) Remove the support plate as shown in Fig. 423. Then move the unit step by step to reach the best Installation, then press the 2 buckles of the air duct Into 2 down slots of the mounting plate.
- Page 32 Installation instructions / INSTALLATION Install Indoor Unit Indoor unit installation 10) Pull the baffles as shown in Fig. 426. Close the front shell as shown in Fig. 427. Then press the E position to fasten the front shell as shown in Fig. 428 . Fig.428 �...
- Page 33 INSTALLATION Install Outdoor Unit Fig. 431...
- Page 34 INSTALLATION Outdoor Units...
-
Page 35: Power And Wiring
INSTALLATION Installation Instructions, Power and Wiring Power and Wiring Connecting of the Cable Front panel • Indoor Unit (Inside) Terminal Connect the power cord to the indoor unit by connecting the wires to the terminals on the control board individually in accordance with the outdoor unit connection. -
Page 36: Leak Check, Evacuation, And Charging (Triple Evacuation)
Leak Check, Evacuation, and Charging (Triple Evacuation) Friedrich requires all installations are Leak Checked and Evacuated in accordance to the “triple evacuation” process. This process promotes a dry tight refrigeration system before opening the service valves. It recommended that a single port refrigeration manifold and hoses rated over 31.5psi be used. - Page 37 INSTALLATION Leak Check, Evacuation, and Charging (Triple Evacuation) EVACUATE BREAK VACUUM WITH DRY NITROGEN WAIT EVACUATE BREAK VACUUM WITH DRY NITROGEN WAIT EVACUATE CHECK FOR TIGHT, DRY SYSTEM (IF IT HOLDS A VACUUM) CHARGE SYSTEM Fig. 436 Capacity Pipe Size Standard Max.
-
Page 38: Checklist And Operation Test
INSTALLATION Checklist and Operation Test Check Unit following Installation Fig. 438 Test Operation System Checks 1. Conceal refrigerant pipes where possible. 2. Make sure drain hose slopes downward along entire length at a slope of 1/4”(inch) per ‘(foot). 3. Ensure all refrigerant pipes and connections are properly insulated. 4. -
Page 39: Maintenance
MAINTENANCE Fig. 501... - Page 40 MAINTENANCE The following is a deep cleaning and must be completed by a professional. Usera are strictly forbidden operate privately, otherwise they will be at their own risk. Cut off the power supply by moving the power switch In the dlnictlon of the arrow.
- Page 41 MAINTENANCE L'.h The followlng 18 a deep cleanlng and must be completed by a professlonal. L'.h Users ara strlctly forbidden to operate prlvately, otherwise they wlll be at their own risk. Remove the acrews of the air duct. (G poaltlon and H poaltlon) screws.
-
Page 42: R-410A Sealed System Repair
R-410A SEALED SYSTEM REPAIR Service Valves Appearance 2-way Valve (Liquid Side) 3-way Valve (Gas Side) Valve cap Hexagonal wrench (4mm) Open position Flare nut Flare nut Closed position Open position Closed position piping piping Service Service connection connection port cap port To outdoor unit To outdoor unit... - Page 43 R-410A SEALED SYSTEM REPAIR Pumping Down Liquid side Indoor unit Outdoor unit Open 2-Way valve Gas side Closed 3-Way valve CLOSE CLOSE Purge the air – Do this quickly so that the gauge ends up indicating 0-15 PSI. – Remove the valve stem caps and confirm that the valve stems are in the raised position.
-
Page 44: Gas Charging (After Repair)
R-410A SEALED SYSTEM REPAIR Gas Charging (After Repair) -
Page 45: Components Testing
COMPONENTS TESTING Resistance Table Of Indoor Coil And Indoor Room Sensor The Resistence Table of Outdoor Coil and Outdoor Air Sensor R(0)=15k B(0/100)=3450 Temp. Resistance Voltage Temp. Resistance Voltage Temp. Resistance Voltage (°F) (kΩ) (°F) (kΩ) (°F) (kΩ) ‑4 38.757 0.58143512 64.4 7.051... -
Page 46: Resistance Table Of Outdoor Compressor Temperature Sensor
COMPONENTS TESTING Resistance Table Of Outdoor Compressor Temperature Sensor R(0)=187.25k B(0100)=3979 Temp. Resistance Voltage Temp. Resistance Voltage Temp. Resistance Voltage (°F) (kΩ) (°F) (kΩ) (°F) (kΩ) ‑4 542.867 0.06185563 64.4 78.854 0.39694585 132.8 6.624 2.532777116 ‑2.2 512.839 0.06543004 66.2 75.381 0.41372093 134.6 6.414... -
Page 47: Compressor
COMPONENTS TESTING Compressor OVERLOAD PROT ECTION INVERTER POWER & CONTROLLER Resistance Test. The compressor is at fault if the resistance of winding is 0(short circuit)or∞ open circuit. Common signs compressor is faulty: • Compressor motor lock. • Discharge pressure value approaches static pressure value . •... -
Page 48: Fan Motor
COMPONENTS TESTING Fan Motor... - Page 49 COMPONENTS TESTING Fan Motor Resistance Test. Test the resistance of the main winding. The indoor fan motor is faulted if the resistance of main winding 0 (short circuit)or ∞ open circuit. DC Voltage test Manually rotate indoor fan motor slowly for several revolutions, and measure voltage “YELLOW” and “GND” on motor. The voltage repeats 0V DC and 5V DC.
-
Page 50: Printed Circuit Board Diagram Lookup Chart
COMPONENTS TESTING Printed Circuit Board Diagram Lookup Chart Model Indoor Unit Indoor Unit Outdoor Unit Outdoor Unit Printed Voltage Number Printed Circuit Circuit Board Board FPHW091 FPHSW09A1A, 1833235 FPHSR09A1A OU‑PCB‑SYD/SVE FPHSW09A1B FPHW093 FPHFW09A3A, 1833235 FPHSR09A3A OU‑PCB‑SYD/SVE 208/230 FPHFW09A3B 1898224 1878005 FRHW093 FRHSW09A3A, 1833235... -
Page 51: Printed Circuit Board (Indoor)
COMPONENTS TESTING Printed Circuit Board (Indoor) Interface of PG motor Room temperature sensor Pipe temperature sensor Switch button Feedback from PG motor Up down swing Left right swing Wiring control or wifi interface Display interface 10 Protective tube Figure 609 1833235 Indoor Unit Printed Circuit Board Identification Interface of PG motor... - Page 52 COMPONENTS TESTING Printed Circuit Board (Indoor) Interface of ID motor Room/and Pipe temperature sensor Switch button Vane Steppers Fuse Figure 611 1836919 Indoor Unit Printed Circuit Board Identification...
-
Page 53: Printed Circuit Board (Outdoor)
COMPONENTS TESTING Printed Circuit Board (Outdoor) Terminal of compressor U Outdoor ambient phase temperature sensor Terminal of compressor V Terminal of 4‑way valve phase Terminal of compressor W Terminal of heater phase Terminal of DC fan communication wire to terminal block Terminal of electronic Terminal of nuetral wire to expansion valve... - Page 54 COMPONENTS TESTING Printed Circuit Board (Outdoor) Terminal of compressor 4‑way valve terminal U/V/W phase Terminal of reactor Terminal of electronic expansion valve Terminal of reactor Outdoor ambient temperature sensor Terminal of signal Outdoor pipe temperature wire,connect to the terminal sensor panel "3(SI)"...
- Page 55 COMPONENTS TESTING Printed Circuit Board (Outdoor) Terminal of reactor Terminal of electronic expansion valve Terminal of compressor DRED Function Terminal of DC fan Terminal of AC fan Heat Sink temperature Cool Valve terminal sensor PressureProtector Heater terminal Compressor discharge 4‑way valve terminal temperature sensor Outdoor ambient Terminal of communication...
-
Page 56: Troubleshooting
TROUBLESHOOTING Diagnostic Codes Outdoor Unit When the unit has the following trouble and the compressor stops running, The LED of outdoor control board will show the error sequence automatically: Diag Outdoor Failure Description LED1 LED2 LED3 the root cause my be one of the following Code Mark description: the lights flash every second for the following faults Outdoor coil temperature sensor... - Page 57 TROUBLESHOOTING Diagnostic Codes Diag Outdoor Failure Description LED1 LED2 LED3 the root cause my be one of the following Code Compressor drive faulted BLINKS BLINKS a.the outdoor drive board failed. b.the compressor failed. c. the outdoor control board failed. Outdoor fan motor locked rotor BLINKS BLINKS a.the connection of the outdoor fan motor is...
-
Page 58: Outdoor Unit When The Compressor Is In Operation
TROUBLESHOOTING Diagnostic Codes Outdoor Unit When The Compressor Is In Operation THE FLASH IS 1 SECOND LED1 LED2 LED3 Reasons for the current operating frequency of the compressor is limited BLINK BLINK BLINK Normal frequency rising and decreasing, no limitation Frequency decreasing or prohibition of frequency rising caused by over‑current Frequency decreasing or prohibition of... -
Page 59: Indoor Unit
TROUBLESHOOTING Diagnostic Codes Indoor Unit The the indoor display board will show the error code automatically when the unit has the following trouble: Error Power Timer Running Sleep Code Content The root cause is may be one of the following the error code will display a. - Page 60 TROUBLESHOOTING Diagnostic Codes Indoor Unit Error Power Timer Running Sleep Code Content The root cause is may be one of the following BLINK Maximum current a.the outdoor control board is short circuited. protection b.the drive board is short circuited. c. other components are short circuited. BLINK Communication trouble a.
- Page 61 TROUBLESHOOTING Diagnostic Codes Indoor Unit Error Power Timer Running Sleep Code Content The root cause is may be one of the following Overheated outdoor a. Radiator sensor fails. radiator b. Detection circuit of the sensor on the control panel fails. Protection against too high a.
-
Page 62: Led Display
TROUBLESHOOTING Diagnostic Codes Led Display Error Power Timer Running Code Content The root cause is may be one of the following Normal BLINK The failure for temperature a. The outdoor temperature sensor loose. sensor of outdoor coil b. The outdoor temperature sensor failed. c. - Page 63 TROUBLESHOOTING Diagnostic Codes LED Display Error Power Timer Running Code Content The root cause is may be one of the following Anti‑freeze protection a.the indoor coil temperature sensor connector loose. with cooling or overload b.the indoor coil temperature sensor failed. protection with heating in c.the indoor control board failed.
- Page 64 TROUBLESHOOTING Diagnostic Codes LED Display Error Power Timer Running Code Content The root cause is may be one of the following BLINK BLINK Indoor fan motor run a. There is something blocking the indoor fan motor. abnormally b. The fan motor cord connector loose. c.
-
Page 65: Test The Jumper Terminals
TROUBLESHOOTING Test the jumper terminals Outdoor Unit Verification of Operation and Testing: When powered on, if there is a probability that the outdoor unit is malfunctioning, or to rule out field wiring, the terminals below can be jumped to engage the outdoor unit in normal cooling operation. Application: Jump these terminals to engage cooling for the outdoor unit. -
Page 66: Protection Circuit Fault Isolation
TROUBLESHOOTING Protection Circuit Fault Isolation Protection diagnosis of the complete machine (all types of protection during operation, i.e. under-voltage, over-voltage and overcurrent protection) Note:List all types of protection that may occur to the complete machine and describe the conditions and signs of the start, course and end of such protection. -
Page 67: Compressor Fault Isolation
TROUBLESHOOTING Compressor Fault Isolation Judging the connecting terminals of inverter compressor: It is impossible to identify terminals U, V and W of inverter compressor with multi‑meter. Just connect the terminals in the same way as the original unit when replacing the compressor. A wrong connection will lead to reverse and loud noise of the compressor. -
Page 68: Unit Does Not Run
TROUBLESHOOTING Unit does not run Switch on the power supply Does it receive the Is the remote Does the screen remote controller controller display normally? signal? setting right? Is the fuse (3.5A/250V) Check the code blown? Is the remote controller in good Replace the batteries condition? Are the wires... -
Page 69: Error Code 39-Dc Fan
TROUBLESHOOTING Error Code 39-DC FAN Error code 39 Indoor fan motor trouble DC Fan Set the air conditioner operate in fan mode Does fan motor Check the connector of stop following the Is indoor fan motor indoor motor connected remote controller running? tightly or not order? -
Page 70: Error Code 39
TROUBLESHOOTING Error Code 39-PG Fan Error code 39 Indoor fan motor trouble PG Fan Set the air conditioner operate in fan mode Does fan motor Check the connector of stop following the Is indoor fan motor indoor motor connected remote controller running? tightly or not order? - Page 71 TROUBLESHOOTING Error Code 9 Error code 9 Maximum current protection Is the windings of the Compressor conpressor right or fault,replace the not(eath winding and compressor winding to the earth) The outdoor control board fault,replace the board Fig. 707...
- Page 72 TROUBLESHOOTING Error Code 13 Error Code 8 Fig. 708...
- Page 73 TROUBLESHOOTING Error Code 15 Compressor protection device is Error 15 open. Wait to see if it resets. Compressor shell temperature A feel test on compressor should too high protection con rm when cool. If device is still open, replace device. Is the protector plug connected to the CN902 Reconnect the plug...
-
Page 74: Error Code 16 Cooling Mode
TROUBLESHOOTING Error Code 16 Cooling Mode Error code 16 cooling mode Anti-freeze protection indoor unit Is indoor heat Check the coil Change the indoor exchanger iced up? sensor right or not board Change the coil Refrigeration system protection,check the sensor air inlet and outlet of indoor unit Error Code 16 Heating Mode Error code 16 heating mode... - Page 75 TROUBLESHOOTING Error Code 20 DC fan motor test point: Fig. 711...
-
Page 76: Error Code 33
TROUBLESHOOTING Error Code 33 Error code 33 Take out the red Indoor connector temperature sensor.Measure the Does the resistance sensor resistance of sensor Replace the of the sensor have indoor control the characteristics on board Take out the white sensor parameter Error code 34 connector Indoor Coil... -
Page 77: Error Code 19
TROUBLESHOOTING Error Code 19 Error code 19 Compressor drive in trouble Is fastening screw fastening of IPM fastened? Check the wiring Corrent the connection between main or replace the wires control board and connectors and compressor Change the control Check the board or replace it Replace the fan or the Check the outdoor fan is... - Page 78 TROUBLESHOOTING Error Code 19 test point: Forward of IPM P-U/P-V/P-W test : Reverse of IPM P-U/P-V/P-W test: Forward of IPM N-U/N-V/N-W test : Reverse of IPM N-U/N-V/N-W test : Fig. 714...
- Page 79 TROUBLESHOOTING Error Code 19 test point: The resistance of the compressor U-W\V-W Values should be +/- 0.1 (Ohms) between phases. Fig. 715...
- Page 80 TROUBLESHOOTING Error Code 36 Error code 36 Communication trouble Is the order of all wires including the indoor and Adjust the order of wires outdoor unit correct? Are all lead wires connecting Retighten the wires connecting indoor and outdoor unit indoor and outdoor unit loosen loosen? Measure the DC voltage...
-
Page 81: Wiring Diagrams
WIRING DIAGRAMS Wiring Diagram Lookup Table Model Number Indoor Unit Indoor Unit Wiring Outdoor Unit Outdoor Unit Voltage Diagram Wiring Diagram FPHW091/A FPHSW09A1A, 1912241 FPHSR09A1A 1912204 FPHSW09A1B/B FPHW093/A FPHFW09A3A, 1854605 FPHSR09A3A 1854707 208/230 FPHFW09A3B/B 1912241 1907790 FRHW093/A FRHSW09A3A, 1854605 FRHSR09A3A 1854707 208/230 FRHSW09A3B/B... -
Page 82: Indoor Units
WIRING DIAGRAMS Indoor Units Figure 801 1854605, 1912241 Figure 802 1907790... - Page 83 WIRING DIAGRAMS Indoor Units Figure 803 1854698 Figure 804 1852066...
-
Page 84: Outdoor Units
WIRING DIAGRAMS Outdoor Units Figure 805 1912204, 1854707... -
Page 85: Introduction
Items with a - in front of the item number (for example -10), are non illustrated items. Items with an * in front of the number (for example *10) are non-stocked items. If you require these items contact Friedrich customer... -
Page 86: Indoor Unit 9-12K
PARTS CATALOG FIgure 901 115V Indoor Unit 9-12K 26 27 ITEM PART PART DESCRIPTION USED ON MODEL NUMBER 67400571 1959683 ‑ installation plate FPHSW09A1A, FPHSW09A1B, FPHSW12A1A, FPHSW12A1B 67400572 1959764 ‑ Supporting button FPHSW09A1A, FPHSW09A1B, FPHSW12A1A, FPHSW12A1B 67400573 2008502 ‑ Refrigeration system FPHSW09A1A, FPHSW09A1B, FPHSW12A1A, FPHSW12A1B 67400154 1466014 ‑... - Page 87 PARTS CATALOG 115V Indoor Unit 9-12K ITEM PART PART DESCRIPTION USED ON MODEL NUMBER 67400588 4113865 ‑ panel FPHSW09A1A, FPHSW09A1B, FPHSW12A1A, FPHSW12A1B 67400589 1964953 ‑ Motor bracket FPHSW09A1A, FPHSW09A1B, FPHSW12A1A, FPHSW12A1B 67400590 1964954 ‑ motor cover FPHSW09A1A, FPHSW09A1B, FPHSW12A1A, FPHSW12A1B 67400591 1964950 ‑...
-
Page 88: Indoor Unit 9-12K
PARTS CATALOG Figure 902 230V Indoor Unit 9-12K 26 27 ITEM PART PART DESCRIPTION USED ON MODEL NUMBER 67400571 1959683 ‑ installation plate FPHFW09A3A, FPHFW09A3B, FPHFW12A3A, FPHFW12A3B 67400572 1959764 ‑ Supporting button FPHFW09A3A, FPHFW09A3B, FPHFW12A3A, FPHFW12A3B 67400573 2008502 ‑ Refrigeration system FPHFW09A3A, FPHFW09A3B, FPHFW12A3A, FPHFW12A3B 67400154 1466014 ‑... - Page 89 PARTS CATALOG Figure 902 230V Indoor Unit 9-12K ITEM PART PART DESCRIPTION USED ON MODEL NUMBER 67400588 4113865 ‑ panel FPHFW09A3A, FPHFW09A3B, FPHFW12A3A, FPHFW12A3B 67400589 1964953 ‑ Motor bracket FPHFW09A3A, FPHFW09A3B, FPHFW12A3A, FPHFW12A3B 67400590 1964954 ‑ motor cover FPHFW09A3A, FPHFW09A3B, FPHFW12A3A, FPHFW12A3B 67400591 1964950 ‑...
-
Page 90: Indoor Unit High Seer 9K
PARTS CATALOG Figure 903 230V Indoor Unit High Seer 9K 26 27 ITEM PART PART DESCRIPTION USED ON MODEL NUMBER 67400571 1959683 ‑ installation plate FRHSW09A3A, FRHSW09A3B 67400572 1959764 ‑ Supporting button FRHSW09A3A, FRHSW09A3B 67400573 2008502 ‑ Refrigeration system FRHSW09A3A, FRHSW09A3B 67400154 1466014 ‑... - Page 91 PARTS CATALOG Figure 903 230V Indoor Unit High Seer 9K ITEM PART PART DESCRIPTION USED ON MODEL NUMBER 67400589 1964953 ‑ Motor bracket FRHSW09A3A, FRHSW09A3B 67400590 1964954 ‑ motor cover FRHSW09A3A, FRHSW09A3B 67400591 1964950 ‑ center staff FRHSW09A3A, FRHSW09A3B 67400592 1964956 ‑...
-
Page 92: Indoor Unit High Seer12K
PARTS CATALOG FIgure 904 230V Indoor Unit High Seer12K 38 39 34 35 27 28 29 30 ITEM PART PART DESCRIPTION USED ON MODEL NUMBER 67401204 1969822 ‑ installation plate FRHSW12A3A, FRHSW12A3B 67401205 1964337 ‑ Supporting button FRHSW12A3A, FRHSW12A3B 67401206 2008448 ‑... - Page 93 PARTS CATALOG FIgure 904 230V Indoor Unit High Seer12K ITEM PART PART DESCRIPTION USED ON MODEL NUMBER 67400474 1961606 ‑ ornamental part FRHSW12A3A, FRHSW12A3B 67400476 2015970 ‑ Vertical Level Vane FRHSW12A3A, FRHSW12A3B 67400591 1964950 ‑ center staff FRHSW12A3A, FRHSW12A3B 67401212 2015958 ‑...
-
Page 94: Indoor Unit 18K
PARTS CATALOG Figure 905 230V Indoor Unit 18K 27 28 ITEM PART PART DESCRIPTION USED ON MODEL NUMBER 67400463 installation plate FPHFW18A3A, FPHFW18A3B 67400464 Blower Wheel FPHFW18A3A, FPHFW18A3B 67400230 bearing FPHFW18A3A, FPHFW18A3B 67400466 Gear FPHFW18A3A, FPHFW18A3B 67400467 Air Duct Assembly ‑ frame FPHFW18A3A, FPHFW18A3B 67400468 Main Shell... - Page 95 PARTS CATALOG Figure 905 230V Indoor Unit 18K ITEM PART PART DESCRIPTION USED ON MODEL NUMBER 67400481 Display kit FPHFW18A3A, FPHFW18A3B 67400482 Front Panel FPHFW18A3A, FPHFW18A3B 67400174 Stepper Motor FPHFW18A3A, FPHFW18A3B 67400222 Stepper motor harness FPHFW18A3A, FPHFW18A3B 67400485 baffle FPHFW18A3A, FPHFW18A3B 67400598 Louver Pins FPHFW18A3A, FPHFW18A3B...
-
Page 96: Indoor Unit 24K
PARTS CATALOG Figure 906 230V Indoor Unit 24K 27 28 ITEM PART PART DESCRIPTION USED ON MODEL NUMBER 67400463 1981622 ‑ installation plate FPHFW24A3A, FPHFW24A3B 67400534 1964593 ‑ Main Air Frame FPHFW24A3A, FPHFW24A3B 67400535 2012367 ‑ EVAP COIL FPHFW24A3A, FPHFW24A3B 67400464 1541633 ‑... - Page 97 PARTS CATALOG Figure 906 230V Indoor Unit 24K ITEM PART PART DESCRIPTION USED ON MODEL NUMBER #N/A 67400479 1961594 ‑ Wire Louver FPHFW24A3A, FPHFW24A3B 67400480 1541387 ‑ Filters FPHFW24A3A, FPHFW24A3B 67400236 1824935 ‑ Display Kit FPHFW24A3A, FPHFW24A3B 67400482 4117900 ‑ panel FPHFW24A3A, FPHFW24A3B 67400547 1961607 ‑...
-
Page 98: Indoor Unit 36K
PARTS CATALOG Figure 907 230V Indoor Unit 36k ITEM PART NUMBER PART DESCRIPTION USED ON MODEL 67400613 1896952 ‑ installation plate assy FPHSW36A3A, FPHSW36A3B, FPHSW36A3C 67400614 1868777 ‑ base holder part FPHSW36A3A, FPHSW36A3B, FPHSW36A3C 67400318 1511626 ‑ cross‑flow fan blade FPHSW36A3A, FPHSW36A3B, FPHSW36A3C 67400615 1248742 ‑... - Page 99 PARTS CATALOG Figure 907 230V Indoor Unit 36k ITEM PART NUMBER PART DESCRIPTION USED ON MODEL 67400628 1531621 ‑ center staff FPHSW36A3A, FPHSW36A3B, FPHSW36A3C 67400629 1531638 ‑ center staff FPHSW36A3A, FPHSW36A3B, FPHSW36A3C 67400630 1550405 ‑ Step motor FPHSW36A3A, FPHSW36A3B, FPHSW36A3C 67400631 1510271 ‑...
-
Page 100: Outdoor Unit 9K
PARTS CATALOG Figure 908 230V Outdoor Unit 9k ITEM PART PART DESCRIPTION USED ON MODEL NUMBER 67400747 1832902 ‑ panel parts FPHSR09A3A 67400335 1405123 ‑ propeller fan blade FPHSR09A3A 67400182 1457759 ‑ DC motor FPHSR09A3A 67400748 1824869 ‑ motor supporter FPHSR09A3A 67400749 1824871 ‑... - Page 101 PARTS CATALOG Figure 908 230V Outdoor Unit 9k ITEM PART PART DESCRIPTION USED ON MODEL NUMBER 67400760 1822371 ‑ Compressor connect FPHSR09A3A wire 67400761 1824870 ‑ valve seat FPHSR09A3A 67400279 1838379 ‑ Capillary assembly FPHSR09A3A 67400280 1258653 ‑ 1/4 2‑way valve FPHSR09A3A 67400281 1407169 ‑...
-
Page 102: Outdoor Unit 12K
PARTS CATALOG Figure 909 230V Outdoor Unit 12k ITEM PART PART DESCRIPTION USED ON MODEL NUMBER 67400180 1847919 ‑ panel parts FPHSR12A3A 67400181 1556766 ‑ propeller fan blade FPHSR12A3A 67400182 1457759 ‑ DC motor FPHSR12A3A 67400183 1849292 ‑ motor supporter assy FPHSR12A3A 67400184 1846086 ‑... - Page 103 PARTS CATALOG Figure 909 230V Outdoor Unit 12k ITEM PART PART DESCRIPTION USED ON MODEL NUMBER 67400271 1854557 ‑ Capillary assembly FPHSR12A3A 67400272 1844583 ‑ 1/4 2‑way valve FPHSR12A3A 67400199 1335015 ‑ 3/8 3‑way valve FPHSR12A3A 67400200 1846084 ‑ right side board FPHSR12A3A 67400201 1854040 ‑...
-
Page 104: Outdoor Unit 18K
PARTS CATALOG Figure 910 230V Outdoor Unit 18k ITEM PART PART DESCRIPTION USED ON MODEL NUMBER 67400790 1844019 ‑ panel parts FPHSR18A3A 67400295 1841783 ‑ propeller fan blade FPHSR18A3A 67400296 1859837 ‑ DC motor FPHSR18A3A 67400791 1841953 ‑ motor supporter FPHSR18A3A 67400792 1841772 ‑... -
Page 105: Outdoor Unit 18K
PARTS CATALOG Figure 910 230V Outdoor Unit 18k ITEM PART PART DESCRIPTION USED ON MODEL NUMBER 67400272 1844583 ‑ 1/4 2‑way valve FPHSR18A3A 67400299 1844499 ‑ 1/2 3‑way valve FPHSR18A3A 67400803 1841776 ‑ right side board FPHSR18A3A 67400201 1854040 ‑ wiring distribution FPHSR18A3A cover assy 67400202... -
Page 106: Outdoor Unit 24K
PARTS CATALOG Figure 911 230V Outdoor Unit 24k ITEM PART PART DESCRIPTION USED ON MODEL NUMBER 67400810 1542623 ‑ panel parts FPHSR24A3A 67400307 1542217 ‑ propeller fan blade FPHSR24A3A 67400303 1561964 ‑ DC motor FPHSR24A3A 67400811 1561919 ‑ motor supporter FPHSR24A3A #N/A FPHSR24A3A... - Page 107 PARTS CATALOG Figure 911 230V Outdoor Unit 24k ITEM PART PART DESCRIPTION USED ON MODEL NUMBER 67400821 1542621 ‑ right side board part FPHSR24A3A 67400306 2006156 ‑ Controller Component FPHSR24A3A 67400204 1852124 ‑ Wire terminal board FPHSR24A3A 67400208 1822633 ‑ Temperature sensor FPHSR24A3A 67400209 1822634 ‑...
-
Page 108: Outdoor Unit 36K
PARTS CATALOG Figure 912 Outdoor Unit 36k ITEM PART PART DESCRIPTION USED ON MODEL NUMBER 67400730 1960394 ‑ panel parts FPHSR36A3A 67400810 panel parts FPHSR36A3B 67400307 1542217 ‑ propeller fan blade FPHSR36A3A, FPHSR36A3B 67400308 1821300 ‑ DC motor FPHSR36A3A, FPHSR36A3B 67400811 1561919 ‑... - Page 109 PARTS CATALOG Figure 912 Outdoor Unit 36k ITEM PART PART DESCRIPTION USED ON MODEL NUMBER 67401251 Electronic expansion valve FPHSR36A3B assembly 67400310 1536052 ‑ 3/8 2‑way valve FPHSR36A3A, FPHSR36A3B 67400311 1856169 ‑ 3/4 3‑way valve FPHSR36A3A 67400305 5/8 3‑way valve FPHSR36A3B 67400742 1866429 ‑...
-
Page 110: Outdoor Unit 9K
PARTS CATALOG Figure 913 115V Outdoor Unit 9K ITEM PART PART DESCRIPTION USED ON MODEL NUMBER 67400747 1832902 ‑ panel parts FPHSR09A1A 67400335 1405123 ‑ propeller fan blade FPHSR09A1A 67400182 1457759 ‑ DC motor FPHSR09A1A 67400748 1824869 ‑ motor supporter FPHSR09A1A 67400749 1824871 ‑... - Page 111 PARTS CATALOG Figure 913 115V Outdoor Unit 9K ITEM PART PART DESCRIPTION USED ON MODEL NUMBER 67400761 1824870 ‑ valve seat FPHSR09A1A 67400279 1838379 ‑ Capillary assembly FPHSR09A1A 67400280 1258653 ‑ 1/4 2‑way valve FPHSR09A1A 67400281 1407169 ‑ 3/8 3‑way valve FPHSR09A1A 67400762 1855206 ‑...
-
Page 112: Outdoor Unit 12K
PARTS CATALOG 115V Outdoor Unit 12K ITEM PART PART DESCRIPTION USED ON MODEL NUMBER 67400180 1847919 ‑ panel parts FPHSR12A1A 67400181 1556766 ‑ propeller fan blade FPHSR12A1A 67400182 1457759 ‑ DC motor FPHSR12A1A 67400183 1849292 ‑ motor supporter assy FPHSR12A1A 67400184 1846086 ‑... - Page 113 PARTS CATALOG Figure 914 115V Outdoor Unit 12K ITEM PART PART DESCRIPTION USED ON MODEL NUMBER 67400760 1822371 ‑ Compressor connect FPHSR12A1A wire 67400271 1854557 ‑ Capillary assembly FPHSR12A1A 67400272 1844583 ‑ 1/4 2‑way valve FPHSR12A1A 67400199 1335015 ‑ 3/8 3‑way valve FPHSR12A1A 67400200 1846084 ‑...
-
Page 114: Outdoor Unit 9K High Seer
PARTS CATALOG Figure 915 230v Outdoor Unit 9K HIGH SEER ITEM PART PART DESCRIPTION USED ON MODEL NUMBER 67400180 1847919 PANEL PARTS FRHSR09A3A 67400181 1556766 PROPELLER FAN FRHSR09A3A BLADE 67400182 1457759 FAN MOTOR FRHSR09A3A 67400183 1849292 MOTOR SUPPORTER FRHSR09A3A ASSY 67400184 1846086 MOUNTING PLATE FRHSR09A3A... - Page 115 PARTS CATALOG Figure 915 230v Outdoor Unit 9K HIGH SEER ITEM PART PART DESCRIPTION USED ON MODEL NUMBER 67400195 1907920 COMPRESSOR FRHSR09A3A 67400196 1847142 STRONG ELECTRICITY FRHSR09A3A CONNECT WIRE 67400197 1864846 ELECTRONIC FRHSR09A3A EXPANSION VALVE ASSEMBLY 67400198 1405371 1/4 2‑WAY VALVE FRHSR09A3A 67400199 1335015 3/8 3‑WAY VALVE...
-
Page 116: Outdoor Unit 12K High Seer
PARTS CATALOG Figure 916 230V Outdoor Unit 12K HIGH SEER ITEM PART PART DESCRIPTION USED ON MODEL NUMBER 67400180 1847919 ‑ panel parts FRHSR12A3A 67400181 1556766 ‑ propeller fan blade FRHSR12A3A 67400182 1457759 ‑ DC motor FRHSR12A3A 67400183 1849292 ‑ motor supporter assy FRHSR12A3A 67400184 1846086 ‑... - Page 117 PARTS CATALOG Figure 916 230V Outdoor Unit 12K HIGH SEER ITEM PART PART DESCRIPTION USED ON MODEL NUMBER 67400760 1822371 ‑ Compressor connect FRHSR12A3A wire 67400271 1854557 ‑ Capillary assembly FRHSR12A3A 67400272 1844583 ‑ 1/4 2‑way valve FRHSR12A3A 67400199 1335015 ‑ 3/8 3‑way valve FRHSR12A3A 67400200 1846084 ‑...
-
Page 118: Appendix
APPENDIX Appendix 1: Reference Sheet of Celsius and Farenheit Fahrenheit Fahrenheit Fahrenheit display Fahrenheit display Fahrenheit display Fahrenheit Celsius Celsius Celsius temperature temperature temperature 60.8 69/70 69.8 78/79 78.8 62/63 62.6 71/72 71.6 80/81 80.6 64/65 64.4 73/74 73.4 82/83 82.4 66/67 66.2... -
Page 119: Appendix 2: Pipe Expanding Method
APPENDIX Appendix 2: Pipe Expanding Method Pipe Pipe cutter Leaning Uneven Burr A:Cut the pip Confirm the pipe length according to the distance of indoor unit and outdoor unit. Cut the required pipe with pipe cutter. B:Remove the burrs Pipe Shaper Remove the burrs with shaper and prevent the burrs from getting into the pipe. -
Page 120: Limited Warranty
FRIEDRICH will repair or replace, at its option, any defective part without charge for the part. -
Page 121: Customer Satisfaction And Quality Assurance
CUSTOMER SATISFACTION and QUALITY ASSURANCE Friedrich is a conscientious manufacturer, concerned about customer satisfaction, product quality, and controlling warranty costs. As an Authorized Service Provider you play a vital role in these areas. By adhering to the policies and procedures you provide us with vital information on each warranty repair you complete. This information is used to identify product failure trends, initiate corrective action, and improve product quality, thereby further reducing warranty expenses while increasing customer satisfaction levels.
Need help?
Do you have a question about the FPHW091A and is the answer not in the manual?
Questions and answers
My unit works fine on the heat setting but when I change it over to cool it shuts off every single time. I cleaned the filters. I’m not sure what the problem could be.
If the Friedrich FPHW091A unit shuts off when switched to the cool setting, one possible issue is Error Code 16 in cooling mode, which indicates anti-freeze protection. This may occur if the indoor heat exchanger is iced up. In this case, you should:
1. Check if the indoor heat exchanger is iced up.
2. If yes, check the coil sensor to see if it is working correctly.
3. If the coil sensor is faulty, replace it.
4. If the sensor is working, check the air inlet and outlet of the indoor unit for any blockages.
These steps help identify and resolve the cause of the unit shutting off during cooling mode.
This answer is automatically generated