Table of Contents
Advertisement
Quick Links
Advertisement
Table of Contents

Subscribe to Our Youtube Channel
Related Manuals for Epson ELPDC05


Summary of Contents for Epson ELPDC05
- Page 1 Epson ELPDC05 ® High Resolution Document Camera User’ s Guide...
- Page 2 Epson product. Epson is not responsible for any use of this information as applied to other products. Neither Seiko Epson Corporation nor its affiliates shall be liable to the purchaser of this product or third parties for damages, losses, costs, or expenses incurred by purchaser or third parties as a result of: accident, misuse, or abuse of this product or unauthorized modifications, repairs, or alterations to this product, or (excluding the U.S.) failure to...
-
Page 3: Table Of Contents
Contents Welcome ........7 Getting the Most from Your Document Camera . - Page 4 Adjusting the Image ....... 25 Using the Pointer ....... . . 30 Adjusting Settings with the On-Screen Display .
- Page 5 Solving Problems Solving Problems with the Image ..... 44 Solving Problems with the Remote Control ... . . 47 Where To Get Help .
-
Page 7: Welcome
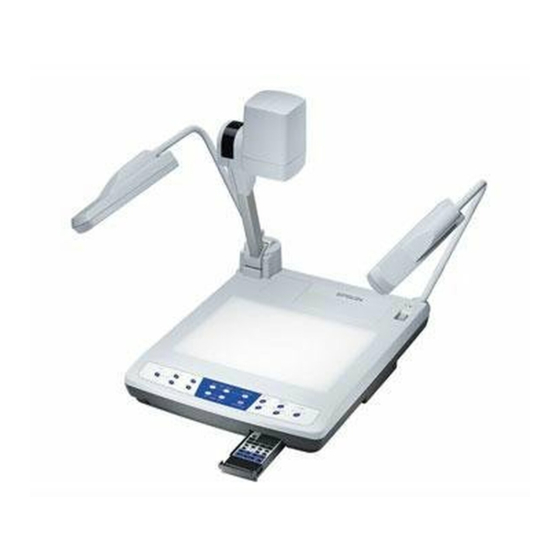
Welcome ® our versatile Epson ELPDC05 High Resolution Document Camera can be connected to most types of projectors and display devices. From boardrooms to auditoriums to courtrooms, you can show fine detail with a large variety of presentation materials. You can even display three-dimensional objects with perfect illumination and depth of focus. -
Page 8: Getting The Most From Your Document Camera
Getting the Most from Your Document Camera Depending on your presentation, you can take advantage of any or all of these options: Using Your Documentation This book contains all the information you need to set up and use your document camera. Please follow these guidelines as you read through it: Welcome Connecting to a projector or TV/computer monitor... -
Page 9: Getting More Information
Epson PrivateLine get help fast. Call (800) 637-7661 and enter the PIN on the card included with your document camera. Or take advantage of Epson’s electronic support services 24 hours a day. See page 48 for more information. - Page 10 Welcome...
-
Page 11: Setting Up The Document Camera
Setting Up the Document Camera his chapter explains how to set up the document camera for a video presentation. You’ll find instructions for: Unpacking the document camera Installing batteries in the remote control Positioning the document camera Unfolding the document camera Connecting to a projector or TV/computer monitor Connecting to a computer Connecting a mouse to the document camera... -
Page 12: Unpacking The Document Camera
Unpacking the Document Camera After unpacking the document camera, make sure you have all the items shown below: Batteries Epson Utility Software Remote control CD-ROM Document camera Mouse Power cord S-video cable RGB video cable USB cable RCA cable Save all the packaging in case you need to ship the document camera later. -
Page 13: Installing Batteries In The Remote Control
Installing Batteries in the Remote Control Before using the remote control, install its batteries. 1. Press down on the battery cover and slide it off. 2. Insert two AAA batteries as shown. 3. Replace the battery compartment cover. caution When replacing batteries, take the following precautions: Don’t mix old and new... -
Page 14: Positioning The Document Camera
Positioning the Document Camera Before connecting the document camera, you need to decide where to caution place it. Follow these guidelines: Don’t hold or lift the document camera by the camera head arm or lighting unit arms; this may damage them. -
Page 15: Unfolding The Document Camera
Unfolding the Document Camera Follow these steps to unfold the document camera: 1. Raise the arm for the left lighting unit until it stops. Then raise the right lighting unit. 2. Position the lighting units so that they face the stage (downward). 3. -
Page 16: Connecting To A Projector Or Tv/Computer Monitor
You can connect the document camera to any projector or monitor that has a standard RGB video, composite video, or S-video input port. Epson projectors support these connections. Most computer monitors support only RGB video, while many television monitors support composite video. Follow the instructions below to connect the document camera to your display device. -
Page 17: Connecting The Rgb Video Cable
Connecting the RGB Video Cable Before you start, make sure your document camera and projector or computer monitor are turned off. 1. Connect one end of the RGB video cable to the document camera’s port. RGB OUT RGB OUT port 2. -
Page 18: Connecting The S-Video Cable
Connecting the S-Video Cable Before you start, make sure your document camera and projector or TV are turned off. 1. Connect one end of the S-video cable to the document camera’s 2. Connect the other end to the S-video input port on the projector Connecting to a Computer The document camera comes with two RGB video input ports. -
Page 19: Connecting A Mouse
Before you start, make sure your document camera and computer(s) are turned off. 1. Connect one end of the RGB video cable to the port on the document camera. RGB input ports 2. Connect the other end of the RGB video cable to your computer’s RGB video output (monitor) port. -
Page 20: Adjusting The Camera Dip Switches
Adjusting the Camera DIP Switches The document camera has two DIP switches that control special note settings. Refer to the table below to make sure they are set correctly for Make sure the document your configuration. camera is turned off before you change the DIP switch settings. -
Page 21: Using The Document Camera
Using the Document Camera nce you have set up the document camera, you’re ready to turn it on, adjust the image, and give your presentation. This chapter covers the following: Turning on the document camera and other equipment Switching between picture sources Adjusting the lighting Adjusting the image Using the pointer... -
Page 22: Turning On Your Equipment
Turning On Your Equipment Make sure your document camera and other equipment are set up and connected correctly, as described in Chapter 1. Always turn on your projector or monitor first. Then turn on your document camera, as described below, followed by any other equipment you’ve connected to it. -
Page 23: What To Do If You See A Blank Screen
5. Place your presentation material on the stage. You should see an image on screen. Once you see your image, turn to page 25 for instructions on making adjustments. If your image doesn’t appear, see the next section for help. When you’re done with your presentation, turn off the document camera as described on page 37. -
Page 24: Switching Between Picture Sources
Switching Between Picture Sources If you have an external video source connected to the document note camera, such as a laptop or desktop computer, you can switch between You can also press the RGB1 the video source and the camera. , and buttons RGB2... -
Page 25: Turning The Lamps Off And On
Turning the Lamps Off and On Press the button on the remote control to turn off the UPPER LAMP lamps. Press it again when you want to turn the lamps back on. There will be a slight delay before the lamps turn back on. Press the button on the remote control to turn the base BASE LAMP... -
Page 26: Zooming And Focusing Your Image
Zooming and Focusing Your Image Use the enlarge the image, and use the document camera will automatically focus the image. If you change items on the stage, press the note control or the The auto focus function focus the image. The indicator light on the document camera flashes works up to a height of until the image is focused. -
Page 27: Doubling The Size Of The Image
Doubling the Size of the Image You can instantly double the size of the displayed image by pressing button on the remote control, or pressing the right mouse button if a mouse is attached to the document camera’s (see page 19). To return the image to its original size, press the button or the right mouse button again. -
Page 28: Increasing Image Contrast
Increasing Image Contrast Some images display best when the contrast between the image and its background is increased. To increase contrast, press the button on the document camera. To turn contrast off, press the button again. Adjusting the White Balance Normally, the document camera automatically adjusts the screen’s white balance. -
Page 29: Switching Between Color And Black And White
Switching between Color and Black and White Sometimes you may want to switch to a black and white image. For example, a black and white display allows you to project text without color interference, resulting in a sharper image. To switch from color to black and white, press the button on the remote control. -
Page 30: Using The Pointer
Using the Pointer The pointer lets you direct attention to specific sections of your Center presentation material. You can choose from two types of pointers in wheel four colors. Left Right mouse mouse To display the pointer, connect the mouse that came with the button button document camera to the... - Page 31 The table below lists the various functions and their descriptions. To select an item, point and click the left mouse button or center wheel. Icon Name Upper Lamps On/Off Base Lamp ON/OFF Color/B&W Pause On/Off Auto Focus Zoom Tele/Wide Focus Near/Far Iris Open/Close...
- Page 32 Icon Name White Balance White Balance Automatic White Balance One Touch White Balance Manual Image Rotation Positive/Negative Film Display Aperture Selection On/Off Gamma Selection Save Settings Restore Defaults Using the Document Camera Function Displays the white balance adjustment menu. Automatically adjusts the white balance and corrects color casts.
-
Page 33: Projecting Transparencies
Projecting Transparencies The document camera enables you to project both positive and negative film with great clarity. Follow these steps: 1. Place your film or slides on the document camera’s stage with the dull side facing up. 2. Do one of the following to turn the upper lamps off and the base lamp on: Press the UPPER LAMP... -
Page 34: Saving Settings And Images
Saving Settings and Images You can save up to eight groups of document camera settings for later use. That way, if you want to present the same type of materials (for note example, negative film), you can quickly recall your settings with a Camera settings remain in memory even when you turn simple push of a button. -
Page 35: Using The Camera Head As A Conventional Video Camera
Installing the Software Follow these steps to install the Image Mate software: 1. Insert the Epson Utility Software CD-ROM in your drive. 2. Open the CD-ROM window. For Windows XP, click then double-click the CD-ROM icon. -
Page 36: Viewing The On-Screen Manual
5. When installation is complete, click Viewing the On-Screen Manual To view the on-screen manual, do the following: 1. Insert the Epson Utility Software CD-ROM in your drive. 2. Open the CD-ROM window. 3. If you have Adobe 4. Double-click the 5. -
Page 37: Turning Off And Storing The Document Camera
Turning Off and Storing the Document Camera When you’ve finished using the document camera, follow these steps to turn off and store it. If you’re using a monitor or projector, shut it down last. 1. Turn off the document camera. 2. - Page 38 5. Rotate the camera head to its storage position. 6. Press the camera arm release button as you carefully lower the 7. Lower the arm for the right lighting unit, and then lower the arm Using the Document Camera camera arm onto the stage. Camera arm release button for the left lighting unit.
-
Page 39: Maintaining And Transporting The Document Camera
Maintaining and Transporting the Document Camera on a regular basis is keep the lenses and stage clean. Any dirt or smears warning Before you clean any part of on the lenses or stage may show up on your displayed image. the document camera, turn it You should not replace the lamps or any other parts. -
Page 40: Cleaning The Lenses
Cleaning the Lenses Clean the lenses whenever you notice dirt or dust on the surface. Maintaining and Transporting the Document Camera Use a canister of compressed air to remove dust. To remove dirt or smears on the lenses, use lens-cleaning paper. If necessary, moisten a soft cloth with lens cleaner and gently wipe the lens surface. -
Page 41: Cleaning The Document Camera Case
Cleaning the Document Camera Case Before you clean the case, first turn off the document camera and unplug the power cord. To remove dirt or dust, wipe the case with a soft, dry, lint-free cloth. To remove stubborn dirt or stains, moisten a soft cloth with water and a neutral detergent. -
Page 42: Transporting The Document Camera
Transporting the Document Camera The document camera contains many glass and precision parts. If you note need to transport it, follow these guidelines to prevent damage to the Epson shall not be liable for document camera: any damages incurred during transportation. -
Page 43: Solving Problems
Solving Problems his chapter helps you solve problems with your document camera, and tells you how to contact technical support for problems you can’t solve yourself. This chapter explains the following: Solving problems with the image Solving problems with the remote control Contacting technical support... -
Page 44: Solving Problems With The Image
No image appears on the screen. The image contains static or noise. note To order accessories from Epson, call (800) 873-7766, or visit the Epson Store www.epsonstore.com (U.S. sales only). In Canada, call (800) 463-7766 for dealer referral. Solving Problems Check that all cables are properly connected (see Chapter 1) and everything is turned on. - Page 45 For best image quality when projecting a computer image, connect your projector or monitor to the document camera’s port. RGB OUT The image is blurry. There may be dirt on the lenses. Clean the lenses as described on page 40. Try pressing the (Auto Focus) button on the remote control, or the...
- Page 46 The image is garbled. A color image displays in black and white. Solving Problems Make sure your computer and/or projector or monitor are securely connected at both ends to the document camera. Check the DIP switches on the document camera. If video output is set to NTSC and the document camera is connected to a monitor that supports PAL, the image may appear garbled.
-
Page 47: Solving Problems With The Remote Control
Solving Problems with the Remote Control Make sure you are within 23 feet (7 m) of the document camera, and within range of the document camera’s sensor (approximately 30° to the left or right and 15° above or below). The remote control batteries may not be installed correctly or may be low on power. -
Page 48: Where To Get Help
Telephone Support Services To use the Epson PrivateLine Support service, call (800) 637-7661 and enter the PIN on the Epson PrivateLine Support card included with your document camera. This is the fastest way to speak to a live representative, and it’s free. This service is available 6 Pacific Time, Monday through Friday, for the duration of your warranty period. -
Page 49: Technical Specifications
Technical Specifications General 1/3 inch (848,676 progressive scan) Resolution 1024 × 768 pixels (Effective resolution, or overscan, is 1034 × 779 pixels) Lens F=2.8, f=4.7 to 84.6 mm Frame speed 20 frames per second Shooting area 13.7 × 10.2 in. (350 × 260 mm) max. 1.0 ×... -
Page 50: Lamps
Lamps Upper Base Remote Control Range Angle from IR receiver Batteries Dimensions Weight Folded (h × w × d) Unfolded (h × w × d) Electrical Rated frequency Power supply Power consumption Rated current Environmental Temperature Humidity Technical Specifications High frequency fluorescent, 6 W × 2 High frequency fluorescent 23 feet (7 m) Approx. -
Page 51: Safety
Safety United States FCC 47CFR Part 15B Class B (DoC) UL1950 3rd Edition Canada ICES-003 Class B CSA C22.2 No.950-95 (cUL) Compatible Video Formats The document camera supports NTSC and PAL video standards, as well as the monitor display formats listed below. Mode Refresh Rate (Hz) VGA1... - Page 52 Mode SXGA—75 SXGA—85 UXGA—60 UXGA—65 UXGA—70 UXGA—75 UXGA—85 MAC 13 MAC 16 MAC 19 MAC 21 PC98 Technical Specifications Refresh Rate (Hz) Resolution × 75.025 1280 1024 × 85.024 1280 1024 × 1600 1200 × 1600 1200 × 1600 1200 ×...
-
Page 53: Notices
Never point the lens into the sun, as this may damage the document camera. Use only attachments and accessories recommended by Epson. Never use the document camera near water—for example, near a bath tub, kitchen sink, laundry tub, or swimming pool. Avoid humid environments, such as a wet basement. - Page 54 Do not block or cover openings in the base, or insert objects through the slots. These openings are provided for ventilation to protect the document camera from overheating. Never place the document camera on a bed, sofa, rug, or similar surface. Do not place the document camera in a built-in installation, such as a bookcase or rack, unless proper ventilation is provided and the guidelines in this manual are followed.
-
Page 55: Remote Control Information
Please consult your state and local regulations regarding disposal or recycling. Do not put in the trash. To make sure that only Epson replacement parts are used, refer all servicing to Epson-authorized servicers. Substitution of unauthorized parts may result in fire, electric shock or other hazards. - Page 56 These conditions commonly cause problems for most infrared-controlled equipment. Try the following if you experience problems: If the remote control still does not work properly, you can always use the buttons located on the document camera control panel, even in an environment containing one of the conditions listed above.
-
Page 57: Declaration Of Conformity
Declaration of Conformity According to 47CFR, Part 2 and 15 Class B Personal Computers and Peripherals; and/or CPU Boards and Power Supplies used with Class B Personal Computers Epson America, Inc. Located at: 3840 Kilroy Airport Way MS: 3-13 Long Beach, CA 90806... -
Page 58: Fcc Compliance Statement
FCC Compliance Statement For United States Users This equipment has been tested and found to comply with the limits for a Class B digital device, pursuant to Part 15 of the FCC Rules. These limits are designed to provide reasonable protection against harmful interference in a residential installation. -
Page 59: Warranty
Epson Dealer or Epson Customer Care Center. Epson will, at its option, repair or replace on an exchange basis the defective unit, without charge for parts or labor. When warranty service involves the exchange of the product or of a part, the item replaced becomes Epson property. - Page 60 To locate an Authorized Epson Servicer nearest you, call the Epson Connection at (562) 276-4394 in the U.S. and (905) 709-3839 in Canada or write to: Epson America, Inc., P. O. Box 93012, MS: 6-33, Long Beach, CA 90809-3012. Notices...
-
Page 61: Index
22 to 23 unfolding, 15 to 16 Electrical specifications, 50 Enlarging image, 26 to 27, 31 Environmental specifications, 50 Epson technical support, 9, 48 FAR button, 26 FCC compliance statement, 58 Film, projecting, 32 to 33 Focusing image, 26, 31... - Page 62 Help, 9, 48 Image brightness, 27 changing to black and white, 29, 31 contrast, 28 enlarging and reducing, 26 to 27, 31 focusing, 26, 31 freezing, 29, 31 rotating, 28, 32 saving and recalling, 34 sources, selecting, 24 troubleshooting, 23, 44 to 46 white balance, 28, 32 Image Mate Software, 35 to 36 Infrared receiver, 14, 50...
- Page 63 Service, see Technical support Settings, saving, 32 to 34 Shooting speed, 35, 49 Slides, projecting, 32 to 33 Software, using, 35 to 36 Specifications dimensions, 50 electrical, 50 environmental, 50 general, 49 lamps, 50 lens, 49 power, 50 remote control, 50 safety, 51 video formats, 51 to 52 Storing document camera, 37 to 38...
- Page 64 Index...
Need help?
Do you have a question about the ELPDC05 and is the answer not in the manual?
Questions and answers