Table of Contents
Advertisement
Advertisement
Table of Contents

Related Manuals for Solt GGSSL60DR2S


Summary of Contents for Solt GGSSL60DR2S
- Page 1 MODEL GGSSL60DR2S User Manual 60cm Slide-out Rangehood...
- Page 2 Purchase Details For future reference, please record the following The rating plate of your hob is located on the rear of the information which can be found on the rating plate appliance. Therefore please fit the duplicate data plates and the date of purchase which can be found on your or label on the outside of the cupboard to sure that the sales invoice.
-
Page 3: Table Of Contents
2 Purchase Details Contents 5 Welcome 6 General Safety Instructions 8 Specifications & Components 9 Installation Instructions 12 Operating Your Rangehood 12 Cleaning & Maintenance 14 Troubleshooting 17 Technical Data 18 Warranty Information Customer Care Sôlt recommends the use of original spare parts. When contacting our customer service team, please ensure that you have the following information at hand (which can be found on your appliances’... - Page 4 This page is intentionally left blank...
-
Page 5: Welcome
Welcome Congratulations on purchasing your new Slide-out Rangehood! The Sôlt brand is proudly distributed within Australia by Residentia Group Pty Ltd. Please refer to the warranty card at the rear of this manual Residentia Group — for information regarding your product’s parts and labour Head Office. -
Page 6: General Safety Instructions
correct or TIONS ood is 650 General Safety Instructions aragraphs ngly, you late fixed to pliance. For your safety, the information in this manual must be INSTALLATION adequate followed to minimize the risk of fire or explosion, electric • The manufacturer will not be held liable for any shock, or to prevent property damage, personal injury or damages resulting from incorrect or improper eter 120mm. - Page 7 Cleaning and user mainten “CAUTION: Accessible part MAINTENANCE USAGE CONDITIONS AND RESTRICTIONS DISPOSAL Switch off or unplug the app • The rangehood has been designed exclusively for The symbol on the packaging indicates that this product domestic use to eliminate kitchen smells. may not be treated as household waste.
-
Page 8: Specifications & Components
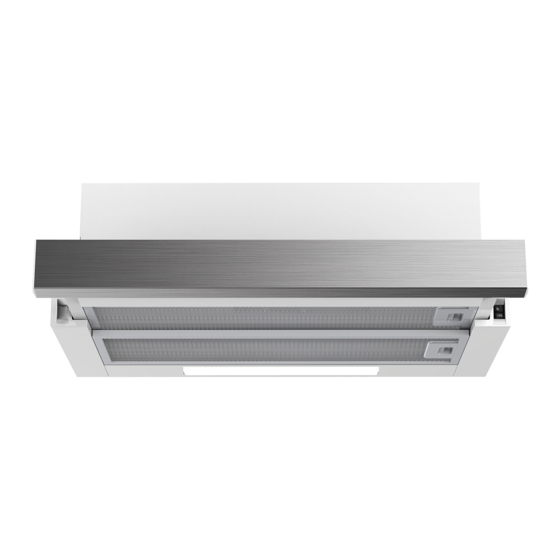
Double Motor OPTIONAL 28/18 Ref. Qty. Product Components Model Typical installation tool required GGSSL60DR2S You’ll most likely require the following tools/equipment Hood Body, complete (not supplied) for the installation of your rangehood. Blower, Filter. Product dimensions (W, D, H mm) •... -
Page 9: Installation Instructions
unit:mm unit:mm unit:mm Installation Instructions Min. Min. Min. Min. Electric Cooktop Gas Cooktop Min. 650mm Min. 650mm Min. Min. Ø118 Security hole Option Option Double motor Double motor Option Double motor OPTIONAL 28/18... - Page 10 purified and discharged into the house. Installation Instructions (continued) CHOOSE A VENTING MODE CHOOSE A VENTING MODE Here two venting modes, extraction-air mode and recirculation mode, before installing should Here two venting modes, extraction-air mode and recirculation mode, before installing should VENTILATION be select one of them.
- Page 11 INSTALLATION METHOD 1 INSTALLATION METHOD 1 Ø118 METHOD #1 Security hole Ø118 Security hole OPTIONAL 28/18 According to the figure, make sure the position of hood in the cabinet. The wood strips should be line up with the 4 keyholes slots on the top of the range hood. On the cabinet, install 4 screws (supplied) according to the relative position of 4 key holes on the bottom of hood.
-
Page 12: Operating Your Rangehood
dition of the appliance: there are visible defects. Operating Your Rangehood parts of the appliance have been securely fitt ed. BEFORE FIRST USE of the cooker hood. (For some models) Operation To ensure that the rangehood is in a safe condition: Check beforehand eeds for the motor and on off switch of the lamp. - Page 13 Cleaning and Maintenance (continued) Cleaning the grease filters (recommended every two months) GREASE FILTERS Keeping this filters clean will keep the rangehood extraction performance at an optimum. CLEANING METAL SELF-SUPPORTING GREASE FILTERS Ensure you never use a corrosive detergent during cleaning. ...
-
Page 14: Troubleshooting
Troubleshooting Operation in case of emergency In the event of an emergency you should: • Switch off all rangehood controls • Switch off the rangehood off at the power outlet and immediately unplug • Please contact the Residentia Group Support Team on 1300 11 HELP (4357). Some minor faults can be fixed by referring to the instructions given in the table below. - Page 15 To replace the LED light, proceed as follows: 1. Disconnect the appliance from the mains or switch off the circuit breaker. 2. Remove the metal filters (see Cleaning and Replacing Filters) . 3. Remove the light by levering its fitting from the hood body(this may require pressure or force to be applied) and disconnect the connector of the light.
- Page 16 This page is intentionally left blank...
-
Page 17: Technical Data
Technical Data RATING PLATE... -
Page 18: Warranty Information
Warranty Information WARRANTY TERMS & CONDITIONS IN THIS WARRANTY SLIDE-OUT RANGEHOOD ‘acceptable quality’ as referred to in clause 10 of this warranty has the same meaning referred to in the This document sets out the terms and conditions of the ACL;... - Page 19 You will bear the cost of transportation, travel and For Appliances and services provided by Residentia delivery of the Appliance to and from Residentia Group in Australia, the Appliances come with a Group or its ASR. If you reside outside of the service guarantee by Residentia Group that cannot be area, you will bear the cost of: excluded under the Australian Consumer Law.
-
Page 20: 1300 11 4357 | E. Support@Residentiagroup.com.au
An initiative by Residentia Group T. 1300 11 4357 E. support@residentiagroup.com.au www.solt.house...
Need help?
Do you have a question about the GGSSL60DR2S and is the answer not in the manual?
Questions and answers