Table of Contents
Advertisement
Quick Links
Advertisement
Table of Contents

Related Manuals for ZyXEL Communications PM7300-T0


Summary of Contents for ZyXEL Communications PM7300-T0
- Page 1 User’s Guide PM7300-T0 XGS-PON SFU with 10G LAN Default Login Details Version 5.42 Edition 1, 07/2021 LAN IP Address http://192.168.0.1 User Name admin Password See the device label Copyright © 2021 Zyxel and/or its affiliates. All Rights Reserved.
- Page 2 Related Documentation • Quick Start Guide The Quick Start Guide shows how to connect the PM7300-T0 and get up and running right away. • More Information Go to support.zyxel.com to find other information on the PM7300-T0...
-
Page 3: Document Conventions
> Home Networking means you first click Network Setting in the navigation panel, then the Home Networking sub menu to get to that screen. Icons Used in Figures Figures in this user guide may use the following generic icons. The PM7300-T0 icon is not an exact representation of your device. Generic Router... -
Page 4: Table Of Contents
Contents Overview Contents Overview User’s Guide ............................8 Introducing the PM7300-T0 ........................9 Hardware ............................... 11 The Web Configurator ......................... 14 System Info ............................21 Broadband ............................23 Home Networking ..........................26 Certificates ............................28 Log ................................. 35 Traffic Status ............................37 System .............................. -
Page 5: Table Of Contents
Introducing the PM7300-T0 .........................9 1.1 Overview ............................9 1.1.1 Multi-Gigabit Ethernet ......................9 1.2 Ways to Manage the PM7300-T0 ....................9 1.3 Good Habits for Managing the PM7300-T0 ................. 10 Chapter 2 Hardware ............................11 2.1 Device Panels ..........................11 2.1.1 LEDs (Lights) ........................... 11 2.1.2 Panel Ports &... - Page 6 9.1.1 What You Can Do in this Chapter ..................37 9.2 WAN Status ............................37 9.3 LAN Status ............................38 Chapter 10 System..............................40 10.1 Overview ............................40 10.2 The System Screen ........................40 Chapter 11 User Account............................41 PM7300-T0 User’s Guide...
- Page 7 15.3 The Reboot Screen ........................50 Chapter 16 Troubleshooting..........................52 16.1 Power, Hardware Connections, and LEDs ................. 52 16.2 PM7300-T0 Access and Login ...................... 53 16.3 Internet Access ..........................54 Part II: Appendices ..................56 Appendix A Customer Support ....................... 57 Appendix B Legal Information ......................
-
Page 8: User's Guide
User’s Guide... -
Page 9: Introducing The Pm7300-T0
H A P T E R Introducing the PM7300-T0 1.1 Overview The PM7300-T0 is a PON (Passive Optical Network) modem with one 10 Gbps Multi-Gigabit Ethernet LAN port. 1.1.1 Multi-Gigabit Ethernet The Multi-Gigabit Ethernet port on the PM7300-T0 supports a maximum connection speed of 10 Gbps, dependent on cable type and length. -
Page 10: Good Habits For Managing The Pm7300-T0
• FTP. Use FTP for firmware upgrades and configuration backup or restore. 1.3 Good Habits for Managing the PM7300-T0 Do the following things regularly to make the PM7300-T0 more secure and to manage the PM7300-T0 more effectively. • Change the Web Configurator password. Use a password that is not easy to guess and that consists of different types of characters, such as numbers and letters. -
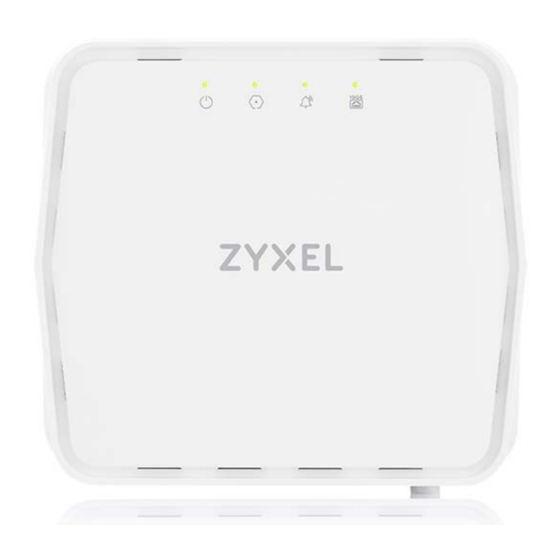
Page 11: Hardware
H A P T E R Hardware 2.1 Device Panels The following show the panels on the PM7300-T0. Figure 2 Front Panel 2.1.1 LEDs (Lights) The LED indicators are located on the top panel. Table 2 PM7300-T0 LED Behavior COLOR... -
Page 12: Panel Ports & Buttons
Press the ON/OFF button after connecting the power adapter to start the PM7300-T0. 2.1.3 RESET Button Insert a thin object into the RESET hole of the PM7300-T0 to reload the factory-default configuration file if you forget your password or IP address, or you cannot access the Web Configurator. This means that you will lose all configurations that you had previously saved. - Page 13 Chapter 2 Hardware Figure 4 Reset Button Make sure the PM7300-T0 is connected to power and the POWER LED is on. Using a thin item, press the RESET button for more than 5 seconds. PM7300-T0 User’s Guide...
-
Page 14: The Web Configurator
• Java permissions (enabled by default). 3.1.1 Accessing the Web Configurator Make sure your PM7300-T0 hardware is properly connected (refer to the Quick Start Guide). Launch your web browser and go to http://192.168.0.1. A password screen displays. To access the administrative Web Configurator and manage the PM7300- T0, type the default username admin and the randomly assigned default password (see the device label) in the password screen and click Login. - Page 15 The following screen displays if you have not yet changed your password. Enter a new password, retype it to confirm and click Apply. Figure 6 Change Password Screen The Connection Status screen appears. Use this screen to configure basic Internet access and wireless settings. Figure 7 Connection Status PM7300-T0 User’s Guide...
-
Page 16: Web Configurator Layout
• A - Title bar: this shows the Zyxel logo and device model name. • B - Menu: click this to show the navigation panel and side bar. • C - Main window: this shows the PM7300-T0’s basic status information. 3.2.1 Settings Icon Click this icon ( to see the side bar and navigation panel. - Page 17 Theme: Click this icon to select a color that you prefer and apply it to the Web Configurator. Language: Select the language you prefer. Restart: Click this icon to reboot the PM7300-T0 without turning the power off. Logout: Click this icon to log out of the Web Configurator.
-
Page 18: Navigation Panel
(settings) or reset the factory default settings. Reboot Reboot Use this screen to reboot the PM7300-T0 without turning the power off. 3.2.3 Dashboard Use the menu items in the navigation panel on the right to open screens to configure PM7300-T0 features. PM7300-T0 User’s Guide... -
Page 19: Widget And Check Icon
) in the lower left corner to arrange the screen order. The following screen appears. Select a block and hold it to move around. Click the Check icon ( ) in the lower left corner to save the changes. PM7300-T0 User’s Guide... - Page 20 Chapter 3 The Web Configurator Figure 11 Check Icon PM7300-T0 User’s Guide...
-
Page 21: System Info
You can expand this screen to view the WAN/LAN interface status and LAN IP address information. 4.2 The System Info Screen Use this screen to view the basic system information of the PM7300-T0. Figure 12 System Info Click the Arrow icon ( ) to view more information on the status of your WAN and LAN interfaces. - Page 22 System UpTime This field displays how long the PM7300-T0 has been running since it last started up. The PM7300-T0 starts up when you plug it in, when you restart it (Maintenance > Reboot), or when you reset it. Interface Status Virtual ports are shown here.
-
Page 23: Broadband
ISP. 5.2 Broadband Settings Use this screen to change your PM7300-T0’s Internet access settings. The summary table shows you the configured WAN services (connections) on the PM7300-T0. Use information provided by your ISP to configure WAN settings. -
Page 24: Add/Edit Internet Connection
This shows whether the PM7300-T0 act as an IGMP proxy on this connection. This shows whether NAT is activated or not for this connection. Default This shows whether the PM7300-T0 use the WAN interface of this connection as the system Gateway default gateway. - Page 25 802.1q Type the VLAN ID number (from 0 to 4094) for traffic through this connection. Cancel Click Cancel to exit this screen without saving any changes. Apply Click Apply to save your changes. PM7300-T0 User’s Guide...
-
Page 26: Home Networking
6.2 The Home Networking Screen Use this screen to set the Local Area Network IP address and subnet mask of your PM7300-T0. Click Network Setting > Home Networking. Follow these steps to configure your LAN settings. - Page 27 DESCRIPTION LAN IP Setup IP Address Enter the LAN IPv4 address you want to assign to your PM7300-T0 in dotted decimal notation, for example, 192.168.0.1 (factory default). Subnet Mask Type the subnet mask of your network in dotted decimal notation, for example 255.255.255.0 (factory default).
-
Page 28: Certificates
• The Local Certificates screen lets you generate certification requests and import the PM7300-T0's CA- signed certificates (Section 7.3 on page 28). • The Trusted CA screen lets you save the certificates of trusted CAs to the PM7300-T0 (Section 7.4 on page 32). - Page 29 LABEL DESCRIPTION Private Key is Select the check box and enter the private key into the text box to store it on the PM7300-T0. protected by a The private key should not exceed 63 ASCII characters (not including spaces). password Browse / Choose Click Browse or Choose File to find the certificate file you want to upload.
-
Page 30: Create Certificate Request
Click Security > Certificates > Local Certificates and then Create Certificate Request to open the following screen. Use this screen to have the PM7300-T0 generate a certification request. To create a certificate signing request, you need to enter a common name, organization name, state/province name, and the two-letter country code for the certificate. - Page 31 This field displays the CSR (Certificate Signing Request) information of this certificate. The CSR will be provided to a certificate authority, and it includes information about the public key, organization name, domain name, location, and country of this certificate. Back Click Back to return to the previous screen. PM7300-T0 User’s Guide...
-
Page 32: Trusted Ca
Click Security > Certificates > Trusted CA to open the following screen. This screen displays a summary list of certificates of the certification authorities that you have set the PM7300-T0 to accept as trusted. The PM7300-T0 accepts any valid certificate signed by a certification authority on this list as being trustworthy;... -
Page 33: Import Trusted Ca Certificate
Click Back to return to the previous screen. 7.4.2 Import Trusted CA Certificate Click the Import Certificate button in the Trusted CA screen to open the following screen. The PM7300-T0 trusts any valid certificate signed by any of the imported trusted CA certificates. Certificates should be in one of the following formats: Binary X.509, PEM (base-64) encoded, Binary PKCS#7, or PEM (base-64) - Page 34 Click Browse or Choose File and select the certificate you want to upload. Path Choose File/ Click this button to find the certificate file you want to upload. Browse Cancel Click Cancel to exit this screen without saving any changes. Click OK to save your changes. PM7300-T0 User’s Guide...
-
Page 35: Log
The Web Configurator allows you to choose which categories of events and/or alerts to have the PM7300-T0 log and then display the logs or have the PM7300-T0 send them to an administrator (as e- mail) or to a syslog server. - Page 36 This field displays the severity level of the log that the device is to send to this syslog server. Category This field displays the type of the log. Messages This field states the reason for the log. PM7300-T0 User’s Guide...
-
Page 37: Traffic Status
Click System Monitor > Traffic Status to open the WAN screen. The figures in this screen show the total number of bytes received and sent through the PM7300-T0’s WAN interfaces. Packet statistics for each WAN interface are listed in the tables below. -
Page 38: Lan Status
Table 17 System Monitor > Traffic Status > WAN LABEL DESCRIPTION Refresh Interval Select how often you want the PM7300-T0 to update this screen. Connected This shows the name of the WAN interface that is currently connected. Interface Packets Sent Data This indicates the number of transmitted packets on this interface. - Page 39 Table 18 System Monitor > Traffic Status > LAN LABEL DESCRIPTION Refresh Interval Select how often you want the PM7300-T0 to update this screen. Interface This shows the LAN or wireless LAN interface on the PM7300-T0. Bytes Sent This indicates the number of bytes transmitted on this interface.
-
Page 40: System
H A P T E R System 10.1 Overview On the System screen, you can name your PM7300-T0 (Host) and give it an associated domain name for identification purposes. 10.2 The System Screen Click Maintenance > System to open the following screen. Assign a unique name to the PM7300-T0 so it can be easily recognized on your network. -
Page 41: User Account
11.1 Overview In the User Account screen, you can view the settings of the “admin” and other user accounts that you use to log in the PM7300-T0. 11.2 The User Account Screen Click Maintenance > User Account to open the following screen. -
Page 42: The User Account Add/Edit Screen
Clear the check box to disable the user account. Select the check box to enable it. User Name This field displays the name of the account used to log into the PM7300-T0 Web Configurator. Retry Times This field displays the number of times consecutive wrong passwords can be entered for this account. - Page 43 Enter the number of times consecutive wrong passwords can be entered for this account. 0 means there is no limit. Idle Timeout Enter the length of inactive time before the PM7300-T0 will automatically log the user out of the Web Configurator. Lock Period Enter the length of time a user must wait before attempting to log in again after a number of consecutive wrong passwords have been entered as defined in Retry Times.
-
Page 44: Remote Management
Use this screen to configure which services can access the PM7300-T0 and which interfaces can allow them. You can also specify the port numbers the services must use to connect to the PM7300-T0. Click Maintenance > Remote Management to open the following screen. -
Page 45: Log Setting
PM7300-T0 records in the Logs Setting screen. 13.2 The Log Settings Screen To change your PM7300-T0’s log settings, click Maintenance > Log Setting. The screen appears as shown. Figure 31 Maintenance > Log Setting The following table describes the fields on this screen. - Page 46 Table 24 Maintenance > Log Setting (continued) LABEL DESCRIPTION OMCI Select OMCI to record information related to the ONT Interface to monitor or troubleshoot problems. Apply Click Apply to save your changes. Cancel Click Cancel to restore your previously saved settings. PM7300-T0 User’s Guide...
-
Page 47: Firmware Upgrade
H A P T E R Firmware Upgrade 14.1 Overview This chapter explains how to upload new firmware to your PM7300-T0. You can download new firmware releases from your nearest Zyxel FTP site (or www.zyxel.com) to use to upgrade your device’s performance. - Page 48 PM7300-T0 again. Table 25 Maintenance > Firmware Upgrade LABEL DESCRIPTION Upgrade Firmware Restore Default Click the check box to have the PM7300-T0 automatically reset itself after the new firmware is Settings After uploaded. Firmware Upgrade Current This is the present Firmware version and the date created.
-
Page 49: Backup/Restore
Figure 34 Maintenance > Backup/Restore Backup Configuration Backup Configuration allows you to back up (save) the PM7300-T0’s current configuration to a file on your computer. Once your PM7300-T0 is configured and functioning properly, it is highly recommended that you back up your configuration file before making configuration changes. The backup configuration file will be useful in case you need to return to your previous settings. -
Page 50: The Reboot Screen
Click the Reset button to clear all user-entered configuration information and return the PM7300-T0 to its factory defaults. The following warning screen appears. You can also press the RESET button on the rear panel to reset the factory defaults of your PM7300-T0. Refer to Section 1.4.6 on page 14... - Page 51 Chapter 15 Backup/Restore Figure 36 Maintenance > Reboot PM7300-T0 User’s Guide...
-
Page 52: Troubleshooting
Make sure you are using the power adapter or cord included with the PM7300-T0. Make sure the power adapter or cord is connected to the PM7300-T0 and plugged in to an appropriate power source. Make sure the power source is turned on. -
Page 53: Pm7300-T0 Access And Login
The default LAN IP address is 192.168.0.1. If you changed the IP address and have forgotten it, you might get the IP address of the PM7300-T0 by looking up the IP address of the default gateway for your computer. To do this in most Windows computers, click Start >... -
Page 54: Internet Access
You cannot log in to the Web Configurator while someone is using Telnet to access the PM7300-T0. Log out of the PM7300-T0 in the other session, or ask the person who is logged in to log out. Turn the PM7300-T0 off and on. - Page 55 Disconnect all the cables from your device and reconnect them. If the problem continues, contact your ISP. I cannot access the PM7300-T0 anymore. I had access to the PM7300-T0, but my connection is not available anymore. Your session with the PM7300-T0 may have expired. Try logging into the PM7300-T0 again.
-
Page 56: Appendices
Appendices... -
Page 57: Appendix A Customer Support
• Brief description of the problem and the steps you took to solve it. Corporate Headquarters (Worldwide) Taiwan • Zyxel Communications Corporation • https://www.zyxel.com Asia China • Zyxel Communications (Shanghai) Corp. Zyxel Communications (Beijing) Corp. Zyxel Communications (Tianjin) Corp. • https://www.zyxel.com/cn/zh/ India • Zyxel Technology India Pvt Ltd • https://www.zyxel.com/in/en/ Kazakhstan •... - Page 58 • Zyxel Singapore Pte Ltd. • http://www.zyxel.com.sg Taiwan • Zyxel Communications Corporation • https://www.zyxel.com/tw/zh/ Thailand • Zyxel Thailand Co., Ltd • https://www.zyxel.com/th/th/ Vietnam • Zyxel Communications Corporation-Vietnam Office • https://www.zyxel.com/vn/vi Europe Belarus • Zyxel BY • https://www.zyxel.by Belgium • Zyxel Communications B.V. • https://www.zyxel.com/be/nl/...
- Page 59 Appendix A Customer Support • https://www.zyxel.com/be/fr/ Bulgaria • Zyxel България • https://www.zyxel.com/bg/bg/ Czech Republic • Zyxel Communications Czech s.r.o • https://www.zyxel.com/cz/cs/ Denmark • Zyxel Communications A/S • https://www.zyxel.com/dk/da/ Estonia • Zyxel Estonia • https://www.zyxel.com/ee/et/ Finland • Zyxel Communications • https://www.zyxel.com/fi/fi/ France •...
- Page 60 • Zyxel Communications Poland • https://www.zyxel.com/pl/pl/ Romania • Zyxel Romania • https://www.zyxel.com/ro/ro Russia • Zyxel Russia • https://www.zyxel.com/ru/ru/ Slovakia • Zyxel Communications Czech s.r.o. organizacna zlozka • https://www.zyxel.com/sk/sk/ Spain • Zyxel Communications ES Ltd • https://www.zyxel.com/es/es/ Sweden • Zyxel Communications • https://www.zyxel.com/se/sv/ Switzerland •...
- Page 61 Appendix A Customer Support Turkey • Zyxel Turkey A.S. • https://www.zyxel.com/tr/tr/ • Zyxel Communications UK Ltd. • https://www.zyxel.com/uk/en/ Ukraine • Zyxel Ukraine • http://www.ua.zyxel.com South America Argentina • Zyxel Communications Corporation • https://www.zyxel.com/co/es/ Brazil • Zyxel Communications Brasil Ltda. • https://www.zyxel.com/br/pt/ Colombia •...
- Page 62 Appendix A Customer Support Middle East • Zyxel Communications Corporation • https://www.zyxel.com/me/en/ North America • Zyxel Communications, Inc. - North America Headquarters • https://www.zyxel.com/us/en/ Oceania Australia • Zyxel Communications Corporation • https://www.zyxel.com/au/en/ Africa South Africa • Nology (Pty) Ltd. • https://www.zyxel.com/za/en/...
-
Page 63: Appendix B Legal Information
Hereby, Zyxel declares that this device is in compliance with the essential requirements and other relevant provisions of Directive 2014/53/EU. Français Par la présente Zyxel déclare que l'appareil équipements est conforme aux exigences essentielles et aux autres dispositions (French) pertinentes de la directive 2014/53/UE. PM7300-T0 User’s Guide... - Page 64 The regulatory limits for maximum output power are specified in EIRP. The EIRP level (in dBm) of a device can be calculated by adding the gain of the antenna used (specified in dBi) to the output power available at the connector (specified in dBm). PM7300-T0 User’s Guide...
- Page 65 (recast), so called as "ErP Directive (Energy-related Products directive) as well as ecodesign requirement laid down in applicable implementing measures, power consumption has satisfied regulation requirements which are: • Network standby power consumption < 8W, and/or • Off mode power consumption < 0.5W, and/or • Standby mode power consumption < 0.5W. PM7300-T0 User’s Guide...
- Page 66 • 請勿將設備解體。 • 請勿阻礙設備的散熱孔,空氣對流不足將會造成設備損害。 • 請插在正確的電壓供給插座 ( 如 : 北美 / 台灣電壓 110V AC,歐洲是 230V AC)。 • 假若電源變壓器或電源變壓器的纜線損壞,請從插座拔除,若您還繼續插電使用,會有觸電死亡的風險。 • 請勿試圖修理電源變壓器或電源變壓器的纜線,若有毀損,請直接聯絡您購買的店家,購買一個新的電源變壓器。 • 請勿將此設備安裝於室外,此設備僅適合放置於室內。 • 請勿隨一般垃圾丟棄。 • 請參閱產品背貼上的設備額定功率。 • 請參考產品型錄或是彩盒上的作業溫度。 • 產品沒有斷電裝置或者採用電源線的插頭視為斷電裝置的一部分,以下警語將適用 : - 對永久連接之設備, 在設備外部須安裝可觸及之斷電裝置; - 對插接式之設備, 插座必須接近安裝之地點而且是易於觸及的。 PM7300-T0 User’s Guide...
- Page 67 Register your product online at www.zyxel.com to receive email notices of firmware upgrades and related information. Trademarks ZyNOS (Zyxel Network Operating System) and ZON (Zyxel One Network) are registered trademarks of Zyxel Communications, Inc. Other trademarks mentioned in this publication are used for identification purposes only and may be properties of their respective owners.
-
Page 68: Index
IP address IPv6 creating prefix delegation public key replacing storage space Certification Authority Certification Authority. see CA certifications viewing IP address status configuration subnet mask backup reset login restoring passwords 14, 15 contact information logs 35, 37, 45 PM7300-T0 User’s Guide... - Page 69 9, 12, 55 prefix delegation Wide Area Network, see WAN product registration warranty note web configurator login passwords 14, 15 registration product reset RESET Button restart Zyxel Device managing restoring configuration service access control status firmware version PM7300-T0 User’s Guide...
Need help?
Do you have a question about the PM7300-T0 and is the answer not in the manual?
Questions and answers