Mercury SmartCraft Operation Manual
Hide thumbs
Also See for SmartCraft:
- Operation manual (30 pages) ,
- Installation manual (10 pages) ,
- Wiring connections (5 pages)

Related Manuals for Mercury SmartCraft


Summary of Contents for Mercury SmartCraft
- Page 1 Operation Manual THIS MANUAL DESCRIBES THE SMARTCRAFT GAUGE SYSTEMS AVAILABLE FOR YOUR BOAT 2001, Mercury Marine 90-10229021...
- Page 3 PRODUCT IDENTIFICATION For boats equipped with SmartCraft gauge systems, look to the descriptions below to identify the system in the boat. Please read about the SmartCraft system to get the best per- formance from them. Monitor Monitor Software Version 2.00 Software Version 1.01 &...
-
Page 5: Table Of Contents
Depending on your type of engine, not all these screens will apply. Monitor with Software Version 1.01 and 1.02 is compatible with: 2001 model year and newer Mercury Outboard mod- els that are designed for use with SmartCraft. - Page 6 MONITOR 1.01-1.02...
-
Page 7: Legend
MONITOR – VERSION 1.01-1.02 Legend = Engine = Fuel = Water Temperature = Water Pressure = Oil = Alarm... -
Page 8: Basic Operation
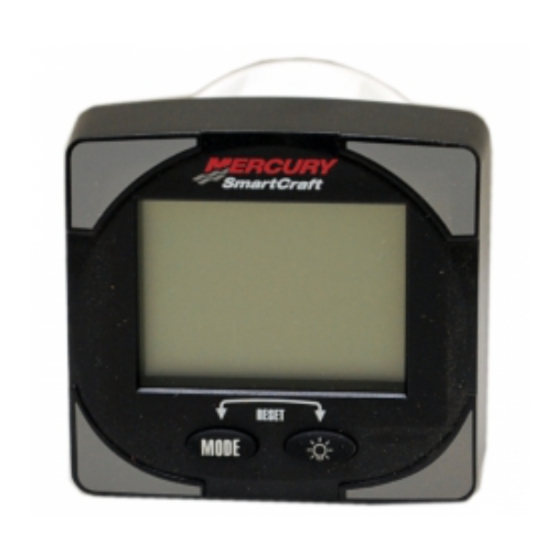
MONITOR – VERSION 1.01-1.02 Basic Operation This monitor is an LCD multi-function display gauge. A variety of dis- plays can be activated using the button. Pressing the button scrolls the following displays: fuel used, tachometer (RPM), fuel flow, power trim position, engine temp, wa- ter pressure, battery voltage, range (if calibrated), and water depth (if equipped with transducer). -
Page 9: Standard Information Display Screens
MONITOR – VERSION 1.01-1.02 Standard Information Display Screens Initial Power Up At power up, a momentary (1 second) screen displays the current monitor software ver- sion, followed by a 4 second dis- Software Version Engine Hours play showing hours of engine use. - Page 10 MONITOR – VERSION 1.01-1.02 Standard Information Display Screens Trim Position TRIM Displays trim position of the pro- pulsion unit up to the maximum trim position, and then displays the trailer position. 0 = down, 10 = full trim 25 = full trailer. NOTE: This screen can be set to pop up whenever the trim switch is used.
- Page 11 MONITOR – VERSION 1.01-1.02 Standard Information Display Screens Range Range Displays estimated range based on current fuel consump- Miles tion and fuel remaining in the tank that is connected to the system. The number displayed is an estimate of the distance you can travel on the remaining fuel at current boat speed.
-
Page 12: Shallow Water Alarm
MONITOR – VERSION 1.01-1.02 Shallow Water Alarm You can set an alarm to trigger whenever the boat moves into water shallower than the alarm level. Setting Shallow Water Alarm. 1. The water depth screen must be displayed. Be sure Depth is turned on in CAL 2. -
Page 13: Warning System
MONITOR – VERSION 1.01-1.02 Warning System When a problem is detected with the engine, the warning display screens will alert the operator to the potential problem. Refer to the Engine Operation, Maintenance Manual for explanation of the prob- lem and the correct action to take. If problem can cause immediate engine damage, the Engine Guardian System will respond to the problem by limiting engine power. - Page 14 MONITOR – VERSION 1.01-1.02 Warning Display Screens IMPORTANT: Refer to the Engine Operation, Maintenance Manual for further explanation of the problem and the correct action to take. Oil Pump Fault The Bell, Engine and oil icons are displayed. The oil pump has stopped functioning electrically.
-
Page 15: Cal 1 Calibration
MONITOR – VERSION 1.01-1.02 CAL 1 Calibration Cal 1 Display Calibrations: •Trim Pop up Screen (On or Off) •Trim Sensor Setting •English or Metric Readings Selection •Range Readings Selection •Fuel Tank Capacity Setting 1. Turn ignition key to the on position. 2. - Page 16 MONITOR – VERSION 1.01-1.02 CAL 1 Calibration Trim Sensor Trim 0.0 Setting 1. The word “Trim” and down arrow should be blinking. 2. trim unit to the full Down/In position. 3. Press the button to save. 4. Press the button to advance to 10.0 setting. Trim Trim Sensor 10.0 Setting...
- Page 17 MONITOR – VERSION 1.01-1.02 CAL 1 Calibration English or Metric SAE English System Metric System Select whether you want the readings in the SAE English system or the Metric system. 1. Press the button to toggle between units. 2. Press the button to move to the next function.
-
Page 18: Cal 2 Calibration
MONITOR – VERSION 1.01-1.02 CAL 2 Calibration Cal 2 Display Calibrations: •Single or Multi-engine Installation •Fuel Tank Calibration •Depth Screen (On or Off) Setting •Dual Station Setting •Coolant Screen (On or Off) •Paddle Wheel Speed Sensor •Oil Pressure Screen (On or Off) •Water Pressure Screen (On or Off) Frequency Setting •Pitot Water Pressure Sensor... - Page 19 Select the speed input of the Pi- tot water pressure sensor on the engine. NOTE:The standard speed in- put on production Mercury Out- boards is 100 PSI. On a High Performance Outboard it could be 200 Psi. 1. Press the button to select.
- Page 20 MONITOR – VERSION 1.01-1.02 CAL 2 Calibration Fuel Tank Calibration Select whether you want to cali- brate the fuel tank. NOTE: Selecting “1” will contin- ue fuel tank calibration. 1. Press the button to select 1= on, 0 = off. Fuel Tank Calibration 0% Setting Have the fuel tank level at...
- Page 21 MONITOR – VERSION 1.01-1.02 CAL 2 Calibration Fuel Tank Calibration 50% Setting Adding the amount of fuel shown will raise fuel tank level to 50 per- 50 Percent Fuel to Add cent. NOTE:The quantity of “Fuel to Add” is determined by the fuel tank capacity number entered in CAL 1 5.
- Page 22 MONITOR – VERSION 1.01-1.02 CAL 2 Calibration Depth Display (on or off) Select whether you want the depth screen to be displayed. 1. Press the button to select on or off. 2. Press the button to move to the next function. Coolant Temperature Display (on or off)
- Page 23 MONITOR – VERSION 1.01-1.02 CAL 2 Calibration Water Pressure Display (on or off) Select whether you want the water pressure screen to be dis- played. 1. Press the button to select on or off. 2. Press the button to move to the next function. Battery Voltage Display (on or off) Volt...
-
Page 25: Note:this Manual Shows All The Monitor Display
Depending on your type of engine, not all these screens will apply. Monitor with Software Version 2.00 is compatible with: 2002 model year and newer Mercury Outboard Mod- els that are designed for use with SmartCraft. MerCruiser model 8.1/496... - Page 26 MONITOR 2.00...
-
Page 27: Legend
MONITOR – VERSION 2.00 Legend = Engine = Fuel = Water Temperature = Water Pressure = Oil = Alarm... -
Page 28: Basic Operation
MONITOR – VERSION 2.00 Basic Operation The Monitor is an LCD multi-function display gauge. A variety of dis- plays can be activated using the button. Pressing the button scrolls the following displays: fuel used, tachometer (RPM), fuel flow, power trim position, engine temp, wa- ter pressure, battery voltage, range (if calibrated), and water depth (if equipped with transducer). - Page 29 MONITOR – VERSION 2.00 Initial Power Up (Or After Master Reset) Initial Auto-Detection Error Messages: Flashing “Stbd” – More than one of the engine computers (ECM’s) are configured as a starboard engine. The engines must be programmed for proper engine location using a DDT or Quicksilver Diagnostic Tool.
-
Page 30: Master Reset
MONITOR – VERSION 2.00 Master Reset You can return the gauge back to factory presets through the Master Reset command. IMPORTANT: Performing a master reset will reset the unit back to all factory defaults, thus eliminating any installation calibra- tions performed during set up of product. 1. -
Page 31: Standard Information Display Screens
MONITOR – VERSION 2.00 Standard Information Display Screens NOTE:This manual shows all the Monitor display screens that are available. Depending on your type of engine, not all these screens will apply. Start Up At start up, a momentary (1 sec- ond) screen displays the current monitor software version, fol- lowed by a 4 second display... - Page 32 MONITOR – VERSION 2.00 Standard Information Display Screens Trim Position TRIM Displays trim position of the pro- pulsion unit up to the maximum trim position, and then displays the trailer position. 0 = down, 10 = full trim 25 = full trailer. NOTE: This screen can be set to pop up whenever the trim switch is used.
- Page 33 MONITOR – VERSION 2.00 Standard Information Display Screens Oil Pressure Displays engine oil pressure in Psi or Bar. Battery Voltage Displays voltage level (condition) Volt of battery. Range Range Displays estimated range based on current fuel consump- Miles tion and fuel remaining in the tank that is connected to the system.
-
Page 34: Shallow Water Alarm
MONITOR – VERSION 2.00 Standard Information Display Screens Water Depth Depth Displays the depth of water un- der the transducer if connected. You must have a depth NOTE: transducer (purchased separate- ly) connected to the system in or- der for this screen to operate. Shallow Water Alarm You can set an alarm to trigger whenever the boat moves into water shallower than the alarm level. -
Page 35: Warning System
MONITOR – VERSION 2.00 Warning System When a problem is detected with the engine, the warning display screens will alert the operator to the potential problem. Refer to the Engine Operation, Maintenance Manual for explanation of the prob- lem and the correct action to take. If problem can cause immediate engine damage, the Engine Guardian System will respond to the problem by limiting engine power. - Page 36 MONITOR – VERSION 2.00 Warning Display Screens IMPORTANT: Refer to the Engine Operation, Maintenance Manual for further explanation of the problem and the correct action to take. Water in Fuel The Bell and Fuel Icon are dis- played. Water in the water-sep- arating fuel filter reached the full level.
-
Page 37: Cal 1 Calibration
MONITOR – VERSION 2.00 CAL 1 Calibration Cal1 Display Calibrations: •(On or Off) Trim Pop up Screen •Trim Calibration •English or Metric Units Selection •Range Units Selection •(On or Off) Depth, Trim, Engine Temperature, Oil Pressure, Oil Temperature, Water Pressure, Volts, Engine Hours, and Data Simulator pages. - Page 38 MONITOR – VERSION 2.00 CAL 1 Calibration Trim Sensor Trim 0.0 Setting (Full Trim in Position) 1. The word “Trim” and down arrow should be blinking. 2. trim unit to the full Down/In position. 3. Press the button to save. 4.
- Page 39 MONITOR – VERSION 2.00 CAL 1 Calibration English or Metric SAE English System Metric System Select whether you want the readings in the SAE English system or the Metric system. 1. Press the button to toggle between units. 2. Press the button to move to the next function.
- Page 40 MONITOR – VERSION 2.00 CAL 1 Calibration Coolant Temperature Display (on or off) Select whether you want the coolant temperature screen to be displayed. 1. Press the button to select on or off. 2. Press the button to move to the next function. Oil Pressure Display (on or off) Select whether you want the oil...
- Page 41 MONITOR – VERSION 2.00 CAL 1 Calibration Water Pressure Display (on or off) Select whether you want the water pressure screen to be dis- played. 1. Press the button to select on or off. 2. Press the button to move to the next function. Battery Voltage Display (on or off) Volt...
-
Page 42: Cal 2 Calibration
Sensor Input Select the PSI input of the Pitot water pressure sensor on the engine. NOTE:The standard speed in- put on production Mercury Out- boards is 100 PSI. Certain High Performance applications may require a 200 Psi input. 1. Press the button to select. - Page 43 Miles match requirements of different sensors. 4.9 is the frequency of the paddle wheel speed sensor provided by Mercury Marine. Press the button to save and move to the next function. Fuel Tank Calibration THERE ARE THREE METHODS TO SET UP THE FUEL TANK LEVEL MONITORING FEATURE: First: Do nothing.
- Page 44 MONITOR – VERSION 2.00 CAL 2 Calibration Tank 1 (fuel) Capacity Setting “t1” = tank 1 1. Press the button until “t1” is displayed. “t1” = tank 1. 2. Press once more. The word “no” and the fuel icon will be displayed.
- Page 45 MONITOR – VERSION 2.00 CAL 2 Calibration Tank 1 Calibration Once the capacities have been entered, you need to. Select whether you want to calibrate fuel tank 1 ” ’t1”. NOTE: The gauge will not let you calibrate the fuel tank until the ca- pacity had been entered).
- Page 46 MONITOR – VERSION 2.00 CAL 2 Calibration Tank 1 Calibration 50% Setting Adding the amount of fuel shown will raise fuel tank level to 50 per- 50 Percent Fuel to Add cent. NOTE:The quantity of “Fuel to Add” is determined by the fuel tank capacity number entered 5.
- Page 47 MONITOR – VERSION 2.00 CAL 2 Calibration Tank 2 Calibration Select whether you want to cali- brate tank 2. NOTE: Tank 2 does not have to be a fuel tank. It could represent an oil tank for example. NOTE: The gauge will not let you calibrate the tank until the capac- ity had been entered).
- Page 48 MONITOR – VERSION 2.00 CAL 2 Calibration Tank 2 Calibration 25% Setting Adding the amount of fuel shown will raise fuel tank level to 25 per- 25 Percent Fuel to Add cent. NOTE :The quantity of fuel to add is determined by the fuel tank ca- pacity number entered.
- Page 49 MONITOR – VERSION 2.00 CAL 2 Calibration Tank 2 Calibration Full Setting Add the amount of fuel to fill the fuel tank. Full Percent Fuel to Add 10. Add the amount of fuel to fill the fuel tank. 11. Press the button to save.
- Page 50 NOTE:This manual shows all the Monitor display screens that are available. Depending on your type of engine, not all these screens will apply. System Tach and Speedometer are compatible with: 2002 model year Mercury Outboard models that are designed for use with SmartCraft. MerCruiser model 8.1/496...
- Page 51 SYSTEM TACH & SPEED...
-
Page 52: System Tach And Speedometer
SYSTEM TACH & SPEEDOMETER Tachometer Speedometer Basic Operation and Features Power up: Each gauge will power up when the ignition is turned on. Gauges will stay on as long as the ignition is on. Lights: The brightness and contrast are adjustable. MODE Buttons: The button is used for selecting information screens. - Page 53 SYSTEM TACH & SPEEDOMETER Basic Operation and Features Digital Display Screen: Displays the following engine information. Tachometer Display Screen: Speedometer Display Screen: DEPENDING ON ENGINE TYPE DEPENDING ON ENGINE TYPE Engine Break–in Speed Engine Temperature Fuel Used Oil Psi COG/SOG – If GPS Input Trim and RPM Distance and fuel to waypoint –...
-
Page 54: Auto Detection Engine Function
“No Starboard Engine” or “Multiple Star- board Engines”, engine will need to be properly selected (Port and Stbd) using a Mercury engine diagnostic tool. “Master Reset” and “Auto detect” again. (Refer to “Master Reset”). System tach and speed come standard with the “Engine Auto–... -
Page 55: Speedometer Display Screens
SYSTEM TACH & SPEEDOMETER Speedometer Continued Next Page Speedometer Display Screens NOT ALL SCREENS MAY APPLY TO YOUR ENGINE TYPE. When the ignition is turned on, the speedometer will show the last screen that was displayed before the ignition was turned off. MODE Press to change display screens. - Page 56 SYSTEM TACH & SPEEDOMETER Speedometer Speedometer Display Screens 6. Range – The estimated range is based on boat speed, fuel con- sumption and fuel remaining in the tank. The numbers displayed indicates an estimate of the distance you can travel with the re- maining fuel.
-
Page 57: Tachometer Display Screens
SYSTEM TACH & SPEEDOMETER Tachometer ° F WATER Continued Next Page Tachometer Display Screens NOT ALL SCREENS MAY APPLY TO YOUR ENGINE TYPE. When the ignition is turned on, the tachometer will display the last screen that was displayed before the ignition was turned off. MODE Press to change display screens. - Page 58 SYSTEM TACH & SPEEDOMETER Tachometer VOLT 22.3 13.6 USED FUEL 22.0 3200 DEPTH FEET Tachometer Display Screens 6. Oil Pressure – Displays engine oil pressure in units of Psi or Bar. 7. Battery Voltage – Displays voltage level (condition) of battery. Also records the running time of engine.
-
Page 59: Troll Control
SYSTEM TACH & SPEEDOMETER Speedometer Tachometer TROLL TROLL TROLL TROLL – – Actual Speed Set Speed Actual Speed Set Speed Troll Control Basic Operation NOTE:Troll control may not be available on all engine models. With troll control you can maintain a trolling speed of 550 to1000 rpm without using the throttle. - Page 60 SYSTEM TACH & SPEEDOMETER Tachometer Speedometer TROLL TROLL TROLL – TROLL – Actual Speed Set Speed Actual Speed Set Speed Troll Control To Set Troll Control 1. With the engine running, shift engine into gear. Set engine speed at idle. TROLL TROLL 2.
-
Page 61: Warning System
SYSTEM TACH & SPEEDOMETER Warning System Alarms Warnings – When a problem is detected, the name of the offending alarm appears on the display (a). If problem can cause immediate engine damage, the Engine Guardian System (b) will respond to the problem by limiting engine power. Imme- diately reduce throttle speed to idle and refer to the warning messages on the following pages. - Page 62 SYSTEM TACH & SPEEDOMETER Warning Display Screens When a problem is detected with the engine, the warning display screens will alert the operator to the potential problem. Refer to the Engine Operation, Maintenance Manual for explanation of the prob- lem and the correct action to take. WARNING DISPLAY SCREENS TACHOMETER SPEEDOMETER...
-
Page 63: Warning Display Screens
SYSTEM TACH & SPEEDOMETER Warning Display Screens IMPORTANT: Refer to the Engine Operation, Maintenance Manual for further explanation of the problem and the correct action to take. 1. OVERHEAT – The engine has overheated. 2. PRESSURE – There is insufficient water pressure in the cooling system. - Page 64 Make sure both ECM’s are not configured for port location using a DDT or Quicksilver Diagnostic Tool. 15. MULTIPLE STARBOARD ENGINE – SmartCraft Gauges are recognizing multiple engines as starboard. In multiple engine applications, each engine must first be assigned a position (starboard, port, starboard2 or port2) with a Quicksilver Diag- nostic Tool before the system will function properly.
- Page 65 SYSTEM TACH & SPEEDOMETER Warning Display Screens 17. OIL PRESSURE – There is insufficient oil pressure. 18. LOW FUEL LEVEL – This message serves as a warning that the fuel level in the fuel tank is critically low. You should stop for fuel immediately to avoid running out.
-
Page 66: Cal 1 Tachometer Calibration
SYSTEM TACH & SPEEDOMETER Quick Cal Calibration Quick Cal – This calibration is for setting lighting and contrast. TROLL MODE 1. Press in the buttons for up to 2 seconds to get to Quick Cal screen. MODE 2. Press to advance through the calibration selections. CAL 1 Tachometer Calibration Cal 1 –... - Page 67 SYSTEM TACH & SPEEDOMETER CAL 1 Tachometer Calibration TRIM CALIBRATION Choosing edit allows you to calibrate the gauge to the standard 0–10 unit trim and 11–25 trailer position scale. [SKIP] [EDIT] TRIM FULL DOWN THEN PRESS PLUS BUTTON [DFLT] [SAVE] [SKIP] TRIM FULL UP THEN PRESS PLUS BUTTON...
- Page 68 SYSTEM TACH & SPEEDOMETER CAL 1 Tachometer Calibration OIL TEMP SCREEN? Do you want to turn on the oil temp screen? [YES] [NO] [SAVE] OIL PRESS SCREEN? Do you want to turn on the oil pressure screen? [YES] [NO] [SAVE] TRIM AND PSI SCREEN? Do you want to turn on the trim and water pressure split screen?
-
Page 69: Cal 2 Tachometer Calibration
SYSTEM TACH & SPEEDOMETER CAL 2 Tachometer Calibration CAL 2 – This calibration level lets you configure the system sensor inputs. TROLL MODE 1. Press in the buttons and hold for approximately 10 seconds for calibration2 (Cal2) screen. MODE 2. Press to advance through the calibration selections. - Page 70 SYSTEM TACH & SPEEDOMETER CAL 2 Tachometer Calibration SPEED OPTION This section lets you configure the following speed sensors. [EDIT] [SKIP] PITOT SENSOR? Select pitot transducer type. You can choose 100 or 200 PSI. (100 PSI is the most common) [SAVE] [YES] [NO]...
- Page 71 SYSTEM TACH & SPEEDOMETER CAL 2 Tachometer Calibration FUEL TANK CAPACITY Lets you enter the capacity of your boats fuel tank. This option is the same for tank 1 as it is for tank 2. [UP] [DOWN] [SAVE] Lets you enter the mode where you can CALIBRATION FUEL TANK calibrate your fuel tank.
- Page 72 SYSTEM TACH & SPEEDOMETER CAL 2 Tachometer Calibration Lets you electronically configure a depth DEPTH SENSOR OFFSET offset. Entering a negative number gives you a water line offset. A positive number [UP] gives you a keel offset. [DOWN] [SAVE] DEPTH ALARM Lets you enter a depth value.
-
Page 73: Cal 1 Speedometer Calibration
SYSTEM TACH & SPEEDOMETER Quick Cal Calibration Quick Cal – This calibration is for setting lighting and contrast. TROLL MODE 1. Press in the buttons for up to 2 seconds to get to Quick Cal screen. MODE 2. Press to advance through the calibration selections. CAL 1 Speedometer Calibration Cal 1 –... - Page 74 SYSTEM TACH & SPEEDOMETER CAL 1 Speedometer Calibration Adjust the gauges internal clock to CALIBRATION HOUR 12:00 AM match your local time. First set the hours then press MODE button to set the [SAVE] minutes. [DOWN] [UP] DISPLAY UNITS Lets you change units of measurement between English (standard) or Metric.
-
Page 75: Cal 2 Speedometer Calibration
SYSTEM TACH & SPEEDOMETER CAL 2 Speedometer Calibration CAL 2 – This calibration level lets you configure the system sensor inputs. TROLL MODE 1. Press in the buttons and hold for approximately 10 seconds for calibration2 (Cal2) screen. MODE 2. Press to advance through the calibration selections. -
Page 76: Note:this Manual Shows All The Monitor Display
NOTE:This manual shows all the Monitor display screens that are available. Depending on your type of engine, not all these screens will apply. Smart Tach and Speedometer are compatible with: 2001 model year and newer Mercury Outboard mod- els that are designed for use with SmartCraft. - Page 77 SMART TACH & SPEED...
-
Page 78: Smart Tach And Speedometer
SMART TACH & SPEEDOMETER gog95 Tachometer Speedometer osl1 Basic Operation and Features Power up: Each gauge will power up when the ignition is turned on. Gauges will stay on as long as the ignition is on. Lights: The brightness and contrast are adjustable. Buttons: The MODE button is used for selecting information screens. - Page 79 SMART TACH & SPEEDOMETER gog95 Speedometer Continued Next Page osl2 Speedometer Displays When the ignition is turned on, the speedometer will show the last screen that was displayed before the ignition was turned off. MODE Press to change display screens. You can revert back to the MODE previous screen by pressing and holding for 2 seconds.
- Page 80 SMART TACH & SPEEDOMETER gog95 Speedometer osl3 Speedometer Displays 6. Traveling Range – The estimated traveling range is based on current fuel consumption and fuel remaining in the tank. The numbers displayed indicates an estimate of the distance you can travel with the remaining fuel. 7.
- Page 81 SMART TACH & SPEEDOMETER gog95 Tachometer ° F Continued Next Page osl4 Tachometer Displays When the ignition is turned on, the tachometer will display the last screen that was displayed before the ignition was turned off. MODE Press to change display screens. You can revert back to the MODE previous screen by pressing and holding for 2 seconds.
- Page 82 SMART TACH & SPEEDOMETER gog95 Tachometer osl5 Tachometer Displays 6. Water Pressure: Displays cooling system water pressure at the engine. 7. Power Trim Angle: Displays trim angle of the outboard up to the maximum trim angle, and then displays the trailer angle. 0 = down, 10 = full trim, and 25 = full trailer.
-
Page 83: Troll Control
SMART TACH & SPEEDOMETER gog95 Tachometer Speedometer TROLL TROLL TROLL TROLL – – Actual Speed Set Speed Actual Speed Set Speed oso6 Troll Control Basic Operation With troll control you can maintain a trolling speed of 550 to1000 rpm without using the throttle. See NOTE: following. NOTE:Avoid using a very low rpm trolling speed for an extended peri- od of time. - Page 84 SMART TACH & SPEEDOMETER gog95 Tachometer Speedometer TROLL TROLL TROLL TROLL – – Actual Speed Set Speed Actual Speed Set Speed osl7 Troll Control To Set Troll Control 1. With the engine running, shift outboard into gear. Set engine speed at idle. TROLL TROLL 2.
-
Page 85: Warning System
SMART TACH & SPEEDOMETER Warning System Alarms Warnings – When a problem is detected, the name of the offending alarm appears on the display (a). If problem can cause immediate engine damage, the Engine Guardian System (b) will respond to the problem by limiting engine power. Imme- diately reduce throttle speed to idle and refer to the warning messages on the following pages. -
Page 86: Warning Display Screens
SMART TACH & SPEEDOMETER Warning Display Screens When a problem is detected with the engine, the warning display screens will alert the operator to the potential problem. Refer to the Engine Operation, Maintenance Manual for explanation of the prob- lem and the correct action to take. WARNING DISPLAY SCREENS TACHOMETER SPEEDOMETER... - Page 87 SMART TACH & SPEEDOMETER Warning Display Screens IMPORTANT: Refer to the Engine Operation, Maintenance Manual for further explanation of the problem and the correct action to take. 1. OVERHEAT – The engine has overheated. 2. PRESSURE – There is insufficient water pressure in the cooling system.
- Page 88 SMART TACH & SPEEDOMETER Warning Display Screens IMPORTANT: Refer to the Engine Operation, Maintenance Manual for further explanation of the problem and the correct action to take. 9. FAULT-IGNITION – A problem has developed in the ignition sys- tem. 10. BATTERY – The electrical system is not charging or the battery charge is low.
-
Page 89: Tachometer Calibration
[DOWN] [SAVE] Do you want the same brightness lev- CALIBRATION BRIGHTNESS el for all SmartCraft gauges? Press + SET ALL INSTRUMENTS? [ NO ] [ YES ] for yes. Press MODE for no. Press – or + to adjust level. Press... - Page 90 Press + (edit) if your adding or EXTERNAL SENSORS deleting any external sensor to the [SKIP] [EDIT] SmartCraft System. Editing External Sensors CALIBRATION Chose Yes or No for each sensor EXTERNAL SENSORS No = not used Yes = in use SPEEDO SENSOR ? YES/NO Press + or –...
- Page 91 SMART TACH & SPEEDOMETER osl18 Tachometer Calibration Add the capacity of the fuel tank. CALIBRATION Press + or – to select. Press MODE FUEL TANK CAPACITY CAPACITY = XX.XX to save. [UP] [DOWN] [SAVE] This calibration accurately adjusts the CALIBRATION fuel level sending unit in the fuel tank.
- Page 92 SMART TACH & SPEEDOMETER osl19 Tachometer Calibration Add the capacity of the oil tank. Press CALIBRATION + or – to select. Press MODE to save. OIL TANK CAPACITY CAPACITY = XX.XX [UP] [DOWN] [SAVE] This calibration accurately adjusts the CALIBRATION oil level sending unit in the oil tank.
- Page 93 SMART TACH & SPEEDOMETER osl20 Tachometer Calibration If the speedometer is not reading cor- CALIBRATION rectly, the speed sensors can be re- SPEED SENSORS calibrated to correct the setting. [SKIP] [EDIT] Press MODE to skip to the next dis- play. Press + (edit) to calibrate the CALIBRATION sensors.
-
Page 94: Speedometer Calibration
BRIGHTNESS [UP] [DOWN] [SAVE] Do you want the same brightness lev- CALIBRATION el for all SmartCraft gauges? Press + BRIGHTNESS for yes. Press MODE for no. SET ALL INSTRUMENTS? [ YES ] [ NO ] Press – or + to adjust level. Press... - Page 95 SMART TACH & SPEEDOMETER osl22 Speedometer Calibration If the clock display is correct, press CALIBRATION MODE to skip. TIME To set or reset the clock Press + [SKIP] [EDIT] Select 12 hour or 24 hour clock set. CALIBRATION TIME FORMAT Press –...
- Page 96 Press + (edit) if your adding or EXTERNAL SENSORS deleting any external sensor to the [SKIP] [EDIT] SmartCraft System. Editing External Sensors CALIBRATION Chose Yes or No for each sensor EXTERNAL SENSORS No = not used Yes = in use AIR SENSOR SENSOR ? YES/NO Press + or –...
Need help?
Do you have a question about the SmartCraft and is the answer not in the manual?
Questions and answers
How do you reset maintenance warning?