Advertisement
Table of Contents
- 1 Table of Contents
- 2 Preinstallation Instructions for Dealers
- 3 Bypass Valve
- 4 Installation
- 5 Programming Procedures for Water Softeners
- 6 Operating Displays for Softeners
- 7 Start-Up Instructions
- 8 Troubleshooting Guide
- 9 Component List
- 10 Replacement Parts
- 11 Installation Fitting Assemblies
- 12 Specifications
- 13 Quick Reference Guide
- 14 Ten Year Limited Warranty
- Download this manual
Advertisement
Table of Contents

Subscribe to Our Youtube Channel
Related Manuals for Sterling IM Series


Summary of Contents for Sterling IM Series
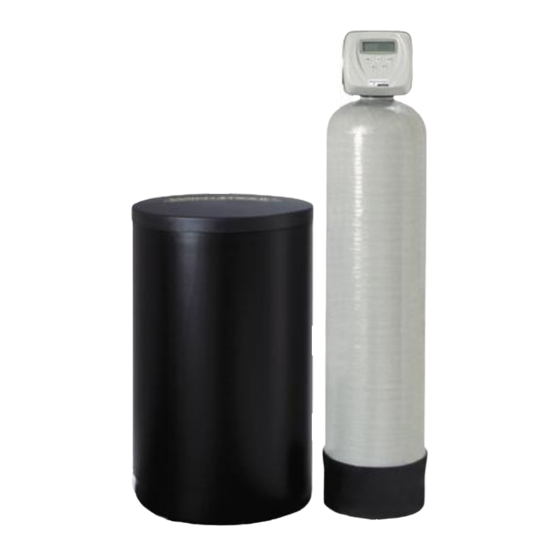
- Page 1 Installation Instructions & Owner's Manual IM & INT Series 12630 US Highway 33 N. Churubusco, IN 46723 Phone: (260) 693-1972 Fax: (260)693-0602 www.sterlingwatertreatment.com...
-
Page 2: Table Of Contents
TABLE OF CONTENTS: Preinstallation Instructions for Dealers Page 3 Bypass Valve Page 3-4 Installation Page 5-6 Programming Procedures for Water Softeners Page 7-8 Operating Displays for Softeners Page 9 Start-up Instructions Page 10 Troubleshooting Guide Page 11-12 Component List Page 13 Replacement Parts Page 14-15 Installation Fitting Assemblies... -
Page 3: Preinstallation Instructions For Dealers
PREINSTALLATION INSTRUCTIONS FOR DEALERS: The manufacturer has set the water treatment unit's sequence of cycles, cycle times, salt dose, exchange capacity and gallon capacity. The salt dose refill time has been preset. The dealer should read this page and guide the installer regarding hardness, day override, and time of regeneration, before installation: For the installer, the following must be used: ●... - Page 4 1. Normal Operation Position: The inlet and outlet handles point in the direction of flow indicated by the engraved arrows on the control valve. Water flows through the control valve for normal operation of a water softener or filter. During the regeneration cycle this position provides regeneration water to the unit, while also providing untreated water to the distribution system (Fig.
-
Page 5: Installation
INSTALLATION: GENERAL INSTALLATION & SERVICE WARNINGS The control valve, fittings and/or bypass are designed to accommodate minor plumbing misalignments. There is a small amount of "give" to properly connect the piping but the water softener is not designed to support the weight of plumbing. Do not use Vaseline, oils, other hydrocarbon lubricants or spray silicone anywhere. - Page 6 6. INLET/OUTLET PLUMBING: Be sure to install Bypass Valve onto main control valve before beginning plumbing. Make provisions to bypass outside hydrant and cold hard water lines at this time. Install an inlet shutoff valve and plumb to the unit's bypass valve inlet located at the right rear as you face the unit.
-
Page 7: Programming Procedures For Water Softeners
PROGRAMMING PROCEDURES FOR WATER SOFTENERS: 1. Set time of day: Time of day should only need to be set after extended power outages or when daylight saving time begins or ends. If an extended power outage occurs, the time of day will flash on and off indicating that the time should be reset. - Page 8 2. Programming cont'd: STEP 4 -- Regeneration Hour: The manufacturer has factory set 2:00 a.m. as the default. This is the hour of day for regeneration and can be reset by using buttons. "AM/PM" toggles after 12. The default time is 2:00 a.m. (recommended for a normal household).
-
Page 9: Operating Displays For Softeners
OPERATING DISPLAYS FOR WATER SOFTENERS: 1. General Operation: When the system is operating, GENERAL OPERATION DISPLAYS one of the three displays may be shown. Pressing NEXT will alternate between displays. One of the displays is always the current time of day. The second display shows the current treated water flow rate through the system in Gallons Per Minute. -
Page 10: Start-Up Instructions
START-UP INSTRUCTIONS FOR WATER SOFTENERS: ● After installation is complete, rotate bypass handles to bypass mode (see Fig. 2 on page 4). ● Turn on water and check for leaks. ● Fully open a cold water faucet -- preferably a laundry sink or bathtub with no aerator. ●... -
Page 11: Troubleshooting Guide
TROUBLESHOOTING GUIDE - SOFTENERS AND FILTERS: PROBLEM CAUSE CORRECTION Timer does A. transformer unplugged A. reconnect transformer not display B. no power at outlet B. repair or use working outlet time of day C. defective transformer C. replace transformer D. defective PC board D. - Page 12 PROBLEM CAUSE CORRECTION A. motor not operating A. replace motor B. no power at outlet B. repair outlet or use working outlet C. defective transformer C. replace transformer Valve stalled in D. defective PC board D. replace PC board regeneration E.
-
Page 13: Component List
COMPONENT LIST: Unit REF# Description IMC24 IMC30 IM24 IM30 IM45 IM60 IM75 INT34 IMI34 IMI68 Control Valve IMC24VlvAssy IMC30VlvAssy IM24VlvAssy IM30VlvAssy IM45VlvAssy IM60VlvAssy IM75VlvAssy INT34VlvAssy IMI34VlvAssy IMI68VlvAssy Mineral Tank MTP1035GR MTP1035GR MTP0844GR MTP0948GR MTP1054GR MTP1248GR MTP1354N MTP1035N MTP0948GR MTP1248GR Distributor T04-35 T04-35 TO4-48... -
Page 14: Replacement Parts
REPLACEMENT PARTS:... - Page 15 Drive Assembly, IM Series CV3186 Power Cord with Transformer, Clack Impression Valve CV3003 Meter and Cable Assembly CV3006 Bypass Valve, IM Series, less I/O fittings CV3175CC-01GR Gray Front Cover, IM Series CV3107-01 Drive Motor, IM Series CV3108CC Circuit Board, IM Series Valve...
-
Page 16: Installation Fitting Assemblies
INSTALLATION FITTING ASSEMBLIES: 1" PVC MALE NPT ELBOW 3/4" & 1" PVC SOLVENT ELBOW Item Part Item Part Description Description CV3007 1" PVC male NPT elbow assy. CV3007-01 3/4" & 1" PVC solvent elbow assy. CV3151 Nut, 1" quick connect CV3151 Nut, 1"... - Page 17 INSTALLATION FITTING ASSEMBLIES: 3/4" COPPER Q-TITE CONNECTOR Item Part Description QT-34 KIT Fittings, Items # 1-3 CV3105 O-ring 215 CV3151 Nut, 1" quick connect PEX-L PEX tubing insert Loosens Drain Nut In Polytube Applications Loosens Injector and Bypass Caps SERVICE WRENCH - CV3193 Although no tools are necessary to assemble or disassemble the valve, the Service Wrench, (shown in various positions on the valve) is...
-
Page 18: Specifications
SPECIFICATIONS: UNIT MODEL NUMBER IMC24 IMC30 IM24 IM30 IM45 IM60 IM75 MEDIA VOLUME (ft 0.75 0.75 CAPACITY (grains) @Minimum Salt Setting (6#/ft 13,500 18,000 13,500 18,000 27,000 36,000 45,000 @Factory Salt Setting (9#/ft 15,750 21,000 15,750 21,000 31,500 42,000 52,500 @Maximum Salt Setting (15#/ft 24,000 32,000... - Page 19 SPECIFICATIONS: UNIT MODEL NUMBER INT34 IMI34 IMI68 MEDIA VOLUME (ft CAPACITY (grains) @Minimum Salt Setting (6#/ft 18,000 18,000 36,000 @Factory Salt Setting (9#/ft 21,000 21,000 42,000 @Maximum Salt Setting (15#/ft 34,000 34,000 68,000 SERVICE FLOW RATES (gpm) Continuous Peak PRESSURE LOSS (psi) @ Continuous Flow Rate @ Peak Flow Rate REGENERATION FLOW RATES (gpm)
-
Page 20: Quick Reference Guide
QUICK REFERENCE GUIDE: MANUAL REGENERATION GENERAL OPERATION CAPACITY REMAINING NOTE: For softeners, if When the system is operating, brine tank does not con- one of three displays will be tain salt, fill with salt and shown: Time of day, gallons wait at least 1.5 hours before per minute, or gallons of regeneration. -
Page 21: Ten Year Limited Warranty
TEN YEAR LIMITED WARRANTY WARRANTY — First Sales, LLC warrants this water conditioner against any defects that are due to faulty material or workmanship during the warranty period. This warranty does not include damage to the product resulting from accident, neglect, misuse, misapplication, alteration, installation or operation contrary to printed instructions, or damage caused by freezing, fire, flood, or Acts of God.
Need help?
Do you have a question about the IM Series and is the answer not in the manual?
Questions and answers
I need to replace a missing locking pin (slide) for the regen operation Can I get a replacement part? How Much??
I am missing the regen locking pin. It I don't have it the hose will blow off