Advertisement
Table of Contents
- 1 Table of Contents
- 2 Pre-Installation Instructions
- 3 General Installation
- 4 Installation Instructions
- 5 OXY3 Timer Operation
- 6 OXY3E Display and Operation
- 7 OXY3E Setting Time of Day
- 8 OXY3E Programming
- 9 Specifications
- 10 Component Parts Breakdown & List
- 11 OXY3 Control Valve Breakdown
- 12 OXY3 Control Valve Parts List
- 13 OXY3E Control Valve Breakdown
- Download this manual
Advertisement
Table of Contents

Related Manuals for Sterling OXY3-10


Summary of Contents for Sterling OXY3-10
- Page 1 Installation Instructions and Owner’s Manual OXY3 & OXY3E Series Iron Reduction System First Sales, LLC 12630 US Highway 33 N Churubusco, IN 46723 Phone (260) 693-1972 Fax (260) 693-0602 OXY3-OXY3E Instruction Manual 180625.docx...
-
Page 2: Table Of Contents
Table of Contents Pre-installation Instructions Page 2 General Installation Page 4 Installation Instructions Page 5 OXY3 Timer Operation Page 8 OXY3E Display and Operation Page 10 OXY3E Setting Time of Day Page 11 OXY3E Programming Page 12 Specifications Page 13 Component Parts Breakdown &... -
Page 3: Pre-Installation Instructions
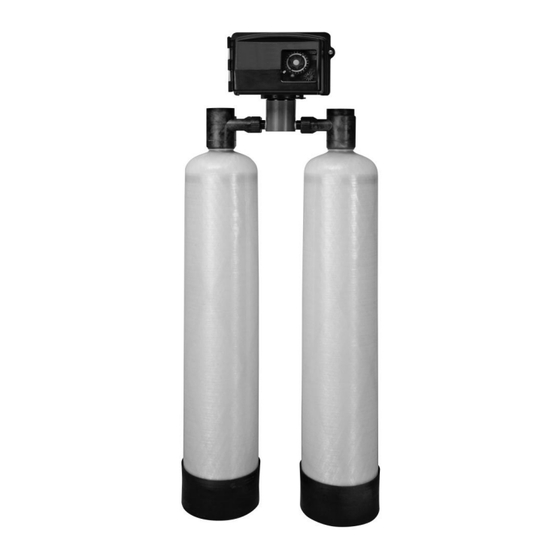
Pre-installation Instructions Description of the iron filtration system The OXY3 iron filtration system includes an aeration tank, a filtration tank and a backwashing control valve. Incoming water flows into the control valve and is directed into the aeration tank. Exposure to the air in this tank will begin oxidizing any clear water iron. - Page 4 Pre-installation Instructions (cont.) Water Supply Unlike other iron filters that do not use chemicals to oxidize the iron, the OXY3 iron filter does not require additional devices such as air compressors, venturis, solenoids, pressure switches or pressure tanks. This filter will function properly when the water supply is furnished by a jet pump, submersible pump, variable speed (constant pressure) pump or community water supply.
-
Page 5: General Installation
General Installation GENERAL INSTALLATION & SERVICE WARNINGS The water conditioner is not designed to support the weight of plumbing. Do not use Vaseline, oils, other hydrocarbon lubricants or spray silicone anywhere. A silicone lubricant may be used on black “O” Rings. This will allow ease of installation and decrease chance of rolling from the bypass and tank connections. - Page 6 General Installation Inlet from water supply Outlet to service Bypass Valve (in service position) Fillport Cap Aeration Tank Filter Tank Drain Line Elbow DLFC Retainer Clip FIGURE 2: Tank Positioning and Fillport Location FIGURE 3: Bypass Valve...
-
Page 7: Installation Instructions
Installation Instructions STEP 1: If media is already loaded in filter tank proceed to Step 4. Otherwise, use the fillport wrench provided to remove the fillport cap (See Figure 2, page 5) by turning it counter-clockwise. STEP 2: Use the fill funnel provided and add the required amount of media (see unit specifications) to the filter tank. - Page 8 Installation Instructions (cont.) STEP 12: Set the Timer Control (Figure 4a) by rotating the Skipper Wheel (Figure 4a) so the red pointer is directly over day 1. Select the days when backwashing will occur by sliding the metal tabs in or out.
- Page 9 Installation Instructions (cont.) d) Continue depressing the red Time Set Button and rotate the 24 Hour Gear to expose the Regeneration Time Pointer (Figure 4a) in the cut out portion of the Manual Backwash Knob. Keep the Regeneration Time Pointer visible in the cut out while rotating only the time plate until the desired time of regeneration (note AM and PM) is aligned with the Regeneration Time Pointer.
-
Page 10: Oxy3 Timer Operation
OXY3 Timer Operation FIGURE 4: Front of Timer Assembly How to set Time of Day: Press and hold the red button to disengage the drive gear. 2. Turn the large 24 hour gear until the actual time of day is at the time of day pointer. 3. - Page 11 OXY3 Timer Operation FIGURE 5: Back of Timer Assembly How to Change the Length of Backwash Cycles: All cycles have been factory set and should not need adjustment. If local conditions require different cycle lengths, however, the following procedures should be followed. The end of the program wheel has been used for backwash cycles to minimize the amount of time that pressure will be applied to the air draw check valve.
-
Page 12: Oxy3E Display And Operation
OXY3E Display and Operation Advance Button FIGURE 6: OXY3E Display Panel SET BUTTON 1. Press and hold “Set Button” for 5 seconds to enter Programming Mode. 2. When valve is in Programming Mode, press “Set Button” to confirm setting and advance to next menu option. -
Page 13: Oxy3E Setting Time Of Day
OXY3E Setting Time of Day Enter Programming Mode: Press and Hold the SET Button for 5 seconds. Use Up Button to set current hour Use Up Button to set current minute Use Up Button to set AM/PM Default setting is 20 GPG. This iron filter does not meter the water use. -
Page 14: Oxy3E Programming
OXY3E Programming Press and HOLD the UP button for 5 seconds to enter the programming mode. Use Up Button to set frequency of backwash cycle. The frequency should never be less than every 3 days, but may high iron levels or water use may require more frequent cycles. -
Page 15: Specifications
Specifications UNIT MODEL NUMBER DESCRIPTION OXY3-10 OXY3-15 OXY3-20 OXY3-30 OXY3-40 MEDIA VOLUME, cu. ft. GRAVEL UNDERBED, lbs. SERVICE FLOW RATES, gpm Continuous @ 6 gpm/ft , gpm Service @ 12 gpm/ft , gpm Peak @ 18 gpm/ft , gpm PRESSURE LOSS... -
Page 16: Component Parts Breakdown & List
Component Parts Breakdown... - Page 17 JG-38CV Back Tube Assembly, includes 2 each o-rings (A), quick release nuts (B), and retainers (D) and 1 back tube (C) DTC204-8 (OXY3-10, OXY3-15, OXY3-20, OXY3E-10, OXY3E-15 and OXY3E-20) Back Tube Assembly, includes 2 each o-rings (A), quick DTC204-15 release nuts (B), and retainers (D) and 1 back tube (OXY3-30, OXY3-40, OXY3E-30 and OXY3E-40) Refer to unit specifications for quantity of media required.
-
Page 18: Oxy3 Control Valve Breakdown
OXY3 Control Valve Breakdown... -
Page 19: Oxy3 Control Valve Parts List
10328 3/8 Tube) Brine Valve, 1650 Short 5.0 gpm DLFC 60011-050ASSY 12092 Stem, 0.5 BLFC with Tube (OXY3-10 & OXY3-15) 5.0 gpm DLFC Housing 7.0 gpm DLFC 60705-50 12408 (Old Style for 1 & 1.5 ft (OXY3-20) 7.0 gpm DLFC Housing... -
Page 20: Oxy3E Control Valve Breakdown
OXY3E Control Valve Breakdown... - Page 21 OXY3E Control Valve Parts List Part REF # Part Number Description REF # Description Number Stainless Steel Bypass, 60041SS 10914-2 Injector Throat, #2, Blue 1” FPT 60900-41 Coupling Kit 10227 Injector Screen 7.0 gpm DLFC Elbow 60705-50A 17776 Injector Body Plastic (OXY3E-10 &...
- Page 22 Troubleshooting PROBLEM CAUSES SOLUTIONS 1) Check timer motor and replace if faulty 2) Ensure uninterrupted power supply 3) Check Backwash frequency setup 4) Verify sediment being removed is less A) Filter not dense than the filter media and install a backwashing “Spin-Down”...
- Page 23 Troubleshooting (cont.) PROBLEM CAUSES SOLUTIONS Howling or A) Inadequate drain whistling noise line diameter or 1) Reconfigure or replace drain line during regeneration drain line restricted Control Valve Faulty switch 1) Replace faulty switch cycles continually B) Faulty timer motor 2) Replace faulty timer motor Loss of electrical power during...
- Page 24 Control Valve Wiring...
- Page 25 TEN YEAR LIMITED WARRANTY WARRANTY – First Sales, LLC. warrants this water conditioner against any defects that are due to faulty material or workmanship during the warranty period. This warranty does not include damage to the product resulting from accident, neglect, misuse, misapplication, alteration, installation or operation contrary to printed instructions, or damage caused by freezing, fire, flood, or Acts of God.
Need help?
Do you have a question about the OXY3-10 and is the answer not in the manual?
Questions and answers