
Subscribe to Our Youtube Channel
Related Manuals for HAAS + SOHN HSP 4.0-F2


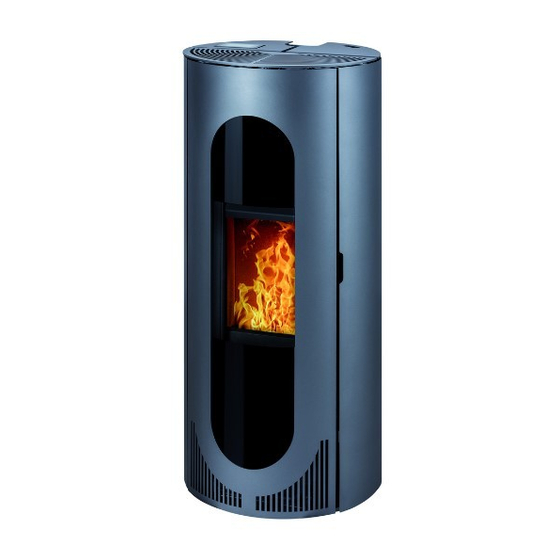
Summary of Contents for HAAS + SOHN HSP 4.0-F2
- Page 1 Installation and operating manual Pellet stove Pellet stove Nameplate: Installation and operating manual Pellet stove 0545508001413–...
- Page 2 Please read through these operating instructions carefully. You will be informed about the function and handling of this stove and you will also save fuel and conserve the environment by heating correctly. The attached equipment sheet is part of these operating instructions. Notes in the text Of utmost importance there are the notes entitled WARNING.
-
Page 3: Table Of Contents
9.1.8. Date / Time ..........................18 9.1.9. Display ........................... 18 9.1.10. Network..........................18 9.1.11. Error Log ..........................20 9.1.12. Manual filling (for HSP 4.0-F2 only)................. 20 9.1.13. Info Software ........................21 9.1.14. Language..........................21 10. Mobile application - general safety instructions ............21 10.1. - Page 4 11.1. Burner test before start zone....................23 11.2. Start zone 1-30 (start zone)....................23 11.3. Heating mode ......................... 23 11.4. Burner test (when heating) ....................23 11.5. Cooling down.......................... 23 11.6. ECO-Mode ..........................23 11.7. Standby ........................... 24 11.8. Shut down ..........................24 11.9.
-
Page 5: General Information
1. General information • Please check the appliance for transport damage when unpacking it. In case of defects, please report these immediately to your stove dealer! • National and European standards, local regulations and those under building law as well as the relevant state building regulations or fire regulations must be complied with when installing, connecting and putting the fireplace into operation. -
Page 6: Electrical Connection
WARNING The stove must not be set up to be operated jointly with the home’s air conditioning and ventilation units. Note Exceptions: RLU certified appliances can also be operated with extractor hoods, vented tumble dryers and air conditioning and ventilation units if the stove has also been connected to a balanced flue. According to the new Electrical and Electronic Equipment Act [ElektroG], our stoves are consid- ered as "large household appliances". -
Page 7: Weather Conditions
4.1. Weather conditions For the safe operation of the fireplace, it must be ensured that the chimney is able to build up the necessary flue draft. Particular attention needs to be paid to this during the transition period (E.G. autumn and spring) or during poor weather conditions (E.G. -
Page 8: Installation
Figure 1: Connection to the chimney: Chimney Effective length of the chimney Inlet of outside air T-shaped block with plug for discharge of condensate 5. Installation CAUTION For comfortable maintenance and service are following distances recommended: at the sides – minimum 50 cm at the back –... -
Page 9: Minimum Gaps To Flammable Components
5.1. Minimum gaps to flammable components CAUTION When installing the stove, it is essential to observe the official fire protection regulations. Please observe the national regulations to this effect. WARNING As the minimum distances from flammable or temperature-sensitive materials (E. G. furniture, wallpaper, wooden cladding) and from load-bearing walls, the specified gaps "at the back", "on the sides"... -
Page 10: Operation Of The Stove Depending On The Air From The Room
5.3. Operation of the stove depending on the air from the room: The pellet stove has been tested as gas-tight according to the EN 14785 standard and can be operated with or without external air supply (the stove then consumes air from the room). In this case, during the simultaneous operation of the stove and the ventilation installation (e.g. -
Page 11: Outside Air Connection (Rlu)
Figure 3: Wind protection of air supply duct WARNING For operation independent of indoor air with RLU certified appliances, the outside air connection must be connected. For the dimensions of the air supply duct: Air supply duct diameter Maximum length Max. -
Page 12: Room Temperature Sensor
CAUTION Please keep in mind that the connection and ducting of the convection air must comply with national and European standard, as well as local, building and fire regulations. Installation must be performed by a competent person. 5.6. Room temperature sensor Note A room temperature sensor is installed on the back of the stove. -
Page 13: Operator Console Functions
6. Operator console functions 6.1. Symbols on the display Menu ON/OFF 09:33 7. Operating the pellet stov 7.1. Suitable fuels • Pellets with 6mm diameter • Identification: DINplus, ÖNorm M 7135, ENplus-A1 7.2. Unsuitable fuels • The use of lower-quality or unauthorised fuel adversely affects the operation of your pellet stove and may lead to the lapse of the guarantee. -
Page 14: Operating Console
Note For type HSP 4.0-F2: when using for the first time, the Manual filling process must be started twice. (see point 9.1.12) Due to the different expansion of the materials used, the stove may make sounds resembling ticking or banging when heated or cooled. - Page 15 7.3.2.2. Welcome page 09:33 7.3.2.3. Setting Setpoint temperature Setpoint temperature Procedure: The "Setpoint temperature" is set with the "Plus" or "Minus" buttons. The setting is saved by pressing the "OK" button. 7.3.2.4. Starting the pellet stove - operating mode ON Procedure: On the standard screen, press the "ON/OFF"...
-
Page 16: Additional Operator Console Functions
Note During the "Burner test", the level of contamination is measured using the pressure difference sensor. If the limit value is not exceeded, the start process is initiated. The display now shows "Start zone". The indicator shows the prog- ress of the start. Start zone Setpoint temperature Note... -
Page 17: Energy Saving Mode - Actual Room Temperature Display
8.2. Energy saving mode - Actual room temperature display The display energy saving mode is activated after approx. 5 mi- nutes. The display shows Actual room temperature. Note Pressing any button makes the welcome page appear again on the display after approx. 3 seconds. 8.3. -
Page 18: Manual Operating Mode
• Maintenance • Power Stage Blower • Date/Time • Display • Network • Error Log • Manual filling (for HSP 4.0-F2 only) • Info Software • Language 9.1.1. Manual operating mode Oper. mode Procedure: Press the "Manually" function to activate the manual operating Manually mode. -
Page 19: Automatic Operating Mode
9.1.2. Automatic operating mode Oper. mode Procedure: Press the "Automatic" function to activate the automatic operating Manually mode. Automatic Weekly program Setpoint temperature Procedure: Press and move the scroll bar to select the desired value. Confirm the selection by pressing the "OK" button. In automatic operating mode, the Setpoint temperature can be set from 10 °C to 30 °C. - Page 20 Multiple selection Procedure: Use double-click on any day of the week to select all days of the week. This allows all days of the week to be programmed with the same values. Confirm the selection by pressing the "OK" button. 1.
-
Page 21: Heating Curve
9.1.4. Heating curve Heating curve Procedure: Press and move the scroll bar to select the setpoint value and then press the "OK" button to conform it. Setting range of the heating curve from 1 to 4. Factory setting: 2 The value to be set is based on the size of the room being heated. •... -
Page 22: Power Stage Blower
9.1.7. Power stage blower Power stage blower Procedure: Press and move the scroll bar to set the desired value. The higher the selected value, the higher the speed of the blower. Confirm the selection by pressing the "OK" button. 9.1.8. Date / Time Procedure: Date / Time Use the "Plus"... - Page 23 9.1.10.1. Mode Network modes are available in the "Mode" menu. Mode local HaasSohn local global 9.1.10.2. App. PIN It is possible to generate a 4-digit pin in the "App. PIN" line. Network Mode local HaasSohn App. PIN 4363 HaasSohn_ Network name WIFI password 9.1.10.3.
-
Page 24: Error Log
In the error log there are shown the latest 64 error messages with Network dates and times. Error Log Info Software 9.1.12. Manual filling (for HSP 4.0-F2 only) Procedure: Manual filling In the main menu, select the "Manual filling" function and press the "START" button. -
Page 25: Info Software
+ S stoves. 10.1. Installation of mobile application You can find the "Haas + Sohn" app on Apple mobile devices in the App Store or on Android mobile devices in the Play Store. Mobile devices with the following operating system are supported: •... -
Page 26: Range Of Functions
The stove must be connected to The stove can be connected to an used to set up a new Haas + Sohn an existing home WLAN (Wifi). existing home WLAN (Wifi). The network (Hotspot, without internet... -
Page 27: Oper. Modes
11. Oper. modes 11.1. Burner test before start zone The start zone begins if: • the current room temperature falls below the set target temperature by 1 °C • the stove is cooled down to a temperature below 70 °C A burner test is performed before each start zone. -
Page 28: Standby
11.7. Standby The stove is in waiting condition. Before it can be switched over from the operating setting "standby" to the operating setting "Start zones 1 – 20", two conditions for the start are to be fulfilled: • The "Actual room temperature" must drop under the "Setpoint temperature" by 1 °C at least •... -
Page 29: Cleaning And Maintenance Work (See Appliance Sheet 3+4.)
• Once the electricity supply has been restored, the stove continues its operation. Long power cut – lasts for more than about 30 seconds: • Once the electricity supply is restored, the stove switches to the Shut down operating status and subsequently to "OFF". - Page 30 F. Screw motor defective D. Clean burner - Ensure adequate G. Pellet fuel has too low a calorific value combustion air E. Flue gas temperature sensor defective - contact service department F. Screw motor defective - contact service department G. Clean burner - switch to high quality pellet type F0006 A.
- Page 31 D. Change flue tube pipeline- contact service department E. Flue gas temperature sensor defective - contact service engineer F0023 A. Flame temperature sensor defective or not A. Contact service department connected F0025 A. Burner dirty (at burner test during start A.
-
Page 32: General Information / Faults
The receipt is to be presented as evidence. If a defect occurs in your appliance within the warranty period, HAAS + SOHN will correct (repair) this defect in the shortest possible time or optionally replace the defective item. Cancellation of the contract /a reduction in price is excluded in so far as this does not conflict with the statutory regulations. -
Page 33: Replacement Part Orders / Service Enquiries / Complaints
WARNING If any constructional change is made to the stove or if it is not used for the intended purpose, any claim under warranty lapses. 18. Replacement part orders / Service enquiries / Complaints For ordering replacement parts or making enquiries about repairs and service as well as in the event of any complaints, please get in touch directly with your Haas +Sohn sales partner where you purchased the appliance. - Page 36 All documents such as operating instructions, appliance sheet, test reports etc. and contact details can also be found under: www.haassohn.com...
Need help?
Do you have a question about the HSP 4.0-F2 and is the answer not in the manual?
Questions and answers