Barco FL40 Series Quick Start Manual
Hide thumbs
Also See for FL40 Series:
- User manual (126 pages) ,
- Quick start manual (6 pages) ,
- Quick manual (2 pages)
Table of Contents
Advertisement
Quick Links
FL40-series
Quick Start Guide
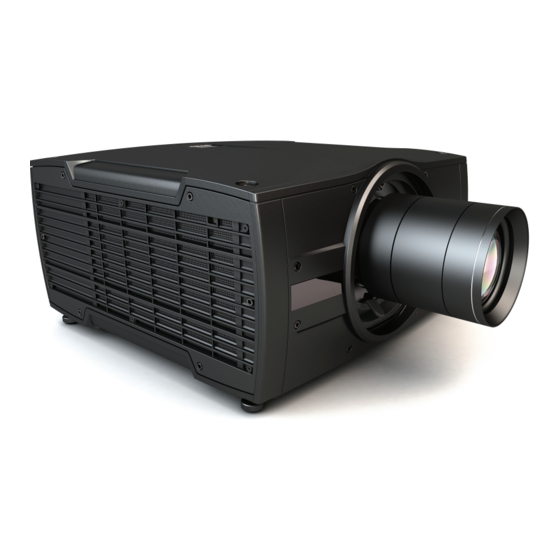
Projector Main Components and interface
Projector Main Components and interface
4
1
1
4
Adjustable feet.
1
Projector lens.
2
Lens holder.
3
IR receiver: For receiving remote control signals
4
LCD panel.
5
Keypad: Used for local operations on the projector.
6
Connector panel: Control and communication interfaces for the projector.
7
R5910124_00
Printed on FSC certi ed paper (www.fsc.org)
1
3
2
General
7
1
6
1
5
The backlight in the standby button on the keypad indicates by
behavior and color the status of the projector.
The table below shows the details.
Operating Status
On (active)
Wait On
Standby (O )
Wait
Overheating
Con gure / Upgrade
Standby ECO
WARNING!
Risk Goup 2 (RG2) LED Product according
to IEC EN 62471-5.
Do not stare into beam.
Refer to user manual before operating
Do not attempt to disassemble or modify
this projector.
Standby button backlight indications
Indication Color / Behaviour
Blue
Blue Flashing
White
White Short Flashing
Red Flashing
White fast ashing
White heartbeat
Advertisement
Table of Contents

Related Manuals for Barco FL40 Series


Summary of Contents for Barco FL40 Series
- Page 1 FL40-series Quick Start Guide General Projector Main Components and interface Projector Main Components and interface WARNING! Risk Goup 2 (RG2) LED Product according to IEC EN 62471-5. Do not stare into beam. Refer to user manual before operating Do not attempt to disassemble or modify this projector.
- Page 2 FL40-series Quick Start Guide General Keypad Keypad LCD Screen. Displays the current projector status and source connections. Navigation Panel. Navigation arrows (up, down, left, right). Confirm selection. Turn On Screen Display (OSD) menu ON / OFF. Power On/Standby Undo action / Back to previous screen Deactivate the OSD.
- Page 3 FL40-series Quick Start Guide General Installation Conditions Installation Conditions Remote Control Power up procedure Connect power Press Power On Button Ambient operating conditions: 110-240V Plug in mains power cord. Altitude 1500 - 3000 m: Altitude 0 - 1500 m: Press the power button. Temperature: 10 - 35°C Temperature: 10 - 40°C Humidity: 10-80% RH...
- Page 4 Install the lens bayonet into the lens mount, and then move the lever to the right. Check that the lever is firmly at the far right end, and that the to complete. lens is firmly in place before removing your hand from the lens.. Go to www.barco.com and select your product. All available firmware downloads are filed under the Technical Downloads tab. WARNING! Download the firmware.
Need help?
Do you have a question about the FL40 Series and is the answer not in the manual?
Questions and answers