
Related Manuals for Lexmark MX824


Summary of Contents for Lexmark MX824
- Page 1 MX822, MX824, MX826, XM7355, XM7365, XM7370 User's Guide June 2018 www.lexmark.com Machine type(s): 7465 Model(s): 436, 496, 636, 696, 836, 896...
-
Page 2: Table Of Contents
Contents Contents Safety information..................7 Conventions................................7 Product statements..............................7 Learning about the printer................. 10 Finding information about the printer......................10 Selecting a location for the printer......................... 11 Printer configurations............................12 Attaching cables..............................15 Using the control panel............................ 16 Understanding the status of the power button and indicator light............16 Setting up and using the home screen applications......18 Using the home screen.............................18 Customizing the home screen........................19... - Page 3 Contents Enabling Magnification mode.........................27 Adjusting the Voice Guidance speech rate....................27 Using the keyboard on the display.......................27 Enabling spoken passwords or personal identification numbers............27 Loading paper and specialty media............28 Setting the size and type of the specialty media..................28 Configuring Universal paper settings......................28 Loading the 550‑sheet tray..........................
- Page 4 Contents Copying multiple pages onto a single sheet..................... 52 Creating a copy shortcut..........................52 E-mailing...................... 54 Setting up the e‑mail function........................54 Configuring e‑mail settings..........................54 Sending an e-mail..............................54 Creating an e-mail shortcut..........................55 Faxing......................56 Setting up the printer to fax..........................56 Sending a fax..............................62 Scheduling a fax..............................
- Page 5 Contents FTP..................................116 USB Drive................................120 Network/Ports..............................126 Security................................138 Reports................................146 Help..................................147 Troubleshooting..............................147 Printing the Menu Settings Page........................147 Securing the printer..................148 Locating the security slot..........................148 Erasing printer memory..........................148 Erasing printer hard disk memory....................... 148 Encrypting the printer hard disk........................148 Restoring factory default settings........................149 Statement of Volatility.............................149 Maintaining the printer................
- Page 6 Contents Paper jam in the 4‑bin mailbox........................199 Paper jam in the offset stacker or staple finisher...................200 Paper jam in the staple, hole punch finisher................... 202 Staple jam in the staple finisher........................203 Staple jam in the staple, hole punch finisher..................206 Troubleshooting..................
-
Page 7: Safety Information
CAUTION—POTENTIAL INJURY: Only a Lexmark Inline Surge Protector that is properly connected between the printer and the power cord provided with the printer may be used with this product. The use of non-Lexmark surge protection devices may result in a risk of fire, property damage, or poor printer performance. - Page 8 Safety information CAUTION—SHOCK HAZARD: To avoid the risk of electrical shock, do not set up this product or make any electrical or cabling connections, such as the power cord, fax feature, or telephone, during a lightning storm. CAUTION—POTENTIAL INJURY: Do not cut, twist, bind, crush, or place heavy objects on the power cord.
- Page 9 CAUTION—TIPPING HAZARD: Installing one or more options on your printer or MFP may require a caster base, furniture, or other feature to prevent instability causing possible injury. For more information on supported configurations, see www.lexmark.com/multifunctionprinters. CAUTION—TIPPING HAZARD: To reduce the risk of equipment instability, load each tray separately.
-
Page 10: Learning About The Printer
Finding information about the printer What are you looking for? Find it here Initial setup instructions: See the setup documentation that came with the printer or go to http://support.lexmark.com. • Connecting the printer • Installing the printer software More setup and instructions for using the printer: Information Center—Go to... -
Page 11: Selecting A Location For The Printer
Learning about the printer What are you looking for? Find it here The latest supplemental information, updates, and customer Go to http://support.lexmark.com. support: Note: Select your country or region, and then • Documentation select your product to view the appropriate support site. -
Page 12: Printer Configurations
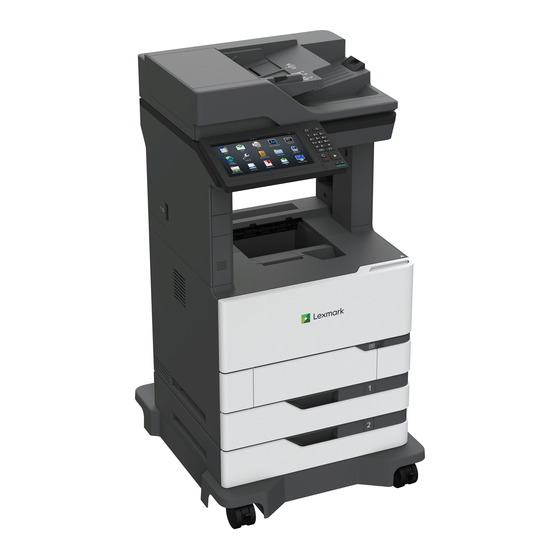
CAUTION—TIPPING HAZARD: Installing one or more options on your printer or MFP may require a caster base, furniture, or other feature to prevent instability causing possible injury. For more information on supported configurations, see www.lexmark.com/multifunctionprinters. CAUTION—TIPPING HAZARD: To reduce the risk of equipment instability, load each tray separately. - Page 13 Learning about the printer You can configure your printer by adding optional 550‑ or 2100‑sheet trays. For more information, see “Installing the 550‑sheet tray” on page 271 “Installing the 2100‑sheet tray” on page 272. Basic model Automatic document feeder (ADF) tray ADF bin Standard bin Multipurpose feeder...
- Page 14 Learning about the printer Configured model Hardware option Alternative hardware option 4‑bin mailbox • Offset stacker • Staple finisher • Staple, hole punch finisher 2100‑sheet tray 550‑sheet trays Caster base Caster base 550‑sheet trays 2100‑sheet tray Staple finisher • 4‑bin mailbox •...
-
Page 15: Attaching Cables
Learning about the printer Attaching cables CAUTION—SHOCK HAZARD: To avoid the risk of electrical shock, do not set up this product or make any electrical or cabling connections, such as the power cord, fax feature, or telephone, during a lightning storm. CAUTION—POTENTIAL INJURY: To avoid the risk of fire or electrical shock, connect the power cord to an appropriately rated and properly grounded electrical outlet that is near the product and easily accessible. -
Page 16: Using The Control Panel
Learning about the printer Using the control panel Use the Display • View the printer messages and supply status. • Set up and operate the printer. Home button Go to the home screen. Power button • Turn on or turn off the printer. Note: To turn off the printer, press and hold the power button for five seconds. - Page 17 Learning about the printer Indicator light Printer status The printer requires user intervention. Power button light Printer status The printer is off, ready, or processing data. Solid amber The printer is in Sleep mode. Blinking amber The printer is in Hibernate mode.
-
Page 18: Setting Up And Using The Home Screen Applications
Setting up and using the home screen applications Setting up and using the home screen applications Note: These applications are supported only in some printer models. Using the home screen Note: Your home screen may vary depending on your home screen customization settings, administrative setup, and active embedded solutions. -
Page 19: Customizing The Home Screen
Setting up and using the home screen applications Touch Shortcut Center Organize all shortcuts. App Profiles Access application profiles. Scan Profiles Scan and save documents directly to the computer. Scan and save documents directly to an FTP server. Bookmarks Organize all bookmarks. Change Language Change the language on the display. -
Page 20: Using Shortcut Center
Setting up and using the home screen applications Using Shortcut Center From the home screen, touch Shortcut Center, and then select a printer function. Touch Create Shortcut, and then configure the settings. Touch Save, and then type a unique shortcut name. Apply the changes. -
Page 21: Creating A Cloud Connector Profile
Touch Create, and then take note of the authorization code. Note: The authorization code is valid only for 24 hours. Open a web browser, and then go to https://lexmark.cloud-connect.co. Click Next, and then accept the Terms of Use. Enter the authorization code, and then click Connect. -
Page 22: Using Qr Code Generator
Setting up and using the home screen applications Note: For information on how to configure the application and its security settings, see the Device Quotas Administrator’s Guide. Using QR Code Generator You may need administrative rights to access the application. Open a Web browser, and then type the printer IP address in the address field. -
Page 23: Creating Folders
Setting up and using the home screen applications • If you are using a proxy server, then temporarily disable it to load the web page correctly. Click Bookmark Setup > Add Bookmark, and then type a unique name for the bookmark. Select an Address protocol type, and then do one of the following: •... -
Page 24: Adding Groups
Setting up and using the home screen applications Notes: • View the printer IP address on the printer home screen. The IP address appears as four sets of numbers separated by periods, such as 123.123.123.123. • If you are using a proxy server, then temporarily disable it to load the web page correctly. Click Address Book. - Page 25 Setting up and using the home screen applications Notes: • View the printer IP address on the printer home screen. The IP address appears as four sets of numbers separated by periods, such as 123.123.123.123. • If you are using a proxy server, then temporarily disable it to load the web page correctly. Click Address Book.
-
Page 26: Setting Up And Using The Accessibility Features
Setting up and using the accessibility features Setting up and using the accessibility features Activating Voice Guidance From the control panel Press and hold the 5 key until you hear a voice message. Select OK. From the keyboard Press and hold the 5 key until you hear a voice message. Press Tab to navigate the focus cursor to the OK button, and then press Enter. -
Page 27: Enabling Magnification Mode
Setting up and using the accessibility features Enabling Magnification mode From the control panel, press and hold the 5 key until you hear a voice message. Select Magnification mode. Select OK. For more information on navigating a magnified screen, see “Navigating the screen using gestures”... -
Page 28: Loading Paper And Specialty Media
Loading paper and specialty media Loading paper and specialty media Setting the size and type of the specialty media The trays automatically detect the size of plain paper. For specialty media like labels, card stock, or envelopes, do the following: From the home screen, navigate to: Settings >... - Page 29 Loading paper and specialty media Flex, fan, and align the paper edges before loading. Load the paper stack with the printable side facedown, and then make sure that the side guides fit snugly against the paper.
- Page 30 Loading paper and specialty media • Do not slide paper into the tray. • To avoid paper jams, make sure that the stack height is below the maximum paper fill indicator. • Load letterhead depending on whether an optional staple finisher is installed or not. Without an optional staple finisher With an optional staple finisher One‑sided printing One‑sided printing...
-
Page 31: Loading The 2100-Sheet Tray
Loading paper and specialty media • Load envelopes with the flap side up and against the left side of the tray. Warning—Potential Damage: Do not use envelopes with stamps, clasps, snaps, windows, coated linings, or self‑stick adhesives. Insert the tray. From the control panel, set the paper size and paper type to match the paper loaded. - Page 32 Loading paper and specialty media Squeeze and slide the length guide to the position for A5 until it clicks into place. Remove the A5 length guide from its holder. Insert the guide into its designated slot, and then press until it clicks into place.
- Page 33 Loading paper and specialty media Loading A4‑, letter‑, legal‑, oficio‑, and folio‑size paper Pull up and slide the width guide to the correct position for the size of the paper being loaded. If the A5 length guide is still attached, then remove it. If the guide is not attached, then proceed to step d on page Place the A5 length guide in its holder.
- Page 34 Loading paper and specialty media Squeeze, and then slide the length guide to the correct position for the size of the paper being loaded. Flex, fan, and align the paper edges before loading. Load the paper stack with the printable side facedown. •...
- Page 35 Loading paper and specialty media Without an optional staple finisher With an optional staple finisher Two‑sided printing Two‑sided printing • When loading prepunched paper, make sure that the holes on the long edge of the paper are against the right side of the tray. One‑sided printing Two‑sided printing Insert the tray.
-
Page 36: Loading The Multipurpose Feeder
Loading paper and specialty media Loading the multipurpose feeder Open the multipurpose feeder. Adjust the guide to match the size of the paper that you are loading. Flex, fan, and align the paper edges before loading. Load paper with the printable side faceup. •... -
Page 37: Linking Trays
Loading paper and specialty media Without an optional staple finisher With an optional staple finisher Two‑sided printing Two‑sided printing • When loading prepunched paper, make sure that the holes on the long edge of the paper are against the right side of the paper guide. One‑sided printing Two‑sided printing •... -
Page 38: Paper Support
Paper support Paper support Supported paper sizes Paper sizes supported by the printer Paper size Standard or Optional Multipurpose feeder Two‑sided optional 550‑sheet 2100‑sheet tray printing tray 210 x 297 mm (8.3 x 11.7 in.) A5 LEF 210 x 148 mm (8.3 x 5.8 in.) A5 SEF 148 x 210 mm (5.8 x 8.3 in.) 105 x 148 mm (4.1 x 5.8 in.) - Page 39 Paper support Paper size Standard or Optional Multipurpose feeder Two‑sided optional 550‑sheet 2100‑sheet tray printing tray 9 Envelope 98 x 225 mm (3.9 x 8.9 in.) 10 Envelope 105 x 241 mm (4.1 x 9.5 in.) DL Envelope 110 x 220 mm (4.3 x 8.7 in.) C5 Envelope 162 x 229 mm (6.4 x 9 in.) B5 Envelope...
- Page 40 Paper support Paper size Offset stacker 4‑bin mailbox Staple finisher Staple, hole punch finisher Stack Staple Stack Staple Hole punch Statement 140 x 216 mm (5.5 x 8.5 in.) Executive 184 x 267 mm (7.3 x 10.5 in.) Letter 216 x 279 mm (8.5 x 11 in.) Legal 216 x 356 mm...
-
Page 41: Supported Paper Types
Paper support Paper size Offset stacker 4‑bin mailbox Staple finisher Staple, hole punch finisher Stack Staple Stack Staple Hole punch Other Envelopes 98.4 x 162 mm (3.9 x 6.4 in.) to 176 x 250 mm (6.9 x 9.8 in.) Supported paper types Paper types supported by the printer Paper type Standard or... - Page 42 Paper support Paper type Standard or Optional Multipurpose feeder Two‑sided printing optional 550‑sheet 2100‑sheet tray tray Custom type [x] To prevent transparencies from sticking together, print up to 20 pages only. Print the succeeding pages after three minutes. Paper types supported by the output options or finishers Paper type Offset stacker 4‑bin Staple finisher...
-
Page 43: Supported Paper Weights
Paper support Supported paper weights Paper weights supported by the printer Paper type and weight Standard or Optional Multipurpose feeder Two‑sided printing optional 2100‑sheet 550‑sheet tray tray Plain paper or Bond ² 60–176 g/m grain long (16–47‑lb bond) Card stock ²... - Page 44 Paper support Paper weights supported by the output options or finishers Paper type and Offset stacker 4‑bin Staple finisher Staple, hole punch finisher weight mailbox Stack Staple Stack Staple Hole punch Plain paper or Bond ² 60–176 g/m grain long (16– 47‑lb bond) Plain paper or Bond...
- Page 45 Paper support Paper type and Offset stacker 4‑bin Staple finisher Staple, hole punch finisher weight mailbox Stack Staple Stack Staple Hole punch Envelopes ² 60–105 g/m (16–28‑lb bond)
-
Page 46: Printing
Printing from a mobile device using Lexmark Mobile Print Lexmark Mobile Print allows you to send documents and images directly to a supported Lexmark printer. Open the document, and then send or share the document to Lexmark Mobile Print. Note: Some third‑party applications may not support the send or share feature. For more information, see the documentation that came with the application. -
Page 47: Printing From A Flash Drive
Printing Printing from a mobile device using AirPrint AirPrint is a mobile printing solution that allows you to print directly from Apple devices to an AirPrint‑certified printer. Notes: • This application is supported only in some Apple devices. • This application is supported only in some printer models. From the home screen of your mobile device, launch a compatible application. -
Page 48: Supported Flash Drives And File Types
Printing Supported flash drives and file types Flash drives • Lexar JumpDrive S70 (16GB and 32GB) • SanDisk Cruzer (16GB and 32GB) • PNY Attaché (16GB and 32GB) Notes: – The printer supports high‑speed USB flash drives with full‑speed standard. –... -
Page 49: Configuring Confidential Jobs
Printing Configuring confidential jobs From the control panel, navigate to: Settings > Security > Confidential Print Setup For non‑touch‑screen printer models, press to navigate through the settings. Configure the settings. Max Invalid PIN Set the number of times an invalid PIN can be entered. Note: When the limit is reached, the print jobs for that user name are deleted. -
Page 50: Printing From A Cloud Connector Profile
Printing From the printer home screen, release the print job. • For confidential print jobs, navigate to: Held jobs > select your user name > Confidential > enter the PIN > select the print job > configure the settings > Print •... -
Page 51: Copying
Copying Copying Making copies Load an original document into the ADF tray or on the scanner glass. Note: To avoid a cropped image, make sure that the original document and output have the same paper size. From the home screen, touch Copy, and then specify the number of copies. If necessary, adjust the copy settings. -
Page 52: Reducing Or Enlarging Copies
Copying Reducing or enlarging copies Load an original document into the ADF tray or on the scanner glass. From the home screen, navigate to: Copy > Scale > specify a scale value Note: Changing the size of the original document or output after setting Scale restores the scale value to Auto. - Page 53 Copying From the Shortcut Type menu, select Copy, and then configure the settings. Apply the changes.
-
Page 54: E-Mailing
E-mailing E-mailing Setting up the e‑mail function Open a web browser, and then type the printer IP address in the address field. Notes: • View the printer IP address on the home screen. The IP address appears as four sets of numbers separated by periods, such as 123.123.123.123. -
Page 55: Creating An E-Mail Shortcut
E-mailing Creating an e-mail shortcut Note: You may need administrative rights to create a shortcut. Open a web browser, and then type the printer IP address in the address field. Notes: • View the printer IP address on the home screen. The IP address appears as four sets of numbers separated by periods, such as 123.123.123.123. -
Page 56: Faxing
Faxing Faxing Setting up the printer to fax Notes: • The following connection methods are applicable only in some countries or regions. • During the initial printer setup, clear the fax function check box and any other function that you plan to set up later, and then select Continue. - Page 57 Faxing CAUTION—POTENTIAL INJURY: To reduce the risk of fire, use only a 26 AWG or larger telecommunications (RJ-11) cord when connecting this product to the public switched telephone network. For users in Australia, the cord must be approved by the Australian Communications and Media Authority.
- Page 58 Faxing Setup 2: Printer is sharing the line with an answering machine Note: If you subscribe to a distinctive ring service, then make sure that you set the correct ring pattern for the printer. Otherwise, the printer does not receive faxes even if you have set it to receive faxes automatically.
- Page 59 There may be an adapter plug installed in the telephone port of the printer. Do not remove the adapter plug from the telephone port of the printer if you are connecting to a serial or cascaded telephone system. Part name Part number Lexmark adapter plug 40X8519...
- Page 60 Faxing Connecting the printer to a non‑RJ11 wall jack Connect one end of the telephone cable to the line port of the printer. Connect the other end of the cable to the RJ11 adapter, and then connect the adapter to the wall jack. If you want to connect another device with a non‑RJ11 connector to the same wall jack, then connect it directly to the telephone adapter.
- Page 61 Faxing Connecting the printer to a wall jack in Germany The German wall jack has two kinds of ports. The N ports are for fax machines, modems, and answering machines. The F port is for telephones. Connect the printer to any of the N ports. Connect one end of the telephone cable to the line port of the printer.
-
Page 62: Sending A Fax
Faxing Connecting to a distinctive ring service A distinctive ring service lets you have multiple telephone numbers on one telephone line. Each telephone number is assigned a different ring pattern. From the home screen, touch Settings > Fax > Analog Fax Setup > Fax Receive Settings > Admin Controls >... -
Page 63: Scheduling A Fax
Faxing For Macintosh users With a document open, choose File > Print. Select the printer and enter the recipient number. If necessary, configure other fax settings. Send the fax job. Scheduling a fax Load the original document into the ADF tray or on the scanner glass. From the home screen, navigate to: Fax >... -
Page 64: Adjusting The Fax Darkness
Faxing Adjusting the fax darkness Load an original document into the ADF tray or on the scanner glass. From the home screen, touch Fax, and then enter the needed information. Adjust the Darkness setting. Send the fax job. Viewing a fax log Note: You may need administrative rights to view the fax logs. -
Page 65: Scanning
Scanning Scanning Scanning to an FTP server Load the original document into the ADF tray or on the scanner glass. From the home screen, touch FTP, and then enter the needed information. If necessary, configure other FTP settings. Send the FTP job. Creating an FTP shortcut Note: You may need administrative rights to create a shortcut. -
Page 66: Scanning To A Fax Server
Scanning Touch Scan to USB and adjust the settings if necessary. Note: If the USB Drive screen does not appear, then touch USB Drive on the home screen. Scan the document. Warning—Potential Damage: To avoid loss of data or printer malfunction, do not touch the flash drive or the printer in the area shown while actively printing, reading, or writing from the memory device. - Page 67 Scanning Select a cloud service provider, and then select a profile. Note: For more information on creating a Cloud Connector profile, see “Creating a Cloud Connector profile” on page If necessary, select a folder. Touch Scan. If necessary, change the scan settings. Touch Scan.
-
Page 68: Understanding The Printer Menus
• Remote Operator Panel Restore Factory Defaults • • Notifications Maintenance • • Power Management Visible Home Screen Icons • • Information Sent to Lexmark About this Printer Print • • Layout • • Setup PostScript • • Quality •... -
Page 69: Device
Understanding the printer menus Help • • Print All Guides Information Guide • • Mono Quality Guide Media Guide • • Connection Guide Moving Guide • • Copy Guide Print Quality Guide • • E‑mail Guide Scan Guide • • Fax Guide Supplies Guide Troubleshooting... - Page 70 Understanding the printer menus Menu item Description Date and Time Configure the settings for Network Time Protocol (NTP). Network Time Protocol Notes: Enable NTP [On*] • Enable Authentication appears only in some printer NTP Server models. Enable Authentication • When Enable Authentication is set to MD5 key, Key ID and Password appear.
- Page 71 Understanding the printer menus Remote Operator Panel Menu item Description External VNC Connection Connect an external Virtual Network Computing (VNC) client to the remote control panel. Don’t Allow* Allow Authentication Type Set the authentication type when accessing the VNC client server.
- Page 72 Understanding the printer menus Menu item Description E‑mail Alerts Setup Enter the server port number of your secondary or backup SMTP server. E‑mail Setup Secondary SMTP Gateway Port Note: This menu item appears only in some printer models. 1–65535 (25*) E‑mail Alerts Setup Specify how long before the printer times out if the SMTP server does not respond.
- Page 73 Understanding the printer menus Menu item Description E‑mail Alerts Setup Set whether credentials are required for user‑initiated e‑mails. E‑mail Setup Note: This menu item appears only in some printer models. User‑Initiated E‑mail None Use Device SMTP Credentials Use Session User ID and Password Use Session E‑mail address and Password* Prompt user...
- Page 74 Understanding the printer menus Menu item Description Error Prevention Set the printer to restart when an error occurs. Auto Reboot Auto Reboot Reboot when idle Reboot always* Reboot never Error Prevention Set the number of automatic reboots that the printer can perform.
- Page 75 Understanding the printer menus Power Management Menu item Description Sleep Mode Profile Allow printing with the display turned off. Print With Display Off Display on when printing Allow printing with display off* Timeouts Set the idle time before the printer begins operating in Sleep mode.
- Page 76 Send printer usage and performance information to Lexmark. Note: Information Send Time and User Information ‑ Level appear only Supplies and Page Usage (Anonymous) when you select any of the settings in Information Sent to Lexmark, Device Performance (Anonymous) except None of the Above. Device Interaction (Anonymous)
- Page 77 Understanding the printer menus Menu item Description Speak Passwords/PINs Set the printer to read out loud passwords or personal identification numbers. Off* Note: This menu item appears only when a headphone or a speaker is attached to the printer. Speech Rate Set the Voice Guidance speech rate.
- Page 78 Understanding the printer menus Menu item Description USB Configuration Set the USB port to run at full speed and disable its high‑speed capabilities. USB Speed Full Auto* Tray Configuration Set the printer to link the trays that have the same paper type and paper size settings.
- Page 79 Understanding the printer menus Menu item Description Printer Emulations Set the printer to recognize and use the PPDS data stream. PPDS Emulation Off* Fax Configuration Set the fax chip to enter low‑power mode whenever the printer determines that it should. Fax Low Power Support Disable Sleep Permit Sleep...
- Page 80 Understanding the printer menus Menu item Description Device Operations Erase messages that were remotely installed. Clear all remotely‑installed messages Device Operations Show existing error messages on the display after the printer remains inactive on the home screen for a length of time equal Automatically Display Error Screens to the Screen Timeout setting.
- Page 81 Understanding the printer menus Out of Service Erase Menu item Description Out of Service Erase Show information on when the printer memory or hard disk was last sanitized. Memory Last Sanitized Hard Disk Last Sanitized Note: Hard Disk Last Sanitized appears only in printers with a hard disk installed.
-
Page 82: Print
Understanding the printer menus Print Layout Menu item Description Sides Specify whether to print on one side or two sides of the paper. 1‑sided* 2‑sided Flip Style Determine which side of the paper (long edge or short edge) is bound when performing two‑sided printing. - Page 83 Understanding the printer menus Menu item Description Pages per Side Orientation Specify the orientation of a multiple‑page document when using Pages per Side. Auto* Landscape Portrait Pages per Side Border Print a border around each page image when using Pages per Side. None* Solid Copies...
- Page 84 Understanding the printer menus Menu item Description Resource Save Determine what the printer does with downloaded resources, such as fonts and macros, when it receives a job that requires more than the Off* available memory. Notes: • When set to Off, the printer retains downloaded resources only until memory is needed.
- Page 85 Understanding the printer menus Menu item Description Contrast Adjust the contrast of the printed output. 0 to 5 (0*) Gray Correction Adjust the contrast enhancement applied to images. Auto* Note: An asterisk (*) next to a value indicates the factory default setting. Job Accounting Note: This menu appears only when a printer hard disk is installed.
- Page 86 Understanding the printer menus Menu item Description Log Action at Full Specify how the printer responds when disk usage reaches the maximum limit (100MB). None* E‑mail & Delete Current Log E‑mail & Delete Oldest Log Post & Delete Current Log Post &...
- Page 87 Understanding the printer menus PostScript Menu item Description Print PS Error Print a page that contains the PostScript error. Off* Note: When an error occurs, processing of the job stops, the printer prints an error message, and the rest of the print job is flushed. Lock PS Startup Mode Disable the PostScript SysStart file.
- Page 88 Understanding the printer menus Menu item Description Lines per Page Specify the number of lines of text for each page printed through the PCL® datastream. 1–255 Notes: • This menu item activates vertical escapement that causes the selected number of requested lines to print between the default margins of the page.
- Page 89 Understanding the printer menus HTML Menu item Description Font Name Set the font to use for HTML documents. [List of fonts] (Times*) Font Size Set the font size to use for HTML documents. 1–255 (12*) Scale Scale HTML documents. 1–400% (100*) Orientation Set the page orientation for HTML documents.
-
Page 90: Paper
Understanding the printer menus Paper Tray Configuration Menu item Description Default Source Set the paper source for all print jobs. Tray [x] (1*) Note: Multipurpose Feeder only appears when Configure MP is set to Multipurpose Feeder Cassette. Manual Paper Manual Envelope Paper Size/Type Specify the paper size or paper type loaded in each paper source. - Page 91 Understanding the printer menus Menu item Description Portrait Width Set the portrait width of the universal paper. 3–52 inches (8.50*) 76–1321 mm (216*) Portrait Height Set the portrait height of the universal paper. 3–52 inches (14*) 76–1321 mm (356*) Feed Direction Set the printer to pick paper from the short edge or long edge direction.
-
Page 92: Copy
Understanding the printer menus Media Types Menu item Description Plain Specify the texture, weight, and orientation of the paper loaded. Card Stock Transparency Recycled Labels Vinyl Labels Bond Envelope Rough Envelope Letterhead Preprinted Colored Paper Light Heavy Rough/Cotton Custom Type [x] Copy Copy Defaults Menu item... - Page 93 Understanding the printer menus Menu item Description Sides (Duplex) Specify the scanning behavior based on the original document. 1 sided to 1 sided* 1 sided to 2 sided 2 sided to 1 sided 2 sided to 2 sided Separator Sheets Specify whether to insert blank separator sheets when printing.
- Page 94 Understanding the printer menus Menu item Description Header/Footer Apply a header or footer on the printed output. Top left Top middle Top right Bottom left Bottom middle Bottom right Overlay Specify the overlay text printed on each page of the copy job. Confidential Copy Draft...
- Page 95 Understanding the printer menus Menu item Description Background Removal Adjust the amount of background visible on a scanned image. Background Detection Note: If you want to remove the background color from the original document, Level then set Background Detection to Content‑based. If you want to remove image noise from a photo, then set Background Detection to Fixed.
-
Page 96: Fax
Understanding the printer menus Fax Mode Menu item Description Fax Mode Select a fax mode. Analog* Fax Server Disabled Note: An asterisk (*) next to a value indicates the factory default setting. Analog Fax Setup General Fax Settings Menu item Description Fax Name Identify your fax machine. - Page 97 Understanding the printer menus Menu item Description Caller ID Show the telephone number of the person sending the fax. Alternate Fax Number Masking Specify the format for masking an outgoing fax number. Off* From Left From Right Digits to Mask Specify the number of digits to mask in an outgoing fax number.
- Page 98 Understanding the printer menus Menu item Description Orientation Specify the orientation of the original document. Portrait* Landscape Sides Specify the page orientation of text and graphics when scanning a two‑sided document. Off* Long Edge Short Edge Content Type Improve the output result based on the content of the original document. Text* Text/Photo Photo...
- Page 99 Understanding the printer menus Menu item Description Color Dropout Specify which color to drop during scanning, and adjust the dropout setting for that color. None* Green Blue Default Red Threshold 0–255 (128*) Default Green Threshold 0–255 (128*) Default Blue Threshold 0–255 (128*) Contrast Set the contrast of the output.
- Page 100 Understanding the printer menus Admin Controls Menu item Description Automatic Redial Adjust the number of redial attempts based on the activity levels of recipient fax machines. 0–9 (5*) Redial Frequency Increase the time between redial attempts to increase the chance of sending fax successfully.
- Page 101 Understanding the printer menus Menu item Description Confirm Fax Number Ask the user to confirm the fax number. Off* Dial Prefix Set a dialing prefix. Dialing Prefix Rules Establish a dialing prefix rule. Prefix Rule [x] Note: An asterisk (*) next to a value indicates the factory default setting. Fax Receive Settings Menu item Description...
- Page 102 Understanding the printer menus Menu item Description Fax Footer Time Stamp Print the time stamp at the bottom of each page from a received fax. Receive* Print Holding Faxes Hold received faxes from printing until they are released. Held Fax Mode Off* Always On Manual...
- Page 103 Understanding the printer menus Menu item Description Manual Answer Code Manually enter a code on the telephone number pad to begin receiving fax. 0–9 (9*) Notes: • This menu item appears only when the printer shares a line with a telephone.
- Page 104 Understanding the printer menus Fax Cover Page Menu item Description Fax Cover Page Configure the settings for the fax cover page. Off by Default* On by Default Never Use Always Use Include To field Off* Include From field Off* From Include Message Field Off* Message:...
- Page 105 Understanding the printer menus Menu item Description Log Paper Source Specify the paper source for printing logs. Tray [x] (1*) Multipurpose Feeder Logs Display Identify the sender by remote fax name or fax number. Remote Fax Name* Dialed Number Enable Job Log View a summary of all fax jobs.
- Page 106 Understanding the printer menus Menu item Description Reply Address Specify a reply address for sending fax. Subject Specify the fax subject and message. Message Enable analog receive Set the printer to receive analog faxes. Off* Note: An asterisk (*) next to a value indicates the factory default setting. Fax Server E‑mail Settings Menu item Description...
- Page 107 Understanding the printer menus Menu item Description Device‑Initiated E‑mail Specify whether credentials are required for device‑initiated e‑mail. None* Use Device SMTP Credentials User‑Initiated E‑mail Specify whether credentials are required for user‑initiated e‑mail. None* Use Device SMTP Credentials Use Session User ID and Password Use Session E‑mail address and Password...
-
Page 108: E-Mail
Understanding the printer menus Menu item Description Content Source Improve the output result based on the source of the original document. Black and White Laser Color Laser* Inkjet Photo/Film Magazine Newspaper Press Other Fax Resolution Set the fax resolution. Standard* Fine Super Fine Ultra Fine... - Page 109 Understanding the printer menus Menu item Description Secondary SMTP Gateway Type the server IP address or host name of your secondary or backup SMTP server. Secondary SMTP Gateway Port Enter the server port number of your secondary or backup SMTP server. 1–65535 (25*) SMTP Timeout Set the time before the printer times out if the SMTP server does not respond.
- Page 110 Understanding the printer menus Menu item Description Device Userid Specify the user ID and password to connect to the SMTP server. Device Password Kerberos 5 REALM Specify the realm for the Kerberos 5 authentication protocol. NTLM Domain Specify the domain name for the NTLM security protocol. Disable "SMTP server not set Hide the “SMTP server not set up”...
- Page 111 Understanding the printer menus Menu item Description PDF Settings Set the PDF format of the scanned image. PDF Version 1.5* Archival Version A‑1a* A‑1b Highly Compressed Off* Secure Off* Searchable Off* Archival (PDF/A) Off* Content Type Improve the output result based on the content of the original document. Text Text/Photo* Photo...
- Page 112 Understanding the printer menus Menu item Description Resolution Set the resolution of the scanned image. 75 dpi 150 dpi* 200 dpi 300 dpi 400 dpi 600 dpi Darkness Adjust the darkness of the scanned image. -4 to 4 (0*) Orientation Specify the orientation of text and graphics on the page.
- Page 113 Understanding the printer menus Menu item Description JPEG Quality Set the quality of a JPEG‑format scanned image. Best for content* Notes: 5–95 • 5 reduces the file size, but lessens the image quality. • 95 provides the best image quality, but produces a large file size. Contrast Specify the contrast of the output.
- Page 114 Understanding the printer menus Admin Controls Menu item Description Max E‑mail Size Set the allowable file size for each e‑mail. 0–65535 (0*) Size Error Message Specify an error message that the printer sends when an e‑mail exceeds its allowable file size. Note: You can type up to 1024 characters.
- Page 115 Understanding the printer menus Menu item Description Log Paper Source Specify the paper source for printing logs. Tray [x] (1*) Multipurpose Feeder Custom Job Scanning Turn on scanning of custom jobs by default. Off* Note: This menu item appears only when a hard disk is installed. Scan Preview Show the scan preview on the display.
-
Page 116: Ftp
Understanding the printer menus FTP Defaults Menu item Description Format Specify the file format for the scanned image. PDF (.pdf)* Note: The menu items may vary depending on your printer model. TIFF (.tif) JPEG (.jpg) XPS (.xps) TXT (.txt) RTF (.rtf) DOCX (.docx) Global OCR Settings Configure the settings for optical character recognition (OCR). - Page 117 Understanding the printer menus Menu item Description Content Source Improve the output result based on the source of the original document. Black and White Laser Color Laser* Inkjet Photo/Film Magazine Newspaper Press Other Color Specify the color when scanning an image. Black and White Gray Color*...
- Page 118 Understanding the printer menus Advanced Imaging Menu item Description Color Balance Adjust the amount of toner used for each color in scan output. -4 to 4 (0*) Color Dropout Specify which color to drop during scanning, and adjust the dropout setting for that color.
- Page 119 Understanding the printer menus Menu item Description Negative Image Create a negative image of the original document. Off* Shadow Detail Adjust the amount of shadow detail visible on a scanned image. ‑4 to 4 (0*) Scan Edge to Edge Allow edge‑to‑edge scanning of the original document. Off* Sharpness Adjust the sharpness of a scanned image.
-
Page 120: Usb Drive
Understanding the printer menus Menu item Description FTP Bit Depth Enable the Text/Photo mode to have smaller file sizes by using 1‑bit image. 1 bit Note: This menu item appears only when Color is set to Gray. 8 bit* Custom Job Scanning Turn on scanning of custom jobs by default. - Page 121 Understanding the printer menus Menu item Description PDF Settings Set the PDF format for the scanned image. PDF Version 1.5* Archival Version A‑1a* A‑1b Secure Off* Archival (PDF/A) Off* Content Type Improve the output result based on the content of the original document. Text Text/Photo* Graphics...
- Page 122 Understanding the printer menus Menu item Description Darkness Adjust the darkness of the scanned image. 1–9 (5*) Orientation Specify the orientation of text and graphics on the page. Portrait* Landscape Original Size Set the paper size of the original document. [List of paper sizes] Notes: •...
- Page 123 Understanding the printer menus Menu item Description JPEG Quality Set the quality of a JPEG‑format image. Best for content* Notes: 5–95 • 5 reduces the file size, but lessens the image quality. • 90 provides the best image quality, but produces a large file size. Contrast Specify the contrast of the output.
- Page 124 Understanding the printer menus Admin Controls Menu item Description Text Default Set the quality of text on a scanned image. 5–95 (75*) Text/Photo Default Set the quality of text or photo on a scanned image. 5–95 (75*) Photo Default Set the quality of a photo on a scanned image. 5–95 (75*) Use Multi‑Page TIFF Choose between single- and multiple‑page TIFF files.
- Page 125 Understanding the printer menus Menu item Description Sides Specify whether to print on one side or two sides of the paper. 1‑Sided* 2‑Sided Flip Style Determine which side of the paper (long edge or short edge) is bound when performing two‑sided printing. Long Edge* Short Edge Note: Depending on the option selected, the printer automatically offsets each...
-
Page 126: Network/Ports
Note: An asterisk (*) next to a value indicates the factory default setting. Wireless Note: This menu is available only in printers connected to a Wi‑Fi network or printers that have a wireless network adapter. Menu item Description Setup Using Mobile App Configure the Wi‑Fi connection using Lexmark Mobile Assistant. - Page 127 Understanding the printer menus Menu item Description Setup On Printer Panel Configure the Wi‑Fi connection using the control panel. Choose Network Note: 802.1x - RADIUS can be configured only from the Embedded Add Wi‑Fi Network Web Server. Network Name Network Mode Infastructure Wireless Security Mode Disabled*...
- Page 128 Understanding the printer menus Menu item Description WPA2/WPA Personal Enable Wi‑Fi security through Wi-Fi Protected Access (WPA). Note: This menu item appears only when the Wireless Security Mode is set to WPA2/WPA-Personal. Set Pre‑Shared Key Set the password for secure Wi‑Fi connection. WPA2-Personal Enable Wi‑Fi security through WPA2.
- Page 129 Understanding the printer menus Menu item Description PCL SmartSwitch Set the printer to switch automatically to PCL emulation when a print job requires it, regardless of the default printer language. Note: If PCL SmartSwitch is off, then the printer does not examine incoming data and uses the default printer language specified in the Setup menu.
- Page 130 Understanding the printer menus Menu item Description IPv6 Set the network adapter to accept the automatic IPv6 address configuration entries provided by a router. Stateless Address Autoconfiguration IPv6 Specify the DNS server address. DNS Server Address IPv6 Assign the IPv6 address. Manually Assigned IPv6 Address IPv6...
- Page 131 Understanding the printer menus Menu item Description Energy Efficient Ethernet Reduce power consumption when the printer does not receive data from the Ethernet network. Note: An asterisk (*) next to a value indicates the factory default setting. TCP/IP Note: This menu appears only in network printers or printers attached to print servers. Menu item Description Set Hostname...
- Page 132 Understanding the printer menus Menu item Description WINS Server Address Specify a server address for Windows Internet Name Service (WINS). Enable BOOTP Allow the BOOTP to assign a printer IP address. Off* Restricted Server List Specify an IP address for the TCP connections. Notes: •...
- Page 133 Understanding the printer menus Menu item Description SNMP Version 3 Configure SNMP version 3 to install and update the printer security. Enabled Set Read/Write Credentials User Name Password Set Read‑only Credentials User Name Password Authentication Hash SHA1* Minimum Authentication Level No Authentication, No Privacy Authentication, No Privacy Authentication, Privacy*...
- Page 134 Understanding the printer menus Menu item Description Pre‑Shared Key Authenticated Configure the authenticated connections of the printer. Connections Note: These menu items appear only when Enable IPSec is set to Host [x] Address Certificate Authenticated Connections Host [x] Address[/subnet] Address[/subnet] Note: An asterisk (*) next to a value indicates the factory default setting.
- Page 135 Understanding the printer menus HTTP/FTP Settings Note: This menu appears only in network printers or printers attached to print servers. Menu item Description Enable HTTP Server Access the Embedded Web Server to monitor and manage the printer. Enable HTTPS Configure the Hypertext Transfer Protocol Secure (HTTPS) settings. Enable FTP/TFTP Send files using FTP.
- Page 136 Understanding the printer menus Menu item Description Packet Size (kbytes) Set the packet size for data transmission. 0–64000 (0*) Note: An asterisk (*) next to a value indicates the factory default setting. Menu item Description PCL SmartSwitch Set the printer to switch to PCL emulation when a print job received through a USB port requires it, regardless of the default printer language.
- Page 137 Understanding the printer menus Menu item Description Options Allow the registered user and other users on the same subnet to send jobs to the printer locally. Enable Local Discovery Options Verify authenticity of the peer certificate to connect to your Google account.
-
Page 138: Security
Understanding the printer menus Security Login Methods Manage Permissions Menu item Description Function Access Control access to the printer functions. Access Address Book in Apps Modify Address Book Manage Shortcuts Create Profiles Manage Bookmarks Flash Drive Print Flash Drive Color Printing Flash Drive Scan Copy Function Copy Color Printing... - Page 139 Understanding the printer menus Menu item Description Device Management Control access to the printer management options. Remote Management Firmware Updates Apps Configuration Operator Panel Lock Import/Export All Settings Out of Service Erase Apps Control access to printer applications. New Apps Card Copy Scan Center Scan Center Custom 1...
- Page 140 Understanding the printer menus Menu item Description Add User Create local accounts to manage access to the printer functions. User Name/Password User Name Password User Name/Password Accounts Add User User Name Accounts Add User Password Accounts Add User PIN Accounts Add User Schedule USB Devices Menu item...
- Page 141 Understanding the printer menus Menu item Description Remote Syslog Facility Specify a facility code that the printer uses when sending log events to a remote 0 ‑ Kernel Messages server. 1 ‑ User‑Level Messages 2 ‑ Mail System 3 ‑ System Daemons 4 ‑...
- Page 142 Understanding the printer menus Menu item Description E‑mail Log Cleared Alert Send e‑mail notification to the administrator when a log entry is deleted. Off* E‑mail Log Wrapped Alert Send e‑mail notification to the administrator when the log becomes full and begins to overwrite the oldest entries.
- Page 143 Understanding the printer menus Login Restrictions Menu item Description Login failures Specify the number of failed login attempts before the user gets locked out. 1–10 (3*) Failure time frame Specify the time frame between failed login attempts before the user gets locked out. 1–60 minutes (5*) Lockout time Specify the lockout duration.
- Page 144 Understanding the printer menus Menu item Description Reserve Job Expiration Set the expiration time that the printer stores print jobs for printing at a later time. Off* 1 Hour 4 Hours 24 Hours 1 Week Require All Jobs to be Held Set the printer to hold all print jobs.
- Page 145 Understanding the printer menus Menu item Description Stored on hard disk Delete all files stored on the printer hard disk. 1 Pass Erase* 3 Pass Erase 7 Pass Erase Note: An asterisk (*) next to a value indicates the factory default setting. Mobile Services Management AirPrint Enable functions in the AirPrint software feature.
-
Page 146: Reports
Understanding the printer menus Reports Menu Settings Page Menu item Description Menu Settings Page Print a report that contains the printer menus. Device Menu item Description Device Information Print a report that contains information about the printer. Device Statistics Print a report about printer usage and supply status. Profile List Print a list of profiles that are stored in the printer. -
Page 147: Help
Understanding the printer menus Menu item Description Fax Call Log Print a report about the last 100 attempted, received, and blocked calls. Note: This menu item appears only when Enable Job Log is set to On. Network Menu item Description Network Setup Page Print a page that shows the configured network and wireless settings on the printer. -
Page 148: Securing The Printer
Securing the printer Securing the printer Locating the security slot The printer is equipped with a security lock feature. Attach a security lock compatible with most laptop computers in the location shown to secure the printer in place. Erasing printer memory To erase volatile memory or buffered data in your printer, turn off the printer. -
Page 149: Restoring Factory Default Settings
Securing the printer Notes: • To avoid loss of data, do not turn off the printer during the encryption process. • This process can take from several minutes to more than an hour, making the printer unavailable for other tasks. •... -
Page 150: Maintaining The Printer
Maintaining the printer Maintaining the printer Warning—Potential Damage: Failure to maintain optimum printer performance, or to replace parts and supplies, may cause damage to your printer. Adjusting the speaker volume Adjusting the default internal speaker volume The speaker volume will reset to default value after the session is logged out, when the printer wakes from Sleep or Hibernate mode, or after a power‑on reset. - Page 151 Maintaining the printer Connecting the printer to a wireless network using Wi‑Fi Protected Setup (WPS) Before you begin, make sure that: • The access point (wireless router) is WPS‑certified or WPS‑compatible. For more information, see the documentation that came with your access point. •...
-
Page 152: Setting Up Serial Printing (Windows Only)
Maintaining the printer Update the IP address. Apply the changes. For Macintosh users From System Preferences in the Apple menu, navigate to the list of printers, and then select + > IP. Type the IP address in the address field. Apply the changes. -
Page 153: Cleaning Printer Parts
Maintaining the printer Cleaning printer parts Cleaning the printer CAUTION—SHOCK HAZARD: To avoid the risk of electrical shock when cleaning the exterior of the printer, unplug the power cord from the electrical outlet and disconnect all cables from the printer before proceeding. - Page 154 Maintaining the printer Using a damp, soft, lint-free cloth, wipe the following areas: • ADF glass • ADF glass pad • Scanner glass • Scanner glass pad...
- Page 155 Maintaining the printer Open door E. Using a damp, soft, lint-free cloth, wipe the following areas: • ADF glass pad in door E • ADF glass in door E Close door E, and then close the scanner cover.
-
Page 156: Ordering Parts And Supplies
Using genuine Lexmark parts and supplies Your Lexmark printer is designed to function best with genuine Lexmark parts and supplies. Use of third-party supplies or parts may affect the performance, reliability, or life of the printer and its imaging components. It can also affect warranty coverage. - Page 157 Corporate Return Program toner cartridge This toner cartridge is available only for contract‑managed printers. For more information, contact your Lexmark representative or system administrator. XM7355, XM7365, and XM7370 Return Program toner cartridges Item United States, Europe, Middle East, Asia Pacific...
- Page 158 Regular Corporate Return Program Imaging unit 58D0Z00 58D0Z0E 58D0ZA0 * This imaging unit is available only for contract‑managed printers. For more information, contact your Lexmark representative or system administrator. Ordering a staple cartridge Part name Part number Staple cartridge 35S8500 Ordering a maintenance kit To identify the supported fuser type, open door A, and then remove the toner cartridge and the imaging unit.
- Page 159 Maintaining the printer Fuser maintenance kit Part number type Type 32 41X2250 Type 33 41X2251 Type 35 41X2252 Type 36 41X2253 Regular fuser maintenance kits Fuser maintenance kit Part number type Type 05 41X2238 Type 06 41X2239 Type 07 41X2240 Type 08 41X2241 Type 17...
-
Page 160: Replacing Parts And Supplies
Maintaining the printer Replacing parts and supplies Replacing the toner cartridge Open door A. Warning—Potential Damage: To prevent damage from electrostatic discharge, touch any exposed metal frame of the printer before accessing or touching interior areas of the printer. Remove the used toner cartridge. Unpack the new toner cartridge, and then shake it to redistribute the toner. - Page 161 Maintaining the printer Insert the new toner cartridge. Close the door. Replacing the imaging unit Open door A. Warning—Potential Damage: To prevent damage from electrostatic discharge, touch any exposed metal frame of the printer before accessing or touching interior areas of the printer. Remove the toner cartridge.
- Page 162 Maintaining the printer Remove the used imaging unit. Unpack the new imaging unit, and then shake it to redistribute the toner. Warning—Potential Damage: Do not expose the imaging unit to direct light for more than 10 minutes. Extended exposure to light may cause print quality problems. Warning—Potential Damage: Do not touch the photoconductor drum.
- Page 163 Maintaining the printer Insert the new imaging unit. Insert the toner cartridge. Close the door. Replacing the fuser Open door C. CAUTION—HOT SURFACE: The inside of the printer might be hot. To reduce the risk of injury from a hot component, allow the surface to cool before touching it. Warning—Potential Damage: To prevent damage from electrostatic discharge, touch any exposed metal frame of the printer before accessing or touching interior areas of the printer.
- Page 164 Maintaining the printer Unlock the fuser. Remove the used fuser. Unpack the new fuser. Insert the new fuser until it clicks into place.
- Page 165 Maintaining the printer Lock the fuser. Close the door. Replacing the transfer roller Open door A. Warning—Potential Damage: To prevent damage from electrostatic discharge, touch any exposed metal frame of the printer before accessing or touching interior areas of the printer. Remove the toner cartridge.
- Page 166 Maintaining the printer Remove the imaging unit. Remove the used transfer roller. CAUTION—HOT SURFACE: The inside of the printer might be hot. To reduce the risk of injury from a hot component, allow the surface to cool before touching it. Unpack the new transfer roller.
- Page 167 Maintaining the printer Insert the new transfer roller until it clicks into place. Insert the imaging unit. Insert the toner cartridge. Close the door. Replacing the pick roller Remove the tray.
- Page 168 Maintaining the printer Warning—Potential Damage: To prevent damage from electrostatic discharge, touch any exposed metal frame of the printer before accessing or touching interior areas of the printer. Remove the used pick roller. Unpack the new pick roller. Install the new pick roller. Insert the tray.
- Page 169 Maintaining the printer Replacing the pick roller in the multipurpose feeder Open the multipurpose feeder. Warning—Potential Damage: To prevent damage from electrostatic discharge, touch any exposed metal frame of the printer before accessing or touching interior areas of the printer. Remove the used pick roller.
- Page 170 Maintaining the printer Install the new pick roller. Close the multipurpose feeder. Replacing the ADF pick roller Turn off the printer. Open door D.
- Page 171 Maintaining the printer Warning—Potential Damage: To prevent damage from electrostatic discharge, touch any exposed metal frame of the printer before accessing or touching interior areas of the printer. Remove the ADF pick roller cover. Remove the used ADF pick roller.
- Page 172 Maintaining the printer Unpack the new ADF pick roller. Warning—Potential Damage: To avoid damage and poor printer performance, handle this part with clean hands. Insert the new ADF pick roller until it clicks into place.
- Page 173 Maintaining the printer Insert the ADF pick roller cover until it clicks into place. Close the door. Turn on the printer. Replacing the ADF feed roller Turn off the printer. Open door D. Warning—Potential Damage: To prevent damage from electrostatic discharge, touch any exposed metal frame of the printer before accessing or touching interior areas of the printer.
- Page 174 Maintaining the printer Remove the ADF pick roller cover. Remove the used ADF feed roller. Unpack the new ADF feed roller. Warning—Potential Damage: To avoid damage and poor printer performance, handle this part with clean hands.
- Page 175 Maintaining the printer Insert the new ADF feed roller until it clicks into place.
- Page 176 Maintaining the printer Insert the ADF pick roller cover until it clicks into place. Close the door. Turn on the printer. Replacing the ADF separator roller Turn off the printer. Open door D. Warning—Potential Damage: To prevent damage from electrostatic discharge, touch any exposed metal frame of the printer before accessing or touching interior areas of the printer.
- Page 177 Maintaining the printer Remove the ADF separator roller cover. Remove the used ADF separator roller. Unpack the new ADF separator roller. Warning—Potential Damage: To avoid damage and poor printer performance, handle this part with clean hands.
- Page 178 Maintaining the printer Insert the new ADF separator roller until it clicks into place. Insert the ADF separator roller cover until it clicks into place.
- Page 179 Maintaining the printer Close the door. Turn on the printer. Replacing the ADF torque limiter Turn off the printer. Open door D. Warning—Potential Damage: To prevent damage from electrostatic discharge, touch any exposed metal frame of the printer before accessing or touching interior areas of the printer. Remove the ADF separator roller cover.
- Page 180 Maintaining the printer Warning—Potential Damage: To avoid damage and poor printer performance, handle this part with clean hands. Remove the used ADF torque limiter. Unpack the new ADF torque limiter. Warning—Potential Damage: To avoid damage and poor printer performance, handle this part with clean hands.
- Page 181 Maintaining the printer Insert the ADF separator roller until it clicks into place. Insert the ADF separator roller cover until it clicks into place.
- Page 182 Maintaining the printer Close the door. Turn on the printer. Replacing the staple cartridge in the staple finisher Open door F. Remove the staple cartridge holder.
- Page 183 Maintaining the printer Remove the empty staple cartridge. Insert the new staple cartridge. Insert the staple cartridge holder. Close the door.
- Page 184 Maintaining the printer Replacing the staple cartridge in the staple, hole punch finisher Depending on the staple cartridge to replace, open either door F or door G. Remove the staple cartridge holder.
-
Page 185: Moving The Printer
Maintaining the printer Remove the empty staple cartridge. Insert the new staple cartridge. Insert the staple cartridge holder. Close the door. Moving the printer Moving the printer to another location CAUTION—POTENTIAL INJURY: If the printer weight is greater than 18 kg (40 lb), then it requires two or more trained personnel to lift it safely. -
Page 186: Saving Energy And Paper
Make sure that there is adequate clearance around the printer. Note: Damage to the printer caused by improper moving is not covered by the printer warranty. Shipping the printer For shipping instructions, go to http://support.lexmark.com or contact customer support. Saving energy and paper Setting up power saver modes Eco‑Mode... -
Page 187: Recycling
The foam used in Lexmark packaging is recyclable where foam recycling facilities exist. Facilities may not exist in your area. When you return a cartridge to Lexmark, you can reuse the box that the cartridge came in. Lexmark recycles the box. - Page 188 Maintaining the printer To return Lexmark cartridges for reuse or recycling, do the following: Go to www.lexmark.com/recycle. Select the product that you want to recycle.
-
Page 189: Clearing Jams
Clearing jams Clearing jams Avoiding jams Load paper properly • Make sure that the paper lies flat in the tray. Correct loading of paper Incorrect loading of paper • Do not load or remove a tray while the printer is printing. •... -
Page 190: Identifying Jam Locations
Clearing jams • Do not use paper that has been cut or trimmed by hand. • Do not mix paper sizes, weights, or types in the same tray. • Make sure that the paper size and type are set correctly on the computer or printer control panel. •... -
Page 191: Paper Jam In Trays
Clearing jams Jam locations Automatic document feeder Standard, finisher, or output option bin Door A Multipurpose feeder Trays Door C Finisher or output option rear door • Door H • Door N • Door P Paper jam in trays Remove the tray. Warning—Potential Damage: A sensor inside the optional tray is easily damaged by static electricity. -
Page 192: Paper Jam In Door A
Clearing jams Paper jam in door A Open door A. Warning—Potential Damage: To prevent damage from electrostatic discharge, touch any exposed metal frame of the printer before accessing or touching interior areas of the printer. Remove the toner cartridge. Remove the imaging unit. Warning—Potential Damage: Do not expose the imaging unit to direct light for more than 10 minutes. - Page 193 Clearing jams Warning—Potential Damage: Do not touch the photoconductor drum. Doing so may affect the quality of future print jobs. Pull out the duplex unit. Remove the jammed paper. Note: Make sure that all paper fragments are removed. Insert the duplex unit.
-
Page 194: Paper Jam In Door C
Clearing jams Insert the imaging unit. Insert the toner cartridge. Close the door. Paper jam in door C Open door C. CAUTION—HOT SURFACE: The inside of the printer might be hot. To reduce the risk of injury from a hot component, allow the surface to cool before touching it. Remove the jammed paper from any of the following areas: Note: Make sure that all paper fragments are removed. -
Page 195: Paper Jam In The Standard Bin
Clearing jams • Fuser area • Below the fuser area • Duplex area Close the door. Paper jam in the standard bin Remove the jammed paper. Note: Make sure that all paper fragments are removed. -
Page 196: Paper Jam In The Multipurpose Feeder
Clearing jams Paper jam in the multipurpose feeder Remove paper from the multipurpose feeder. Remove the jammed paper. Note: Make sure that all paper fragments are removed. Flex, fan, and align the paper edges before loading. -
Page 197: Paper Jam In The Automatic Document Feeder
Clearing jams Reload paper. Paper jam in the automatic document feeder Remove all original documents from the ADF tray. Open door D. Warning—Potential Damage: To prevent damage from electrostatic discharge, touch any exposed metal frame of the printer before accessing or touching interior areas of the printer. Remove the jammed paper. - Page 198 Clearing jams Open the scanner cover. Open door E. Remove the jammed paper. Note: Make sure that all paper fragments are removed. Close door E, and then close the scanner cover.
-
Page 199: Paper Jam In The 4-Bin Mailbox
Clearing jams Paper jam in the 4‑bin mailbox Paper jam in door N Open door N. Remove the jammed paper. Note: Make sure that all paper fragments are removed. Close the door. Paper jam in the mailbox bin Remove the jammed paper. Note: Make sure that all paper fragments are removed. -
Page 200: Paper Jam In The Offset Stacker Or Staple Finisher
Clearing jams Paper jam in the offset stacker or staple finisher Paper jam in door H Open door H. Remove the jammed paper. Note: Make sure that all paper fragments are removed. - Page 201 Clearing jams Close the door. Paper jam in the offset stacker or staple finisher bin Remove the jammed paper. Note: Make sure that all paper fragments are removed.
-
Page 202: Paper Jam In The Staple, Hole Punch Finisher
Clearing jams Paper jam in the staple, hole punch finisher Paper jam in door P Open door P. Remove the jammed paper. Note: Make sure that all paper fragments are removed. Close the door. Paper jam in the staple, hole punch finisher bin Remove the jammed paper. -
Page 203: Staple Jam In The Staple Finisher
Clearing jams Staple jam in the staple finisher Open door F. - Page 204 Clearing jams Remove the staple cartridge holder. Remove the loose staples.
- Page 205 Clearing jams Press the staples against the metal bracket. Note: If the staples are at the rear of the cartridge, then shake the cartridge downward to bring the staples near the metal bracket. Insert the staple cartridge holder until it clicks into place. Close the door.
-
Page 206: Staple Jam In The Staple, Hole Punch Finisher
Clearing jams Staple jam in the staple, hole punch finisher Depending on the staple jam location, open either door F or door G. Remove the staple cartridge holder. - Page 207 Clearing jams Remove the loose staples. Press the staples against the metal bracket. Note: If the staples are at the rear of the cartridge, then shake the cartridge downward to bring the staples near the metal bracket.
- Page 208 Clearing jams Insert the staple cartridge holder until it clicks into place. Close the door.
-
Page 209: Troubleshooting
Troubleshooting Troubleshooting Network connection problems Cannot open Embedded Web Server Action Step 1 Go to step 2. Install a supported browser. Check if you are using a supported browser: • Internet Explorer® version 11 or later • Microsoft Edge • Safari version 6 or later •... - Page 210 Troubleshooting Action Step 6 Go to step 7. Contact your administrator. Check if the web proxy servers are disabled. Are the web proxy servers disabled? Step 7 The problem is Contact customer solved. support. Access the Embedded Web Server. Did the Embedded Web Server open? Unable to read flash drive Action Step 1...
-
Page 211: Hardware Options Problems
Troubleshooting Checking the printer connectivity From the home screen, touch Settings > Reports > Network > Network Setup Page. Check the first section of the network setup page, and confirm that the status is connected. If the status is not connected, then the LAN drop may be inactive, or the network cable may be malfunctioning. -
Page 212: Issues With Supplies
Troubleshooting Action Step 4 The problem is Contact customer solved. support. Check if the internal option is available in the print driver. Note: If necessary, manually add the internal option in the print driver to make it available for print jobs. For more information, see “Adding available options in the print driver”... - Page 213 The printer has detected a non‑Lexmark supply or part installed in the printer. Your Lexmark printer is designed to function best with genuine Lexmark supplies and parts. Use of third- party supplies or parts may affect the performance, reliability, or life of the printer and its imaging components.
-
Page 214: Paper Feed Problems
Troubleshooting Paper feed problems Envelope seals when printing Action Contact The problem is Use envelopes that have been stored in a dry environment. customer solved. Note: Printing on envelopes with high moisture content can seal the support. flaps. Resend the print job. Does the envelope seal when printing? Collated printing does not work Action... - Page 215 Troubleshooting Action Step 2 The problem is Contact customer solved. support. From the home screen, touch Settings > Paper > Tray Configuration > Paper Size/Type. Set the paper size and type to match the paper loaded in the linked trays. Print the document.
-
Page 216: Printing Problems
Action Step 1 Go to step 2. The problem is solved. Check if the printer is using a genuine and supported Lexmark toner cartridge. Note: If the cartridge is not supported, then install a supported one. Print the document. Is the printer printing blank or white pages? - Page 217 Troubleshooting Action Step 2 Go to step 3. The problem is solved. Remove any packing material that is left on the imaging unit. Remove the toner cartridge, and then remove the imaging unit. Warning—Potential Damage: Do not expose the imaging unit to direct light for more than 10 minutes.
- Page 218 Action Step 1 Go to step 2. The problem is solved. Check if the printer is using a genuine and supported Lexmark toner cartridge. Note: If the cartridge is not supported, then install a supported one. Print the document. Is the print dark? Step 2 Go to step 3.
- Page 219 Troubleshooting Action Step 6 Go to step 7. The problem is solved. Load paper from a fresh package. Note: Paper absorbs moisture due to high humidity. Store paper in its original wrapper until you are ready to use it. Print the document. Is the print dark? Step 7 Go to step 8.
- Page 220 Action Step 1 Go to step 2. The problem is solved. Check if the printer is using a genuine and supported Lexmark toner cartridge. Note: If the cartridge is not supported, then install a supported one. Print the document. Are fine lines not printed correctly?
- Page 221 Troubleshooting Action Step 2 Go to step 3. The problem is solved. Load paper from a fresh package. Note: Paper absorbs moisture due to high humidity. Store paper in its original wrapper until you are ready to use it. Print the document. Is the paper folded or wrinkled? Step 3 Contact...
- Page 222 Action Step 2 Go to step 3. The problem is solved. Check if the printer is using a genuine and supported Lexmark toner cartridge. Note: If the toner cartridge is not supported, then install a supported one. Print the document.
- Page 223 Troubleshooting Action Step 6 Go to step 7. The problem is solved. Remove the imaging unit. Warning—Potential Damage: Do not expose the imaging unit to direct light for more than 10 minutes. Extended exposure to light may cause print quality problems. Warning—Potential Damage: Do not touch the photoconductor drum under the imaging unit.
- Page 224 Troubleshooting Incorrect margins Action Step 1 The problem is Go to step 2. solved. Adjust the paper guides to the correct position for the paper loaded. Print the document. Are the margins correct? Step 2 The problem is Contact customer solved.
- Page 225 Action Step 1 Go to step 2. The problem is solved. Check if the printer is using a genuine and supported Lexmark toner cartridge. Note: If the cartridge is not supported, then install a supported one. Print the document. Is the print light? Step 2 Go to step 3.
- Page 226 Troubleshooting Action Step 5 Go to step 6. The problem is solved. Remove the toner cartridge, and then remove the imaging unit. Warning—Potential Damage: Do not expose the imaging unit to direct light for more than 10 minutes. Extended exposure to light can cause print quality problems.
- Page 227 Action Step 1 Go to step 2. The problem is solved. Check if the printer is using a genuine and supported Lexmark toner cartridge. Note: If the cartridge is not supported, then install a supported one. Print the document. Is the print mottled? Step 2 Go to step 4.
- Page 228 Action Step 1 Go to step 2. The problem is solved. Check if the printer is using a genuine and supported Lexmark toner cartridge. Note: If the cartridge is not supported, then install a supported one. Print the document. Is the paper curled? Step 2 Go to step 3.
- Page 229 Troubleshooting Action Step 3 Go to step 4. The problem is solved. Depending on your operating system, specify the paper size and paper type from the Printing Preferences or Print dialog. Notes: • Make sure that the settings match the paper loaded. •...
- Page 230 Action Step 1 Go to step 2. The problem is solved. Check if the printer is using a genuine and supported Lexmark toner cartridge. Note: If the toner cartridge is not supported, then install a supported one. Print the document.
- Page 231 Troubleshooting Action Step 2 Go to step 3. The problem is solved. Remove, and then insert the imaging unit. Warning—Potential Damage: Do not expose the imaging unit to direct light for more than 10 minutes. Extended exposure to light may cause print quality problems. Warning—Potential Damage: Do not touch the photoconductor drum under the imaging unit.
- Page 232 Action Step 1 Go to step 2. The problem is solved. Check if the printer is using a genuine and supported Lexmark toner cartridge. Note: If the toner cartridge is not supported, then install a supported one. Print the document.
- Page 233 Troubleshooting Action Step 3 Go to step 4. The problem is solved. Remove the imaging unit. Warning—Potential Damage: Do not expose the imaging unit to direct light for more than 10 minutes. Extended exposure to light may cause print quality problems. Warning—Potential Damage: Do not touch the photoconductor drum under the imaging unit.
- Page 234 Action Step 1 Go to step 2. The problem is solved. Check if the printer is using a genuine and supported Lexmark toner cartridge. Note: If the cartridge is not supported, then install a supported one. Print the document. Does toner easily rub off? Step 2 Go to step 3.
- Page 235 Settings > Troubleshooting > Print Quality Test Pages. For non‑touch‑screen printer models, press navigate through the settings. Action Contact customer The problem is Check if the printer is using a genuine and supported Lexmark support. solved. toner cartridge. Note: If the cartridge is not supported, then install a supported one.
- Page 236 Action Step 1 Go to step 2. The problem is solved. Check if the printer is using a genuine and supported Lexmark toner cartridge. Note: If the cartridge is not supported, then install a supported one. Print the document. Do vertical white lines appear on prints?
- Page 237 Action Step 1 Go to step 2. The problem is solved. Check if the printer is using a genuine and supported Lexmark toner cartridge. Note: If the toner cartridge is not supported, then install a supported one. Print the document.
- Page 238 Troubleshooting Action Step 3 Go to step 4. The problem is solved. Remove the imaging unit. Warning—Potential Damage: Do not expose the imaging unit to direct light for more than 10 minutes. Extended exposure to light may cause print quality problems. Warning—Potential Damage: Do not touch the photoconductor drum under the imaging unit.
- Page 239 Action Step 1 Go to step 2. The problem is solved. Check if the printer is using a genuine and supported Lexmark toner cartridge. Note: If the toner cartridge is not supported, then install a supported one. Print the document.
- Page 240 Troubleshooting Vertical dark streaks with print missing Note: Before solving the problem, print the Print Quality Test Pages. From the control panel, navigate to Settings > Troubleshooting > Print Quality Test Pages. For non‑touch‑screen printer models, press navigate through the settings. Action Step 1 Go to step 2.
- Page 241 Contact customer The problem is support. solved. Check if the printer is using a genuine and supported Lexmark toner cartridge. Note: If the toner cartridge is not supported, then install a supported one. Print the document. Do vertical dark streaks with missing images appear on prints? Repeating defects Note: Before solving the problem, print the Print Quality Test Pages.
- Page 242 Troubleshooting Confidential and other held documents do not print Action Step 1 The problem is Go to step 2. solved. From the control panel, check if the documents appear in the Held Jobs list. Note: If the documents are not listed, then print the documents using the Print and Hold options.
- Page 243 Troubleshooting Slow printing Action Step 1 Go to step 2. The problem is solved. Make sure that the printer cable is securely connected to the printer and to the computer, print server, option, or other network device. Is the printer printing slow? Step 2 Go to step 3.
- Page 244 Troubleshooting Action Step 5 Go to step 6. The problem is solved. Depending on your operating system, specify the paper type from the Printing Preferences or Print dialog. Notes: • Make sure that the setting matches the paper loaded. • You can also change the setting on the printer control panel.
- Page 245 Print the document. Is the document printed? Step 5 The problem is Contact customer solved. support. Remove, and then reinstall the printer software. Note: The printer software is available at http://support.lexmark.com. Print the document. Is the document printed?
- Page 246 Troubleshooting The printer is not responding Action Step 1 The problem is Go to step 2. solved. Check if the power cord is connected to the electrical outlet. CAUTION—POTENTIAL INJURY: To avoid the risk of fire or electrical shock, connect the power cord to an appropriately rated and properly grounded electrical outlet that is near the product and easily accessible.
- Page 247 Troubleshooting Adjusting toner darkness From the control panel, navigate to: Settings > Print > Quality For non-touch-screen printer models, press to navigate through the settings. From the Darkness menu, adjust the setting. Apply the changes. Job prints from the wrong tray or on the wrong paper Action Step 1 Go to step 2.
-
Page 248: Faxing Problems
Troubleshooting Faxing problems Cannot send or receive faxes Action Step 1 The problem is Go to step 2. solved. Resolve any error messages that appear on the display. Can you send or receive a fax? Step 2 The problem is Go to step 3. - Page 249 Troubleshooting Action Step 5 The problem is Go to step 6. solved. Check if the printer is connected to an analog phone service or to the correct digital connector. • If you are using an Integrated Services for Digital Network (ISDN) telephone service, then connect to an analog telephone port of an ISDN terminal adapter.
- Page 250 Troubleshooting Can receive but not send faxes Action Step 1 The problem is Go to step 2. solved. Load the original document properly into the ADF tray or on the scanner glass. Can you send faxes? Step 2 The problem is Contact customer solved.
-
Page 251: Scanning Problems
Troubleshooting Poor fax print quality Action Step 1 The problem is Go to step 2. solved. Make sure that there are no print quality defects. From the control panel, navigate to Settings > Troubleshooting > Print Quality Test Pages. Correct any print quality defects. For more information, see “Print quality is poor”... - Page 252 Troubleshooting Partial copies of document or photo Action Step 1 The problem is Go to step 2. solved. Make sure that the document or photo is loaded facedown on the upper left corner of the scanner glass. Copy the document or photo. Is the document or photo copied correctly? Step 2 The problem is...
- Page 253 Troubleshooting Action Step 1 Go to step 2. The problem is solved. Open the scanner cover. Using a damp, soft, lint‑free cloth, wipe the ADF glass and the white underside of the ADF cover. Close the scanner cover. Do vertical streaks still appear on scanned documents? Step 2 Contact customer...
- Page 254 Troubleshooting Scanner does not close Action Remove obstructions that keep the scanner unit open. The problem is Contact customer solved. support. Did the scanner unit close correctly? Scanning takes too long or freezes the computer Action Close all applications that are interfering with the scan. Contact customer The problem is...
-
Page 255: Contacting Customer Support
Technical support via telephone is also available. In the U.S. or Canada, call 1-800-539-6275. For other countries or regions, go to http://support.lexmark.com. -
Page 256: Upgrading And Migrating
Upgrading and migrating Upgrading and migrating Hardware Available internal options • Flash memory • Font cards • Firmware cards – Forms and Bar Code – PRESCRIBE – IPDS • Printer hard disk • Internal solutions port – Parallel 1284‑B Interface Card –... - Page 257 Upgrading and migrating Install any supported internal options. For more information, see the documentation that came with the option.
- Page 258 Upgrading and migrating Close the access cover. Connect the power cord to the printer, and then to the electrical outlet. CAUTION—POTENTIAL INJURY: To avoid the risk of fire or electrical shock, connect the power cord to an appropriately rated and properly grounded electrical outlet that is near the product and easily accessible.
- Page 259 Upgrading and migrating Installing a memory card CAUTION—SHOCK HAZARD: To avoid the risk of electrical shock, if you are accessing the controller board or installing optional hardware or memory devices sometime after setting up the printer, then turn the printer off, and unplug the power cord from the electrical outlet before continuing. If you have any other devices attached to the printer, then turn them off as well, and unplug any cables going into the printer.
- Page 260 Upgrading and migrating Unpack the memory card. Warning—Potential Damage: Do not touch the connection points along the edge of the card. Insert the memory card until it clicks into place. Close the access cover.
- Page 261 Upgrading and migrating Connect the power cord to the printer, and then to the electrical outlet. CAUTION—POTENTIAL INJURY: To avoid the risk of fire or electrical shock, connect the power cord to an appropriately rated and properly grounded electrical outlet that is near the product and easily accessible.
- Page 262 Upgrading and migrating Unpack the optional card. Warning—Potential Damage: Do not touch the connection points along the edge of the card. Push the card firmly into place.
- Page 263 Upgrading and migrating Note: The entire length of the connector on the card must touch and be flush against the controller board. Warning—Potential Damage: Improper installation of the card may cause damage to the card and the controller board. Close the access cover. Connect the power cord to the printer, and then to the electrical outlet.
- Page 264 Upgrading and migrating Installing a printer hard disk CAUTION—SHOCK HAZARD: To avoid the risk of electrical shock, if you are accessing the controller board or installing optional hardware or memory devices sometime after setting up the printer, then turn the printer off, and unplug the power cord from the electrical outlet before continuing. If you have any other devices attached to the printer, then turn them off as well, and unplug any cables going into the printer.
- Page 265 Upgrading and migrating Install the hard disk. Warning—Potential Damage: Do not touch or press the center of the hard disk.
- Page 266 Upgrading and migrating Close the access cover. Connect the power cord to the printer, and then to the electrical outlet. CAUTION—POTENTIAL INJURY: To avoid the risk of fire or electrical shock, connect the power cord to an appropriately rated and properly grounded electrical outlet that is near the product and easily accessible.
- Page 267 Upgrading and migrating Installing an internal solutions port CAUTION—SHOCK HAZARD: To avoid the risk of electrical shock, if you are accessing the controller board or installing optional hardware or memory devices sometime after setting up the printer, then turn the printer off, and unplug the power cord from the electrical outlet before continuing. If you have any other devices attached to the printer, then turn them off as well, and unplug any cables going into the printer.
- Page 268 Upgrading and migrating Unpack the internal solutions port (ISP) kit. Mounting bracket Thumbscrews If necessary, remove the printer hard disk. Insert the bracket into the board until it clicks into place.
- Page 269 Upgrading and migrating Attach the ISP to the bracket. If necessary, attach the hard disk to the ISP. Remove the hard disk bracket. Connect the hard disk to the ISP. Warning—Potential Damage: Do not touch or press the center of the hard disk.
- Page 270 Upgrading and migrating...
- Page 271 Upgrading and migrating Close the access cover. Connect the power cord to the electrical outlet, and then turn on the printer. CAUTION—POTENTIAL INJURY: To avoid the risk of fire or electrical shock, connect the power cord to an appropriately rated and properly grounded electrical outlet that is near the product and easily accessible.
- Page 272 CAUTION—TIPPING HAZARD: Installing one or more options on your printer or MFP may require a caster base, furniture, or other feature to prevent instability causing possible injury. For more information on supported configurations, see www.lexmark.com/multifunctionprinters. Turn off the printer. Unplug the power cord from the electrical outlet, and then from the printer.
- Page 273 Upgrading and migrating Unpack the tray, and then remove all packing material. Note: If optional trays are already installed, then unlock them from the printer before lifting the printer. Do not try to lift the printer and trays at the same time. Install the tray on the caster base.
- Page 274 Upgrading and migrating Connect the power cord to the printer, and then to the electrical outlet. CAUTION—POTENTIAL INJURY: To avoid the risk of fire or electrical shock, connect the power cord to an appropriately rated and properly grounded electrical outlet that is near the product and easily accessible.
- Page 275 CAUTION—TIPPING HAZARD: Installing one or more options on your printer or MFP may require a caster base, furniture, or other feature to prevent instability causing possible injury. For more information on supported configurations, see www.lexmark.com/multifunctionprinters. Turn off the printer. Unplug the power cord from the electrical outlet, and then from the printer.
- Page 276 CAUTION—TIPPING HAZARD: Installing one or more options on your printer or MFP may require a caster base, furniture, or other feature to prevent instability causing possible injury. For more information on supported configurations, see www.lexmark.com/multifunctionprinters. Turn off the printer. Unplug the power cord from the electrical outlet, and then from the printer.
- Page 277 CAUTION—TIPPING HAZARD: Installing one or more options on your printer or MFP may require a caster base, furniture, or other feature to prevent instability causing possible injury. For more information on supported configurations, see www.lexmark.com/multifunctionprinters. Turn off the printer. Unplug the power cord from the electrical outlet, and then from the printer.
- Page 278 Upgrading and migrating Remove the printer top cover. Install the staple finisher. Connect the power cord to the printer, and then to the electrical outlet. CAUTION—POTENTIAL INJURY: To avoid the risk of fire or electrical shock, connect the power cord to an appropriately rated and properly grounded electrical outlet that is near the product and easily accessible.
- Page 279 CAUTION—TIPPING HAZARD: Installing one or more options on your printer or MFP may require a caster base, furniture, or other feature to prevent instability causing possible injury. For more information on supported configurations, see www.lexmark.com/multifunctionprinters. Turn off the printer. Unplug the power cord from the electrical outlet, and then from the printer.
-
Page 280: Software
• From the software CD that came with your printer. • Go to http://support.lexmark.com, and then select your printer and operating system. Run the installer, and then follow the instructions on the computer screen. For Macintosh users, add the printer. -
Page 281: Firmware
Updating firmware Some applications require a minimum device firmware level to operate correctly. For more information on updating the device firmware, contact your Lexmark representative. From the Embedded Web Server, click Settings > Device > Update Firmware. Browse to locate the required flash file. -
Page 282: Notices
The following paragraph does not apply to any country where such provisions are inconsistent with local law: LEXMARK INTERNATIONAL, INC., PROVIDES THIS PUBLICATION “AS IS” WITHOUT WARRANTY OF ANY KIND, EITHER EXPRESS OR IMPLIED, INCLUDING, BUT NOT LIMITED TO, THE IMPLIED WARRANTIES OF MERCHANTABILITY OR FITNESS FOR A PARTICULAR PURPOSE. - Page 283 Notices Trademarks Lexmark, the Lexmark logo, and MarkNet are trademarks or registered trademarks of Lexmark International, Inc. in the United States and/or other countries. Google Cloud Print and Google Chrome are trademarks of Google Inc. Macintosh, the Mac logo, and Safari are trademarks of Apple Inc.
- Page 284 The WEEE logo signifies specific recycling programs and procedures for electronic products in countries of the European Union. We encourage the recycling of our products. If you have further questions about recycling options, visit the Lexmark Web site at www.lexmark.com for your local sales office phone number.
- Page 285 Notices ENERGY STAR Any Lexmark product bearing the ENERGY STAR emblem on the product or on a start-up screen is certified to comply with Environmental Protection Agency (EPA) ENERGY STAR requirements as configured when shipped by Lexmark. Temperature information Operating temperature and relative humidity 10 to 32.2°C (50 to 90°F) and 15 to 80% RH...
- Page 286 750 (MX822, XM7355); 850 (MX824, XM7365); hard‑copy original documents. 900 (MX826, XM7370) Scan The product is scanning hard‑copy documents. 84 (MX822, XM7355); 88 (MX824, XM7365); 86 (MX826, XM7370) Ready The product is waiting for a print job. Higher power usage: 58 (MX822, XM7355); 49 (MX824, XM7365);...
- Page 287 Regulatory notices for telecommunication terminal equipment This section contains regulatory information pertaining to products that contain the analog facsimile card: Lexmark Regulatory Type/Model Number: LEX-M14-002 Notice to users of the US telephone network: FCC requirements This equipment complies with Part 68 of the FCC rules and the requirements adopted by the Administrative Council for Terminal Attachments (ACTA).
- Page 288 Notices If you experience trouble with this equipment, for repair or warranty information, contact Lexmark International, Inc. at www.lexmark.com or your Lexmark representative. If the equipment is causing harm to the telephone network, the telephone company may request that you disconnect the equipment until the problem is resolved.
- Page 289 LEX-M14-002 A11-0160001JP Using this product in Switzerland This product requires a Swiss billing tone filter (Lexmark part number 80D1877) to be installed on any line which receives metering pulses in Switzerland. Utilisation de ce produit en Suisse Cet appareil nécessite l’utilisation d’un filtre de tonalité de facturation suisse (nº de référence Lexmark :...
- Page 290 Teilenummer 80D1877) für jede Leitung installiert werden, über die in der Schweiz Zeitsteuertakte übertragen werden. Uso del prodotto in Svizzera Questo prodotto richiede un filtro toni Billing svizzero, (codice Lexmark 80D1877) da installare su tutte le linee che ricevono impulsi remoti in Svizzera. Regulatory notices for wireless products This section contains regulatory information that applies only to wireless models.
- Page 291 Note: To assure compliance with FCC regulations on electromagnetic interference for a Class A computing device, use a properly shielded and grounded cable such as Lexmark part number 1021231 for parallel attach or 1021294 for USB attach. Use of a substitute cable not properly shielded and grounded may result in a violation of FCC regulations.
- Page 292 Member States relating to radio equipment. The manufacturer of this product is: Lexmark International, Inc., 740 West New Circle Road, Lexington, KY, 40550 USA. The authorized representative is: Lexmark International Technology Hungária Kft., 8 Lechner Ödön fasor, Millennium Tower III, 1095 Budapest HUNGARY.
- Page 293 The manufacturer of this product is: Lexmark International, Inc., 740 West New Circle Road, Lexington, KY, 40550 USA. The authorized representative is: Lexmark International Technology Hungária Kft., 8 Lechner Ödön fasor, Millennium Tower III, 1095 Budapest HUNGARY.
- Page 294 —Is manufactured from new parts, or new and serviceable used parts, which perform like new parts —Is, during normal use, free from defects in material and workmanship If this product does not function as warranted during the warranty period, contact a Remarketer or Lexmark for repair or replacement (at Lexmark's option).
- Page 295 To obtain warranty service you may be required to present proof of original purchase. You may be required to deliver your product to the Remarketer or Lexmark, or ship it prepaid and suitably packaged to a Lexmark designated location. You are responsible for loss of, or damage to, a product in transit to the Remarketer or the Lexmark designated location.
- Page 296 Lexmark's liability for actual damages from any cause whatsoever will be limited to the amount you paid for the product that caused the damages. This limitation of liability will not apply to claims by you for bodily injury or damage to real property or tangible personal property for which Lexmark is legally liable.
-
Page 297: Index
Index Index confidential print jobs 49 Numerics printing from a Macintosh 2100‑sheet tray blank pages 216 computer 49 installing 272 blocking junk faxes 64 printing from Windows 49 loading 31 bookmarks configuring 4‑bin mailbox creating 22 fax speaker settings 150 installing 275 creating folders for 23 configuring daylight saving... - Page 298 Index copying on letterhead 51 fax speaker settings copying photos 51 configuring 150 Eco‑Mode setting 186 creating a Cloud Connector fax troubleshooting Eco‑Settings profile 21 cannot receive faxes 250 configuring 22 creating a copy shortcut 52 cannot send faxes 250 editing contacts 24 creating a fax destination cannot send or receive...
- Page 299 51 HTTP/FTP Settings 135 showing 19 loading 36 Image 89 identifying jam locations 190 loading, 2100‑sheet tray 31 Information Sent to Lexmark 76 imaging unit Lexmark Mobile Print IPSec 133 ordering 158 using 46 Job Accounting 85 replacing 161...
- Page 300 211 setting 28 confidential and other held noise emission levels 283 parts status documents do not print 242 Non‑Lexmark supply 213 checking 156 envelope seals when non‑volatile memory 149 personal identification number printing 214 erasing 148 method 151 incorrect margins 224 Not enough free space in flash...
- Page 301 264 counters 213 printer hard disk memory 149 restoring factory default recycling erasing 148 settings 149 Lexmark packaging 187 printer information RJ11 adapter 59 Lexmark products 187 finding 10 running a slideshow 20 toner cartridges 187 printer is not responding 246...
- Page 302 Index scanning to a computer 66 supplies incorrect margins 224 scanning to a fax server 66 conserving 187 jammed pages are not scanning to a flash drive 65 supplies status reprinted 216 scanning to an FTP server checking 156 job prints from the wrong using the control panel 65 supply notifications tray 247...
- Page 303 firmware flash file 281 USB cable 15 USB port 15 enabling 210 using genuine Lexmark parts 156 genuine Lexmark supplies 156 using Customer Support 22 using Display Customization 20 using QR Code Generator 22 using the ADF copying 51...
Need help?
Do you have a question about the MX824 and is the answer not in the manual?
Questions and answers