Table of Contents
Advertisement
Quick Links
Advertisement
Table of Contents
Troubleshooting

Related Manuals for VorTek SonoPro S36 Series


Summary of Contents for VorTek SonoPro S36 Series
- Page 1 Series S36 Instruction Manual Table of Contents SonoPro Professional Series Ultrasonic Flow ® Meter Series S36 Instruction Manual Document Number 800120 Rev A 8475 W I-25 Frontage Rd Suite 300 Longmont, CO 80504 (303) 682-9999 (888) 386-7835 Fax (303) 682-4368 http://www.vortekinst.com 800120...
- Page 2 Instruments. The information contained in this manual is subject to change without notice. TRADEMARKS ® SonoPro is a registered trademark of VorTek Instruments, LLC. Other product and company names l i s ted in this manual are trademarks or trade names of their respective manufacturers. 800120...
-
Page 3: Table Of Contents
Series S36 Instruction Manual Table of Contents Table of Contents Chapter 1 Introduction SonoPro Ultrasonic Flow Meters ..........1-1 ® Using this Manual ............... 1-1 Note and Safety Information ..........1-2 Receipt of System Components ..........1-2 Technical Assistance ............1-2 How the SonoPro Flow Meter Operates ........ - Page 4 Series S36 Instruction Manual Table of Contents ..............Energy Menu 3-11 Fluid Menu ..............3-12 Units Menu ..............3-13 Time and Date Menu ............3-14 Diagnostics Menu ............. 3-15 Calibration Menu .............. 3-16 Password Menu ..............3-18 Chapter 4 Serial Communications Standard Communications............
- Page 5 Series S36 Instruction Manual Table of Contents Appendix A Product Specifications Appendix B Flow Meter Calculations Appendix C Sound Speed and Pipe Data Appendix D Quick Start-Up Guide Appendix E Mounting Template Appendix F Glossary of terms Figures 1-1. Ultrasonic Flow Path............1-3 2-1.
- Page 6 Series S36 Instruction Manual Table of Contents 2-32. Isolated Pulse Output Using Meter Provided Power Supply 2-24 2-33. Isolated Frequency Output Using External Power Supply .. 2-25 2-34. Iso. Freq. Output Using Meter Provided Power Supply..2-26 2-35. Isolated Alarm Output Using External Power Supply ..2-26 2-36.
- Page 7 Series S36 Instruction Manual Table of Contents Warnings and Cautions Warning! Consult the flow meter nameplate for specific flow meter approvals. To avoid potential electric shock, follow National Electric Code or your local code when wiring this unit to a power source. Failure to do so could result in injury or death. All AC power connections must be in accordance with published CE directives.
-
Page 8: Chapter 1 Introduction
A pulse output signal for remote totali- zation and frequency output are also available. SonoPro ® digital elec- tronics allows for easy reconfiguration for most liquids. The VorTek Se- ries SonoPro Meters’ simple installation combines with an easy-to-use ®... -
Page 9: Note And Safety Information
Receipt of System Components When receiving a VorTek ultrasonic flow meter, carefully check the out- side packing carton for damage incurred in shipment. If the carton is damaged, notify the local carrier and submit a report to the factory or dis- tributor. -
Page 10: How The Sonopro Flow Meter Operates
Series S36 Instruction Manual Chapter 1 Introduction How the SonoPro Flow Meter Operates ® Velocity Measurement The SonoPro Fixed Mount flow meter operates on the transit time ultra- ® sonic measurement method. This type of measurement uses the basic fact that the fluid's velocity influences the transmission speed of the ultrason- ic signal. -
Page 11: Temperature Measurement
Flow meters include a local 2 x 16-character LCD display housed within the enclosure. Local operation and reconfiguration are accomplished us- ing a tactile keypad. If local operation and reconfiguration are not de- sired, an Android® tablet with VorTek Instruments’ SonoConfig™ In- 800120... - Page 12 Series S36 Instruction Manual Chapter 1 Introduction strument Interface Software can be purchased to communicate with the SonoPro ® and provide valuable setup, diagnostic, and data logging tools. The electronics include nonvolatile memory that stores all configuration information. The nonvolatile memory allows the flow meter to function immediately upon power up, or after an interruption in power.
-
Page 13: Chapter 2 Installation
Series S36 Instruction Manual Chapter 2 Installation Chapter 2 Installation Installation Overview VorTek’s SonoPro Ultrasonic flow meter installations are simple and ® straightforward. Wiring instructions begin on page 2-20. Flow Meter Installation Requirements Before installing the flow meter, verify the installation site allows for the fol-... -
Page 14: Unobstructed Flow Requirements
Series S36 Instruction Manual Chapter 2 Installation Unobstructed Flow Requirements Select an installation site that will minimize possible distortion in the flow profile. Valves, elbows, control valves and other piping components may cause flow disturbances. Check your specific piping condition against the ex- amples shown below. -
Page 15: Series S36 Clamp-On Flow Meter Installation
Series S36 Instruction Manual Chapter 2 Installation Series S36 Clamp-On Flow Meter Installation Prior to installing the SonoPro ® transducers, a clean pipe surface needs to be established. Remove any rust or loose paint or debris to make a smooth sur- face. -
Page 16: W - Four Traverses
Series S36 Instruction Manual Chapter 2 Installation W – Four Traverses – Installation Method 2 MHz transducers shown. Figure 2-2. W - Four Traverses Z – One Traverse – Installation Method 2 MHz transducers shown. Figure 2-3. Z - One Traverse Once the installation method is chosen, you will then need to refer to Chapter 3 for programming the unit for the actual application. -
Page 17: Large Mounting Clamps
7. Apply a thin coat of coupling grease to the transducers. If the coupling grease that came with your SonoPro flow meter unit runs out, contact VorTek Instru- ® ments to order a replacement container. -
Page 18: Spacing Locating Points On Large Clamps
Series S36 Instruction Manual Chapter 2 Installation Figure 2-5. Spacing Locating Points on Large Clamps Mounting Clamp Front Adjustable Hook Figure 2-6. Spacing Locating Point on Large Clamp 800120... -
Page 19: Opposite Side Transducer Installation
Start with a loose fit. 4. Apply a thin coat of coupling grease to the first transducer. If the coupling grease that came with your SonoPro flow meter unit runs out, contact VorTek Instru- ® ments to order a replacement container. -
Page 20: Opposite Side Transducer Installation, Front View
Series S36 Instruction Manual Chapter 2 Installation Figure 2-7. Opposite Side Transducer Installation, Front View Figure 2-8. Opposite Side Transducer Installation, Side View 800120... -
Page 21: Small Rail/Fixture System
Series S36 Instruction Manual Chapter 2 Installation Figure 2-9. Opposite Side Transducer Installation, Angled View Small Rail / Fixture System Figure 2-10. Small Rail/Fixture System 800120... -
Page 22: Adjacent Side Transducer Installation
Series S36 Instruction Manual Chapter 2 Installation Figure 2-11. Small Rail/Fixture System with Worm-Clamps Adjacent Side Transducer Installation Program all the calibration menu items of the flow meter for the fluid and pipe specifics to obtain the transducer mounting locations. Position the rail/fixture system on the pipe in the desired location. -
Page 23: Spacing Locating Point On Small Rail/Fixture System
® runs out, contact VorTek Instruments to order a replacement container. Place the transducers in the left and right mounting bracket of the rail/ fixture system. Once the rightmost transducer is fitted, move the clamp so that the scribe line on the transducer is placed at the flow meter’s determined location. -
Page 24: Enclosure Mounting - Wall Or Panel
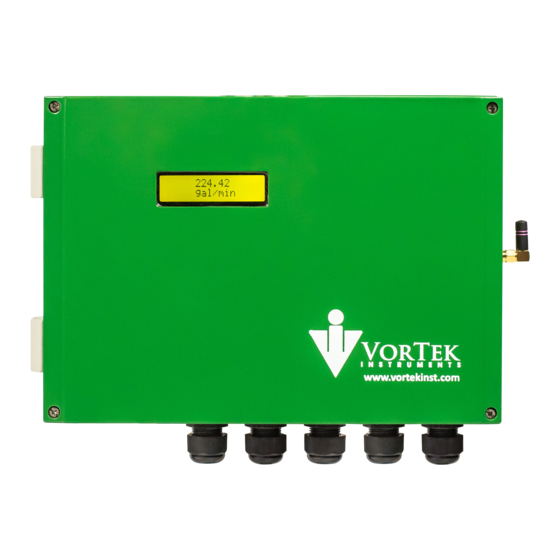
Series S36 Instruction Manual Chapter 2 Installation Enclosure Mounting – Wall or Panel The SonoPro® Professional Series flow meter can be mounted to a wall or panel using the four holes that pass through the enclosure. See below for a procedure on mounting the SonoPro®... - Page 25 Series S36 Instruction Manual Chapter 2 Installation Figure 2-13. Holes for Wall or Panel Mounting Align the holes on the enclosure with the holes in the wall or panel. Insert the screws through the holes in the enclosure and into the wall or panel. Tighten once all screws are in place.
-
Page 26: Enclosure Mounting - Pipe Mounting Bracket
Series S36 Instruction Manual Chapter 2 Installation Enclosure Mounting - Pipe Mounting Bracket Instructions for Installation *This kit is not included with the standard offering of the product. It is an accessory option and must be ordered under the code, -PMK, for these parts to be included with your flowmeter* Gather the mounting bracket and two U-Bolts provided with your flowme- ter. -
Page 27: Mounting Bracket With U-Bolt
Series S36 Instruction Manual Chapter 2 Installation With the mounting bracket in one hand and one U-Bolt in the other hand, place the U-Bolt around the 2-inch pipe in which the flowmeter is to be mounted and through one set of holes in the center of the mounting bracket as shown in Figure 2-16. -
Page 28: Mounting Bracket With Both U-Bolts And Nuts
Series S36 Instruction Manual Chapter 2 Installation Figure 2-18. Mounting Bracket with Both U-Bolts and Nuts Gather the four socket head cap screws, lock washers, and nuts provided with your flowmeter. Now that the mounting bracket is fully secured to the pipe, the enclosure can be attached to the bracket. -
Page 29: Feeding Screw Through Enclosure And Mounting Bracket
Series S36 Instruction Manual Chapter 2 Installation Figure 2-20. Feeding Screw Through Enclosure and Mounting Bracket 11. Using the lock washers and nuts provided, place a lock washer over the screw threads and start threading a nut on as shown in Figure 2-21. Tighten the nut by hand first to allow for the remaining screws to be in- stalled. -
Page 30: Mounting Bracket With All Screws Attached
Series S36 Instruction Manual Chapter 2 Installation 12. Repeat Steps 10-11 for installing the three remaining screws. The assem- bly should resemble that of Figure 2-22. Figure 2-22. Mounting Bracket with All Screws Attached 13. Now that all hardware is installed and hand tight, go to each screw and tighten down fully using an 9/64-inch Allen wrench and an 11/32-inch wrench. -
Page 31: Wiring Connections
Series S36 Instruction Manual Chapter 2 Installation Wiring Connections Warning! The IP66 hinged lid enclosure, when opened, contains an area for wir- To avoid potential electric shock, follow National Electric ing. Included in this area are numerous push and lock terminal blocks Code safety practices or your for making all required connections. -
Page 32: Input Power Connections
Series S36 Instruction Manual Chapter 2 Installation Input Power Connections To access the wiring terminal blocks, locate the four Phillips head Warning! screws on the lid of the enclosure which prevent the lid from opening. Use a Class 2 isolated power Unscrew the four screws and open the hinged lid to expose the terminal supply that is grounded, pro- vides DC output, and has no... - Page 33 Series S36 Instruction Manual Chapter 2 Installation AC Power Wiring The AC power wire size must be 24 to 12 AWG with the wire Warning! stripped 7.5 mm (0.295 inch). The wire insulation temperature To avoid potential electric must meet or exceed 90°C (194°F). Connect 100 to 240 VAC (8 W shock, follow National Electric Code safety practices or your maximum) to the Line and Neutral terminals on the terminal block.
-
Page 34: Transducer Connections
Series S36 Instruction Manual Chapter 2 Installation Transducer Connections Connect the transducer cables to the transducers and the SonoPro Pro- ® fessional Series Ultrasonic unit. The cable marked with blue heat shrink wrap is intended for the downstream transducer and the leftmost con- nector on the fixed mount enclosure. -
Page 35: 4-20 Ma Output Connections
Series S36 Instruction Manual Chapter 2 Installation 4-20 mA Output Connections SonoPro The standard ® Professional Series flow meter has two 4-20 mA loop outputs. The 4-20 mA loop current is controlled by the meter electron- ics. The electronics must be wired in series with the sense resistor or current meter. -
Page 36: Pulse Output Connections
Series S36 Instruction Manual Chapter 2 Installation mA Meter For HART communications the signal loop must have a 24 VDC minimum of 250 ohms load 24 VDC resistance. > 250 Ohm AC units only Meter Provided DC Power Figure 2-30. Iso. 4-20 mA Output Using Meter Provided Power Supply Pulse Output Connections The pulse output is used for a remote counter of the flow total. -
Page 37: Frequency Output Connections
Series S36 Instruction Manual Chapter 2 Installation Frequency Output Connections The frequency output is used for a remote counter of the flow rate. It can be scaled to output a 1 to 10 kHz signal proportional to mass or volume flow, temperature, or density. -
Page 38: Alarm Output Connections
Series S36 Instruction Manual Chapter 2 Installation Freq. Out + 24 VDC Out Freq. Out - - 24 VDC Out AC units only Meter provided DC Power Freq. Out voltage = +24 VDC Figure 2-34. Iso. Freq. Output Using Meter Provided Power Supply Alarm Output Connections Two alarm outputs (Alarm 1 and Alarm 2) are included on the standard SonoPro... -
Page 39: Rtd Input Connections
Series S36 Instruction Manual Chapter 2 Installation RTD Input Connections The SonoPro VER/VERER-EM models include inputs for up to ® two RTD inputs. With these inputs, a 3 or 4-wire RTD may be used. To connect a 3-wire RTD, split the single wire into two sepa- rate wires (see the circle in Figure 2-37) and connect these to the EXCITE and SENSE-H terminals on either the RTD1 or RTD2 four pin connectors. -
Page 40: Chapter 3 Operating Instructions
Series S36 Instruction Manual Chapter 3 Operation Chapter 3 Operating Instructions After choosing the installation orientation of the SonoPro ® Fixed Mount Ultrasonic flow meter, you are ready to begin operation. The sections in this chapter explain the display/keypad commands, meter start-up, and programming. -
Page 41: Start Up
Series S36 Instruction Manual Chapter 3 Operation Start Up To begin flow meter operation: Note Starting the flow meter Turn on POWER to the meter. At start up, the unit runs a series or pressing EXIT will always display the of self-tests that check the RAM, ROM, EPROM and all flow Run Mode screens. -
Page 42: Using The Setup Menus
Series S36 Instruction Manual Chapter 3 Operation Using the Setup Menus 800120... -
Page 43: Programming The Flow Meter
Series S36 Instruction Manual Chapter 3 Operation Programming the Flow Meter 1. Enter the Setup Menu by pressing the ENTER key until prompted for a password. Note: all outputs are disabled while using the Setup Menus. 2. Use the keypad to select the password characters (1234 is the factory-set password). When the password is correctly displayed, press ENTER to continue. -
Page 44: Output Menu
Series S36 Instruction Manual Chapter 3 Operation Output Menu 800120... - Page 45 Series S36 Instruction Manual Chapter 3 Operation Example for Setting an Output The following shows how to set Output 1 to measure mass flow with 4 mA = 0 lb/hr and 20 mA = 100 lb/hr with a time constant of 5 seconds. Note: all outputs are disabled while using the Setup Menus. First, set the desired units of measurement: 1.
-
Page 46: Display Menu
Series S36 Instruction Manual Chapter 3 Operation Display Menu ENTER Run Mode Password ENTER Display Menu keys to access menus Cycle Time (sec) If Cycle Time is set to zero, manual advance is required Number of Digits Used to set the number of digits displayed after the decimal point Display Smooting Display smoothing = Yes or No MF Vf Te De T... -
Page 47: Alarms Menu
Series S36 Instruction Manual Chapter 3 Operation Alarms Menu ENTER Run Mode Password ENTER Alarms Menu keys to access menus <Measure> None Mass <Mode> Volume None Relay Alarm 1 <Measure> units * Energy More > xxxx HIGH Alarm (>) Temp 1,2 LOW Alarm (<) Density <Measure>... -
Page 48: Totalizer #1 Menu
Series S36 Instruction Manual Chapter 3 Operation Totalizer #1 Menu ENTER Run Mode Password ENTER Totalizer Menu keys to access menus Totaling Example: Inactive Mass Volume Maximum flow rate = 600 gallons per minute Energy (600 gallons per minute = 10 gallons per second) (unit) / Pulse If unit per pulse is set to 600 gallons per pulse, xxxx... -
Page 49: Totalizer #2 Menu
Series S36 Instruction Manual Chapter 3 Operation Totalizer #2 Menu ENTER Run Mode Password ENTER Totalizer Menu keys to access menus Totaling Inactive Mass Volume Energy Reset Total ? YES or NO Use the Totalizer #2 to Monitor Flow or Energy. Note: Totalizer #2 does not operate a relay, it is for monitoring only. -
Page 50: Energy Menu
Series S36 Instruction Manual Chapter 3 Operation Energy Menu – For EMS Energy Meters Only ENTER Run Mode Password ENTER Energy Menu keys to access menus Loc in Sent Flow Yes or No Heating System Yes or No % Returned Configuration: There are several possibilities regarding the measurement of water energy given the location of the meter and the use of a second RTD. -
Page 51: Fluid Menu
Series S36 Instruction Manual Chapter 3 Operation Fluid Menu ENTER Run Mode Password keys to access menus ENTER Fluid Menu < Liquid Water Flowing Fluid Liquids > < Density > < AL > < BL> < Sound Speed ft/s Other Liquid > xxxx xxxx xxxx... -
Page 52: Units Menu
Series S36 Instruction Manual Chapter 3 Operation Units Menu ENTER Password Run Mode ENTER Units Menu keys to access menus Mass Flow Unit Ston = Short Ton = 2000 lb lb, Ston, Lton, gram Lton = Long Ton = 2240 lb sec, min, hr, day Mton = Metric Ton = 1000 kg kg, Mton... -
Page 53: Time And Date Menu
Series S36 Instruction Manual Chapter 3 Operation Time & Date Menu ENTER Run Mode Password ENTER Time & Date Menu keys to access menus Set Time xx:xx:xx Set Date xx/xx/xx Use the Time and Date Menu to enter the correct time and date into the flow meter’s memory. -
Page 54: Diagnostics Menu
Series S36 Instruction Manual Chapter 3 Operation Diagnostics Menu Use the Diagnostics Menu to evaluate signal integrity, simulate operation, and review the system files. The system log files contain time/date stamped messages including power on, power off, programming time outs, parameter faults, incorrect password entry, and other various information relative to system operation and programming. -
Page 55: Calibration Menu
Series S36 Instruction Manual Chapter 3 Operation Calibration Menu The Calibration Menu contains the calibration information needed for programming the meter and calculating the transducer scribe to scribe spacing. If provided at the time of order, the application information will be preconfigured in the meter, otherwise it is needed at the time of installation to properly program the unit. - Page 56 Series S36 Instruction Manual Chapter 3 Operation Pipe O.D. in. and Pipe Wall in., are the dimensions of the pipe in which the transducers will be installed and are required to calculate the flow rate. The Pipe I.D. does not need to be entered as it is calculated by the flow meter electronics.
-
Page 57: Password Menu
Series S36 Instruction Manual Chapter 3 Operation Password Menu ENTER Run Mode Password ENTER Password Menu keys to access menus Set Password 1234 Use the Password Menu to set or change the system password. The factory-set password is 1234. 3-18 800120... -
Page 58: Chapter 4 Serial Communications
Series S36 Instruction Manual Chapter 4 Serial Communications Chapter 4 Serial Communications Standard Communications Standard communication with the SonoPro® Professional Series Flow Meter comes in the form of direct wire communication. The USB port on the bottom of the enclosure for use with direct wire communication can be seen in Figure 4-1. -
Page 59: Modbus Communications
Series S36 Instruction Manual Chapter 4 Serial Communications flow meter using SonoConfig™ Instrument Interface software to assist with setup, diagnostic, and data logging features. Refer to Chapter 5 for more information on SonoConfig™ Instrument Interface software. Figure 4-2. Bluetooth® Antenna on SonoPro® Professional Series Connect to a Device To connect your SonoPro®... -
Page 60: Wiring
Overview This document describes the preliminary implementation of the Modbus communication protocol for use in monitoring common process variables in the VorTek SonoPro® Professional Series Flow Meter. The physical layer utilizes the half -duplex RS-485 port, and the Modbus protocol. -
Page 61: Menu Items
Series S36 Instruction Manual Chapter 4 Serial Communications Pin Labeling (among devices) “RS-485 –” = “A” = “TxD-/RxD-” = “Inverting pin” “RS-485 +” = “B” = “TxD+/RxD+” = “Non-Inverting pin” “RS-485 GND” = “GND” = “G” = “SC” = “Reference” Menu Items The following menu items are in the Output Menu and allow selection and control of the Modbus communication protocol. -
Page 62: Byte Order (Modbus)
Series S36 Instruction Manual Chapter 4 Serial Communications registers representing floating point or long integer data and/or the byte order within the registers may be reversed for compatibility with some PLCs and PC software. The following four selections are available in this menu; when selecting an item, the protocol is changed immediately without having to press the Enter key. -
Page 63: Register Definitions
Series S36 Instruction Manual Chapter 4 Serial Communications 40001–49999 Read/write 16-bit registers ("holding 03 (read holding registers) 06 (write registers"), IEEE 754 floating point single register) 16 (write multiple register pairs, arbitrary length strings registers) encoded as two ASCII characters per 16- bit register Each range of register numbers maps to a unique range of addresses that are determined by the function code and the register... - Page 64 Series S36 Instruction Manual Chapter 4 Serial Communications Registers Variable Data type Units Function Addresses code unsigned — 65100-65101 Serial number — 03, 04 long 8500-8511 48501-48512 string — 03, 06, 16 Net Volume Flow unsigned 30545-30546 display units* 03, 04 544-545 Totalizer long...
-
Page 65: Register Definitions (Modbus)
Series S36 Instruction Manual Chapter 4 Serial Communications The following registers are available with energy meter firmware: Registers Variable Data type Units Function Addresses code 30003-30004 Temperature #2 float display units* 03, 04 30191-30192 Delta Temperature float display units* 03, 04 190-191 30011-30012 Energy Flow... - Page 66 Series S36 Instruction Manual Chapter 4 Serial Communications Exception Status Definitions The Read Exception Status command (function code 07) returns the exception status byte, which is defined as follows. This byte may be cleared by setting “coil” register #00008 (function code 5, address 7, data = 0xff00).
- Page 67 Series S36 Instruction Manual Chapter 4 Serial Communications most significant bit set, and the data field will contain the exception code byte, as follows: Exception Code Description Invalid function code — function code not supported by device Invalid data address — address defined by the start address and number of registers is out of range Invalid data value —...
- Page 68 Series S36 Instruction Manual Chapter 4 Serial Communications A typical response from the device is as follows: 01 07 03 62 31 01 Device address 07 Function code 03 Exception status byte 62 31 CRC Request the first 12 registers from device with address 1: 01 04 00 00 00 0C F0 0F 01 Device address 04 Function code, 04 = read input register...
- Page 69 Series S36 Instruction Manual Chapter 4 Serial Communications 84 Function code with most significant bit set indicates error response 02 Exception code 2 = invalid data address C2 C1 CRC Request the state all three alarms: 01 02 00 00 00 03 38 0B 01 Device address 02 Function code 2 = read discrete inputs 00 00 Starting address...
-
Page 70: Bacnet Ms/Tp Communications
Series S36 Instruction Manual Chapter 4 Serial Communications BACnet MS/TP Communications Refer to the document, Start-up Guide – ProtoCessor FPC-ED2, for all information relating to the ProtoCessor and how to configure the ProtoCessor to communicate via BACnet. This document can be found at www.vortekinst.com. Applicable Flow Meter Models Only The SonoPro®... -
Page 71: Chapter 5 Datalogging
Chapter 5 Datalogging Chapter 5 Datalogging Datalogging Overview VorTek Instruments SonoPro® Ultrasonic Flow Meter can log data internally. The procedure for programming the unit to log data can be found below. To download data that has already been logged, see Chapter 6: SonoConfig™ Instrument Interface Software – The SonoPro®... -
Page 72: Diagnostics Menu
Series S36 Instruction Manual Chapter 5 Datalogging 4. Press “Enter” to access the first level of the hidden Diagnostics menu. The text in Figure 5-4 will be displayed. Figure 5-4. First Level of Hidden Diagnostics Menu 5. Press the right arrow to access the second level of the hidden Diagnostics menu. - Page 73 Series S36 Instruction Manual Chapter 5 Datalogging 8. The next four parameters define the variables that will be recorded during a logging session. A logging session is defined as an entire day. The unit will record all defined variables, at the interval selected above, and save them to a file with the format of YYYYMMDD.log at the end of each day.
-
Page 74: Logging Variables
Series S36 Instruction Manual Chapter 5 Datalogging Figure 5-8. Logging Variables 9. Once the four variables are defined, press the “EXIT” button until you are prompted to “Save Changes?”. Select “YES” or “NO”, press “ENTER”, and you will be returned to the run mode screen. The device is now set up to log data. -
Page 75: Chapter 6 Sonoconfig™ Instrument Interface Software
An image of the SonoConfig™ app icon can be seen in Figure 6-1. SonoConfig™ can also be provided preloaded on a tablet from VorTek Instruments, LLC. For a preview of what can be seen on the Waveforms tab of SonoConfig™, see Figure 6- 2. -
Page 76: Screenshot Of Waveforms Tab On Sonoconfig
Series S36 Instruction Manual Chapter 6 SonoConfig™ Instrument Interface Software Figure 6-2. Screenshot of Waveforms Tab on SonoConfig™ 800120... -
Page 77: Chapter 7 Troubleshooting And Repair
Series S36 Instruction Manual Chapter 7 Troubleshooting and Repair Chapter 7 Troubleshooting and Repair Warning! Always turn off power and remove main power before disassembling any part of the Hidden Diagnostics Menus flow meter. The menus shown on the following page can be accessed using the password 16363, then moving to the display that reads “Diagnostics Menu”... - Page 78 Series S36 Instruction Manual Chapter 7 Troubleshooting and Repair Hidden Diagnostics Menus 800120...
-
Page 79: Level One Hidden Diagnostics Values
Series S36 Instruction Manual Chapter 7 Troubleshooting and Repair Level One Hidden Diagnostics Values • Signal Strength = A unitless measure of the amplitude of the received ultrasonic signal displayed as a percentage (0 to 100). A value of 0 means there is no signal being received. -
Page 80: Level Two Hidden Diagnostics Values
Series S36 Instruction Manual Chapter 7 Troubleshooting and Repair • Index = The number of the Gain setting being applied to the signal. The range of numbers in the Index is 48 to 215. An index value of 48 is displayed at the largest gain value. - Page 81 Series S36 Instruction Manual Chapter 7 Troubleshooting and Repair • Alarm (2) Test = Used as a test to verify that the alarm circuit is functioning. When low is selected the alarm will initiate a low alarm on the output. When High is selected it will give a high alarm on the output.
- Page 82 Series S36 Instruction Manual Chapter 7 Troubleshooting and Repair • Slow Smoothing = Slow time constant if smoothing is enabled in the Display Menu under the Display Smooth? Submenu. • Fast Smoothing = Fast time constant if smoothing is enabled in the Display Menu under the Display Smooth? submenu.
-
Page 83: Analog Output Calibration
Series S36 Instruction Manual Chapter 7 Troubleshooting and Repair Analog Output Calibration To check the 4–20 mA circuit, connect a DVM in series with the output loop. Select zero or full scale (from the second level of the hidden Diagnostics menu) and then actuate the ENTER key. -
Page 84: Troubleshooting The Flow Meter
Series S36 Instruction Manual Chapter 7 Troubleshooting and Repair Troubleshooting the Flow Meter Warning! Always turn off power and remove main power before disassembling any part of the flow meter. First Check Items: Installation Programming Correct Installation Spacing Correct ... - Page 85 Series S36 Instruction Manual Chapter 7 Troubleshooting and Repair Record values - Hidden Diagnostics Menu continued: With No Flow With Flow (if possible) Avg. Delta T= Up Peak = Down Peak = Zeros in Signal = Wave Freq. = Cutoff V = SR Coefficient = Num Cycles = Waveform =...
-
Page 86: Determine The Fault
Series S36 Instruction Manual Chapter 7 Troubleshooting and Repair Determine the Fault Symptom: Output at No Flow 1. The programming values defined in the Calibration menu may not match the actual hardware being used at the time of measurement, leading to erroneous flow rate readings. -
Page 87: Symptom: Inaccurate Flow Rate Reading
Series S36 Instruction Manual Chapter 7 Troubleshooting and Repair 5. Verify all meter configuration and troubleshooting steps previously described. There are many possible causes of this problem, consult factory if necessary. Symptom: Inaccurate Flow Rate Reading 1. If the flow rate you are measuring is negative, the transducers/cables may have been installed incorrectly. -
Page 88: Symptom: Unsatisfactory Correlation
Series S36 Instruction Manual Chapter 7 Troubleshooting and Repair amplitudes and a steady frequency and period. With an Unkeyed signal you can define the number of cycles (Num Cycles) parameter which is used to define the number of cycles (or pulses) being sent by the driving circuit. More on Num Cycles can be found below. - Page 89 Series S36 Instruction Manual Chapter 7 Troubleshooting and Repair If your problem persists, run through the First Check Items in the beginning of this chapter, fill in the Record Values Section, and contact the factory if necessary. 800120 7-13...
-
Page 90: Returning Equipment To The Factory
Before returning any SonoPro® Fixed Mount Ultrasonic flow meter to the factory, you must request a Return Material Authorization (RMA) number. To obtain an RMA number and the correct shipping address, submit a request through VorTek Instruments, LLC website, vortekinst.com, or contact Customer Service at:... - Page 91 Series S36 Instruction Manual Appendix A Specifications Appendix A Product Specifications Accuracy ≤1-inch Line Size: +/- 2% of rate >1-inch Line Size: +/- 1% of rate Accuracy is dependent on several variables including pipe characteristics and transducer mounting configuration. Special calibration can improve accuracy. Contact factory if needed.
- Page 92 Series S36 Instruction Manual Appendix A Specifications 800120...
- Page 93 Series S36 Instruction Manual Appendix B Flow Meter Calculations Appendix B Flow Meter Calculations Volume Flow Rate Mass Flow Rate Where: A = Cross sectional area of the pipe (ft^2) C = speed of sound L = sound path length = Mass flow rate (lbm / sec) = Volume flow rate (ft^3 / sec) V = Flowing velocity (ft / sec)
- Page 94 Series S36 Instruction Manual Appendix B Flow Meter Calculations Fluid Calculations Density The liquid density is found using the International Association for the Properties of Water and Steam, IAPWS Industrial Formulation 1997 for the Thermodynam- ic Properties of Water and Steam. Viscosity The liquid viscosity is found using the International Association for the Proper- ties of Water and Steam, The IAPS Formulation 1985 for the Viscosity of Ordi-...
- Page 95 Series S36 Instruction Manual Appendix C Sound Speed and Pipe Data Appendix C Sound Speed and Pipe Data Pipe Sound Speeds Material Shear Wave (ft/sec) Long Wave (ft/sec) Carbon Steel 10598 19325 Stainless 302 10236 18525 Stainless 303 10236 18525 Stainless 304 10305.12 19094.49...
- Page 96 Series S36 Instruction Manual Appendix C Sound Speed and Pipe Data Pipe Chart 800120...
- Page 97 Series S36 Instruction Manual Appendix C Sound Speed and Pipe Data 800120...
- Page 98 Series S36 Instruction Manual Appendix C Sound Speed and Pipe Data 800120...
- Page 99 Series S36 Instruction Manual Appendix C Sound Speed and Pipe Data 800120...
- Page 100 Series S36 Instruction Manual Appendix C Sound Speed and Pipe Data 800120...
- Page 101 Series S36 Instruction Manual Appendix C Sound Speed and Pipe Data 800120...
- Page 102 Series S36 Instruction Manual Appendix C Sound Speed and Pipe Data 800120...
- Page 103 Series S36 Instruction Manual Appendix D Quick Start-Up Guide Appendix D Quick Start-Up Guide 1. Turn on power to the fixed mount ultrasonic unit by pressing the “POWER” button after the input power wire connections have been made. 2. Press “ENTER”. A screen with “Enter Password” will be displayed. a.
- Page 104 Series S36 Instruction Manual Appendix D Quick Start-Up Guide Enter temperature of liquid being measured Enter “Fluid Temp. 2”. Note: Only for models with Energy. 6. Now that all parameters have been set, navigate to the “Trans Traverse” sub-menu within the “Calibration”...
- Page 105 Series S36 Instruction Manual Appendix E Mounting Template Appendix E Mounting Template The SonoPro fixed mount ultrasonic flow meter can be mounted to a wall or panel by using the ® procedure outlined in Chapter 2. To assist with the mounting of the enclosure, a mounting tem- plate is provided as mentioned in Chapter 2.
- Page 106 Series S36 Instruction Manual Appendix F Glossary of Terms Appendix F Glossary of Terms A B C D Cross sectional area. ACFM Actual Cubic Feet Per Minute (volumetric flow rate). ASME American Society of Mechanical Engineers. British Thermal Unit, an energy measurement. Compressibility A f actor used to correct for the non-ideal changes in a f luid’s density due to changes in temperature and/or pressure.
- Page 107 Series S36 Instruction Manual Appendix F Glossary of Terms Milli-amp, one thousandth of an ampere of current. Viscosity, a measure of a f luid’s resistance to shear stress. Honey has high viscosi- ty, alcohol has low viscosity. Line pressure (psia or bar absolute). ...
Need help?
Do you have a question about the SonoPro S36 Series and is the answer not in the manual?
Questions and answers