
Related Manuals for SANLI LazerMulch LMS405


Summary of Contents for SANLI LazerMulch LMS405
- Page 1 INSTRUCTION MANUAL LAWN MOWER LazerMulch LMS405 CONSUMER HELPLINE 1800 466 068 PLEASE READ THE INSTRUCTIONS IN THIS MANUAL BEFORE OPERATION.
-
Page 2: Lawn Mower
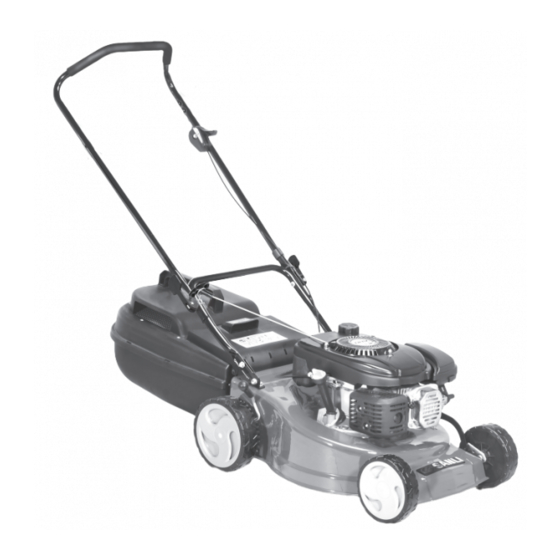
INSTRUCTION MANUAL INSTRUCTION MANUAL LMS40 LAWN MOWER What you get with your mower ×1 ×1 ×2 ×1 ×1 ×4 ×1 ×1 ×1 ×1 5. Spanners 9. Mulching Plug 1. Petrol Lawnmower 6. Bolt and Nut Assembly 2. Instruction Manual 10. Spring Cord Guide 3. - Page 3 1. Comfort Grip Handle 5. Air Filter 9. Height Adjustment Lever 2. Throttle Control Lever 6. Spark Plug 10. Grass Catcher 3. Rear Flap 11. Spring Cord Guide 4. Fuel Tank 8. Oil Sump PAGE 3 WWW.SANLI.COM.AU...
- Page 4 INSTRUCTION MANUAL Parts required: 4 x bolts and nuts Remove and ensure you have all the parts required for assembly (see page 2 for reference) 1. LOWER LOOP HANDLE ASSEMBLY 1. Lower Loop Handle Assembly Fit the lower handles with bolts and nuts supplied.
-
Page 5: Assembly Guidelines
ASSEMBLY GUIDELINES LAWN MOWER LMS405 2. UPPER HANDLE ASSEMBLY Parts required: 2 x Handle Toggles 2 x Bolts 1 x Spring Cord Guide 2b. Upper Handle Assembly 4. Attach the Grass Catcher 6. Complete machine ready for your Fit the right side Handle Toggles and Lift the Rear Flap with one hand. -
Page 6: Before You Begin
INSTRUCTION MANUAL BEFORE YOU BEGIN WARNING! The following procedures must be carried out before you start the engine of your lawnmower. FILL OIL SUMP WITH 600ml of FILL FUEL TANK WITH SAE 30 Oil PREMIUM PETROL (NO E10 PETROL) Fig 1 Fig 2 Fig 4 Fill Fuel tank with min 95 octane... -
Page 7: Starting The Engine
BEFORE YOU BEGIN/STARTING THE ENGINE LAWN MOWER LMS405 STARTING THE ENGINE WARNING! The following procedures must be carried out before you start the engine of your lawnmower. Fig 5 Fig 6 Fig 7 Fig 8 Starting the engine 4. Firmly hold the top handle with 6. -
Page 8: Using Your Mower
INSTRUCTION MANUAL USING YOUR MOWER Fig 9 Fig10 Fig11 Fig12 Fig13 Cleaning your Mower Attach the Grass Catcher tarpaulin or similar cover as it may The grass catcher attaches easily by cause condensation resulting in WARNING! Turn mower off before cleaning lifting the mower’s Rear Flap with corrosion. -
Page 9: Tips On Mower Safety
USING YOUR MOWER/SAFETY TIPS LAWN MOWER LMS405 TIPS ON MOWER SAFETY HOT! Max 20° 1. Before starting your mower inspect 8. Mow across the face of slopes, not 14. Do not transport the it carefully to ensure that there are up &... -
Page 10: Maintenance Schedule
Use only genuine SANLI to prevent possible injury when Thereafter, maintenance of the spark parts or those approved by SANLI. handling the blade. Disconnect plug should take place every 25 hours. the spark plug cap and tilt the Remove the spark plug cap (Fig.14) -
Page 11: Basic Maintenance
BASIC MAINTENANCE LAWN MOWER LMS405 Fig16 Fig17 Fig18 Changing the oil (use SAE30 oil) Do not twist the foam cartridge to clean it as this could cause damage. into its housing and replace If your mower is not serviced correctly, you could reduce your mower’s ability to operate and void WARNING! component is in place and properly... -
Page 12: Technical Specification
INSTRUCTION MANUAL TECHNICAL SPECIFICATION Consistent with our policy of continuous improvement, SANLI reserves the right of any of its products without notice or obligation. and images in this manual as being for illustrative purposes only. They may in no case serve as a basis for any legal claim. - Page 13 The warranty is not transferable and is only applicable to the original purchaser that can provide the original proof of purchase. Sanli provides a Premium Warranty Cover for this product for a period of 5 years from your original purchase date with the exception of commercial use.
- Page 14 To validate your 5 year warranty, you must * Register your product warranty online at www.sanli.com.au * Maintain your mower and update this service log by Authorised Sanli Dealers * Use fresh 95 Octane premium petrol (Not older than 3 months)
- Page 15 Sharpen and balance blade. Replace worn or damaged blade Clean fuel line and carburettor Notes Service carried out by: (Sanli Dealer's Stamp) Invoice No/Job No: Service Date: Proof of service 4 (25 hours usage after third service or three years after purchase)
- Page 16 Sharpen and balance blade. Replace worn or damaged blade Clean fuel line and carburettor Notes Service carried out by: (Sanli Dealer's Stamp) Invoice No/Job No: Service Date: Proof of service 6 (25 hours usage after fifth service or five years after purchase)
- Page 17 INSTRUCTION MANUAL Notes. PAGE 17...
- Page 18 Notes. PAGE 18...
- Page 19 Telephone: 02 97710088 Address: 1/61-71 Rookwood Road, Yagoona NSW 2199 WWW.SANLI.COM.AU Email: support@sanli.com.au...
Need help?
Do you have a question about the LazerMulch LMS405 and is the answer not in the manual?
Questions and answers