
Related Manuals for Denver WCT-5003MK2


Summary of Contents for Denver WCT-5003MK2
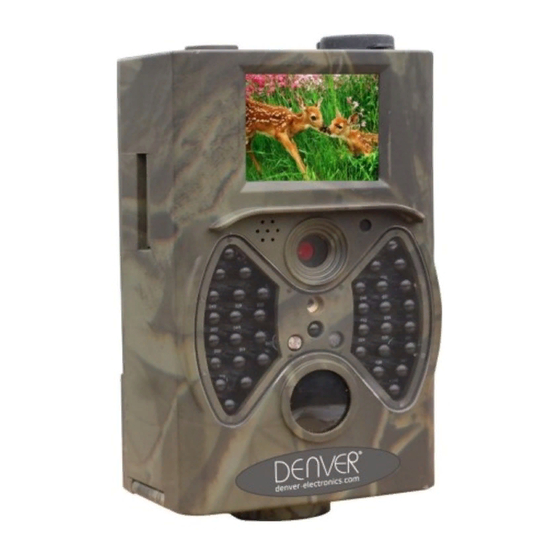
- Page 1 Wild Camera DENVER WCT-5003MK2 Instruction Manual WWW.DENVER-ELECTRONICS.COM ENG-1...
-
Page 2: Table Of Contents
Table of Contents 1. Instructions......................... 3 General Description....................3 Camera Body Interface................... 3 Camera components and features.................3 Remote Control....................... 3 1.4.1 Navigating..................... 4 Shooting Information Display.................4 Supported Format....................5 2. Cautions..........................5 3. Easy Operation........................6 Power Supply......................6 Insert the SD-card....................6 Power on and Enter into the ON Mode..............6 Enter into the TEST Mode..................7 3.4.1 Custom Settings....................7... -
Page 3: Instructions
1. Instructions 1.1 General Description This digital trail camera is a surveillance camera working automatically. It can be triggered at once by any movement of human (or animals) in a certain region of interested (ROI) monitored by a high sensitive Passive Infrared (PIR) motion sensor, and then automatically captures high quality pictures (up to 12M pixels) or records 1080p HD video clips (WVGA or QVGA). -
Page 4: Navigating
1.4.1 Navigating Press UP or DOWN to select or highlight the menu item, while press LEFT or RIGHT to select the option of each item and press OK to make selection. 1.5 Shooting Information Display When the camera is turned on (the power switch is slid to TEST position), the shooting information will be displayed in the monitor. -
Page 5: Supported Format
1.6 Supported Format Item Format Photo Video File Format FAT32 Here are some important notices. You don’t need to concern about the file system format of the camera unless you have problems with reading the SD-card by your other equipment. If this happened, please format the SD-card in the camera or in a computer at first and then reinsert the card into your camera to make a try. -
Page 6: Easy Operation
3. Easy Operation 3.1 Power Supply To supply power for the camera, four or eight AA size batteries are needed. Open the bottom cover. Confirm that the power switch is at the OFF (Right) position, pull out the battery depot. Load the fully charged batteries into the depot according the polarities sign shown below. -
Page 7: Enter Into The Test Mode
3.4 Enter into the TEST Mode Slide the power switch to the TEST position to enter into the TEST mode. There are some functions in TEST mode: Custom settings, manual capture, preview. 3.4.1 Custom Settings Press the MENU switch to enter into menu setting. The camera can be taken over control to manually customize the camera settings which display on the camera or external TV monitor. -
Page 8: Advanced Operations
4. Advanced Operations From the basic operations of the camera in previous chapter, we know that the camera has three basic operation modes: 1. OFF mode: Power switch is at OFF position (Right). 2. ON mode: Power switch is at ON position (Left). 3. -
Page 9: Video Setting
4.1.2 Video Setting 4.1.3 System Setting ENG-9... -
Page 10: Default
4.1.4 Default Default Settings are listed as below: Setting Default Items Mode Camera Camera, Video, Camera&Video Resolution 12MP, 8MP ,5MP Interpolated (Camera) Interval 1 Seconds 1-30 Seconds,1-30 Minutes Multi Single Single,3,6,9 Pictures 100,200,400 Resolution 1080P 1080P, 720P, WVGA ,QVGA (Video) Video Length 10s,30s,60s,90s YY/MM/DD,MM/DD/YY,DD/MM/YY... -
Page 11: Set Photo Size
4.1.8 Set Photo Size This parameter has three values: 12MP, 8MP and 5MP. The default value is 5 mega pixels. The following shows how to set pixel size as 5M Pixel: a) Press MENU to display the setting menu. b) Press DOWN to select Resolution. c) Press Right to select 12M Pixel. -
Page 12: Set Video Length
4.1.13 Set Video Length The following shows how to set video length to 30 Seconds, provided that the previous value is 10 Seconds: a) Press MENU to display the setting menu. b) Press DOWN to select Video Length. c) Press down the select switch to save the current setting, then press MENU to return to info display. -
Page 13: Playback
4.2 Playback In playback mode, images or videos can be viewed, deleted. The images and videos can be viewed on: LCD screen on camera and TV monitor which connect to camera with TV cable. For simplicity, operations with PC won’t be introduced here. 4.2.1 Viewing Photo or Video a) Switch to TEST mode and enter into info display. -
Page 14: Appendix Ⅰ: Technical Specifications
Appendix Ⅰ: Technical Specifications Image Sensor Type(True Megapixels) 5 Mega Pixels Color CMOS Memory SD Card 8MB~32GB Lens F=3.1; FOV=60 ° Size 145mm * 80mm * 55 mm IR Filter: Full Automatic IR Filter TFT Display Screen: 2.0 inch PIR Sensitivity 3 sensitivity levels: High/Normal/Low PIR Sensor Sight Angle 100 Degrees... - Page 15 ALL RIGHTS RESERVED, COPYRIGHT DENVER ELECTRONICS A/S Electric and electronic equipment contains materials, components and substances that can be hazardous to your health and the environment, if the waste material (discarded electric and electronic equipment) is not handled correctly. Electric and electronic equipment is marked with the crossed out trash can symbol, seen above.
Need help?
Do you have a question about the WCT-5003MK2 and is the answer not in the manual?
Questions and answers