Table of Contents
Advertisement
Advertisement
Table of Contents

Related Manuals for Denver WCM-5003


Summary of Contents for Denver WCM-5003
- Page 1 GPRS/MMS/SMS Digital Infrared Trail Camera User’s Manual WCM-5003...
-
Page 2: Table Of Contents
Table of Contents Instructions ......................1 General Description ....................1 Camera Body Interface ..................1 Camera components and features ................ 1 Remote Control ..................... 1 Shooting Information Display ................2 Brief Introduction for SIM card and Signal ............2 Supported Format ....................2 Easy Operation ...................... -
Page 3: Instructions
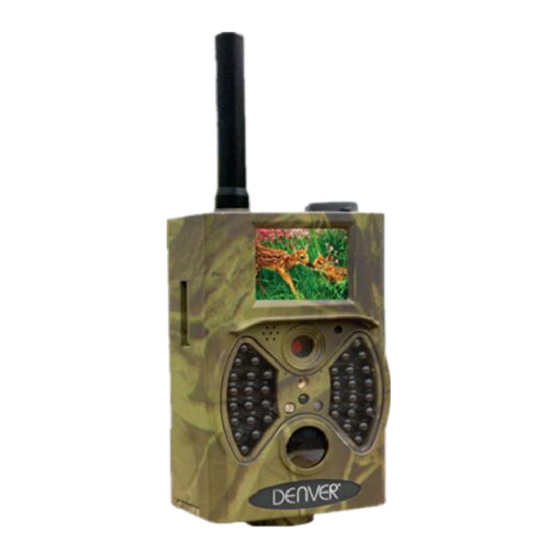
1. Instructions General Description This digital trail camera with MMS function can work automatically day and night. It can be triggered by any movement of human (or animals) in a certain region monitored by motion sensor, and then automatically captures pictures (up to 12M pixels) or records 1080p or HD video clips (WVGA or QVGA). -
Page 4: Shooting Information Display
Press the punctuation “*” for laser pointer. Select Item (UP) Display Menu Selection Exit (MENU) (OK) Select Option Select Option (Left) (RIGHT) Select Item (DOWN) 1.5 Shooting Information Display When power switch is turn to TEST position, the shooting information will be displayed in the monitor. -
Page 5: Insert The Microsd-Card And The Sim-Card
Slot 1 Slot 2 Slot 3 Slot 4 2.2 Insert the MICROSD-card and the SIM-card Insert MICROSD-card and SIM into the card slot. When use MMS/E-mail function, be sure to insert SIM-card into the SIM-card slot correctly. Supporting MicroSD 2G/GSM/MMS/ GPRS service 2.3 Enter into the TEST Mode Turn the power switch to the TEST position to enter into the TEST mode. -
Page 6: Power On And Enter Into The On Mode
2.4 Power on and Enter into the ON Mode Before switching on, please pay attention to the following items: 1. Do not face light source directly. These may cause false triggers The height from ground for placing should be 1-2 meters. For example for deer height is good size appropriately. -
Page 7: System Setting
3.1.3 System Setting 3.1.4 MMS Menu Setting 3.1.5 SMTP Menu Setting This camera can send pictures instantly to user’s mobile via MMS method. So before using this function user needs to finish the settings mms in MMSCONFIG. -
Page 8: Mms/Smtp Settings
3.2 MMS/SMTP Settings 3.2.1 Preparation 1. 2G/GSM Mobile Operator Service 2. format 2GB+ MICROSD or SD card 3. computer(Vista, Windows 7, windows 8 system) 4. One SIM card without PIN lock 5. The SIM card should be able to send images via 2G/GSM/ GPRS/MMS network 6. -
Page 9: Sms Command Code
3. Insert all 4. Fill in sender email info in 5. Go to table, choose 6. Click button and save as Parameter.dat to MICROSD card 7. Plug USB cable from camera 8. Go to in cam menu, check the subsetting is the same with above setting Turn camera to on mode 3.3 SMS Command Code mms/smtp need to be set ‘on' mode well before using thes sms command... -
Page 10: Cautions
4. Cautions The working voltage of the camera is 6.0V. Please unlock and format the MicroSD card. Please insert the MicroSD-card when the power switch is at OFF position. Please do not insert or take out the MicroSD-card when the power switch is at ON position. -
Page 11: Appendixⅰ: Technical Specifications
Appendix : Technical Specifications Image Sensor Type 5 Mega Pixels Color CMOS (True Megapixels) Memory MICROSD Card 8MB~32GB Lens F=3.1; FOV=60 ° Size 145mm * 80mm * 55 mm IR Filter: Full Automatic IR Filter TFT Display Screen: 2.0 inch PIR Sensor Sight Angle 60 Degrees PIR Sensing Distance... - Page 12 DK-8250 Egaa Denmark www.facebook.com/denverelectronics Hereby, Inter Sales A/S, declares that this model DENVER WCM-5003 is in compliance with the essential requirements and other relevant provisions of Directive 1999/5/EC. A copy of the Declaration of Conformity may be obtained at Inter Sales A/S...
Need help?
Do you have a question about the WCM-5003 and is the answer not in the manual?
Questions and answers