Table of Contents
Advertisement
OPERATION AND INSTALLATION MANUAL
FOR MODELS:
STW412AEZRB
STW48AYRE
STW410AYRE
STW410AZEB
STW412AYRE
950-0225-revD
THRU THE WALL
AIR CONDITIONER
COOLING
CAPACITY
12,000/11,700
8,000
10,000
10,000
12,000
HEATING
CAPACITY
10,600/8,600
N/A
N/A
N/A
N/A
POWER
SUPPLY
208/230V 60Hz
115V 60Hz
115V 60Hz
208/230V 60Hz
115V 60Hz
1/21/2017
Advertisement
Table of Contents

Subscribe to Our Youtube Channel
Related Manuals for Sea Breeze STW412AEZRB


Summary of Contents for Sea Breeze STW412AEZRB
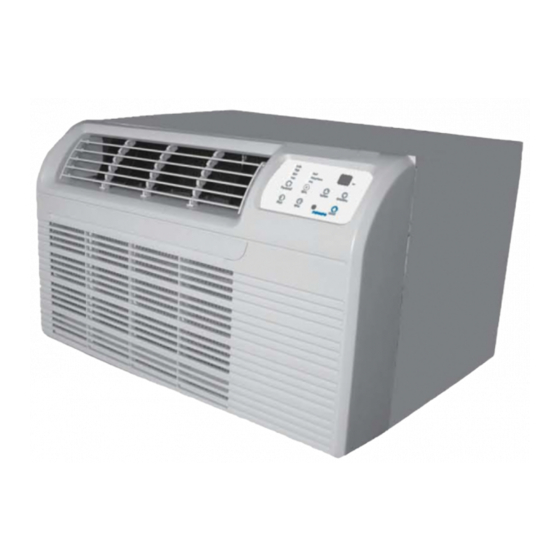
- Page 1 THRU THE WALL AIR CONDITIONER OPERATION AND INSTALLATION MANUAL FOR MODELS: COOLING HEATING POWER CAPACITY CAPACITY SUPPLY STW412AEZRB 12,000/11,700 10,600/8,600 208/230V 60Hz STW48AYRE 8,000 115V 60Hz STW410AYRE 10,000 115V 60Hz STW410AZEB 10,000 208/230V 60Hz STW412AYRE 12,000 115V 60Hz 950-0225-revD 1/21/2017...
-
Page 2: Table Of Contents
CONTENTS IMPORTANT INSTRUCTIONS ............................1 INSTALLATION INSTRUCTIONS ............................3 Items in Kit ................................3 How to Install TTW in Existing Sleeve ........................4 Complete Installation ..............................7 OPERATION ..................................8 Turn Unit on ................................8 Change Temperature Setting ............................ 9 Adjust Fan Speed..............................9 Select Operating Mode ............................ -
Page 3: Important Instructions
IMPORTANT INSTRUCTIONS WARNING: To reduce the risk of fire, electrical shock or injury when using your air conditioner, follow these basic precautions: Plug into a grounded 3 prong outlet. Do not use an extension cord. Do not remove ground prong. Unplug Air Conditioner before servicing. - Page 4 LCDI or AFCI Power Cords - Underwriters Laboratories and the National Electric Code (NEC) now require power cords that sense current leakage and can open the electrical circuit to the unit on units rated at 250 volts or less. In the event that unit does not operate, check the reset button located on or near the head of the power cord as part of the normal troubleshooting procedure.
-
Page 5: Installation Instructions
INSTALLATION INSTRUCTIONS NOTE: The air conditioner dimension is: 24”W x 14”H x 18”D without front panel. To ensure that the unit operates safely and efficiently, it should be installed, operated, and maintained according to this installation and operating instructions and all local codes and ordinances, or, in their absence, with the latest edition of the National Electrical Code. -
Page 6: How To Install Ttw In Existing Sleeve
How to Install TTW in Existing Sleeve Remove old air conditioner from wall sleeve and prepare wall sleeve as follows: · Clean interior but do not disturb seals. · Wall sleeve must be securely fastened in wall before installing air conditioner. - Page 7 Cut (2) 17” Tapered Spacer Blocks as shown below into three pieces. The 2 1/2” section is placed in front of the rib on base with the tapered end facing the back of the sleeve. Cut the remaining portion to 12 1/2” and placed behind the rib again sloping toward the rear of the sleeve. This helps induce a rearward slope on the unit.
- Page 8 OPTION 3 – Mounting Sea Breeze Sleeve (4230050) to TTW. The previous directions are the preferred way to mount the new rear grill. The unit performance is slightly better and the possibility of drafts is reduced. Another option is direct mounting of the grille to the unit. Mounting hardware included in accessory kit.
-
Page 9: Complete Installation
Complete Installation 1. Install the 1”x1 1/2” x 84” long stuffer-seal (foam insulation) between the wall sleeve and the unit. 2. Assemble the trim frame by inserting top and bottom pieces into side pieces and snapping into place. 3. Pull cord through trim frame then slide over unit until flush with wall. -
Page 10: Operation
OPERATION Before you begin, thoroughly familiarize yourself with the control panel and remote as shown below and all its functions then follow the symbol for the functions you desire. The air conditioner can be controlled by the remote control or the control panel. Control Panel Turn Unit on Press the ON/OFF button. -
Page 11: Change Temperature Setting
Change Temperature Setting Change Temperature: Press or hold either Up (▲) or Down (▼) button until the desired temperature set point is seen on the display. Temperature range is 62° F (17° C) to 86° F (30° C) in 1° F (1° C) increments. -
Page 12: Select Operating Mode
Select Operating Mode Select Operating Mode: To choose operating mode, press the Mode button. Each time you press the button, a mode is selected in a sequence that goes from Auto, Cool, Dry, Heat and Fan. The indicator light beside the Mode button will be illuminated. -
Page 13: Sleep Mode
Sleep Mode SLEEP MODE: The temperature setting will increase (Cooling mode) or decrease (Heating mode) by 2° F in 30 minutes. In another 30 minutes the temperature setting will increase/decrease by another 2° F. This temperature will be maintained for 6 hours and then the temperature will return to the original set point temperature. -
Page 14: Check Filter
Check Filter CHECK FILTER FEATURE: This feature is a reminder to clean the Air Filter for more efficient operation. The LED (light) will illuminate after 250 hours of operation. To reset after cleaning the filter, press the Check Filter button and the light will turn off. DISPLAY INDICATIONS: Display &... -
Page 15: Remote Control
REMOTE CONTROL Handling and location of the remote controller Use the remote controller at a distance of 26 ft., or less, from the appliance. Point it towards the receiver on the air conditioner. Communication is confirmed with a beep. CAUTIONS ... -
Page 16: Function Buttons
Function Buttons ① ON/OFF Button: Push this button to start operation, push the button again to stop operation. NOTE: The unit will initiate automatically the Energy Saver function under Cool, Dry, Auto (Only Auto-Cooling and Auto Fan) modes. ② MODE Button: Press this button to select the desired operation mode from AUTO, COOL, DRY, and FAN as the following sequence. -
Page 17: Remote Display
○ 11 CLOCK Button: Use to set the time. ○ 12 LED Button: Turns the display on and off. ○ 13 LOCK Button: When you press the LOCK button, all current settings are locked in and the remote controller will not operate until the lock button is pressed again. -
Page 18: Setting The Clock
Setting the Clock Before you start operation the air conditioner, set the clock of remote control using the procedures given in this section. The clock panel on the remote control will display the time regardless of whether the air conditioner is in use or not. -
Page 19: Automatic Operation
Automatic Operation When you set the air conditioner in AUTO mode, it will automatically select cooling, heating (not applicable to cool only units) or fan only operation depending on what temperature you have selected and the room temperature. Once you select the operating mode, the operating conditions are saved in the unit’s microcomputer memory. -
Page 20: Cooling/Fan Only Operation
Cooling/Heating/Fan only Operation Start the function: Ensure unit is plugged and power is available. The OPERATION lamp on the display panel of the unit starts flashing. 1. MODE button Press to select COOL, HEAT or FAN ONLY. 2. TEMP/TIME button Set the desired temperature, the most comfortable temperature is between 70℉... -
Page 21: Timer Operation
Timer Operation 1. TIMER button Press the TIMER button, the remote will display “0.0” alongside either the TIMER ON or TIMER OFF indicator, and will flash. 2. TEMP/TIME button Press to set the desired time. ▲ Forward ▼ Backward Press or hold the “▲” or ”▼” button to change the Auto time by 0.5 hour increments, up to 10 hours, then at 1hour increments up to 24 hours. -
Page 22: Example Of Timer Setting
Example of Timer Setting TIMER ON (Timer start Operation) The TIMER ON function is useful when you want the unit to turn on automatically before you return home. The air conditioner will automatically start operating at the set time. IMPORTANT: The time will be registered within a 3 seconds period (after pressing the TEMP/TIME button), so you should continue pressing the button until the desired time is established. -
Page 23: Combined Timer
Combined Timer Setting both ON and OFF timers simultaneously TIMER OFF → TIMER ON (ON→STOP→START operation) This feature is useful when you want to stop the air conditioner after you go to bed, and start it agin in the morning when you wake up or when you return home. -
Page 24: Important Information
IMPORTANT INFORMATION The Cool function has an automatic 3-minute time delayed start if the unit is turned off and on quickly. This prevents overheating of the compressor and possible circuit breaker tripping. The fan will continue to run during this time. -
Page 25: Air Conditioner Care
AIR CONDITIONER CARE Your new air conditioner is designed to give you many years of dependable service. This section tells you how to clean and care for your air conditioner properly. Call your local authorized dealer for an annual checkup. Remember, the cost of this service call is your responsibility. -
Page 26: Troubleshooting
TROUBLESHOOTING Before calling for service, try the suggestions below to see whether you can solve your problem without outside help. An extension cord is being used. Do not use an extension cord with this or any other appliance. Air conditioner will not operate You are trying to restart the air conditioner too soon after turning the unit off. - Page 27 Air Conditioner cycles on and off too The temperature set point or Thermostat control is often, or does not cool room in cooling not at a cool enough setting. mode Adjust the temperature set point to a cooler setting by pressing the minus button to reduce the temperature The air conditioner is not properly sized for your or adjust the Thermostat control to a cooler setting by...
-
Page 28: Specifications
SPECIFICATIONS STW410AZEB IRP Model Number STW412AEZRB STW48AYRE STW410AYRE STW412AYRE 423-0108 Product Code 423-0104 423-0105 423-0106 423-0107 208/230 Rated Voltage 208/230 9,800/10,000 8,000 10,000 12,000 Cooling Capacity 11,700/12,000 Heating Capacity 8,600/10,600 198-253 103-126 103-126 103-126 Operating Voltage Range 198-253 10.6 10.6 10.6... -
Page 29: Warranty
WARRANTY International Refrigeration Products warrants that the product supplied is free from defects in material and workmanship. This warranty is valid as long as this product is properly handled, installed, operated and serviced in accordance with the installation and operating instructions shipped with this unit.
Need help?
Do you have a question about the STW412AEZRB and is the answer not in the manual?
Questions and answers