Fujitsu ETERNUS DX60 S2 Hardware And Software Installation Manual
Hide thumbs
Also See for ETERNUS DX60 S2:
- User manual (131 pages) ,
- Maintenance manual (55 pages) ,
- Operation manual (119 pages)

Related Manuals for Fujitsu ETERNUS DX60 S2


Summary of Contents for Fujitsu ETERNUS DX60 S2
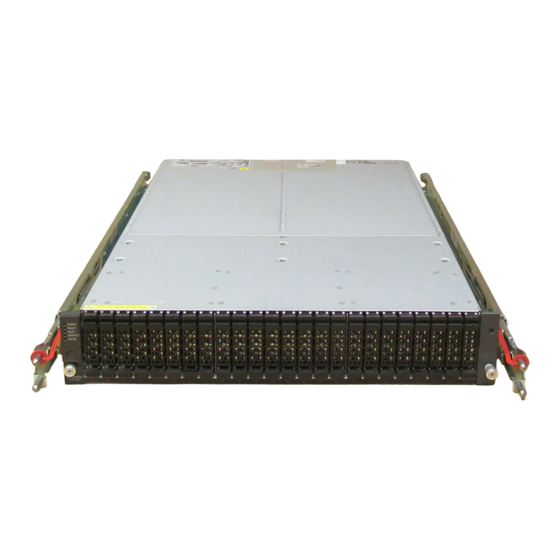
- Page 1 ETERNUS DX60 S2 Hardware and Software Installation Hardware and Software Installation ETERNUS DX60 S2 Copyright Fujitsu Technology Solutions, Release September 2011...
-
Page 2: Hardware Installation
Hardware Installation Package Contents Rack Mounting Power Cabling Backend Cabling Power On and Power Off Procedures Hardware and Software Installation ETERNUS DX60 S2 Copyright Fujitsu Technology Solutions, Release September 2011... -
Page 3: Package Contents
Controller Enclosure Kit Installation poster Documentation CD Rack mount kit Controller Enclosure Front bezel 2 X power cord Safety Manual Hardware and Software Installation ETERNUS DX60 S2 Copyright Fujitsu Technology Solutions, Release September 2011... - Page 4 Installation poster Rack mount kit Drive Enclosure Front bezel 2 X power cords 2 X SAS cables Safety Manual Hardware and Software Installation ETERNUS DX60 S2 Copyright Fujitsu Technology Solutions, Release September 2011...
-
Page 5: Rack Mounting
Rack Mounting (1) Rack mount kit Rack mount installation overview Hardware and Software Installation ETERNUS DX60 S2 Copyright Fujitsu Technology Solutions, Release September 2011... - Page 6 Controller Enclosure Insert the pins of the left hand side slide rail in the 1st and 3rd hole counting from the bottom of the 2U Bracket Hardware and Software Installation ETERNUS DX60 S2 Copyright Fujitsu Technology Solutions, Release September 2011...
- Page 7 M5 Centering screw (10 mm) M5 centering screw and M5 pan head screws M5 Pan head screw (10 mm) Hardware and Software Installation ETERNUS DX60 S2 Copyright Fujitsu Technology Solutions, Release September 2011...
- Page 8 M5 Centering Base line of the screw (10 mm) Controller Enclosure M5 Cage nut M5 Pan head Base line of the screw (10 mm) Controller Enclosure Hardware and Software Installation ETERNUS DX60 S2 Copyright Fujitsu Technology Solutions, Release September 2011...
- Page 9 Rack Mounting (4) Front view of rack installation Hardware and Software Installation ETERNUS DX60 S2 Copyright Fujitsu Technology Solutions, Release September 2011...
- Page 10 Rack Mounting (5) Fit the Controller Enclosure and/or Drive Enclosure to the rack For better stability, a rack is to be filled starting from the bottom Hardware and Software Installation ETERNUS DX60 S2 Copyright Fujitsu Technology Solutions, Release September 2011...
-
Page 11: Power Cabling
Make sure that the AC power switches on each Enclosure are turned off before connecting their power cables Always follow the local power cabling regulations! Hardware and Software Installation ETERNUS DX60 S2 Copyright Fujitsu Technology Solutions, Release September 2011... - Page 12 • SAS (IN) port connector • Plug for SAS (IN) port • SAS (OUT) port connector • Plug for SAS (OUT) port Hardware and Software Installation ETERNUS DX60 S2 Copyright Fujitsu Technology Solutions, Release September 2011...
- Page 13 Backend Cabling (1) Connect SAS (OUT) ports of the Controller Enclosure with the SAS (IN) ports of the Drive Enclosure Hardware and Software Installation ETERNUS DX60 S2 Copyright Fujitsu Technology Solutions, Release September 2011...
-
Page 14: Power On Procedure
• Steady green when the cache is in use • Blinking green when a power failure has occurred and the cache data has been stored in the CompactFlash memory Hardware and Software Installation ETERNUS DX60 S2 Copyright Fujitsu Technology Solutions, Release September 2011... -
Page 15: Power Off Procedure
Server I/O is stopped Check that the CACHE LED on the Operation Panel is off Make sure the CACHE LED of the Controller Enclosure is off Hardware and Software Installation ETERNUS DX60 S2 Copyright Fujitsu Technology Solutions, Release September 2011... -
Page 16: Software Setup
Software Setup Initial Configuration Initial Configuration Web GUI Initial Configuration for Expansion Drive Enclosure ETERNUS SF Express Hardware and Software Installation ETERNUS DX60 S2 Copyright Fujitsu Technology Solutions, Release September 2011... -
Page 17: Initial Configuration
Mozilla Firefox 3.0.x, 3.5.x and 3.6.x Web browser settings • Do not use a proxy server or cache (Temporary Internet Files) • Enable Java Scripting, Style Sheets and Cookies Hardware and Software Installation ETERNUS DX60 S2 Copyright Fujitsu Technology Solutions, Release September 2011... - Page 18 The LAN cable must go to the MNT port with the Master LED on MNT Port Master LED MNT Port Master LED CM #0 CM #0 CM #1 CM #1 Hardware and Software Installation ETERNUS DX60 S2 Copyright Fujitsu Technology Solutions, Release September 2011...
- Page 19 To start the installation procedure, logon to ETERNUS DX60 S2 Web GUI using one of the default User Accounts User name: root, Password: root User name: f.ce, Password: <Check Code><System Serial Number> Hardware and Software Installation ETERNUS DX60 S2 Copyright Fujitsu Technology Solutions, Release September 2011...
- Page 20 Initial Configuration Web GUI (2) Opening screen after logon to ETERNUS DX60 S2 Web GUI General status of the system Initial configuration steps Hardware and Software Installation ETERNUS DX60 S2 Copyright Fujitsu Technology Solutions, Release September 2011...
- Page 21 Abnormal status is detected at power-off, the device has not started up normally Failed to restore the operating environment at power-on The device is abnormal Hardware and Software Installation ETERNUS DX60 S2 Copyright Fujitsu Technology Solutions, Release September 2011...
- Page 22 RAID group or as a hot spare.) Orange The component is under maintenance Yellow Preventive maintenance is required for a component A component failure is detected Hardware and Software Installation ETERNUS DX60 S2 Copyright Fujitsu Technology Solutions, Release September 2011...
- Page 23 Initial Configuration Web GUI (5) Set Date and Time Hardware and Software Installation ETERNUS DX60 S2 Copyright Fujitsu Technology Solutions, Release September 2011...
- Page 24 Initial Configuration Web GUI (6) Set Machine Name (optional) Hardware and Software Installation ETERNUS DX60 S2 Copyright Fujitsu Technology Solutions, Release September 2011...
- Page 25 Initial Configuration Web GUI (7) Change the password if needed (need customer approval) Hardware and Software Installation ETERNUS DX60 S2 Copyright Fujitsu Technology Solutions, Release September 2011...
- Page 26 Initial Configuration Web GUI (8) Set Network Environment (if needed) Hardware and Software Installation ETERNUS DX60 S2 Copyright Fujitsu Technology Solutions, Release September 2011...
- Page 27 Configure Expansion Drive Enclosure (1) Choose tab "Maintenance" Select "Add Drive Enclosure" Hardware and Software Installation ETERNUS DX60 S2 Copyright Fujitsu Technology Solutions, Release September 2011...
- Page 28 Configure Expansion Drive Enclosure (2) This is also a Wizard driven procedure Start with Next Hardware and Software Installation ETERNUS DX60 S2 Copyright Fujitsu Technology Solutions, Release September 2011...
- Page 29 Configure Expansion Drive Enclosure (3) This step is to verify that the Drive Enclosure is properly installed in the rack Hardware and Software Installation ETERNUS DX60 S2 Copyright Fujitsu Technology Solutions, Release September 2011...
- Page 30 Configure Expansion Drive Enclosures (4) The Software Wizard scans automatically for new Drive Enclosures Hardware and Software Installation ETERNUS DX60 S2 Copyright Fujitsu Technology Solutions, Release September 2011...
- Page 31 Configure Expansion Drive Enclosure (5) This step is for verifying that the Auto Power Switch is set to "Off" The switch is located in the Operation Panel Hardware and Software Installation ETERNUS DX60 S2 Copyright Fujitsu Technology Solutions, Release September 2011...
- Page 32 Configure Expansion Drive Enclosure (6) The Expansion for the Drive Enclosure is finished Hardware and Software Installation ETERNUS DX60 S2 Copyright Fujitsu Technology Solutions, Release September 2011...
- Page 33 End of Initial Configuration Before logging off from the ETERNUS DX60 S2 Web GUI, verify that all components have a condition "Normal" General status of the system in the Web GUI is "Normal" i.e. green All system LEDs are showing normal system status...
- Page 34 ETERNUS SF Storage Cruiser DX60 S2 starts shipping with SF Express v14.2 that will be replaced by v15.0 as soon as it becomes available Hardware and Software Installation ETERNUS DX60 S2 Copyright Fujitsu Technology Solutions, Release September 2011...
-
Page 35: Additional Reading
Additional Reading Instructions for Rack installation, initial Setup and initial configuration ETERNUS DX60 S2 Disk Storage System, User's Guide, Site Planning • P3AM-5492-03ENZ0 • Link to document ETERNUS Web GUI, User's Guide, ETERNUS DX60 S2 • P2X0-1120-01ENZ0 •...
Need help?
Do you have a question about the ETERNUS DX60 S2 and is the answer not in the manual?
Questions and answers