Advertisement
Quick Links
Advertisement

Related Manuals for BROSA Romulus Extendable Dining Table


Summary of Contents for BROSA Romulus Extendable Dining Table
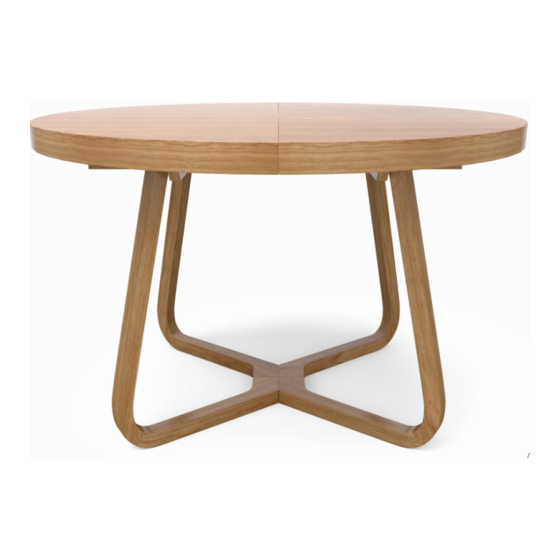
- Page 1 ASSEMBLY GUIDE Romulus Extendable Dining Table...
-
Page 2: What You Need
Components Before you get started, check you have all of the pieces below. If anything’s missing, please visit www.brosa.com.au/pages/product-return-and-parts-request and we’ll sort it out right away. Leg x 2 Hardware A x 6 B x 6 C x 2 D x 4... - Page 3 Insert the wooden dowel into the middle hole Step 1 of a leg as shown in the diagram. Insert the threaded rods into each of the outer holes. Align the two legs to each other and rmly press them together. Fit a half-lunar washer to one end of the threaded rod followed by a nut (E).
- Page 4 Align the leg structure formed in Step 1 to the under- Step 2 side of the table top so that all of the screw holes overlap. Fit a washer to a bolt and screw into each hole and use the Allen key to tighten all in place.
- Page 5 To extend the table: Step 3 Under the table unlock the slides by lifting the rubber locks on both sides. Release both of the metal locks by lifting the latch and unhooking the loop. Warning: before moving the table (anytime), ensure that all of the locks and slides are locked.
- Page 6 Push either side of the two halves and rmly press Step 5 the two halves and the leaf together. Under the table relock all of the metal locks by hooking the loop and pulling down the latch. Lock the slides on both sides by pressing down the rubber locks.
- Page 7 Enjoy your new extendable dining table! Step 6...
Need help?
Do you have a question about the Romulus Extendable Dining Table and is the answer not in the manual?
Questions and answers