Table of Contents
Advertisement
Quick Links
1885
Electric Pressure Washer
MAX
P S I
ASSEMBLY, CARE AND
USE INSTRUCTIONS
Model AR130
READ CAREFULLY
IMPORTANT:
AND
ATTACH RECEIPT TO MANUAL FOR FUTURE
REFERENCE
Questions, problems, missing parts?
Before returning to your retailer, contact our
customer service department,
8:30 am - 5:00 pm, Monday - Friday.
service@austechindustries.com.au
RETAIN THESE INSTRUCTIONS
Advertisement
Table of Contents

Related Manuals for Blue Clean AR130


Summary of Contents for Blue Clean AR130
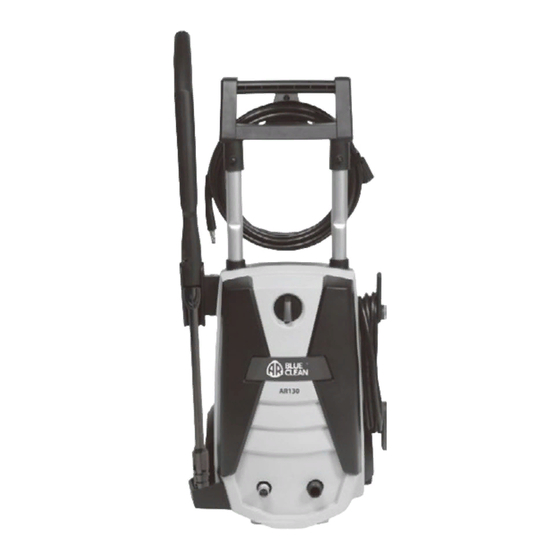
- Page 1 1885 P S I Electric Pressure Washer ASSEMBLY, CARE AND USE INSTRUCTIONS Model AR130 READ CAREFULLY IMPORTANT: RETAIN THESE INSTRUCTIONS ATTACH RECEIPT TO MANUAL FOR FUTURE REFERENCE Questions, problems, missing parts? Before returning to your retailer, contact our customer service department, 8:30 am - 5:00 pm, Monday - Friday.
-
Page 2: Table Of Contents
Troubleshooting ....................... 15 Limited Warranty ......................16 INTENDED APPLICATION This pressure washer is intended for: DOMESTIC CLEANING APPLICATIONS PRODUCT SPECIFICATIONS PRODUCT SPECIFICATIONS SPECIFICATIONS Maximum PSI Max LPM Weight Model (lbs/sq. in.) (Litres/per min) Cold Water Volts Watts (Kg) AR130 1885 1800 ✔... -
Page 3: Package Contents
PACKAGE CONTENTS PACKAGE CONTENTS PACKAGE CONTENTS PART DESCRIPTION QUANTITY PART DESCRIPTION QUANTITY Pressure Washer Unit Fixed Brush Spray Gun Holster Transparent Water Filter Nozzle Cleaning Wire Turbo Nozzle Lance High Pressure Hose Spray Gun Nozzle Tray Spray Gun Trigger Lock Variable Spray Nozzle Screw Lance... -
Page 4: Safety Information
SAFETY INFORMATION SAFETY INFORMATION SAFETY INFORMATION Please read and understand this entire manual before power tool carefully and only when you are alert. attempting to assemble, operate, or install the product. 10. Watch your balance and footing while using your pressure washer. - Page 5 33. NEVER use lances or other parts that are not will overheat and damage the high pressure pump. compatible for this specific AR Blue Clean unit. 26. NEVER leave the pressure washer unattended while 34. NEVER spray any electrical outlet with your pressure it is powered “ON”.
-
Page 6: Assembly Instructions
PREPARATION PREPARATION PREPARATION Before beginning assembly of product, make sure all Tools Required for Assembly (not included): Phillips parts are present. Compare parts with package contents screwdriver list and hardware contents list. If any part is missing or damaged, DO NOT attempt to assemble the product. Estimated Assembly Time: 5 minutes ASSEMBLY INSTRUCTIONS Power Unit Assembly... - Page 7 ASSEMBLY INSTRUCTIONS High Pressure Hose Assembly Screw high pressure hose (D) clockwise onto bottom left, when facing the unit, front of pressure washer unit (A). Pull back collar and insert o-ring post into water outlet far enough so collar can thread onto outlet threads until hand tight.
- Page 8 ASSEMBLY INSTRUCTIONS Lock Unlock Variable Spray Locking Spray Gun (before Lance installation) Nozzle Lance and Turbo Nozzle To lock the trigger of the spray gun (J), aim the gun Lance Installation away from you and push the lock button from right to While the spray gun (J) is in the locked position, insert left.
- Page 9 ASSEMBLY INSTRUCTIONS ASSEMBLY INSTRUCTIONS Garden Hose Adapter Installation Remove plastic shipping cover on water inlet, front right side when facing the unit (A). Install the transpar- You will need a quick connect hose adapter (not ent water filter (H) by hand tightening clockwise. supplied) fitted to the end of your garden hose (L).
-
Page 10: Operating Instructions
OPERATING INSTRUCTIONS OPERATING INSTRUCTIONS • Turn the tap on fully to ensure good water supply. • Make sure the “ON/OFF” switch is in the “OFF” position. The power switch has international symbols for ‘on’ and ‘off’: On (|) Off (O). •... - Page 11 OPERATING INSTRUCTIONS OPERATING INSTRUCTIONS • When using the detergent, fill it with a properly formulated detergent or cleaner with water ratio according to instructions on the container. Fan Spray Pencil Stream • DO NOT use thick gel-like detergents, as they will clog Using Variable Spray Nozzle the power washer and can cause damage.
- Page 12 OPERATING INSTRUCTIONS OPERATING INSTRUCTIONS OPERATING INSTRUCTIONS Operation Tips • If you hear the motor run intermittently when the trigger is not being squeezed, that is normal. The pump is priming itself so it is ready to operate when the trigger is squeezed. Turn off the power washer if not being used after five minutes.
-
Page 13: Care And Maintenance
CARE AND MAINTENANCE CARE AND MAINTENANCE Detergents Cleaning the Transparent Water Filter • Use detergents designed for pressure washers. • The screens inside the transparent water filter should • This system applies detergent under low pressure. be cleaned periodically. Rinse it with clean water, and The cleaning power of the detergents is enhanced then place it back in the adapter. - Page 14 OPERATING INSTRUCTIONS OPERATING INSTRUCTIONS CARE AND MAINTENANCE Storage • When your pressure washing session has been • Remove high pressure hose from spray gun. completed, turn off the power switch located on the • Remove lance from the gun. Place the gun in the front of the pressure washer.
-
Page 15: Troubleshooting
TROUBLESHOOTING PROBLEM CORRECTIVE ACTION Unit will not turn on. 1. Check the power cord is plugged directly into an outlet. 2. Do not use an extension cord. 3. Make sure the power switch is turned on. Note: When power switch is turned on, the pressure washer will turn on by itself for 1-2 seconds and shut off. -
Page 16: Limited Warranty
CARE AND MAINTENANCE LIMITED WARRANTY This Limited Warranty applies only to new products* distributed by Austech Industries Pty Ltd (“Austech Industries”). It is a condition of this Limited Warranty Policy that the purchaser read the owner’s manual for the product and only use the product to the extent or for the purposes stated therein.
Need help?
Do you have a question about the AR130 and is the answer not in the manual?
Questions and answers