
Related Manuals for Hans Grohe AXOR Starck Organic 12018 1 Series


Summary of Contents for Hans Grohe AXOR Starck Organic 12018 1 Series
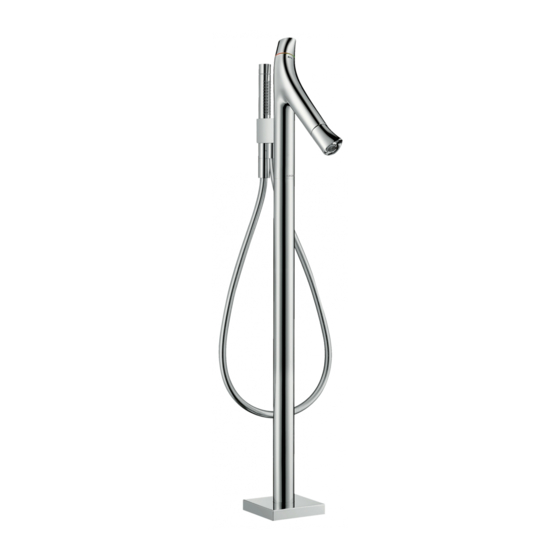
- Page 1 EN Installation / User Instructions / Warranty FR Instructions de montage / Mode d'emploi / Garantie ES Instrucciones de montaje / Manejo / Garantía Starck Organic 12018xx1 12016xx1...
-
Page 2: Technical Information
English Technical Information Water pressure Recommended 15 - 75 PSI (0.1 - 0.5 MPa) Maximum 145 PSI (1 MPa) Hot water temp. Recommended 120°-140° F (48° - 60° C)* Maximum 158°F (70° C)* Flow rate - 12018001 handshower max. 1.75 GPM (6.6 L/min) spout @ 44 PSI 5.3 GPM (20 L/min) Flow rate - 12016001 handshower max. 2.0 GPM (7.6 L/min) spout @ 44 PSI 5.3 GPM (20 L/min) * Please know and follow all applicable local plumbing codes when setting the temperature on the water heater. Installation Considerations • For best results, Hansgrohe recommends that this • 12016001 only: The handshower is for use with unit be installed by a licensed, professional plumber. -
Page 3: Données Techniques
Français Données techniques Pression d’eau recommandée 15 - 75 PSI (0.1 - 0.5 MPa) maximum 145 PSI (1 MPa) Température d'eau chaude recommandée 120°-140° F (48° - 60° C)* maximum 158°F (70° C)* Capacité nominale - 12018001 douchette 1.75 GPM (6.6 L/min) bec @ 44 PSI 5.3 GPM (20 L/min) Capacité nominale - 12016001 douchette 2.0 GPM (7.6 L/min) bec @ 44 PSI 5.3 GPM (20 L/min) * Vous devez connaître et respecter tous les codes de plom- berie locaux applicables pour le réglage de la température du chauffe-eau. À prendre en considération pour l’installation • 12016001 seulement: Cette douchette doit • Pour de meilleurs résultats, Hansgrohe recommande que ce produit soit installé par un plombier être utilisée avec une soupape qui compense professionnel licencié. -
Page 4: Consideraciones Para La Instalación
Español Datos tecnicos Presión en servicio recomendada 15 - 75 PSI (0.1 - 0.5 MPa) max. 145 PSI (1 MPa) Temperatura del agua caliente recomendada 120°-140° F (48° - 60° C)* max. 158°F (70° C)* Caudal máximo - 12018001 teleducha 1.75 GPM (6.6 L/min) surtidor @ 44 PSI 5.3 GPM (20 L/min) Caudal máximo - 12016001 teleducha 2.0 GPM (7.6 L/min) surtidor @ 44 PSI 5.3 GPM (20 L/min) * Debe conocer y cumplir todos los códigos locales apli- cables para ajustar la temperatura del calentador de agua. Consideraciones para la instalación • Para obtener mejores resultados, la instalación • 12018001 solamente: Esta ducha de mano debe estar a cargo de un plomero profesional debe ser utilizada con una válvula que compensa matriculado. - Page 5 8¾" 2½" 1½" 2⅛" 2⅝" 6⅞" 1⅝" 4⅞"/4⅞" ½" NPT min. 2¾" 5⅞" Tools Required / Outiles Utiles / Herramientas Útiles 8 mm...
-
Page 6: Installation / Installation / Instalación
Installation / Installation / Instalación 8 mm English Français Español Turn off the water at the Avant de commencer, ¡Cierre el paso del agua main before beginning. fermez l’eau à la valve en la entrada del suminis- principale! tro antes de comenzar! Cut the plaster shield so that it extends ⅜" above the surface of Coupez le protecteur de façon à... - Page 7 8 mm English Français Español Position the tub filler on the rough. Placez le robinet de baignoire sur Coloque el grifo de la bañera en la Pivot the tub filler, if necessary. la pièce de surface. Faites pivoter pieza interior. Haga girar el grifo le robinet de baignoire de façon à de la bañera para que mire hacia Make sure that the tub filler is level. l’orienter dans la bonne direction. la dirección correcta. Connect the tub filler to the rough Assurez-vous que le robinet de Asegúrese de que el grifo de la ba- using the 6 screws (3 included with baignoire est de niveau.
- Page 8 English Français Español Install the handshower and hose. Installez le tuyau et la douchette. Instale la manguera y la teleducha. Rest the handshower in the holder. Déposez la douchette dans son Apoye la teleducha en el soporte. support.
- Page 9 Set the high temperature limit stop / Réglage de la butée limite d’eau chaude / Ajuste el tope de límite de alta temperatura 3 mm 112° F* * To prevent scald injury, the maximum output temperature of the shower valve must be no higher than 120°F. In 3 mm Massachusetts, the maximum output temperature can be no higher than 112° F.
- Page 10 Justify the handle / Réglez la poignée / Ajuste la manija...
- Page 11 Replacement Parts / Pièces détachées / Repuestos 98334xx0 95843000 95839000 98390000 98913000 (26x1.5) (M34x1.5) 98282000 98127000 (M5x30) (11x2) 98129000 (14x2) 95392xx0 94074000 98058000 94246000 28282xx0 (49") 92220000 (M4x5) 98209000 (28x2.5) (M34x1.5) 92134xx0 92133xx0 97670000 (M10x35) 92132000 98212000 (41x2) 95290000 98127000 (11x2) 94074000 98190000...
- Page 12 User Instructions / Instructions de service / Manejo ouvert abierto cold froid chaud frío caliente > 104°F...
- Page 13 Maintenance / Maintenance / Mantenimiento 8 mm 8 mm...
-
Page 14: Troubleshooting
Troubleshooting Problem Possible Cause Solution Insufficient water - Supply pressure inadequate - Check water pressure (If a pump has been installed make sure the pump is working correctly). - Filters are dirty - Clean filter on the thermo cartridge - Shower filter seal dirty - Clean filter seal between shower and hose Crossflow: hot water is forced into - Check valves dirty or leaking - Clean check valves, replace if neces- cold water pipe, or vice versa, when sary (page 13) mixer is closed Spout temperature does not corre- - Thermostat has not been adjusted - Adjust thermostat (page 10) spond with temperature set Temperature regulation not possible - Thermostat cartridge dirty or dam- - Clean thermostat cartridge, replace aged if necessary - For new installations: hot and cold... -
Page 15: Localización De Fallas
Localización de fallas Problema Causa Solución Sale poca agua - presión insuficiente - comprobar presión - Filtros sucios - Limpiar filtros en las uniones a las tomas de agua caliente y fría y en el cartucho termostático - Filtro de la teleducha sucio - Limpiar / Cambiar filtro entre flexo y teleducha Flujo de agua cruzada agua caliente - válvula antirretorno sucia o pierde - limpiar / cambiar válvula antirretorno entra en la tubería del agua fría o (página 13) al revés Temperatura del agua no corresponde - termostato no ha sido ajustado - ajustar termostato (página 10) a lo marcado - Temperatura del agua caliente de- - aumentar temperatura del agua masiado baja caliente a 42º - 65º C. - Page 16 Cleaning Recommendation for Hansgrohe Products Modern bathroom faucets, kitchen faucets and shower products are made from different materials to comply with the needs of the market with regard to design and functionality. To avoid damage to the product, it is necessary to take proper care of it. For best results: • Prevent the buildup of mineral scale and /or soap residue by cleaning your Hansgrohe product(s) when needed. • Select a cleaning agent specifically intended for the type of product. • Do not use these types of cleaners as they will cause damage to your Hansgrohe product: ´ Any cleaning agent containing hydrochloric acid, formic acid, lye, or acetic acid. ´ Abrasive cleaning powders, pads, or brushes. ´ Steam cleaners. ´ “No rinse” cleaning agents. • Always follow the instructions provided by the manufacturer of the cleaning agent. • Do not mix cleaning agents, unless directed by the manufacturer. • Do not spray cleaners directly onto the product as drops could enter openings and gaps and cause damage. When using spray cleaners, spray the cleaner onto a soft cloth or sponge. • Always rinse your Hansgrohe product thoroughly with clear water and polish dry with a soft cloth after cleaning. Important • Residue from soaps and shampoos can cause damage. Rinse the product with clean water after each use. • Residue from basin/tub/tile cleaner can cause damage to faucets and fittings. Immediately rinse any overspray from the Hansgrohe product.
- Page 17 Important • Les residus de produits pour le corps comme les savons liquides, shampooings, gels de douche, teintures pour cheveux, parfums, apres-rasage et vernis a ongles peuvent causer des deteriorations. Rincez le produit avec de l’eau propre après chaque utilisation. • Le résidu provenant des nettoyants pour cuvette/baignoire/carrelage peut endommager les robinets et les raccords de tuyauterie. Rincez immédiatement toute surpulvérisation sur le produit Hansgrohe. • De meme, il est interdit de stocker des detergents ou des produits chimiques sous les produits, par ex. dans un meuble sous lavabo, car les vapeurs qui s’en degagent risquent d’abimer les produits. • Les dommages au produit causés par un mauvais entretien ou par l’utilisation de produits de nettoyage inadéquats ne sont pas couverts par la garantie. • Si un composant du produit est endommagé, remplacez-le, car il existe un risque de blessure. Recomendación de limpieza para los productos de Hansgrohe Hoy en día, las griferías de baño y de cocina así como duchas modernas se componen de materiales muy distintos para satisfacer las exigencias del mercado respecto al diseño y la funcionalidad. Para evitar daños y reclamaciones hay que tener...
-
Page 20: Limited Consumer Warranty
Limited Consumer Warranty This warranty is limited to products manufactured by Hansgrohe, Inc. excessive water pressure or corrosion. (“Hansgrohe”) that are purchased by a consumer in the United States C. Labor and other expenses for disconnection, deinstallation, or Canada after March 1, 1996, and installed in either the United or return of the product for warranty service (including but States or in Canada. not limited to proper packaging and shipping costs), or for installation or reinstallation of the product.
Need help?
Do you have a question about the AXOR Starck Organic 12018 1 Series and is the answer not in the manual?
Questions and answers