Table of Contents

Subscribe to Our Youtube Channel
Related Manuals for Jackson Grills PREMIER 850BI-2


Summary of Contents for Jackson Grills PREMIER 850BI-2
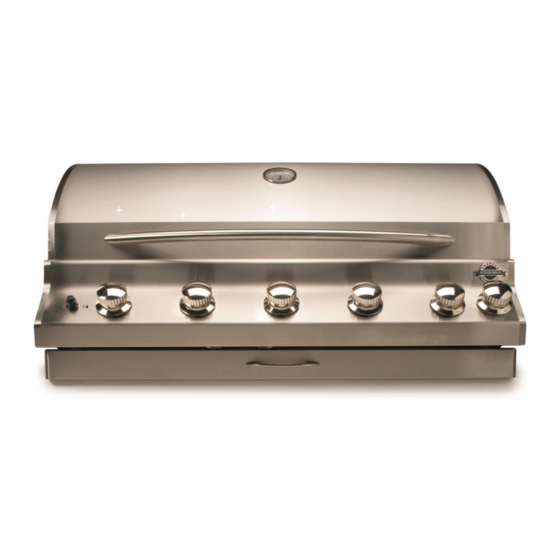
- Page 1 OWNER’S MANUAL for PREMIER 850BI-2 For Built-in Models: JPG850BI-LP (Liquid Propane) JPG850BI-NG (Natural Gas) Important Notice Please read ALL safety notices on Pg. 2-3 before assembling or operating this grill Version: SEPT 15...
-
Page 2: Safety Warnings
!SAFETY WARNINGS! IMPORTANT: Please read and understand all warnings and precautions prior to operating your gas grill. !WARNING! !WARNING! If you smell gas: 1. Do not store or use gasoline or other 1. Shut off gas to the appliance. flammable liquids in the vicinity of this 2. -
Page 3: Table Of Contents
CERTIFICATION & TESTING This appliance has been tested by Labtest Certification (LC) and has been tested to ANSI Z21.58a-1198 & CGA 16a-M98, and Certified for Canada and the USA. NOTE: The use and installation of this product must conform to local codes. In the absence of local codes, use the National Fuel and Gas Code, ANSI A223.1, Storage and Handling of Liquefied Petroleum Gasses, NFPA / ANSI 58. -
Page 4: Unpacking Your Grill; Parts Checklist
UNPACKAGING YOUR GRILL The JPG850BI-2 Built-In Model comes packaged one box. Please open the box carefully and set aside all loose components. Once unpacked, match the parts to the list shown below. Check all components for possible damage before assembling your grill. Most of your portable grill has been factory assembled, however there are still some items that must be unpacked, and placed in the correct position in your barbecue. -
Page 5: Special Message To Owners
OWNER REGISTRATION: Please take the time to fill out and return a Warranty Registration Card. This can be done on-line at www.jacksongrills.com, or simply fill in the form below and mail or fax to: Jackson Grills Fax: 1 (877) 855-5373 #106-2480 Mt. -
Page 6: Tools Required For Assembly
Tools Required for Assembly*: *Please use the proper tools to simplify installation and prevent personal injury or damage to your grill. A) Installer Supplied Tools: Medium Phillips Screwdriver 5/16” Wrench (or 8mm) ¾’ Wrench (or 19mm) Assembling & Preparing Your Grill: B) Install Flame Diffusers, Cook Grids and Warming Rack: 1. - Page 7 D) Rotisserie Kit Installation: Figure 4 1. Slide the Rotisserie Motor onto the Motor Mount Bracket, on the RH side of the grill (Fig. 4). 2. Side the two forks and the counter balancer onto the spit rod, and position as desired. Tighten in place. 3.
-
Page 8: Installation Of A Built-In Model
Installation: Installing in an outdoor cabinet: This grill must be safely and correctly installed as a built in, before using. Please refer to the chart below, for correct installation dimensions. Framing must enclose the grill on the back and sides, but the bottom of the cut-out may be left open. The grill is supported by the three integral flanges (left, right and rear), so no support underneath is required. -
Page 9: Propane Gas Connection
Propane Gas Connection: Fuel Source: The following instructions are for a Propane Equipped grill ONLY. Hose & Regulator: Use only the propane hose and regulator supplied with your Propane grill. Installation Codes: The installation of this appliance must conform with local codes or, in the absence of local codes, to the National Fuel Gas Code, ANSI Z223. -
Page 10: Natural Gas Connection
Connecting Your Grill to a Propane Cylinder: 1. Make sure tank valve is in its full off position (turn clockwise to stop). 2. Check tank valve to ensure that is equipped with external (male) threads (i.e. QCC-1 type connecter). 3. -
Page 11: Leak Testing
Leak Testing: 1. GENERAL: Although all gas connections on the grill are leak tested at the factory prior to shipment, a complete gas tightness check must be performed at the installation site due to possible mishandling in shipment, or excessive pressure unknowingly being applied to the unit. -
Page 12: Installer Final Checklist
Installer Final Check List: At least 36” clearance maintained from combustible constructions to the sides and back of this grill. There is no unprotected combustible construction or materials above the grill. All internal packaging removed. When using Natural Gas; conversion kit must be installed. ... -
Page 13: Lighting Instructions
Grill Lighting Instructions: 1. BEFORE LIGHTING: Always inspect the gas supply hose before turning the gas “ON”. If there is evidence of cuts, wear, or abrasion, it must be replaced before use. Use only a manufacturer approved replacement hose. Check all gas connections for leaks before each use. Do not light grill if gas odor is present. 2. -
Page 14: Grill And Rotisserie Cooking
Grill and Rotisserie Cooking: Total Gas Consumption: Total gas consumption per hour, per burner: MODEL JPG850BI-2: Main burners: 15,000 Btu/hr. X 5 = 75,000 BTU/hr. Infrared Rotisserie burner: 13,500 Btu/hr. X 1 = 13,500 BTU/hr. Total Potential Consumption: = 88,500 BTU/hr. !WARNING! Clean your grill often, especially the grease pan and grease cup. - Page 15 2. Using the Grilling Surface (Cook Grids): !WARNING! Grilling requires high heat for searing and proper browning. Do not leave grill unattended Most foods are cooked at the “HI” heat setting for the entire while cooking! Potential BURN cooking duration. and FIRE RISK! When grilling large pieces of meat or poultry, it may be necessary to turn the heat to a lower setting, after the initial searing.
-
Page 16: Cleaning & Maintenance
For a deep clean and to remove layers of carbon and grease build-up, Jackson Grills Stainless Steel Cleaner/Polish (see below) is a strong, abrasive cleaner that can cut through even the toughest stains. Make sure you clean going with the grain of the stainless as going against the grain can severely scratch the surface. - Page 17 2. Grease Management System: Your grill is designed to allow grease to flow along the bottom of the firebox, and collect in both the grease collecting pan and the small grease cup. The grease pan must be cleaned on a regular basis for the system to work as designed and prevent grease fires.
-
Page 18: Storing Your Grill
5. Interior Firebox Cleaning: Remove the cooking grid, flame diffuser and the burner from the grill. Remove excess residue using a brush, scraper and/or cleaning pad. Spray inside the firebox with oven degreaser and let stand for 5 minutes. ... -
Page 19: Trouble Shooting
Trouble Shooting: A) SPIDER AND INSECT WARNING: Spiders and insects can nest in the burners during storage: these nests can cause fires inside burners or beneath the grill. This is potentially hazardous: ALWAYS remove and clean the burners immediately after bringing your grill out of storage, and regularly thereafter. -
Page 20: Exploded Parts View
Exploded View: JPG850BI-2 Built In Model Optional BIDOORS Single Door Optional DRAWER-3 drawer kit... -
Page 21: Parts List
Parts List: JPG850BI-2 Built In Model Part# Part# Loc. DESCRIPTION Loc. DESCRIPTION (Qty.) (Qty.) Hood JH-005 Main Burner JB-00P (5) Warming Shelf Rail JH-102 (2) Manifold Tube ONLY JF-006 Hood Handle JH-96 Grease Tray JH-009 Thermometer JT-04 Grease Tray Handle JH-104 Inner Hood JH-007... -
Page 22: Warranty
Jackson Grills will replace (at our option), any LP hose and regulator defective stainless steel burner for the first 10 years. Thermometer From 11-15 years, Jackson Grills will provide 50% of Gas valves the current retail price of the stainless steel burner. ...
Need help?
Do you have a question about the PREMIER 850BI-2 and is the answer not in the manual?
Questions and answers