Table of Contents
Advertisement
Quick Links
Advertisement
Table of Contents

Subscribe to Our Youtube Channel
Related Manuals for LI-COR LI-3100C


Summary of Contents for LI-COR LI-3100C
- Page 1 LI-3100C Area Meter Instruction Manual...
- Page 3 LI-3100C Area Meter Instruction Manual LI-COR Biosciences 4647 Superior Street Lincoln, Nebraska 68504 Phone: +1-402-467-3576 Toll free: 800-447-3576 (U.S. and Canada) envsales@licor.com Regional Offices LI-COR Biosciences GmbH Siemensstraße 25A 61352 Bad Homburg Germany Phone: +49 (0) 6172 17 17 771 envsales-gmbh@licor.com...
- Page 4 The information contained in this document is subject to change without notice. LI-COR makes no warranty of any kind with regard to this material, including, but not limited to the implied warranties of merchantability and fitness for a particular purpose. LI-COR shall not be liable for errors contained herein or for incid- ental or consequential damages in connection with the furnishing, performance, or use of this material.
-
Page 5: Table Of Contents
Changing from 1.0 mm² to 0.1 mm² resolution Changing from 0.1 mm² to 1.0 mm² resolution Section 5. Using the Windows® interface software Installing the software Connecting the LI-3100C to a computer Software basics Creating a log file Missed data packets... - Page 6 Section 6. Troubleshooting Continuous spurious data accumulation Belts not tracking properly Fluorescent tube fails to illuminate Excessive data variability Miscellaneous malfunctions Laboratory conditions Section 7. Maintenance Changing the fluorescent tube Changing the transparent belts Alternative belt removal technique Replacing the transparent belts Cleaning the transparent belts Cleaning the mirror or camera lens Cleaning the interior of the camera...
-
Page 7: Section 1. General Information
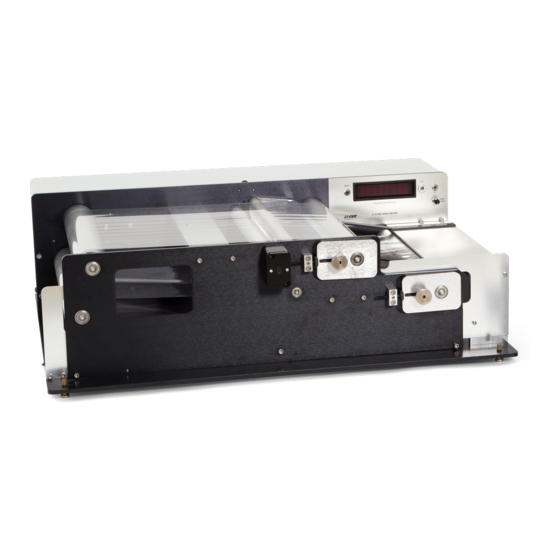
Section 1. General information The LI-3100C Area Meter precisly measures area (length and width) of objects in bio- logical, industrial, and other applications. Instrument function Samples are placed between the guides on the lower transparent belt and allowed to pass through the instrument. As items travel under the 15 watt fluorescent light source, the object is reflected by a system of three mirrors to a solid state scanning camera within the rear housing. - Page 8 Section 1. General information LI-3100C Area Meter Manual...
-
Page 9: Section 2. Preparations
Rear sliding bearing blocks are visible in Figure 2-1 on the next page. Front sliding bearing blocks are visible in Figure 2-2 on page 2-3. Coarse adjustment is performed by simultaneously sliding both bearing blocks for one pulley. LI-3100C Area Meter Manual... - Page 10 (C) decimal selector switch set for 1.0 mm or 0.1 mm operation (inset), (D) 28 mm lens, (E) screws on the outer camera pressure rail, (F) slide this window to the left to inspect the voltage selector, (G) upper drive pulley gear. LI-3100C Area Meter Manual...
-
Page 11: Fluorescent Tube Installation
Section 2. Preparations Fluorescent tube installation Note that the fluorescent tube may be enclosed inside the rear cover of the LI-3100C during shipping. Remove the rear cover to unpack and install the fluorescent tube. Figure 2-2. Area Meter in 0.1 mm resolution configuration. - Page 12 Section 2. Preparations Figure 2-3. Area meter with fluorescent tube connector housing removed. (A) fluorescent tube connector housing. (B) fluorescent tube with exposed pins. LI-3100C Area Meter Manual...
-
Page 13: Voltage Selector Operation And Characteristics
Section 2. Preparations Voltage selector operation and characteristics The voltage selector is located in the power connector module (Figure 2-1 on page 2-2). The selector is inspected for proper voltage by sliding the clear plastic win- dow to a position over the power connector. The visible number on the small prin- ted circuit board located under the fuse indicates the selected voltage as follows: Either 100 or 120 V for 105-126 VAC operation. - Page 14 Section 2. Preparations LI-3100C Area Meter Manual...
-
Page 15: Section 3. Operation
Data accumulation may continue to occur if the fluorescent tube output is not suf- ficient, such as initial starting in extremely cold conditions. Excessively low line voltage is also a cause for continued rapid spurious counting. LI-3100C Area Meter Manual... -
Page 16: Belt Tension And Tracking Adjustment
). However, samples that have a very high ratio of edge to area (i.e., conifer needles, small irregular leaves, roots, etc.) exhibited the opposite effect. In addition, incorrect calibration resulted in larger errors with these samples. LI-3100C Area Meter Manual... -
Page 17: Calibration Procedure
Section 3. Operation The LI-3100C now uses the entire 25 cm measurement width for high resolution (0.1 mm ) mode, so it is important to compensate for the above-mentioned edge effect for the calibration procedure. While round discs like those previously used are simple to manufacture with a precise area, this shape has the least amount of edge (in this case circumference) compared to its area. -
Page 18: Pressing Roller Adjustment
After tightening the pressing roller, refer to Transparent belt tension adjustment on page 2-1 to adjust the lower belt to its proper tension and alignment. Figure 3-1. Adjustable press roller in the retracted position. LI-3100C Area Meter Manual... - Page 19 Section 3. Operation Figure 3-2. Press roller in position for use with thin leaves. Pressing roller adjustment...
- Page 20 Section 3. Operation LI-3100C Area Meter Manual...
-
Page 21: Section 4. Changing Measurement Resolution
Section 4. Changing measurement resolution The LI-3100C utilizes the full measurement width at all times, for both 0.1 and 1.0 resolution. The 0.1 mm resolution may be preferable , since it provides the best accuracy, particularly with small or complex shaped objects to 0.5 mm in width. - Page 22 Section 4. Changing measurement resolution Figure 4-1. LI-3100C camera position configured for 0.1 mm operation. Lightly tighten the set screws. Be sure that the lens cover has been removed and that no other obstruction is in the optical path. Replace the rear housing.
-
Page 23: Changing From 0.1 Mm² To 1.0 Mm² Resolution
Move the decimal selector switch to the 1.0 mm position. Loosen all four set screws on the outer camera pressure rail. Figure 4-2. LI-3100C camera position configured for 1.0 mm operation. Align the yellow focus mark to the red lens index mark. - Page 24 Section 4. Changing measurement resolution LI-3100C Area Meter Manual...
-
Page 25: Section 5. Using The Windows® Interface Software
These are also available from the software web page. Connecting the LI-3100C to a computer The LI-3100C can be connected to a computer with either the USB connection or a serial connection (serial port or USB-to-serial adapter is required). - Page 26 9-pin serial port. If you want to interface to a computer with a 25-pin serial port, a 9-pin to 25-pin adapter must be used. Turn on the LI-3100C. Start the lamp by pressing and holding the lamp button for a few seconds and then releasing.
-
Page 27: Software Basics
LI-3100C. However, resetting the LI-3100C counter on the front instrument panel does reset the software counter. Figure 5-2. LI-3100C software, main window. To disconnect the PC software from the LI-3100C, choose Disconnect from the Con- nection menu. Alternatively, click the Disconnect icon in the toolbar. Software basics... -
Page 28: Creating A Log File
Create button to open the data file. Figure 5-3. New Data File dialog box. The main window of the LI-3100C program contains a grid where a log file can be viewed as it is being created. Pressing the Log Data button will prompt the user for remarks (if enabled) and append a new row of data to the log file. - Page 29 The Average Area column shows the average for the last "n" area obser- vations, selectable by the user in the New Data File dialog box. Figure 5-5. Grid on main window of the LI-3100C software, populated by data logged to an open log file.
-
Page 30: Missed Data Packets
LI-3100C software. This asterisk indicates that a data packet has been missed. The next time data is logged, a remark will be placed in the last column of the file indicating this. -
Page 31: Importing A Data File To A Spreadsheet
Figure 5-7. Example LI-3100C data file after being imported into a spreadsheet. Using the LI-3000A readout The LI-3100C serial port can be converted to connect to the readout console of the LI-3000A Portable Area Meter for those users who desire this functionality (standard on earlier versions of the LI-3100). - Page 32 Section 5. Using the Windows® interface software LI-3100C Area Meter Manual...
-
Page 33: Section 6. Troubleshooting
Return to the original position. Perform calibration as described in Calibration on page 3-2. If counts continue at an unacceptable rate, contact LI-COR. LI-3100C Area Meter Manual... -
Page 34: Belts Not Tracking Properly
If the instrument is operated with the rear cover removed, an intense stray light beam may focus on the reticon sensor. In order for this to occur, an unlikely LI-3100C Area Meter Manual... -
Page 35: Miscellaneous Malfunctions
In conditions of very high electrical noise on the AC Mains power circuit, or improper chassis grounding (the 3rd terminal of the power cord), the auxiliary com- puter display and the LI-3100C display may differ by a small amount, for less than the basic accuracy. - Page 36 Section 6. Troubleshooting LI-3100C Area Meter Manual...
-
Page 37: Section 7. Maintenance
Separate the fluorescent tube power cord connector located near the instrument front plate and under the belt drive pulleys. This connector may remain mated if the front plate can rest near the instrument without straining the cord. LI-3100C Area Meter Manual... - Page 38 Section 7. Maintenance Figure 7-1. LI-3100C with front plate removed. (A) Fluorescent tube power connector, (B) pulley support brackets, (C) upper belt rocking idler, (D) lower belt idler, (E) proper loc- ation of pulley peripheral end grooves, lower belt idler peripheral end groove, and the end plate notch.
-
Page 39: Alternative Belt Removal Technique
Section 7. Maintenance Caution: Do not exert excessive upward pressure on the drive pulleys as the belts are removed. This will bend the gear shaft which extends through the rear plate bearing Alternative belt removal technique Follow steps in Changing the transparent belts on page 7-1 and then proceed with the following two steps. -
Page 40: Cleaning The Transparent Belts
Cleaning the motor and belt drive system The motor and belt drive system requires no routine service or lubrication. If excess- ive debris becomes embedded into the belt, it can be removed with a small stiff LI-3100C Area Meter Manual... - Page 41 Section 7. Maintenance brush. Cleaning the motor and belt drive system...
- Page 42 Section 7. Maintenance LI-3100C Area Meter Manual...
-
Page 43: Section 8. Removing The Upper Belt Assembly
Caution: Do not allow the upper belt rocking idler or the lower belt idler to drop onto the mirror located directly beneath these components. Remove the upper belt rocking idler. Remove the upper pulley. Remove the upper belt. LI-3100C Area Meter Manual... - Page 44 Remove the upper drive pulley gear (see Figure 2-3 on page 2-4). A 7/64" (.278 cm) hexagonal key is required for the socket set screw. This key is not provided with the instrument. Then remove the upper pulley. Replace the front plate, connect the fluorescent tube power connector and replace the fluorescent tube. LI-3100C Area Meter Manual...
-
Page 45: Appendix A. Specifications
Length: Unlimited. Conveyer Belt Speed: 8.0 cm s-1 at 60 Hz; 6.7 cm s-1 at 50 Hz. Transparent Belts: Rugged clear vinyl. Light Source: 15 watt fluorescent tube. Power Requirement: 108-126/216-252 VAC, 48-66 Hz, 100 W max. LI-3100C Area Meter Manual... - Page 46 Appendix A. Specifications Operating Temperature: +15 to 55 °C. Storage Temperature: -20 to 65 °C. Size: 25.0 H × 60.0 W × 73.0 cm L (9.8" × 23.6" × 28.7") Weight: 43 kg (95 lb.). LI-3100C Area Meter Manual...
-
Page 47: Appendix B. Warranty
Inc.'s examination discloses to have been defective in material or workmanship without charge and only under the following conditions, which are: The defects are called to the attention of LI-COR, Inc. in Lincoln, Nebraska, in writing within one year after the shipping date of the instrument. - Page 48 The foregoing constitutes LI-COR, Inc.'s sole obligation and liability with respect to damages resulting from the use or performance of the instrument and in no event shall LI-COR, Inc. or its representatives be liable for damages beyond the price paid for the instrument, or for direct, incidental or con- sequential damages.
- Page 50 Regional Offices LI-COR Biosciences GmbH Siemensstraße 25A 61352 Bad Homburg Germany Phone: +49 (0) 6172 17 17 771 envsales-gmbh@licor.com LI-COR Biosciences UK Ltd. St. John’s Innovation Centre Cowley Road Cambridge CB4 0WS United Kingdom Phone: +44 (0) 1223 422102 envsales-UK@licor.com LI-COR Distributor Network: www.licor.com/envdistributors...
Need help?
Do you have a question about the LI-3100C and is the answer not in the manual?
Questions and answers