Advertisement
Table of Contents
- 1 Important Safety Information
- 2 Parts and Hardware
- 3 Specification and Dimension
- 4 Product Dimensions
- 5 Installation Overview
- 6 Minimum Clearance to Combustibles
- 7 Minimum Mantel Clearances
- 8 Three-Sided, Two-Sided, and Single-Sided Viewing Pre-Installation
- 9 Three-Sided Viewing Installation
- 10 Two-Sided Viewing Installation
- 11 Single-Sided Viewing Installation
- 12 Front Glass Installation / Removal
- 13 Operation
- 14 Care and Maintenance
- Download this manual
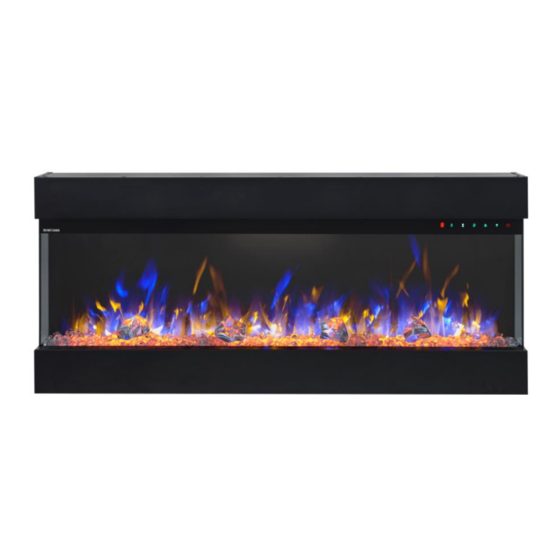
Ezee Glow Celestial 36,50,60,72 Electric Fire Range
MZEFTCEL36
MZEFTCEL50
MZEFTCEL60
MZEFTCEL72
OWNERS MANUAL
AC 220-240V, 50Hz 1400-1600W
Please read the entire owner's manual, including all safety information,
before plugging in or using this product. Failure to do so could result in fire,
WARNING
electric shock, or serious personal injury.
Keep the owner's manual for future reference. If you sell or give this product
CAUTION
away, make sure this manual accompanies this product.
Advertisement
Table of Contents

Related Manuals for Ezee Glow Celestial 36


Summary of Contents for Ezee Glow Celestial 36
- Page 1 Ezee Glow Celestial 36,50,60,72 Electric Fire Range MZEFTCEL36 MZEFTCEL50 MZEFTCEL60 MZEFTCEL72 OWNERS MANUAL AC 220-240V, 50Hz 1400-1600W Please read the entire owner’s manual, including all safety information, before plugging in or using this product. Failure to do so could result in fire, WARNING electric shock, or serious personal injury.
-
Page 2: Important Safety Information
IMPORTANT SAFETY INFORMATION! WARNING When using electrical appliances basic precautions should always be followed to reduce the risk of fire, electric shock and injury to persons, including the following: Read all instructions before using this heater. ⚫ This heater is hot when in use. To avoid burning, do not touch hot surface. If provided, use ⚫... -
Page 4: Parts And Hardware
Preparation This product includes a GLASS panel. Use extreme caution when handling. Failure to do so could result in personal injury or property damage. Remove all parts and hardware from the carton and place them on a clean, soft, dry surface. Check the parts list to make sure you have all the parts you need. -
Page 5: Specification And Dimension
Specification and Dimension PRODUCT DIMENSIONS Model Number 36.6" 19.1" 7.9" 35.5" 18.3" 10.1" 36.4" MZEFTCEL36 93cm 48.4cm 20cm 90.2cm 46.56cm 25.61cm 92.57cm 50" 19.1" 7.9" 48.9" 18.3" 10.1" 49.8" MZEFTCEL50 127cm 48.4cm 20cm 124.2cm 46.56cm 25.61cm 126.57cm 60" 19.1" 7.9" 58.9"... - Page 6 Three-sided installation • Glass exposed on front, left, AND right sides. • Appliance is fully recessed into the wall with both sides open. • See pages 9 and 10 for more info. Two-sided installation • Glass exposed on front AND left OR right sides. •...
-
Page 7: Minimum Clearance To Combustibles
Installation / Minimum Clearance Your appliance is a recessed and/or mantel installed appliance. Select a suitable location that is not susceptible to moisture build-up. It must be located enough distance away from curtains, furniture and high traffic areas. See below for more info. NOTE: Follow all local and national electrical codes. - Page 8 Installation / Rough Framing Model Number 36.6" 8.07" 19.25" MZEFTCEL36 9.3cm 20.5cm 48.9cm 50" 8.07" 19.25" MZEFTCEL50 127cm 20.5cm 48.9cm 60" 8.07" 19.25" MZEFTCEL60 152.4cm 20.5cm 48.9cm 72" 8.07" 19.25" MZEFTCEL72 182.8cm 20.5cm 48.9cm Note: Appliance is NOT load-bearing. Carefully consider weight of finishing materials when constructing rough framing. Ensure installation complies with all local building codes and requirements.
-
Page 9: Three-Sided, Two-Sided, And Single-Sided Viewing Pre-Installation
Three-sided, two-sided, and single-sided viewing Pre-installation 1.Remove the 8 screws from the top and bottom of the appliance (Fig. 3-1). 2.Install the 4 metal brackets (supplied) using the 8 screws previously removed (Fig. 3-2). 3. Remove the side trims and side panels from both sides of the appliance by removing the 12 screws (Fig.3-3). -
Page 10: Three-Sided Viewing Installation
Three-sided Viewing Installation Note: When installed with both sides open, the appliance will have a front view, as well as left and right-side views. 1.Re-secure both side trims using the 12 screws previously removed (Fig. 3-4). Two-sided Viewing Installation Note: When installed fully recessed into the wall with one side open, the appliance will have a front view and left- or right-sided view, depending on your desired open side. -
Page 11: Single-Sided Viewing Installation
Single-sided Viewing Installation Note: When installed fully recessed into the wall with both left and right sides covered, the appliance will have a front view only. 1. Re-secure both side panels using the 8 screws previously removed (Fig. 3-6). -
Page 12: Front Glass Installation / Removal
Front Glass Installation / Removal Note: Support the front glass through the entire process to avoid breakage. 1. Ensuring the glass metal bracket is fitted to the top of the front glass, place the front glass into the track located inside the firebox (Fig. 4-1). 2. - Page 13 Fuel-bed Effect Installation Note: The appliance must be installed in its final location before the crystals, artificial logs and charred wood pieces are installed. 1. While supporting the glass, remove the screws holding the front glass screen in place. Remove the glass and safely store it to one side for now.
-
Page 14: Operation
Operation Please read the entire owner’s manual, including all safety information, before plugging in or using this product. Failure to do so could result in fire, electric shock, or serious personal injury. Power Plug the power cord into a 220-240V 50Hz outlet (see IMPORTANT SAFETY INFORMATION on Pages 2 and 3). - Page 15 Control Panel Operation BUTTON FUNCTION ACTION & INDICATION ON: Enables control panel functions and 1. Press once, Indicator light turns on. remote control. Turns on flame effect. Power turns on. All functions enabled. OFF: Disables control panel functions and 2. Press again, Flame effect turns off. remote control.
- Page 16 Remote Control Operation BUTTON FUNCTION ACTION & INDICATION ON: Enables control panel functions and 1. Press once, Indicator light turns on. remote control. Turns on flame effect. Power turns on. All functions enabled. OFF: Disables control panel functions and 2. Press again, Flame effect turns off. POWER remote control.
- Page 17 LCD Screen Weekday Note: The functions can Mon, Tues, Wed, Thurs, Fri, Sat, Sun only be adjusted when the related letters or digits are flashing. Time Display Note: Calibrate the timer to current time before Current Time / Timer From 00:00 to 24:00 entering the weekly NOTE: 00-12:00 is AM / 13:00-24:00 is PM settings.
- Page 18 Repeat steps 1 to 6 to set the “ON/OFF” time and temperature for Wednesday, Thursday, Friday, Saturday, and Sunday. Press to finish, ensuring to aim the remote control at the receiver, located in the middle of the appliance. The appliance will “beep” once to confirm your settings have been saved successfully. Open window warning If the room temperature decreases by 10 degrees within 3 minutes, the appliance will assume there is an open window nearby.
-
Page 19: Care And Maintenance
Care and Maintenance Cleaning ALWAYS turn the heater OFF and unplug the power cord from the outlet before cleaning, performing maintenance, or moving the fire unit. Failure to do so could result in electric shock, fire, or personal injury. NEVER immerse in water or spray with water. Doing so could result in electric shock, fire, or personal injury. - Page 20 WEEE: Meaning of crossed-out wheeled dustbin: Do not dispose of electrical appliances as unsorted municipal waste, use separate collection facilities. Contact your local government for information regarding the collection systems available. If electrical appliances are disposed of in landfills or dumps, hazardous substances can leak into the groundwater and get into the food chain, damaging your health and well-being.
Need help?
Do you have a question about the Celestial 36 and is the answer not in the manual?
Questions and answers