Table of Contents
Advertisement
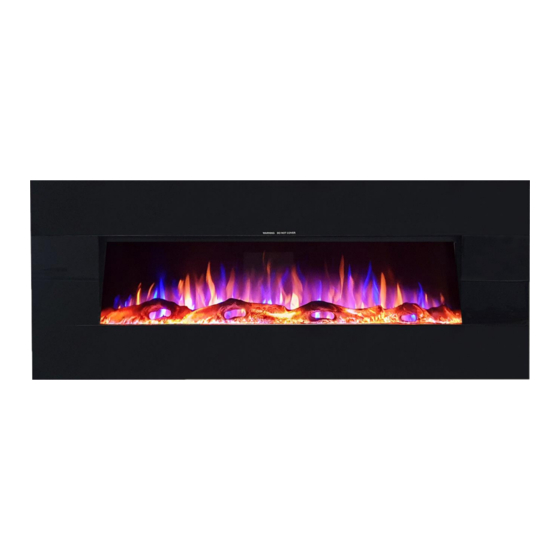
Mini Zara, Zara, Grand Zara and XL Zara Electric Fire Range
Model Numbers: MZEZAWHBL42, MZEZAWHBL50, MZEZAWHBL60, MZEZAWHBL72
Please read the entire owner's manual, including all safety information,
before plugging in or using this product. Failure to do so could result in fire,
WARNING
electric shock, or serious personal injury.
Keep the owner's manual for future reference. If you sell or give this product
CAUTION
away, make sure this manual accompanies this product.
@ezeeglow
Be sure to upload your fire image using #ezeeglow and tag Ezee
Glow on Facebook or Instagram to feature on our social media!
OWNERS MANUAL
AC 220-240V, 50Hz 1400-1600W
@ezeeglowelectricfires
1
Rev G
Advertisement
Table of Contents

Related Manuals for Ezee Glow Mini Zara


Summary of Contents for Ezee Glow Mini Zara
- Page 1 Mini Zara, Zara, Grand Zara and XL Zara Electric Fire Range OWNERS MANUAL Model Numbers: MZEZAWHBL42, MZEZAWHBL50, MZEZAWHBL60, MZEZAWHBL72 AC 220-240V, 50Hz 1400-1600W Please read the entire owner’s manual, including all safety information, before plugging in or using this product. Failure to do so could result in fire, WARNING electric shock, or serious personal injury.
-
Page 2: Important Safety Information
IMPORTANT SAFETY INFORMATION! WARNING When using electrical appliances basic precautions should always be followed to reduce the risk of fire, electric shock and injury to persons, including the following: ⚫ Read all instructions before using this heater. ⚫ This heater is hot when in use. To avoid burning, do not touch the hot surface. If provided, use handles when moving this heater. - Page 3 IMPORTANT SAFETY INFORMATION! WARNING WARNING: This heater is not equipped with a device to control the room temperature. Do not use this heater in small rooms when they are occupied by persons not capable of leaving the room on their own, unless constant supervision is provided.
-
Page 4: Install Preparation
Install preparation This product includes a GLASS panel. Use extreme caution when handling. Failure to do so could result in personal injury or property damage. Remove all parts and hardware from the carton and place them on a clean, soft, dry surface. Check the parts list to make sure you have all the parts you need. - Page 5 Dimensions Product dimensions listed in mm and [inches]. Mini Zara: Zara:...
- Page 6 Grand Zara: XL Zara:...
-
Page 7: Installation Overview
Installation Overview Wall Mounted Installation Find a safe location: Rear View of Fireplace Minimum clearance on each side: Minimum 0” 0” (0cm). (0 cm) Minimum clearance below: 11.8” (30cm). Minimum clearance above: 0” (0cm). Minimum clearance from the front: 3 feet (90 cm). - Page 8 Due to the many different materials used on different walls, it is highly recommended that you consult a competent tradesman before you install this appliance on the wall. Select a location that is not prone to moisture and is located at least 36" (914mm) away from combustible materials such as curtain drapes, furniture, bedding, paper, etc.
- Page 9 33cm 33cm Wall 32.5cm Wood screws 30cm...
- Page 10 Wall Securing Bracket Installation Following wall bracket installation, the small “L” shape mounting bracket (page 6 – item ‘D’) needs attached to secure the fire to the wall. See below guide and illustration: G. Remove the two screws on the bottom of the fire box, then grab the L-shape mounting bracket.
- Page 11 STEP A. Select a dry wall for fire recess. Select recess size using the illustration above and the corresponding columns W1, H1 and D1 below: Note – Ensure there Product Name is at least a 1.5cm Mini Zara 90.5cm 48.26cm 12cm 92.5cm...
- Page 12 STEP C. Lift the fire into the recess and attach four screws through the holes in the corners of the fire, into the previously fitted dry wall mounts. The fire is now secured to the wall. Fixed glass parts STEP D. Next, attach the front glass by lifting it flush against the fire and locating the hooks...
- Page 13 Fuel-bed Effect Installation Note: The appliance must be installed in its final location before the crystals or artificial logs are installed. A. For both options, the front glass must be removed, and the appliance mounted in its final location before the log effect or pebbles are installed. Simply remove the two silver-coloured screws on each side of the fire and lift the front glass up then out to remove it.
-
Page 14: Methods Of Operation
Operation Please read the entire owner’s manual, including all safety information, before plugging in or using this product. Failure to do so could result in fire, electric shock, or serious personal injury. Power Plug the power cord into a 220-240V 50Hz outlet (see IMPORTANT SAFETY INFORMATION on Pages 2 and 3). -
Page 15: Control Panel Operation
Control Panel Operation BUTTON FUNCTION ACTION & INDICATION ON: Enables control panel functions and 1. Press once, Indicator light turns on. remote control. Turns on flame effect. Power turns on. All functions enabled. OFF: Disables control panel functions and 2. Press again, Flame effect turns off. remote control. -
Page 16: Remote Control Operation
Remote Control Operation BUTTON FUNCTION ACTION & INDICATION ON: Enables control panel functions and 1. Press once, Indicator light turns on. remote control. Turns on flame effect. Power turns on. All functions enabled. OFF: Disables control panel functions and 2. Press again, Flame effect turns off. remote control. - Page 17 LCD Screen Weekday Note: The functions can Mon, Tues, Wed, Thurs, Fri, Sat, Sun only be adjusted when the related letters or digits are flashing. Time Display Note: Calibrate the timer to current time before Current Time / Timer From 00:00 to 24:00 entering the weekly NOTE: 00-12:00 is AM / 13:00-24:00 is PM settings.
- Page 18 again. When “18” begins flashing, use Press to select the desired temperature for Tuesday. Repeat steps 1 to 6 to set the “ON/OFF” time and temperature for Wednesday, Thursday, Friday, Saturday, and Sunday. Press to finish, ensuring to aim the remote control at the receiver, located in the middle of the appliance.
-
Page 19: Care And Maintenance
Care and Maintenance Cleaning ALWAYS turn the heater OFF and unplug the power cord from the outlet before cleaning, performing maintenance, or moving the fire unit. Failure to do so could result in electric shock, fire, or personal injury. NEVER immerse in water or spray with water. Doing so could result in electric shock, fire, or personal injury. -
Page 20: Troubleshooting (Faq)
Troubleshooting/ FAQ Problem Possible Cause Solution Note Fire not Fire not plugged Check plug is correctly fitted If all solutions have turning on in or switched on into socket and the socket is been tested and at socket turned on. problem persists, a new control panel is Fuse blown... - Page 21 Heater Build-up of hot air Ensure inlets and outlet are If problem persists, cutting out free from obstruction and the installation will there are sufficient clearances need assessed to surrounding the unit. ensure it adheres to all required minimum clearances as stated in this manual.
- Page 22 WEEE: Meaning of crossed-out wheeled dustbin: Do not dispose of electrical appliances as unsorted municipal waste, use separate collection facilities. Contact your local government for information regarding the collection systems available. If electrical appliances are disposed of in landfills or dumps, hazardous substances can leak into the groundwater and get into the food chain, damaging your health and well-being.
Need help?
Do you have a question about the Mini Zara and is the answer not in the manual?
Questions and answers