Advertisement
Table of Contents
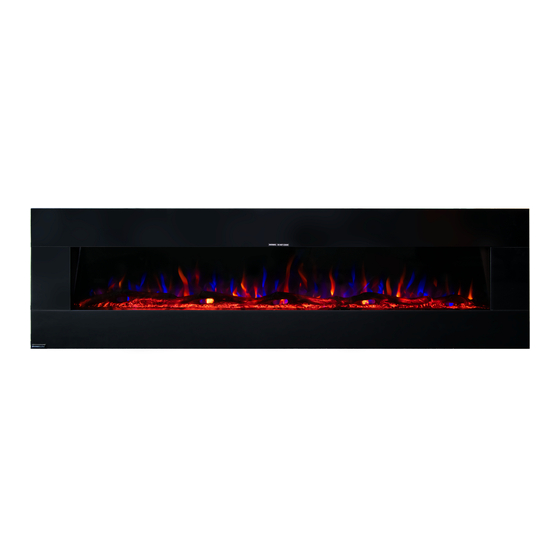
Ezee Glow Zara Black Wall Hung Fire
Model Numbers:
MZEZAWHBL42
MZEZAWHBL50
MZEZAWHBL60
MZEZAWHBL72
OWNER'S MANUAL
AC 220-240V 50Hz 1400-1600W
Read and understand this entire owner's manual, including all safety
WARNING
information, before plugging in or using this product. Failure to do so could
result in fire, electric shock, or serious personalinjury.
Keep this owner's manual for future reference. If you sell or give this
CAUTION
product away, make sure this manual accompanies this product.
Advertisement
Table of Contents

Related Manuals for Ezee Glow Zara Black


Summary of Contents for Ezee Glow Zara Black
- Page 1 Ezee Glow Zara Black Wall Hung Fire Model Numbers: MZEZAWHBL42 MZEZAWHBL50 MZEZAWHBL60 MZEZAWHBL72 OWNER’S MANUAL AC 220-240V 50Hz 1400-1600W Read and understand this entire owner’s manual, including all safety WARNING information, before plugging in or using this product. Failure to do so could result in fire, electric shock, or serious personalinjury.
-
Page 2: Important Safety Information
IMPORTANT SAFETY INFORMATION! WARNING When using electrical appliances basic precautions should always be followed to reduce the risk of fire, electric shock and injury to persons, including thefollowing: Read all instructions before using this heater. • This heater is hot when in use. To avoid burning, do not touch hot surface. If provided, use •... - Page 3 IMPORTANT SAFETY INFORMATION! WARNING WARNING: This heater is not equipped with a device to control the room temperature. Do not use this heater in small rooms when they are occupied by persons not capable of leaving the room on their own, unless constant supervision is provided. ·...
-
Page 4: Parts And Hardware
Preparation This product includes a GLASS panel! Always use extreme caution when handling glass. Failure to do so could result in personal injury or property damage. Remove all parts and hardware from the carton and place them on a clean, soft, dry surface. Parts and assembly steps are grouped for free-standing or wall-hanging use. - Page 5 The wall mount fasteners included with this fireplace are for use ONLY with a NOTICE wood-framed wall covered in drywall (sheet rock). For concrete walls, cinder blocks, or other wall types, consult a professional for the best attachment methods. ALWAYS unplug this fireplace heater before assembly or cleaning, or before relocating.
- Page 6 13” (33cm) 13” (33cm) wall 12.8” (32.5cm) High Wood screws Minimum 20”(50cm)
- Page 7 “L” Shape Mounting Bracket Installation A. After finishing the installation of the wall bracket, you need to use the small “L” shape mounting bracket (D) to attach the fireplace box to the wall. B. Remove the two white screws on the bottom of the fireplace box, then grab the ‘L” shape mounting bracket.
- Page 8 RECESSED TO WALL INSTALLATION STEP A. Select a dry wall to open a hole for fireplace box. Size of hole as below chart Figure Model Number MZEZAWHBL42 35.8”(91cm) 19” (48.26cm) MZEZAWHBL50 43.8” (111.5cm) 19” (48.26cm) MZEZAWHBL60 53.8”(136.7cm) 19” (48.26cm) MZEZAWHBL72 65.8”(167cm) 19”...
- Page 9 Fixed glass parts...
- Page 10 Log-set / Pebble Ember Installation (NOTE: Please make the installation according to your preference.) A. Glass front must be removed and the appliance mounted in its final location before the log-set / pebble effect are installed. B. If you want your fireplace with the log-set, remove the log-set from the packaging and put it into the designed slot in the fireplace as below.
-
Page 11: Methods Of Operation
Operation Read and understand this entire owner’s manual, including all safety information, before plugging in or using this product. Failure to do so could result in electric shock, fire, serious injury, or death. Methods of Operation This electric fireplace can be operated by the TOUCH ON CONTROL PANEL, located on the Front right side glass panel of the fireplace, or by the battery-powered REMOTECONTROL. - Page 12 Control Panel / Remote Control Operation BUTTON FUNCTION ACTION & INDICATION ON: Enables control panel functions and Press once. Indicator light turns on. remote control. Turns on flame effect. Power turns on. All functions enabled. OFF: Disables control panel functions and Press again.
-
Page 13: Remote Control Operation
Remote Control Operation BUTTON FUNCTION ACTION & INDICATION ON: Enables control panel functions and 1. Press once. Indicator light turns on. remote control. Turns on flame effect. Power turns on. All functions enabled. OFF: Disables control panel functions and 2. Press again. Flame effect turns off. POWER remote control. - Page 14 TIMER SETTINGS ON REMOTE CONTROL : Timer: Displays current day, time, and week. Press to enter or confirm timer settings. : Settings: Press to move to next step (use with timer button). Press to confirm week timer. : Back: Press to clear timer settings. Press to return to the previous step (use with Settings button).
- Page 15 2 Set ON/OFF time and temperature on a weekly cycle Press . When “MON” begins flashing, press 3 times. When “ON” begins flashing, use to select the desired hour and minute to turn on the heater. at any time to clear the digits and shut down “ON”...
-
Page 16: Remote Control Battery Information
When the heater is first turned on, a slight odor may be present. This is normal and NOTICE should not occur again unless the heater is not used for a long period of time. To improve operation, aim the remote control at the front of the fireplace. DO NOT NOTICE press the buttons too quickly. -
Page 17: Maintenance
Maintenance Risk of electric shock! DO NOT OPEN any panels! No user-serviceable parts inside! ALWAYS turn the heater OFF and unplug the power cord from the outlet before cleaning, performing maintenance, or moving this fireplace. Failure to do so could result in electric shock, fire, or personal injury. Electrical and Moving Parts: •... - Page 18 Should you require after sales information or warranty assistance within UK & Ireland with this product please go to https://www.micon-dist.com. Imported and Distributed by Micon Distribution Ltd.1a Hallstown Road, Ballinderry Upper, Lisburn BT28 2NE. Ezee Glow Brand exclusively owned by Micon...
Need help?
Do you have a question about the Zara Black and is the answer not in the manual?
Questions and answers
Is there anything I can do when the orange flame has stopped working on one side?