Table of Contents
Advertisement
Quick Links
Advertisement
Table of Contents

Subscribe to Our Youtube Channel
Related Manuals for Ezee Glow Celestial 36

Summary of Contents for Ezee Glow Celestial 36
- Page 1 Rev B...
-
Page 2: Important Safety Information
Important Safety Information When using electrical appliances basic precautions should be followed to reduce the risk of fire, electric shock and injury to persons, including the following: • Read all instructions before using this heater. • This heater is hot when in use. To avoid burning, do not touch hot surface. If provided, use handles when moving this heater. - Page 3 Important Safety Information WARNING - The heat functions H1 and H2, do not control the room temperature. Thermostat function must be set-up to control room temperature. We recommend you do not use this heater in small rooms when they are occupied by persons not capable of leaving the room on their own, unless constant super- vision is provided.
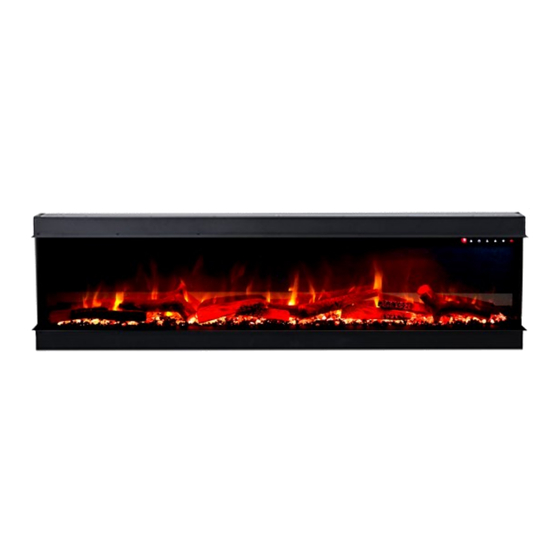
- Page 4 Key Features & Technical Specification Key features 4 sizes - 36”, 50”, 60” & 72”. • 1-sided, 2-sided and 3-sided built-in fitting options. • Energy Related Products (ERP) compliant. • 11 fuel-bed effect settings & 5 brightness settings. • 3 flame effect settings & 5 brightness settings. •...
- Page 5 Preparation First things first... Decide where the fire will be fitted and measure the space using the dimensions in this manual, making sure it fits. Remove the fire unit from the box and place it on a clean, soft, dry surface. Check the parts list to make sure you have all the parts you need.
-
Page 6: Parts & Hardware
Parts & Hardware Required tools for installation: Phillips screwdriver • Tape measure • Spirit level • Masonry or drywall screws, depending on your type of wall • Circular saw or hand saw • Drill and drill-bit set • Parts B - Screws C - Drywall Anchors A - Fire unit D - Remote Control... - Page 7 Dimensions CELESTIAL RANGE DIMENSIONS (MM) MODEL NUMBER 36” 50” 1272 1242 1266 60” 1526 1496 1520 72” 1830 1800 1826...
-
Page 8: Installation Overview
Installation Overview Your appliance allows for three installation configurations. One sided Glass exposed on the front only. Two sided Glass exposed on the front and left or right sides. Three sided Glass exposed on the front, left and right sides. - Page 9 Installation - Minimum Clearances Your appliance is a recessed and/or mantel installed appli- ance. Select a suitable location that is not susceptible to moisture build-up. It must be located enough distance away from curtains, furniture and high traffic areas. Note - Follow all local and national electrical regulations/ codes.
- Page 10 Installation - Rough framing FRAMING DIMENSIONS (MM) MODEL NAME Celestial 36” Celestial 50” 1275 Celestial 60” 1529 Celestial 72” 1833 Note - Appliance is not load bearing. Carefully consider weight of finishing materi- als when constructing rough framing. Note - Ensure installation complies with all local building codes and requirements.
- Page 11 Installation - Plasterboard PLASTERBOARD RECESS DIMENSIONS (MM) MODEL NAME Celestial 36” Celestial 50” 1300 Celestial 60” 1554 Celestial 72” 1857 Note - Dimensions assuming plasterboard is 12.5mm thick.
-
Page 12: Installation Preparation
Installation - Preparation Celestial 36” & 50” models have 4 brackets and 8 screws. Celestial 60” & 72” models have 6 brackets and 12 screws. Follow instructions below for your relevant model: 1. Remove the 8 (or 12) silver screws on the top and bottom of the appli- ance, see figure 3-1. - Page 13 Installation - Choose your viewing style Attach the relevant side panels or side trims to achieve your look. The 3-sided trims are packaged in a cardboard box behind the front glass screen for transport. One sided Two sided Three sided...
- Page 14 Installation - Front glass removal Note - If you’ve just got your fire and you’re removing the glass for the first time, following Step 3, you should be able to access the card- board box containing the fuel-bed media and 3-sided trims. See the next section on how to set up your fuel-bed.
- Page 15 Installation - Fuel-bed setup Note - Before you start, make sure to read the previous page explaining how to remove the front glass screen. Note - The fire must be installed in its final location before the crystals and logs are installed. Cut open the crystals bag(s) and disperse all the crys- tals evenly on the fuel-bed tray in a side to side motion.
-
Page 16: Operation
Operation Warning - Please read the entire owner’s manual, including all safety information, before plugging in or using this product. Failure to do so could result in fire, electric shock, or seri- ous personal injury. Note - When the heater is first turned on, a slight odour may be present. This is normal and should not occur again unless the heater is not used for a long period of time. - Page 17 CONTROL PANEL OPERATION BUTTON FUNCTION ACTION ON / OFF - Enables control panel functions. Press once - Control panel but- Turns on flame effect. tons illuminate, flame effect and remote screen turns on. Press again - Flame effect and all functions turn off. FLAME BRIGHTNESS - Adjusts flame bright- Press once - Flame brightness ness.
- Page 18 REMOTE OPERATION BUT- FUNCTION ACTION ON / OFF - Enables control panel func- Press once - Control panel illuminates, flame tions. Turns on flame effect. effect and remote screen turns on. Note - On first use, point the remote at Press again - All functions turn off.
- Page 19 Remote operation continued BUTTON FUNCTION ACTION TIMER - Heater can be programmed to auto- matically turn on / off at specified times during the week. Note - Settings range from 30 mins to 8 hrs. OK SELECTOR - Ok button is pressed to select certain settings.
- Page 20 Operation - Setting the timer Set current day and time Press and hold ‘Timer’ button. When ‘MON’ begins flashing, use the ‘Arrows’ to select the cur- rent day. Press ‘OK’ to complete the day setting. Step 1 When the hour digits flash, use the ‘Arrows’ to select the current hour. Press ‘OK’ to complete the hour setting.
- Page 21 Operation - Open window warning If the room temperature decreases by 10 degrees within 3 minutes, the appliance will assume there is an open window nearby. In order to conserve energy, the heater will automatical- ly switch from High Heat to Low Heat, or if the heater is already at Low Heat, it will turn off completely.
- Page 22 Operation - Temperature limiting control This heater is equipped with a Temperature Limiting Control. Should the heater reach an unsafe temperature, the heater will automatically turn off. To reset: Press the on / off button on the control panel and ensure the fire is off.
-
Page 23: Care And Maintenance
Care & Maintenance Cleaning Metal - Buff using a soft, dry cloth. Do not use brass polish or household cleaners, as these products will damage the metal trim. Glass - Use a good quality glass cleaner sprayed onto a cloth. Dry thorough- ly with kitchen roll or a lint-free cloth. -
Page 24: Troubleshooting (Faq)
TROUBLESHOOTING/ FAQ PROB- POSSIBLE CAUSE SOLUTION NOTE Fire not Fire not plugged in or Check plug is correctly fitted into socket and If all solutions switched on at socket socket is turned on. have been tested turning and problem persists, contact Fuse blown Disconnect plug and inspect the fuse. - Page 25 TROUBLESHOOTING/ FAQ CONTINUED PROB- POSSIBLE CAUSE SOLUTION NOTE Heater Build-up of hot air Ensure inlets and outlets are free from obstruc- If problem per- tion and there are sufficient clearances surround- sists, the installa- cutting ing the unit, as stated in manual. tion will need assessed to ensure it adheres...
-
Page 26: Appliance Disposal
Appliance disposal Do not dispose of electrical appliances as unsorted municipal waste, use separate collection facilities. Contact your local government for infor- mation regarding the collection systems available. If electrical appliances are dis- posed of in landfills or dumps, hazardous substances can leak into the groundwater and get into the food chain, damaging your health and well-being. -
Page 27: Warranty
Warranty Your product has a one year guarantee from the date of purchase. Should this product prove defective within one year of purchase due to a design fault, poor workmanship or material breakdown, the product will be repaired or replaced free of charge. Product warranty is subject to the fol- lowing conditions: •...
Need help?
Do you have a question about the Celestial 36 and is the answer not in the manual?
Questions and answers