Viessmann Vitovent 300 Installation Instructions Manual
Domestic ventilation system with heat recovery and remote control; air flow rate up to 180 m3/h
Hide thumbs
Also See for Vitovent 300:
- Technical manual (96 pages) ,
- Service instructions for contractors (64 pages) ,
- Service instructions manual (60 pages)

Subscribe to Our Youtube Channel
Related Manuals for Viessmann Vitovent 300


Summary of Contents for Viessmann Vitovent 300
- Page 1 VIESMANN Installation instructions for contractors Vitovent 300 Domestic ventilation system with heat recovery and remote control; air flow rate up to 180 m VITOVENT 300 Dispose after installation. 5592 914 GB 8/2007...
- Page 2 Safety instructions Please follow these safety instructions closely to prevent accidents and material losses. Safety instructions explained the Code of Practice of relevant trade associations, Danger all current safety regulations as This symbol warns against the defined by DIN, EN, DVGW, TRGI, risk of injury.
-
Page 3: Table Of Contents
Index Preparing for installation System diagram..................Air distribution .................... Routing lines ....................Thermal insulation ..................Preventing flow noise and pressure drop ............. Silencer ....................10 Installation versions of the air outlets ............11 Floor-level outlet ..................11 Slotted outlet (for wall or ceiling mounting) ..........12 Positioning .................... -
Page 4: System Diagram
System diagram Note: Legend see from page 5... - Page 5 System diagram (cont.) A Ceiling A Ceiling B Wall A Wall B Floor Duct system System Part no. (DN) Flexible pipe thermally insulated 7249 101 (round), 2.5 m long 9521 450 swaged (round), 5 m 7249 102 long 9521 455 Connecting piece (round) for joining two 7249 103 flex pipes...
- Page 6 System diagram (cont.) Duct system System Part no. (DN) Expelled air roof outlet (round) with pro- 9562 054 tective grille Air distribution 6 connections 100/150 9542 586 box (flat) 3 connections 100/150 9562 050 Silencer flexible (flat) 9542 573 9542 574 crush-resistant 9562 049 Flat duct...
-
Page 7: Air Distribution
System diagram (cont.) Not shown System Part no. (DN) Reducer DN 160 to 7249 108 for the connection of pipework and for adapting DN 125 pipes DN 125 to the outside air filter box DN 125 to 7249 109 DN 100 Elbow 90º... -
Page 8: Routing Lines
D WC L Air distribution box E Bathroom M Flat duct F Extract air N Vitovent 300 Routing lines Secure the air distribution system Secure joints with self-tapping with clips or perforated straps. screws or blind rivets and seal air- Never let lines sag to prevent the tight with shrink tape. -
Page 9: Thermal Insulation
Routing lines (cont.) Never let drilling swarf drop into the device connectors. Secure the flexible pipe with a hose clip to the ventilation air connector on the device. Thermal insulation Thermally insulate parts of the air dis- Provide ventilation air and extract tribution system that are routed air lines with an insulation layer of at through unheated areas. -
Page 10: Silencer
Preventing flow noise and pressure drop (cont.) Silencer Flexible versions System men- sio- 100 flexible 128 202 150 flexible 207 304... -
Page 11: Installation Versions Of The Air Outlets
Preventing flow noise and pressure drop (cont.) Crush-resistant version Installation versions of the air outlets Floor-level outlet A Screed (50 to 60 mm) B Impact sound insulation (30 mm) C Flat duct (51 mm) -
Page 12: Slotted Outlet (For Wall Or Ceiling Mounting)
Installation versions of the air outlets (cont.) Slotted outlet (for wall or ceiling mounting) A Ventilation air via slotted outlets B Flat duct (51 mm) A Ventilation air via a wall mounted valve DN 100 Extract air via extract air valve DN 100 B Diverter (flat to round DN 100) C Flat duct (51 mm) -
Page 13: Positioning
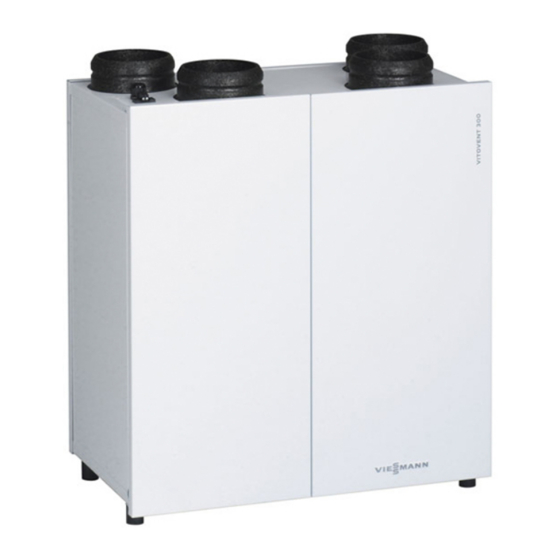
The following are ideal locations: The Vitovent 300 can be installed Utility room and domestic offices on freestanding or wall mounted. The the ground floor device must be accessible for mainte- Wall mounted cupboard nance purposes. -
Page 14: Operation With Open Flue Combustion Equipment
Positioning (cont.) Operation with open flue combustion equipment When installing domestic ventilation The pressure drop in the installation systems together with open flue com- room may be up to 0.04 mbar. A bustion equipment (open flue gas higher pressure drop could cause the fired boilers or open fireplaces), return flow of flue gases, if the ventila- ensure that the operation of the... -
Page 15: Installing The Ventilation Air And Extract Air Device
Installing the ventilation air and extract air device Installing the device Position the device level on its rubber feet. It may be necessary to provide a plinth to safeguard the free drainage of condensate (see page 17). Hanging the device on the wall... -
Page 16: Connection Of The Ductwork
Installing the ventilation air and extract air device (cont.) 1. Undo the screws in the back of the 4. Fit rubber profile C to the wall device. retainer and mount level on the wall with the screws and rawl plugs sup- 2. -
Page 17: Connecting The Condensate Drain
Connection of the ductwork (cont.) A Ventilation air connector (DN 125) E Condensate drain hose B Extract air connector (DN 125) (hose connection internal Ø C Outside air connector (DN 125) 12 mm) D Expelled air connector (DN 125) F Height of the adjustable feet Push the relevant lines onto the appropriate connectors. -
Page 18: Condensate Drain Via Siphon
Connecting the condensate drain (cont.) Should the condensate drain hose run partially through unheated rooms, protect it from frost in such areas (e.g. thermal insulation or ribbon heater). Condensate drain via siphon 1. Push the condensate drain hose (1.5 m, supplied in the pack) onto the condensate drain elbow on the device. -
Page 19: Electrical Connections
(230 V/50 Hz). Connecting the remote control A Top of the Vitovent 300 device D Wall mounting base, remote con- B Socket, OpenTherm BUS cable trol C Plug, OpenTherm BUS cable... -
Page 20: Connecting To The Power Supply
C (plugged into socket B on terminals X1 E of the remote con- the l.h. top of the Vitovent 300 A). trol. Never route this cable alongside These cores may be interchanged. -
Page 21: External Wall Connection
External wall connection To prevent condensation, thermally insulate the outside air line diffusion-proof. The outside air is supplied via the external wall inlet grille. 1. Create a wall duct 300 mm 5. Secure the pipe connector with rawl plugs to the wall. 2. -
Page 22: Expelled Air Roof Outlet
Expelled air roof outlet To prevent condensation, thermally insulate the expelled air line diffusion- proof. Stale air from which the latent heat has been largely extracted (expelled air) is routed to the outside via the expelled air roof outlet. 1. Let the roof outlet hood into the roof in accordance with the struc- tural conditions on site. -
Page 23: Flo
1. Make an aperture 110 mm in the wall or ceiling. 2. Open the flap in the front panel and remove the filter. 3. Push the extract air line onto the extract air valve. Insulate the extract air line with per- manently resilient material against structure-borne noise transmission. -
Page 24: Ventilation Air Aperture For Wall Mounting
Ventilation air aperture for wall mounting 1. Make an aperture 110 mm in the 3. Push the connector onto the wall. mounting ring. 4. Insert and secure the mounting ring A distance of approx. 200 to in the wall (screws, silicone or 300 mm to the ceiling improves the expanding installation foam). -
Page 25: Slotted Outlet For Wall And Ceiling Mounting
Slotted outlet for wall and ceiling mounting 1. Remove the slotted outlet from the 4. Unfinished wall: connection box. After rendering/plastering, insert and secure the slotted outlet. 2. Push the flat duct onto the connec- Light wall structure: tion box. Make a slot 305 x 40 mm, then insert and secure the slotted outlet. -
Page 26: Floor-Level Outlet
Floor-level outlet 1. Push the flat duct onto the floor outlet. Remove the protective film from the floor outlet after the floor has been fin- 2. Secure the floor outlet with rawl ished (screed). plugs. Separate installation instruc- tions... -
Page 27: Commissioning And Adjustment
Commissioning and adjustment For commissioning and adjust- ment, see service instructions. - Page 28 Viessmann Werke GmbH&Co KG Viessmann Limited D-35107 Allendorf Hortonwood 30, Telford Telephone: +49 6452 70-0 Shropshire, TF1 7YP, GB Fax: +49 6452 70-2780 Telephone: +44 1952 675000 www.viessmann.com Fax: +44 1952 675040 E-mail: info-uk@viessmann.com...
Need help?
Do you have a question about the Vitovent 300 and is the answer not in the manual?
Questions and answers