Viessmann VITOVENT 300 Operating Instructions Manual
Domestic ventilation system with heat recovery for max. air flow rate 180 m3/h, 300 m3/h, 400 m3/h
Hide thumbs
Also See for VITOVENT 300:
- Technical manual (96 pages) ,
- Service instructions for contractors (64 pages) ,
- Service instructions manual (60 pages)

Related Manuals for Viessmann VITOVENT 300


Summary of Contents for Viessmann VITOVENT 300
- Page 1 VIESMANN Operating instructions for the system user Domestic ventilation system with heat recovery For max. air flow rate 180 m /h, 300 m /h, 400 m VITOVENT 300 Please keep safe. 5592 578 GB 4/2010...
- Page 2 Safety instructions For your safety Please follow these safety instructions closely to prevent accidents and mate- rial losses. Safety instructions explained Danger Incorrect work on the system can Danger lead to life-threatening acci- This symbol warns against the dents. risk of injury. Work on electrical equipment must only be carried out by a Please note...
- Page 3 Safety instructions For your safety (cont.) Auxiliary components, spare and wearing parts Please note Components that are not tested with the system may cause sys- tem damage, or may affect its functions. Installation or replacement work must only be carried out by quali- fied personnel.
-
Page 4: Table Of Contents
Index Index Introductory information Device description....................■ Domestic ventilation system................■ Heat recovery....................■ Bypass......................■ Ice guard circuit....................■ Remote control....................Commissioning..................... Your system is preset at the factory..............Where to find the controls Summary of controls and indicators..............■... - Page 5 Index Index (cont.) Scanning options Scanning temperatures and further settings............24 Scanning time programs..................25 ■ Scanning current times for program "P1"............25 ■ Scanning switching times for program "P2"............25 Scanning holiday program..................26 What to do if... "FIL" appears on the display................27 "FAULT F2/F5/F9/F10"...
-
Page 6: Introductory Information
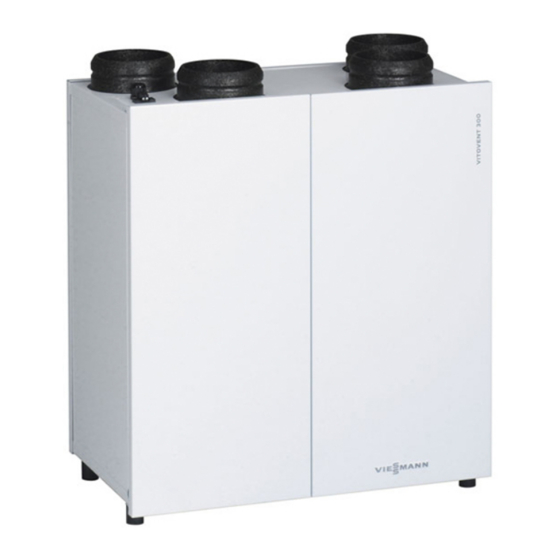
Introductory information Device description Domestic ventilation system The domestic ventilation system compri- Fresh air enters the living rooms and ses the central ventilation unit Vitovent bedrooms via ventilation air apertures. 300, a duct system with silencers for out- Stale air from rooms where moisture and side air/ventilation air and extract air/ odours are created (e.g. -
Page 7: Remote Control
Introductory information Device description (cont.) Subject to the thickness of the ice, the To prevent the ice guard circuit respond- outside flow rate can be stopped com- ing, link an electric pre-heater bank pletely. At regularly decreasing intervals, (accessory) or a geothermal heat the appliance control unit checks exchanger (on-site) into the domestic whether the ventilation air fan can be... -
Page 8: Your System Is Preset At The Factory
Introductory information Your system is preset at the factory The remote control is factory-set to oper- ating program "P1". Your domestic ven- tilation system is therefore ready for use: Monday to Friday ■ 6:00 to 22:00 h: Standard ventilation Display: "P1 NORMAL" ■... -
Page 9: Where To Find The Controls
Where to find the controls Summary of controls and indicators Opening the remote control unit Functions C Changing the settings D Rotary program selector (page 11) E Confirmation F Terminating entries NORMAL G Information (page 24) H Reset (only for language, time and MENU date) (see page 23) K Fan operating display... -
Page 10: Symbols On The Display
Where to find the controls Summary of controls and indicators (cont.) Symbols on the display These symbols are not always dis- played, but appear subject to the oper- ating condition. Flashing displays indicate that modifica- tions can be made. PROG P2 STANDARD A Weekdays (1 ≙... -
Page 11: Selecting Ventilation Operating Mode
Selecting ventilation operating mode Switching the system off 9"Standby mode" Please note If the system is shut down for a prolonged period (9), it may suf- fer moisture damage. ■ Only select operating program 9 to replace the filter mats. ■... -
Page 12: Selecting The Operating Program
Selecting ventilation operating mode Selecting the operating mode (cont.) g: Constant raised ventilation Operating mode for high relative humid- ity, e.g. because a shower is in use, there are many visitors, or the air contamina- tion level is high (e.g. due to smokers). The air flow rate for raised ventilation is set by your contractor during commis- sioning. - Page 13 Selecting ventilation operating mode Selecting the operating program (cont.) P2: Individually adjustable time program Room ventilation in accordance with an individually adjustable time program, see page 14. You can choose from 3 ventilation stages: ■ Reduced ventilation: "Reduced" (cor- responds to m) MENU ■...
-
Page 14: Settings
Settings Changing the operating settings MENU "Settings" Changing operating settings. Example: Time settings for P2. MENU Setting an individual time program (P2) Setting switching points for ventilation times Set switching points for the whole Note week. The ventilation appliance operates in Enter the time and ventilation stage for "Reduced"... -
Page 15: Example
Settings Setting an individual time program (P2) (cont.) Example From Monday to Friday and on Sunday, 4. xw for "DAILY" you want to ventilate from 8:00 to 22:00 h and on Saturday from 9:00 to 5. d to confirm; "HOUR" 23:00 h with the "normal"... - Page 16 Settings Setting an individual time program (P2) (cont.) 18. d 9. x to confirm; "END" is dis- until "END" is displayed. played and approx. 3 s later Approx. 3 s later, "PRO- "NEW" flashes. GRAM P2" appears; symbol "PROG" flashes. Re: 2.) Deleting the settings for "SIN- GLE DAY"...
-
Page 17: Deleting Switching Points
Settings Setting an individual time program (P2) (cont.) 12. d to confirm. Wait until "SIN- 18. xw for "00" (23:00 h). GLE DAY" flashes (after a brief display of available 19. d to confirm; "REDUCED" is memory slots). displayed. 13. d to confirm;... -
Page 18: Reducing The Ventilation Stage For Several Days
Settings Setting an individual time program (P2) (cont.) 5. xw for "ALL" Deleting all switching points Turn the rotary program selector to 6. d to confirm; "CONFIRM" "MENU" and press the following keys: flashes. 1. x for "PROGRAM P2", the 7. -
Page 19: Changing The Ventilation Stage For A Few Hours Only
Settings Reducing the ventilation stage for several days (cont.) 1. xw for "HOLIDAY PROG"; sym- 6. Turn the rotary selector to the required program. As soon as the bol "j" flashes. start time has been reached, the dis- play shows, for example: 2. -
Page 20: Changing The Bypass Function
Settings Changing the bypass function For appliances with a maximum air flow rate of 300 m /h and 400 m /h, the integral bypass damper can be opened or closed manually. In standard mode, "BYPASS AUTO" should always be selected. For further information on the bypass function, see page 6. -
Page 21: Further Adjustments
Further adjustments Time and date Turn the rotary program selector to 7. xw for selecting your country "MENU" and press the following keys: "FREE CONTROL". 1. xw for "TIME/DATE"; symbol "u" flashes. 8. d to confirm. If you have selected "FREE CONTROL", "MONTH SU"... -
Page 22: Language
Further adjustments Display version (cont.) Display version 1 Display version 2 (delivered condition) Display of the ambient air temperature Time display PROG PROG 9 12 15 18 21 24 9 12 15 18 21 24 Turn the rotary program selector to 2. -
Page 23: Standard Settings / Reset
Further adjustments Language (cont.) 5. xw for the required language. 6. d to confirm. Possible languages are: 7. Turn the rotary selector to the ■ German required program. ■ English ■ French ■ Polish ■ Swedish Standard settings / Reset Standard settings (remote control) Resetting to the standard settings (deliv- 3. -
Page 24: Scanning Options
Scanning options Scanning temperatures and further settings Repeatedly pressing c enables you to scan the following values in the order shown: Note The rotary selector must not be set to "MENU". With display version 1 (standard display of extract air temperature): Display Explanation Notes... -
Page 25: Scanning Time Programs
Scanning options Scanning temperatures and further settings (cont.) Display Explanation Notes OUTSIDE TEMP Outside temperature This temperature is captured at the heat exchanger and does not represent the actual outside tem- perature. TEMP EXHAUST Extract air temperature This temperature is captured at the heat exchanger and does not represent the actual room tem- perature. -
Page 26: Scanning Holiday Program
Scanning options Scanning time programs (cont.) 4. d 5. d to confirm; the first switching respectively for all other point for Monday is displayed switching points of the week. together with the time slot Several switching points graphic for Monday. may be selected for each day. -
Page 27: What To Do If
What to do if... "FIL" appears on the display Cause Remedy Filters in the Vitovent are dirty. Clean or replace the filters (see page 30). "FAULT F2/F5/F9/F10" is shown alternately on the display with "CALL SERVICE" Cause Remedy Outside air fan is idle Notify the heating/ventilation contractor of Extract air fan is idle the fault code and isolate the appliance... -
Page 28: Maintenance Cleaning
Maintenance Cleaning The casing of these appliances can be We recommend you arrange a mainte- cleaned with a commercially available nance contract with a heating/ventilation domestic cleaning agent (non-scour- contractor. ing). Omitting the regular service represents Regularly change the outside air and a risk;... - Page 29 Maintenance Cleaning the ventilation/extract air valves (cont.) 1. If installed, open cover A. Kitchen extract air valve 2. Remove grease filter from aluminium mesh B. 3. Clean grease filter B with water and detergent or in the dishwasher. 4. Dry grease filter B and reinsert. 5.
-
Page 30: Replacing Filter Mats And Extract Air Filter
Maintenance Replacing filter mats and extract air filter Replacing extract air filter Message in the remote control If "FIL" appears on the display, check Note the filter mats in the appliance and the To replace the extract air filters and filter extract air filters in the extract air mats, the rotary program selector must valves. -
Page 31: Cleaning Or Replacing Filter Mats
Maintenance Replacing filter mats and extract air filter (cont.) Cleaning or replacing filter mats Vitovent for a maximum air flow rate of 180 m 1. Open the flap of the remote control. 5. If necessary, clean the filter mats with a vacuum cleaner or replace filters 2. - Page 32 Maintenance Replacing filter mats and extract air filter (cont.) 8. Hold down d on the remote control 7. Slide the new or cleaned filter mats into their guides in the correct posi- for at least 3 s to clear the "FIL" dis- tions.
- Page 33 Maintenance Replacing filter mats and extract air filter (cont.) Danger 7. Close the appliance door and lock The appliance power supply is into place. located behind the l.h. door of 8. Hold down d on the remote control the appliance. The power sup- ply must only be handled by for at least 3 s to clear the "FIL"...
-
Page 34: Keyword Index
Keyword index Keyword index Air flow rate..........6 Language...........22 Air volume..........6 Program selection Bypass...........6, 10 ■ Party mode........12 Bypass function ■ Program P2........13 ■ Changing........20 ■ Raised ventilation demand.....12 ■ Reduced.........11 ■ Settings...........14 Cleaning..........28 ■ Standard.........11 ■ Standby..........11 Display version........21 Remote control........7 Rotary selector........9 Filter.........6, 27, 28 Filter check........31, 33... - Page 36 Contact your local contractor if you have any questions regarding the maintenance and repair of your system. You may, for example, find local contractors on the internet under www.viessmann.com. Viessmann Werke GmbH&Co KG Viessmann Limited D-35107 Allendorf Hortonwood 30, Telford...
Need help?
Do you have a question about the VITOVENT 300 and is the answer not in the manual?
Questions and answers