Viessmann Vitocal 300-G Dismantling Instructions
Brine/water heat pump with r290 refrigerant for operation in esycool container
Hide thumbs
Also See for Vitocal 300-G:
- Installation and service instructions manual (256 pages) ,
- Installation and service instructions for contractors (144 pages) ,
- Operating and service instructions (104 pages)

Related Manuals for Viessmann Vitocal 300-G


Summary of Contents for Viessmann Vitocal 300-G
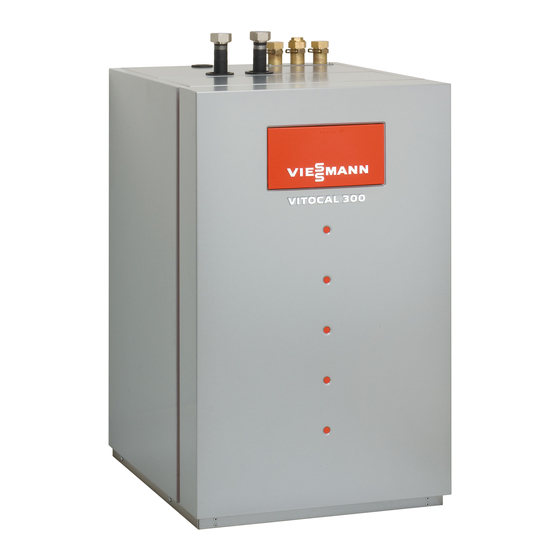
- Page 1 VIESMANN Installation and dismantling instructions for contractors Vitocal 300-G Type BW 301.C17 Brine/water heat pump with R290 refrigerant for operation in ESyCool container VITOCAL 300-G 5800 908 GB 8/2017...
- Page 2 Safety instructions Please follow these safety instructions closely to prevent accidents and material losses. Safety instructions explained Danger Note This symbol warns against the risk of injury. Details identified by the word "Note" contain additional information. Please note This symbol warns against the risk of material losses and environmental pollution.
- Page 3 Safety instructions (cont.) Safety instructions for working on the system Working on the system Work on the refrigerant circuit ■ Isolate the system from the power supply, e.g. by R290 refrigerant (propane) is an air displacing, colour- removing the separate fuse or by means of a mains less, flammable, odourless gas which forms explosive isolator, and check that it is no longer live.
- Page 4 ■ ance with the information provided by For replacements, use only original spare parts Viessmann. supplied or approved by Viessmann. Safety instructions for operating the heat pump ■ The heat pump may only be operated in the ESyCool container with explosion protection provided for this purpose;...
-
Page 5: Table Of Contents
Index Information Disposal of packaging ................Symbols ....................Intended use ..................Product information ................Preparing for installation Requirements for on-site connections ........... Installation sequence Installation room requirements .............. Transport ....................Siting the heat pump ................Removing the transport brackets and levelling the heat pump ... 10 ■... -
Page 6: Information Disposal Of Packaging
Please dispose of packaging waste in line with statu- tory regulations. DE: Use the disposal system organised by Viessmann. AT: Use the ARA statutory disposal system (Altstoff Recycling Austria AG, licence number 5766). CH: Packaging waste is disposed of by the HVAC contractor. -
Page 7: Intended Use
Intended use The appliance is only intended to be installed and Intended use presupposes that a fixed installation in operated in the ESyCool container, with due attention conjunction with permissible, system-specific compo- paid to the associated installation and dismantling nents has been carried out. instructions as well as the operating and service instructions. -
Page 8: Preparing For Installation Requirements For On-Site Connections
Requirements for on-site connections 230V~ <42V Fig. 1 Secondary circuit flow (heating water flow) Secondary circuit return (heating water re- turn) Primary circuit return (heat pump brine out- let) Primary circuit flow (heat pump brine inlet) -
Page 9: Installation Sequence Installation Room Requirements
Installation room requirements The installation room must meet the requirements of Danger ISO 5149-1 for machinery rooms. Dust, gases and vapours can be damaging to health and trigger explosions. Please note Avoid dust, gases and vapours in the installation Unfavourable ambient conditions can lead to room. -
Page 10: Removing The Transport Brackets And Levelling The Heat Pump
Siting the heat pump (cont.) Removing the transport brackets and levelling the heat pump Fig. 2 1. Remove the transport brackets. 2. Site the heat pump. Level it horizontally. Please note Operating the appliance without first remov- ing the transport brackets may cause vibra- tions and excessive noise. -
Page 11: Removing The Top Panel
Siting the heat pump (cont.) Removing the top panel Fig. 3 Making the hydraulic connections For arrangement of hydraulic connections: See page 8. Connecting the primary circuit Please note The heat transfer medium can cause corrosion damage to on-site lines and components. The components and lines used must be resist- ant to the heat transfer medium. -
Page 12: Connecting The Secondary Circuit
4. Apply thermal and vapour diffusion-proof insulation and safety valve (to DIN 4757). to all lines. Note 5. Fill the primary circuit with Viessmann heat transfer ■ The expansion vessel must be approved to medium and vent. DIN 4807. The diaphragms of the expansion ves-... -
Page 13: Electrical Connections, Heat Pump
Electrical connections, heat pump Required cable lengths in the heat pump 1.0 m for 400 V~ power cable and other connecting cables Recommended compressor power cable Cable Max. cable length 50 m 5 x 2.5 mm Routing the cables to the heat pump wiring chamber Danger When routing the connecting cables, observe the loca- Damaged wiring insulation wiring can lead to... -
Page 14: Connecting The Cables To The Heat Pump Control Unit
Electrical connections, heat pump (cont.) 1. Route LV leads through the "< 42 V" opening to the 2. Route 230 V cables and the compressor power wiring chamber. Provide strain relief using the cable through the "230 V~" opening to the wiring cable ties supplied. -
Page 15: Checking The Control Panel For Vapour Tightness
Electrical connections, heat pump (cont.) Fig. 6 Vapour tight control panel Power supply unit for safety high pressure switch Transformer EEV PCB: Make no connections. Phase monitor: See 25. EEV PCB (refrigerant circuit controller): Make no Connecting cable to the heat pump control unit: LV connections. -
Page 16: Installing The Heat Pump Control Unit
Electrical connections, heat pump (cont.) 3. Tighten the test connector fitting. Ensure tightness. 4. Generate negative pressure of 3 mbar (0.3 kPA) using the hand pump of the testing device. 5. Observe the pressure for the next 90 s. After 90 s the negative pressure should still be 1.5 mbar (0.15 kPA). -
Page 17: Fitting The Casing Front
Installing the heat pump control unit (cont.) Fitting the casing front Fig. 9 Fig. 10 Cross connect PCB Casing front Plug-in connection ON/OFF switch Controller and sensor PCB... -
Page 18: Opening The Heat Pump Control Unit
Installing the heat pump control unit (cont.) Fig. 11 Opening the heat pump control unit Fig. 12 Heat pump control unit electrical connections Required cable lengths from the wall outlet 0.6 m where the cables come out of the wall centrally directly below the heat pump control unit Recommended heat pump control unit power cable Cable... -
Page 19: Inserting The Cables And Applying Strain Relief
Heat pump control unit electrical connections (cont.) Inserting the cables and applying strain relief Fig. 13 Cables with moulded strain relief On-site cables Connecting the cables to the heat pump Fig. 14 Cross connect PCB Connecting cable to the heat pump: LV < 42 V Controller and sensor PCB Connecting cable to the heat pump: 230 V~ control cable... -
Page 20: Inserting The Coding Card
Heat pump control unit electrical connections (cont.) Inserting the coding card Only insert the coding card supplied with the heat pump. Fig. 15 Coding card Controller and sensor PCB... -
Page 21: Overview Of The Electrical Connections In The Heat Pump Control Unit
Heat pump control unit electrical connections (cont.) Overview of the electrical connections in the heat pump control unit Note ■ Route 230 V~ cables and LV cables separately and bundle them tightly together at the terminals. This ensures that, in the event of a fault, e.g. when detaching a wire, the wires cannot drift into the adja- cent voltage area. -
Page 22: Cross Connect Pcb (Signal And Safety Connections)
Heat pump control unit electrical connections (cont.) Plug Terminals Function Explanation 223.1 223.2 Central fault message Floating contact: Closed: Fault ■ Open: No fault ■ Not suitable for safety LV ■ Connection values (contact rating): Voltage: 230 V~ ■ Max. switching current: 4(2) A ■... -
Page 23: Controller And Sensor Pcb
Heat pump control unit electrical connections (cont.) Terminals Function Explanation X3.12 "External demand" signal: External Requires floating contact: X3.13 compressor start Closed: Demand ■ Open: No demand ■ Breaking capacity 230 V, 2 mA ■ Note These and further external functions, e.g. provision of external set values, can alternatively be connected via external EA1 extension. -
Page 24: Power Supply
Power supply Isolators for non-earthed conductors Danger ■ Install an isolator in the power cable to provide Incorrect core assignment can lead to serious omnipolar separation from the mains for all active injury from electrical current and result in appli- conductors, corresponding to overvoltage category ance damage. -
Page 25: Phase Monitor
Power supply (cont.) Phase monitor The phase monitor monitors the compressor power Over/undervoltage in % " U" ■ Δ supply. Phase asymmetry in % "Asy" ■ If the internal tolerance range is exceeded or under- shot, the phase monitor interrupts the safety chain LEDs explained in Fig. -
Page 26: Filling And Venting The Primary Side
Charge and vent the primary circuit before con- necting the power supply. 1. Check the pre-charge pressure of the expansion vessel. 2. Charge the primary circuit with Viessmann heat transfer medium and vent. Note Ensure frost protection down to 19 °C. -
Page 27: Closing The Heat Pump
Closing the heat pump Danger Please note Risk of explosion: Electrical components can If a casing door is not securely closed this can cause sparks which may be ignited by escaping lead to damage from condensation, vibrations refrigerant. and excessive noise. After every time the control panel is opened or Seal the casing door so it is soundproof and dif- closed, check the casing door for vapour tight-... -
Page 28: Check The Diaphragm Grommets
Closing the heat pump (cont.) Fig. 21 Check the diaphragm grommets Check diaphragm grommets at the hose outlets. Please note Incorrectly closed casing doors can lead to dam- age from condensation, vibrations and exces- sive noise. Ensure that diaphragm grommets are cor- rectly seated at the hose outlets. -
Page 29: Commissioning Starting The Heat Pump
Starting the heat pump Front of the heat pump control unit External control Flow temperature 40°C Fig. 23 Fault indicator (red) ON indicator (green) ON/OFF switch 1. Switch ON the power supply, e.g. at a separate fuse or a mains isolator. 2. -
Page 30: Dismantling
Dismantling For dismantling, follow all the steps shown in these instructions in reverse order. -
Page 31: Specification
Specification Vitocal 300-G, type BW 301.C17 Performance data to EN 14511 (B0/W35, 5 K spread) Rated heating output 18.33 Refrigerating capacity 14.57 Power consumption 4.11 Coefficient of performance (COP) 4.47 ε Brine (primary circuit) Capacity Minimum flow rate 2600 Pressure drop at minimum flow rate mbar Max. - Page 32 Specification (cont.) Permiss. operating pressure Primary circuit Secondary circuit Dimensions Total length Total width Total height 1155 Total weight Connections (male thread) Primary circuit flow/return ½ Secondary circuit flow/return ½...
-
Page 33: Keyword Index
Keyword index Floor load..............9 Adjustable feet............. 9 Floor unevenness............9 Ambient temperatures..........9 Fuse F1..............21 Appliance alignment.............9 Fuse F3..............21 Fuse protection – Compressor.............31 Cable length – Heat pump control unit..........31 – Heat pump...............13 Fuses................. 31 – Heat pump control unit..........18 Cables –... - Page 34 Keyword index (cont.) Removing the top panel..........11 Noise..............27, 28 Residual current device (RCD)........24 Non-return valves, opening........26 Room height..............9 Routing cables............13 ON/OFF switch............29 ON indicator............... 29 Safety assembly............12 On-site connections............. 8 Safety chain............... 25 Overflow valve............12 Safety high pressure switch coupling relay....
- Page 36 Viessmann Werke GmbH & Co. KG Viessmann Limited D-35107 Allendorf Hortonwood 30, Telford Telephone: +49 6452 70-0 Shropshire, TF1 7YP, GB Fax: +49 6452 70-2780 Telephone: +44 1952 675000 www.viessmann.com Fax: +44 1952 675040 E-mail: info-uk@viessmann.com...
Need help?
Do you have a question about the Vitocal 300-G and is the answer not in the manual?
Questions and answers