Table of Contents
Advertisement
Quick Links
Advertisement
Table of Contents

Related Manuals for Westinghouse WGen5500


Summary of Contents for Westinghouse WGen5500
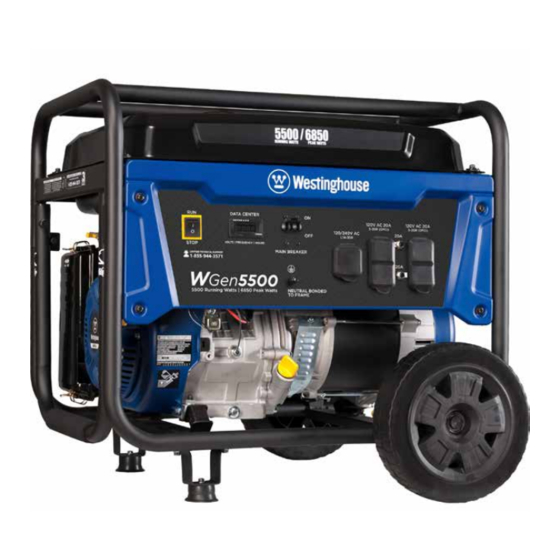
- Page 1 USER MANUAL Gen5500 Portable Generator 5500 Running Watts | 6850 Peak Watts...
-
Page 2: Wgen5500 Technical Specifications
Contact our service team to order altitude kits. FOR YOUR RECORDS: Date of Purchase: Generator Model Number: Purchased from Store/Dealer: Generator Serial Number: HAVE QUESTIONS? Email us at service@wpowereq.com or call 1-855-944-3571 2 | Westinghouse Portable Power... -
Page 3: Product Registration
IMPORTANT: KEEP YOUR PURCHASE RECEIPT TO ENSURE TROUBLE-FREE WARRANTY COVERAGE. PRODUCT REGISTRATION To ensure trouble-free warranty coverage, it is important you register your Westinghouse generator. You can register your generator by either: 1. Filling in the product registration form below and mailing to:... -
Page 4: Table Of Contents
Before Starting the Generator ....14 WGen5500 Schematic ..... . . 32 Altitude Conversion Kit . -
Page 5: Safety
NOTE: Indicates a procedure, practice or condition that should be followed in order for the generator to function in the manner intended. Read Manufacturer’s Instructions Read Safety Messages Before Proceeding Wear Personal Protective Equipment (PPE) Westinghouse Portable Power | 5... -
Page 6: General Safety Rules
Never use the generator to power medical support equipment. engine misfires often. Always disconnect tools or Always remove any tools or other service equipment used during appliances from the maintenance from the generator before operating. generator before starting. 6 | Westinghouse Portable Power... -
Page 7: Safety Labels And Decals
Designed in Columbus , Ohio USA principa l de CSA Columbus Ohio 43228 Etats-Unis Co n u à columbus , Ohio,tats-Unis Made in China/ Fabriqu é en Chine ON = COLD START OFF = RUN/WARM START Westinghouse Portable Power | 7... - Page 8 SAFETY SAFETY LABELS AND DECALS 8 | Westinghouse Portable Power...
-
Page 9: Unpacking
WHEEL KIT ACCESSORIES BOX Open the Wheel Kit Accessories box and verify the contents against the list right. If any parts are missing, please locate an authorized Westinghouse Generator dealer at service@wpowereq.com or call 1-855-944-3571. Westinghouse Portable Power | 9... -
Page 10: Assembly
4. Repeat previous steps on other wheel. 3. Install the mounting feet to the frame using the M8 flange bolts included. 1 - Mounting Foot 2 - Flange Bolts M8 Figure 1 - Assemble Mounting Feet to Frame 10 | Westinghouse Portable Power... -
Page 11: Features
Oil Fill Plug/Dipstick: Must be removed to add Single Piece Handle: Includes rubber grip. Allows and check oil. you to easily push or pull unit with one hand. Oil Drain Plug: Must be removed to drain engine oil Westinghouse Portable Power | 11... - Page 12 CARB Canister: Required for models sold into and used in California. Muffler and Spark Arrester: Avoid contact until engine is cooled down. Spark arrestor prevents sparks from exiting the muffler. It must be removed for servicing. Alternator Cover: Gain access to alternator wiring. 12 | Westinghouse Portable Power...
-
Page 13: Control Panel Features
Lifetime run hours Main Circuit Breaker: The main circuit breaker controls total output of all outlets to protect the generator. 120/240-Volt, 30-Amp Twist Lock Outlet (NEMA L14-30R): Outlet can supply either 120V or 240V output. Westinghouse Portable Power | 13... -
Page 14: Operation
1-855-944-3571 for altitude part kits. could lead to moisture collecting on, in or around the generator. High Altitude Carburetor Kit Part Number: 140545 Dry Surface – Always operate the generator on a dry surface free of any moisture. 14 | Westinghouse Portable Power... -
Page 15: Powercord
Using Extension Cords Westinghouse Portable Power assumes no responsibility for the content within this table. The use of this table is the responsibility of the user only. This table is intended for reference only. The results produced by using this table are not guaranteed to be correct or applicable in all situations as the type and construction of cords are highly variable. -
Page 16: Transfer Switch Connections
Filling the fuel tank with gasoline while TRANSFER SWITCH CONNECTIONS the generator is running can cause The Westinghouse generator is wired with the neutral gasoline to leak and come in contact bonded to ground. If you are connecting your generator... -
Page 17: Adding Gasoline To The Fuel Tank
DO NOT connect 240V loads to a 120V receptacles. DO NOT gasoline vapors. connect 3-phase loads to the generator. DO NOT connect 50Hz loads to the generator. Let engine stabilize and warm up for a few minutes before adding load. Westinghouse Portable Power | 17... -
Page 18: Power Output And Demand
3. The total running power demand of all the devices that will be connected to any one of the generator’s outlets must not exceed the generator’s specified running power output or 3,700 W, whichever is the lesser. Figure 10 - Choke - ON 18 | Westinghouse Portable Power... -
Page 19: Stopping The Generator
Figure 12 - Engine Recoil Handle - Pull stopped quickly, position the engine control switch to the STOP position immediately. 7. As the engine starts and stabilizes, gradually move the choke lever back to the OFF position. 8. Plug in electric devices. Westinghouse Portable Power | 19... -
Page 20: Maintenance
Use or Every Year Engine Oil Check Level Change Change Cooling Features Check/Clean Air Filter Check Clean* Replace Spark Plug Check/Clean Replace Spark Arrestor Check/Clean *Service more frequently if operating in dry and dusty conditions 20 | Westinghouse Portable Power... -
Page 21: Inspecting And Cleaning The Spark Arrestor
MAINTENANCE TABLE 2: MAINTENANCE SCHEDULE - AUTHORIZED WESTINGHOUSE SERVICE DEALER PERFORMED After First 20 After 50 Hours After 100 Hour After 300 Hours Before Every Hours or First of Use or Every of Use or Every of Use or Every... -
Page 22: Engine Oil Maintenance
5. Remove oil fill plug/dipstick (see Figure 18 below). 8. Continue to add oil until the oil is at the correct level. See Figure 19. 9. Replace the oil fill plug/dipstick. Figure 18 - Oil Fill Plug/Dipstick 22 | Westinghouse Portable Power... -
Page 23: Changing Engine Oil
6. Rinse in clean water by submerging the air filter of hazardous materials. Consult local authorities or elements in fresh water and applying a slow reclamation facility. squeezing action Westinghouse Portable Power | 23... -
Page 24: Spark Plug Maintenance
Never apply any side load or move the spark plug laterally Westinghouse Part Number: 180526 when removing the spark plug. Applying a side load or moving the spark plug laterally may crack and damage the spark plug boot. 24 | Westinghouse Portable Power... -
Page 25: Checking And Adjusting Valve Lash
Use a vacuum cleaner to remove dirt and debris stuck in Bolt Torque 8-12N.m 8-12N.m the cooling air inlets and exhaust ports. General Cleaning of the Generator – Use a damp rag to clean all remaining surfaces. Westinghouse Portable Power | 25... -
Page 26: Storage
5. Press the reset button on the GFCI outlet. 6. If trying 1-5 above does not solve the 6. Take the generator to your nearest problem, the cause might be the generator authorized service dealer. has a fault. 26 | Westinghouse Portable Power... - Page 27 RPM. 3. If trying 1-3 above does not solve 3. Take the generator to your nearest the problem, the cause might be a authorized service dealer. fault in the generator Westinghouse Portable Power | 27...
-
Page 28: Exploded And Engine Views
WGen5500 EXPLODED VIEW Westinghouse Generator Accessories (call to order) 210004 GENERATOR COVER 210003 WGC25 25’ POWER CORD 210052 30A 6 BREAKER TRANSFER SWITCH KIT - MODEL WHMTS30 210075 25’ Cord 30AMP Transfer Switch 210076 50A 6 BREAKER TRANSFER SWITCH KIT - MODEL... - Page 29 WGen5500 EXPLODED VIEW PART NO. Part. Description Part. Description 100533 FRAME 150501 WASHER FUEL TANK 100552 ISOLATOR B 150512 CARBON TANK COMP 100553 ISOLATOR A 120507 FRAME WIRE 100551 NUT M10 120508 BEARING Φ8 150505 FUEL TANK CAP COMP 180524...
-
Page 30: Wgen5500 Engine View
BALL BEARING 180504 OIL SEAL 190225 GOVERNOR ASSEMBLY 190410 SHAFT, GOVERNOR ARM 190409 WASHER, GOVERNOR ARM SHAFT 190408 PIN,LOCK 180507 BOLT DRAIN PLUG 180508 WASHER, DRAIN PLUG 180586 SWITCH ASSEMBLY, OIL LEVEL 130536 BOLT M6X16 30 | Westinghouse Portable Power... - Page 31 WGen5500 ENGINE VIEW PART NO. 180604 DOWEL PIN, CASE COVER 180810 ROD, PUSH 190407 PISTON 180520 SHROUD 190406 PISTON RING SET 120505 BOLT M6X12 190405 ROD ASSEMBLY., CONNECTING 180521 EXHAUST PIPE 190404 PIN, PISTON 180524 NUT M8 180791 CLIP, PISTON...
-
Page 32: Schematics
WGen5500 SCHEMATIC 32 | Westinghouse Portable Power... -
Page 33: Generator Specifications
6.6 gal. (25 L) Shipping Weight Ib. (kg) 182 lb. (91.6 kg) Run Time at %25 Load (hrs.) 20 hrs. 855464003971 Run Time at %50 Load (hrs.) 15 hrs. GTIN 00855464003971 Gasoline Fuel Gauge Choke type Manual Westinghouse Portable Power | 33... - Page 34 34 | Westinghouse Portable Power Version 07.23.18KD...
Need help?
Do you have a question about the WGen5500 and is the answer not in the manual?
Questions and answers